Wakame Kyuri Su - Cucumber Seaweed Salad

Thursday, August 28, 2014

This delightful salad comes to you via my wonderful mom-in-law, Annette who's traveled extensively and is a gifted cook, among other things. While living in Tokyo years ago, she learned to make wakame kyuri so - a simple, delicious salad of wakame seaweed and fresh cucumbers with a light, flavorful sesame dressing.

Wakame kyuri so (seaweed cucumber salad) by Eve Fox, The Garden of Eating, copyright 2014

I'm not normally super into seaweed so I was surprised to find that I could not stop eating it the first time she made it for us a few years back. The flavors are delicate and harmonious and the texture is this great mix of chewy and crispy that's super oishi (that's Japanese for "yummy"). It's also surprisingly easy to make and ridiculously good for you.

The ingredients are simple - cucumbers, dried wakame seaweed, rice vinegar, sesame seeds, sesame oil, sea salt and a little bit of honey or maple syrup.
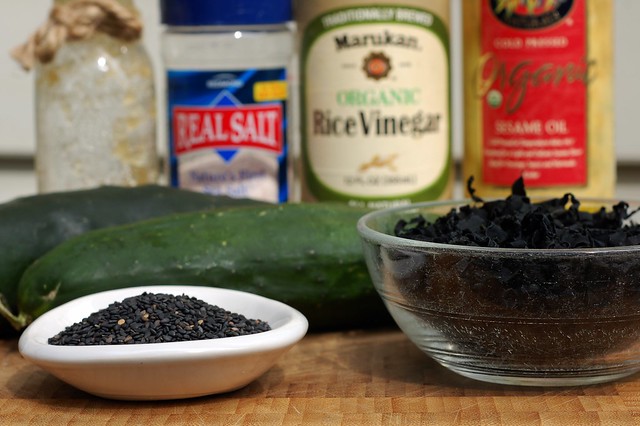
Ingredients for wakame kyuri so seaweed cucumber salad by Eve Fox, The Garden of Eating, copyright 2014

Start by preparing the cucumbers. Slice or grate them (a mandolin would work very well here, too), then add a bunch of sea salt and toss to combine. Let them sit for a bit to draw the water out.


While you're waiting for the cukes, make the sesame dressing to give the seeds a little time to soften and soak up a little flavor. Mix the oil, vinegar, sesame seeds and honey and shake to combine. Then set it aside.
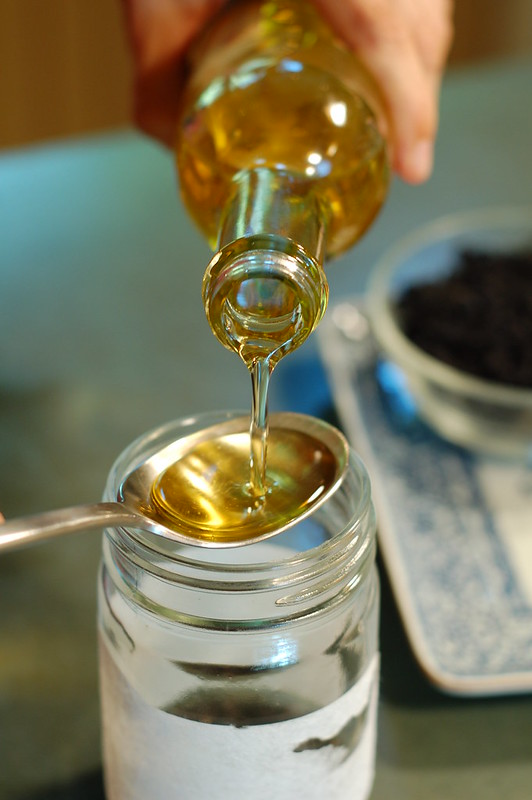
Adding the toasted sesame oil by Eve Fox, The Garden of Eating, copyright 2014

Then it's time to soak the dried seaweed in cold water.
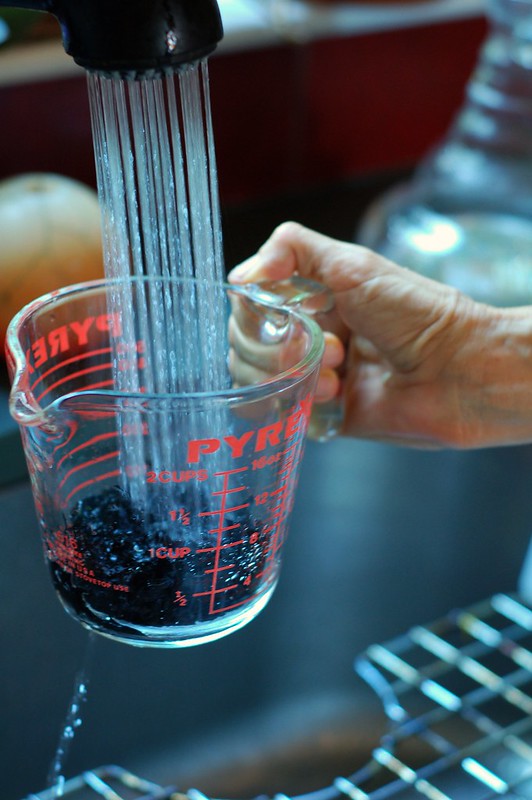
Soaking the dried wakame seaweed by Eve Fox, The Garden of Eating, copyright 2014

It should not sit for very long (five minutes tops) or it will get soggy. Then give it a rinse in fresh water, squeeze it gently and let it drain.
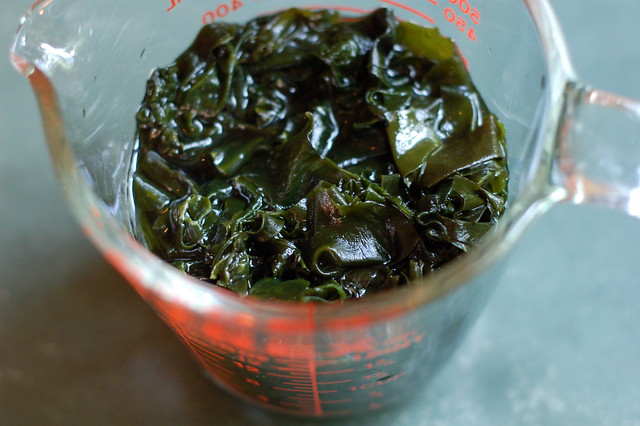
Soaking the dried wakame seaweed by Eve Fox, The Garden of Eating, copyright 2014

Now it's time to rinse the salt out of the cucumbers and give them a few gentle squeezes to get the water out of them.
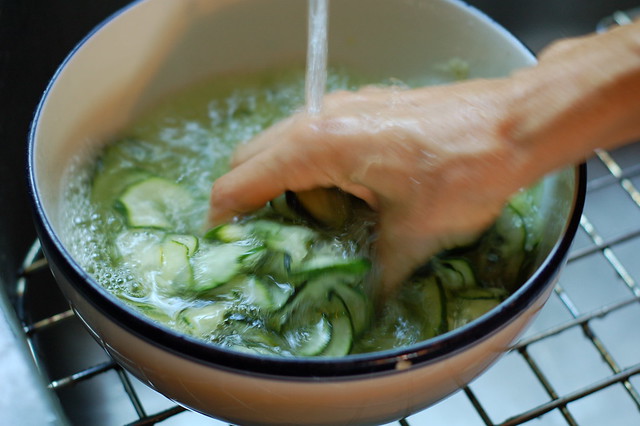
Rinsing the salt off the cucumbers by Eve Fox, The Garden of Eating, copyright 2014

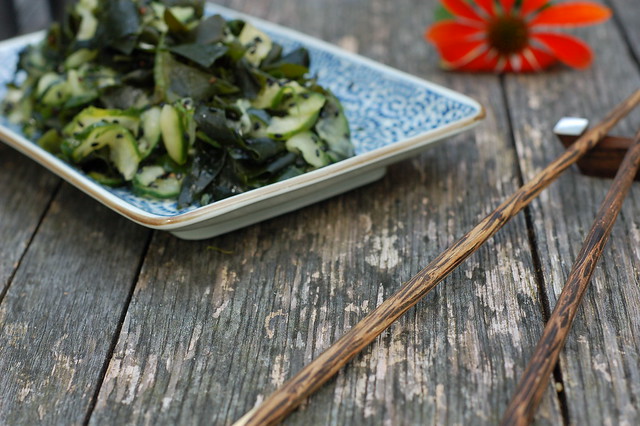
Combine the drained seaweed with the drained cucumbers and toss with the sesame dressing. Taste it all and adjust the seasonings to your liking if need be. Itadakimasu!
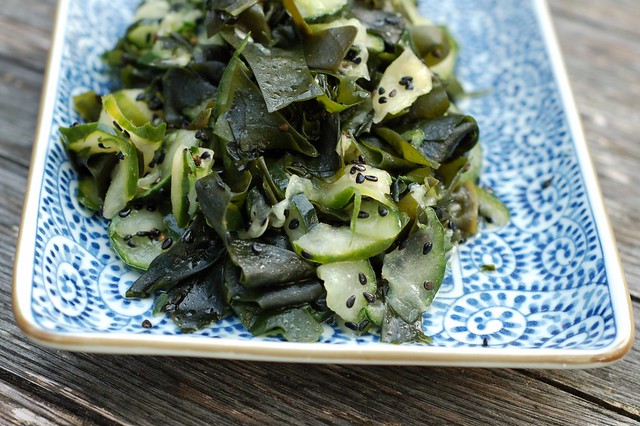
Wakame kyuri so (seaweed cucumber salad) by Eve Fox, The Garden of Eating, copyright 2014

-- print recipe --
Wakame Kyuri Su
Serves 4

Ingredients

* 2 medium-sized organic English cucumbers
* 1/4 cup dried wakame
* 2 Tbsps black or white sesame seeds
* 4 Tbsps organic toasted sesame oil
* 3 Tbsps organic rice vinegar
* 1 Tbsp sea salt
* 1 Tbsp honey or maple syrup

Directions

1. If you're using organic cucumbers (you should!) wash them well. If you're using conventional cukes, peel them, then cut off both ends and slice it thinly using a box grater or a mandolin. Put the cucumbers in a bowl and sprinkle them with a tablespoon of salt and mix well - the salt will draw the water out of the cucumbers. Let sit for 30 minutes.

2. Make the dressing: combine the oil, vinegar, sesame seeds and honey and stir or shake to combine then set it aside to sit and so the sesame seeds can soften while you work on the seaweed.

3. Place the seaweed in a bowl or mixing cup and cover with several inches of cold water and let sit for 5 minutes. Don't let this go on too long or the seaweed will get soggy. Then rinse the seaweed in water and give it a gentle squeeze to wring out some of the water and let it drain.

4. Rinse the cucumbers in water to remove the salt then gently squeeze them in large handfuls to drain and let sit for a minute in a colander or sieve to drain fully. Combine the wakame with the cucumbers in a serving bowl and toss with the dressing. Taste it and adjust the seasonings, as needed. Chill for at least half an hour and serve. It will keep in the fridge for up to two days but you may want to squeeze a bit of water out of it before serving if you do so.

You might also like:

The Scariest Thing I've Ever Written

Tuesday, August 26, 2014

I've put off writing this post all summer because I'm so frikking scared of it. It's that kind of nagging fear that keeps you from going back to sleep when you wake up at 4:30 AM to pee and then lie there wondering if it will ever get light out and trying to imagine how you ever thought this pillow was comfortable?! while your mind jumps from terrible scenario to terrible scenario like a monkey on a sugar high. It's so much fun that I usually just give in and go downstairs around 5:00 AM to make myself a much-needed cup of coffee. As a result, I am prone to falling asleep while singing Sweet Baby James to my son at his 8:00 PM bedtime but he's surprisingly understanding and just prods me gently me until I resume singing.

The thing that's been scaring me half to death is that I've decided to try to make writing this blog my job. There, I've said it. Deep breath...

I'm terrified that it won't work, that I'll FAIL. The roots of this fear go deep - even as a little girl I preferred not to put it all on the line, to hold back a little, because that way, if I failed, I could tell myself it was because I hadn't really tried.

I've been lucky in a lot of ways - I was a great student and a natural test-taker so getting straight A's in school was more or less a breeze. And I happened into an amazing career in my early 20's - using the web to help progressive nonprofits build movements and create change. For the past 12 years I've been surrounded by an incredible team of people who are truly passionate about their work - they're out to change the world and they work their asses off doing it. But about seven years ago, I realized that saving the world in this particular way was not my calling - I was pretty good at it and it was intellectually stimulating and I loved my co-workers (still do!) but it just didn't grab me by the heart or make my soul sing (how many New Age-y clichés can I use in one sentence?!) But I kept on doing it for another seven years for a lot of reasons, many of which were good ones but the most powerful of which was that it was safe. I'm a fairly anxious person and safety has always been important to me. But, unfortunately, safety does not equal happiness or fulfillment...

For years, many people who've had the questionable pleasure of being a party to my existential angst about work have asked me, "Well, what do you want to do?" And I've jokingly answered, "I want to get paid to write my blog," an idea that I dismissed out of hand as impractical every single time I said it. After all, I'm the primary breadwinner for our family of four and blogging is not exactly a get-rich-quick scheme. But even though I've treated it as a joke, the truth is that writing this blog is what I actually want to do. I love food. I love growing it, I love cooking it, and I LOVE eating it. In a world that often feels like it's coming apart at the seams, where the toxic, 24-hour news cycle and even my Facebook feed are dominated by deeply disturbing things like the growth of ISIS and Michael Brown's shooting in Ferguson, growing and cooking good food is an affirmation of all that I find hopeful and nourishing (no pun intended, for once).

I also find the writing and photographing really fun and fulfilling. My very talented mom raised me and my very talented brother to view art as the pinnacle of human achievement. And although I no longer believe it's the only thing that matters, I still want creativity to be a big part of my life.

So even though I am shaking in my metaphorical boots, I'm gonna try to make it work. The worst that can happen is that I'll fail, right? Right?!?!?

But why am I telling you all of this in such a long-winded, semi-rambling manner?
  1. I need to make it official, so that I'm forced to start taking myself more seriously.
  2. I want to let you know there will be a few changes around here:
    * In the next few months, I plan to redesign the blog to make it more user-friendly and give it a long-overdue facelift. It's not 2007 anymore...
    * I will begin running ads and I may do the occasional sponsored post and get more strategic about my affiliate marketing efforts. I've never wanted to do this but, then again, if running ads and a sponsored post here and there enables me to do what I love, I think it's worth it. And hopefully, you will, too, since the result will be more recipes, better pictures and lots of new information about gardening, foraging and the like.
  3. Last but most definitely not least, I need your help! If you like this blog, will you please tell your friends and family about it? And please like it on Facebook, follow me on Twitter and sign up to get posts via email (there's a rather annoying double opt-in required, sorry!)
Since I am now emotionally exhausted from baring my soul to you, I will close with this great quote from Joseph Campbell that gave me the push I needed to finally sit down and write this post.

"I think a person who takes a job in order to live––that is to say, for the money––has turned himself into a slave. WORK begins when you don't like what you're doing. There's a wise saying: make your hobby your source of income. Then there's no such thing as work, and there's no such thing as getting tired. That's been my experience. I did just what I wanted to do. It takes a little courage at first, because who the hell wants you to do just what you want to do; they've all got a lot of plans for you. But you can make it happen. I think it's very important for a young person to have the courage to do what seems to him significant in his life, and not just take a job in order to make money. But this takes a bit of prudence and very careful planning, and may delay financial achievement and comfortable living. But the ultimate result will be very much to his pleasure."

- Joseph Campbell, An Open Life (with Michael Toms)

Grilled Coconut Kale

Sunday, August 24, 2014

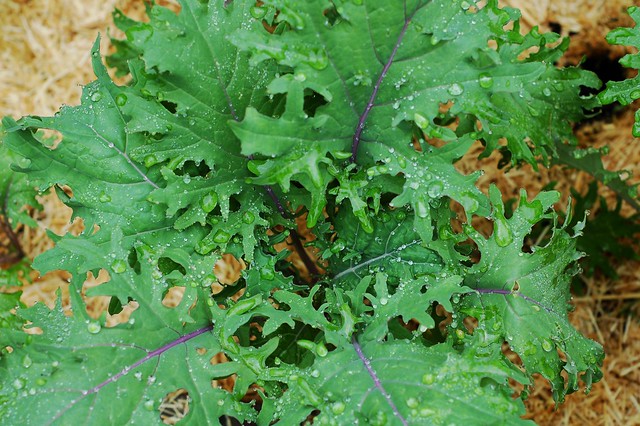
Life with two young kids is so chaotic that I don't actually remember sprinkling kale seeds in one of our raised garden beds this spring. But I must have because we're afloat in a sea of ragged jack kale now. It's gorgeous stuff -- wide, silvery green leaves with slender, dusky purple stems. The plants are so prolific that it's a struggle to keep up - a stark contrast to last summer when soft, green cabbage looper caterpillars would devour the plants within hours if I wasn't out there pulling them off and squishing them - an experience that I find to be equal parts gross, guilt-inducing, and thrilling - multiple times a day.

Our jack kale plants by Eve Fox, the Garden of Eating blog, copyright 2014

In addition to kale salads, kale chips (stay tuned for the results of my latest experiment - I tried out eight different flavors!) and just chopping, blanching and freezing bunches of it for the winter, I was looking for some new ideas. My friend, Pat, responded to my call for kale inspiration by sharing this recipe along with a short note, "Try this--it sounds like it won't work, but it's delicious." So I tried it and, of course, he's right.

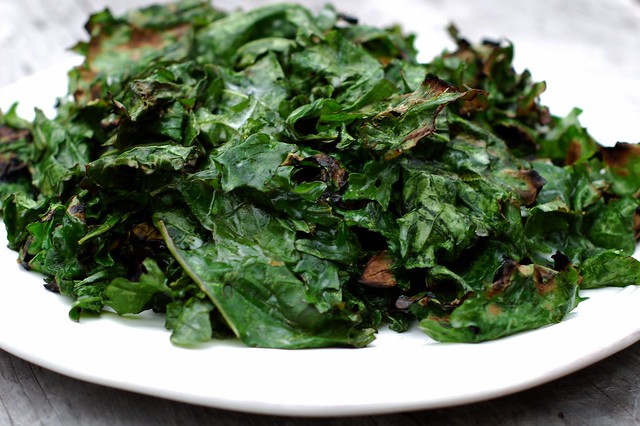
Grilled Coconut Kale by Eve Fox, The Garden of Eating, copyright 2014

There is something a little weird about marinating kale in coconut milk spiked with lime juice and spices for hours and grilling it. But there's nothing strange about the pile of slightly charred greens you'll be left with at the end of the process. The kale has a remarkable flavor - smoky, rich, and complex.

It's not hard but you do need to start it earlier in the day to allow time for the marinating. First step - get yerself some kale. If you're not growing your own, lots of people around you probably are so check your local farmer's market or scan the roadside farm stands.

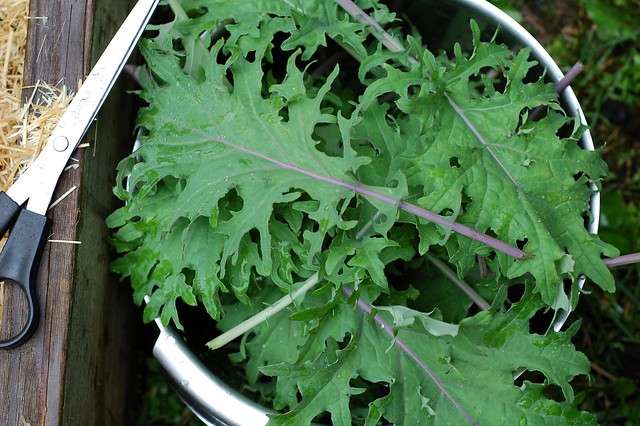
First kale harvest by Eve Fox, the Garden of Eating blog, copyright 2014

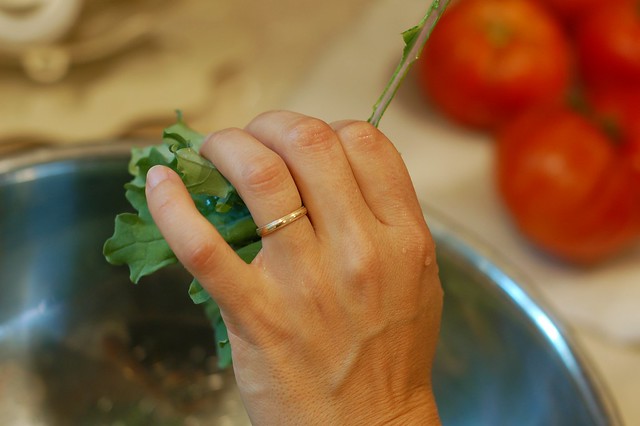
Wash it and remove the leaves from the ribs. This is actually pretty easy and you don't even need to use a knife - in fact, it's easier if you just use your hands. Grasp the leaf in one hand and grab the rib in the other, then pull down from the bottom of the leaf to the top. You should be left with the leaf in one hand and the rib in the other.

Removing the ribs from the kale is easy by Eve Fox, The Garden of Eating, copyright 2014

I'd recommend not slicing the leaves since it is much easier to grill them in large pieces. Dinosaur kale may actually be the best choice for this dish since it's tougher than other varieties and can stand up to grilling a bit better.

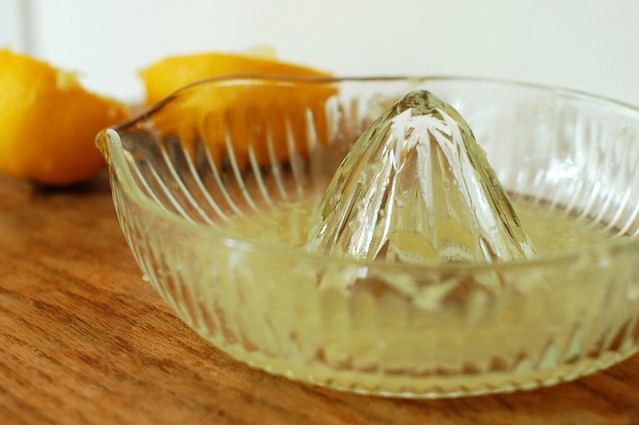
Then make your marinade. Start by juicing a lemon.

Juicing the lemon by Eve Fox, The Garden of Eating, copyright 2014

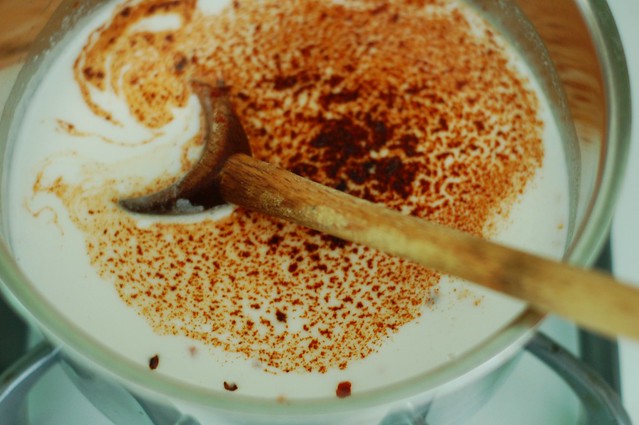
Heat up the coconut milk until it softens then add the spices and the lemon juice and stir.

Creating the spiced coconut milk marinade for the kale by Eve Fox, The Garden of Eating, copyright 2014

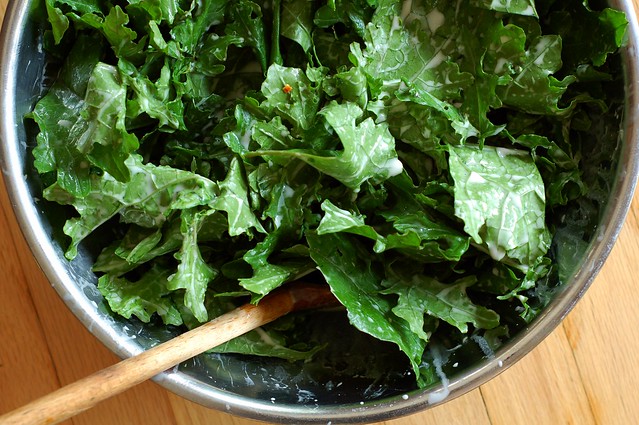
Mix the kale with the marinade in a large, non-reactive bowl making sure it all gets well coated. Cover it with a big plate or a plastic bag (I'm not a fan of plastic wrap) and let it sit for four hours, turning a few times.

Marinating the kale in coconut milk, lime juice and spices by Eve Fox, The Garden of Eating, copyright 2014

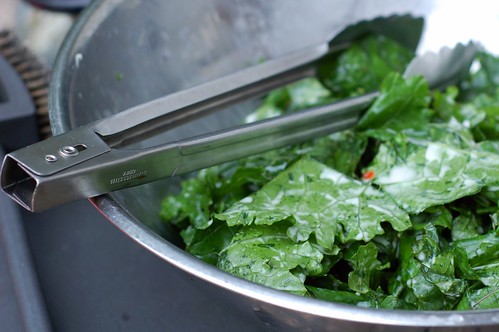
Then it's grilling time! Fire 'er up and clean your grate. Bring your tongs and a plate to put them on as it's a very quick grilling process and you won't have time to run back into the house for anything once you start.

Coconut marinated kale awaits grilling by Eve Fox, The Garden of Eating, copyright 2014

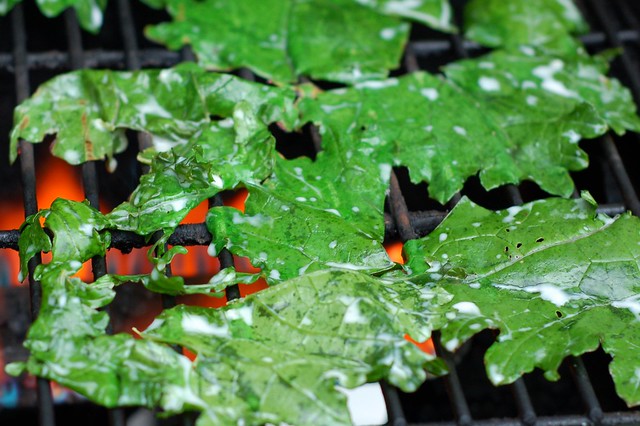
Once you've got a nice even medium-high heat going, lay the kale leaves on the grill for between 30-60 seconds, then turn them over and repeat with the other side. Some of mine burst into flames but I just blew them out and carried on. I think the dino kale probably can withstand slightly longer grilling (we're talking seconds here) since it is thicker and tougher.

Grilling the coconut kale by Eve Fox, The Garden of Eating, copyright 2014

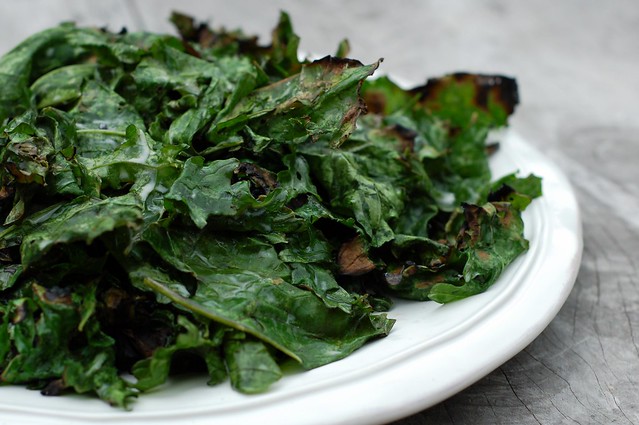
You'll have a pile of gorgeously charred, lightly spiced, coconut kale.

Grilled Coconut Kale by Eve Fox, The Garden of Eating, copyright 2014

Since I can't stomach the idea of tossing out a whole bunch of perfectly good coconut milk, I used the leftover marinade to make a delicious curried coconut basmati rice with cinnamon and currants that I've adapted from the Moosewood Restaurant Cooks at Home cookbook and hope to post about someday soon. The curried rice went perfectly with the grilled kale and grilled ginger-lime shrimps I made.

-- print recipe --
Grilled Coconut Kale
adapted from Sam Sifton's recipe for the NYTimes which was, in turn, adapted from  a dish served byVij's Restaurant in Vancouver
Serves 4-6

Ingredients
* 2 bunches of kale
* 2 cans of organic coconut milk
* 1 Tbsp sea salt
* Generous pinch of red pepper flakes
* 1 Tbsp garam masala or curry powder
* Juice of one lemon

Directions

1. Rinse the kale thoroughly (I counted no less than 19 green caterpillars in the water I used and while they're a great source of protein,  I'd rather skip eating them.) Remove the ribs from the leaves and put the ribs in the compost or set them aside to use in your next batch of homemade vegetable stock.

2. Heat the coconut milk over a low flame until it's lukewarm then pour it into a large ceramic or stainless steel bowl and add the spices and lemon juice and stir. Add the kale leaves and give everything a good stir to ensure that the leaves are evenly coated. Cover it with a plate or a plastic bag and marinate, turning a few times, for about four hours. In a large pot set over a low flame, heat the coconut milk until it is thoroughly mixed and just lukewarm.

3. Get your grill hot then clean it and turn the flame down to create a medium to high heat. Using metal tongs (or your fingers - I did some of both) lay the kale leaves on the grill in a single layer. Cook for 30-60 seconds (this will vary a bit depending on what type of kale you're using), until the leaves begin to brown at the edges and sizzle, then flip them and do the other side for another 30 seconds or so until the leaves have softened. Serve right away though the leftovers are surprisingly tasty. I chopped mine up and added them right to the curried coconut rice - delicious!

You might also like:
For more delicious recipes, gardening ideas, foraging tips, and food-related inspiration "like" the Garden of Eating on Facebook, or follow me on Twitter and Pinterest.

Thursday, August 28, 2014

Wakame Kyuri Su - Cucumber Seaweed Salad

This delightful salad comes to you via my wonderful mom-in-law, Annette who's traveled extensively and is a gifted cook, among other things. While living in Tokyo years ago, she learned to make wakame kyuri so - a simple, delicious salad of wakame seaweed and fresh cucumbers with a light, flavorful sesame dressing.

Wakame kyuri so (seaweed cucumber salad) by Eve Fox, The Garden of Eating, copyright 2014

I'm not normally super into seaweed so I was surprised to find that I could not stop eating it the first time she made it for us a few years back. The flavors are delicate and harmonious and the texture is this great mix of chewy and crispy that's super oishi (that's Japanese for "yummy"). It's also surprisingly easy to make and ridiculously good for you.

The ingredients are simple - cucumbers, dried wakame seaweed, rice vinegar, sesame seeds, sesame oil, sea salt and a little bit of honey or maple syrup.

Ingredients for wakame kyuri so seaweed cucumber salad by Eve Fox, The Garden of Eating, copyright 2014

Start by preparing the cucumbers. Slice or grate them (a mandolin would work very well here, too), then add a bunch of sea salt and toss to combine. Let them sit for a bit to draw the water out.


While you're waiting for the cukes, make the sesame dressing to give the seeds a little time to soften and soak up a little flavor. Mix the oil, vinegar, sesame seeds and honey and shake to combine. Then set it aside.

Adding the toasted sesame oil by Eve Fox, The Garden of Eating, copyright 2014

Then it's time to soak the dried seaweed in cold water.

Soaking the dried wakame seaweed by Eve Fox, The Garden of Eating, copyright 2014

It should not sit for very long (five minutes tops) or it will get soggy. Then give it a rinse in fresh water, squeeze it gently and let it drain.

Soaking the dried wakame seaweed by Eve Fox, The Garden of Eating, copyright 2014

Now it's time to rinse the salt out of the cucumbers and give them a few gentle squeezes to get the water out of them.

Rinsing the salt off the cucumbers by Eve Fox, The Garden of Eating, copyright 2014

Combine the drained seaweed with the drained cucumbers and toss with the sesame dressing. Taste it all and adjust the seasonings to your liking if need be. Itadakimasu!

Wakame kyuri so (seaweed cucumber salad) by Eve Fox, The Garden of Eating, copyright 2014

-- print recipe --
Wakame Kyuri Su
Serves 4

Ingredients

* 2 medium-sized organic English cucumbers
* 1/4 cup dried wakame
* 2 Tbsps black or white sesame seeds
* 4 Tbsps organic toasted sesame oil
* 3 Tbsps organic rice vinegar
* 1 Tbsp sea salt
* 1 Tbsp honey or maple syrup

Directions

1. If you're using organic cucumbers (you should!) wash them well. If you're using conventional cukes, peel them, then cut off both ends and slice it thinly using a box grater or a mandolin. Put the cucumbers in a bowl and sprinkle them with a tablespoon of salt and mix well - the salt will draw the water out of the cucumbers. Let sit for 30 minutes.

2. Make the dressing: combine the oil, vinegar, sesame seeds and honey and stir or shake to combine then set it aside to sit and so the sesame seeds can soften while you work on the seaweed.

3. Place the seaweed in a bowl or mixing cup and cover with several inches of cold water and let sit for 5 minutes. Don't let this go on too long or the seaweed will get soggy. Then rinse the seaweed in water and give it a gentle squeeze to wring out some of the water and let it drain.

4. Rinse the cucumbers in water to remove the salt then gently squeeze them in large handfuls to drain and let sit for a minute in a colander or sieve to drain fully. Combine the wakame with the cucumbers in a serving bowl and toss with the dressing. Taste it and adjust the seasonings, as needed. Chill for at least half an hour and serve. It will keep in the fridge for up to two days but you may want to squeeze a bit of water out of it before serving if you do so.

You might also like:

Tuesday, August 26, 2014

The Scariest Thing I've Ever Written

I've put off writing this post all summer because I'm so frikking scared of it. It's that kind of nagging fear that keeps you from going back to sleep when you wake up at 4:30 AM to pee and then lie there wondering if it will ever get light out and trying to imagine how you ever thought this pillow was comfortable?! while your mind jumps from terrible scenario to terrible scenario like a monkey on a sugar high. It's so much fun that I usually just give in and go downstairs around 5:00 AM to make myself a much-needed cup of coffee. As a result, I am prone to falling asleep while singing Sweet Baby James to my son at his 8:00 PM bedtime but he's surprisingly understanding and just prods me gently me until I resume singing.

The thing that's been scaring me half to death is that I've decided to try to make writing this blog my job. There, I've said it. Deep breath...

I'm terrified that it won't work, that I'll FAIL. The roots of this fear go deep - even as a little girl I preferred not to put it all on the line, to hold back a little, because that way, if I failed, I could tell myself it was because I hadn't really tried.

I've been lucky in a lot of ways - I was a great student and a natural test-taker so getting straight A's in school was more or less a breeze. And I happened into an amazing career in my early 20's - using the web to help progressive nonprofits build movements and create change. For the past 12 years I've been surrounded by an incredible team of people who are truly passionate about their work - they're out to change the world and they work their asses off doing it. But about seven years ago, I realized that saving the world in this particular way was not my calling - I was pretty good at it and it was intellectually stimulating and I loved my co-workers (still do!) but it just didn't grab me by the heart or make my soul sing (how many New Age-y clichés can I use in one sentence?!) But I kept on doing it for another seven years for a lot of reasons, many of which were good ones but the most powerful of which was that it was safe. I'm a fairly anxious person and safety has always been important to me. But, unfortunately, safety does not equal happiness or fulfillment...

For years, many people who've had the questionable pleasure of being a party to my existential angst about work have asked me, "Well, what do you want to do?" And I've jokingly answered, "I want to get paid to write my blog," an idea that I dismissed out of hand as impractical every single time I said it. After all, I'm the primary breadwinner for our family of four and blogging is not exactly a get-rich-quick scheme. But even though I've treated it as a joke, the truth is that writing this blog is what I actually want to do. I love food. I love growing it, I love cooking it, and I LOVE eating it. In a world that often feels like it's coming apart at the seams, where the toxic, 24-hour news cycle and even my Facebook feed are dominated by deeply disturbing things like the growth of ISIS and Michael Brown's shooting in Ferguson, growing and cooking good food is an affirmation of all that I find hopeful and nourishing (no pun intended, for once).

I also find the writing and photographing really fun and fulfilling. My very talented mom raised me and my very talented brother to view art as the pinnacle of human achievement. And although I no longer believe it's the only thing that matters, I still want creativity to be a big part of my life.

So even though I am shaking in my metaphorical boots, I'm gonna try to make it work. The worst that can happen is that I'll fail, right? Right?!?!?

But why am I telling you all of this in such a long-winded, semi-rambling manner?
  1. I need to make it official, so that I'm forced to start taking myself more seriously.
  2. I want to let you know there will be a few changes around here:
    * In the next few months, I plan to redesign the blog to make it more user-friendly and give it a long-overdue facelift. It's not 2007 anymore...
    * I will begin running ads and I may do the occasional sponsored post and get more strategic about my affiliate marketing efforts. I've never wanted to do this but, then again, if running ads and a sponsored post here and there enables me to do what I love, I think it's worth it. And hopefully, you will, too, since the result will be more recipes, better pictures and lots of new information about gardening, foraging and the like.
  3. Last but most definitely not least, I need your help! If you like this blog, will you please tell your friends and family about it? And please like it on Facebook, follow me on Twitter and sign up to get posts via email (there's a rather annoying double opt-in required, sorry!)
Since I am now emotionally exhausted from baring my soul to you, I will close with this great quote from Joseph Campbell that gave me the push I needed to finally sit down and write this post.

"I think a person who takes a job in order to live––that is to say, for the money––has turned himself into a slave. WORK begins when you don't like what you're doing. There's a wise saying: make your hobby your source of income. Then there's no such thing as work, and there's no such thing as getting tired. That's been my experience. I did just what I wanted to do. It takes a little courage at first, because who the hell wants you to do just what you want to do; they've all got a lot of plans for you. But you can make it happen. I think it's very important for a young person to have the courage to do what seems to him significant in his life, and not just take a job in order to make money. But this takes a bit of prudence and very careful planning, and may delay financial achievement and comfortable living. But the ultimate result will be very much to his pleasure."

- Joseph Campbell, An Open Life (with Michael Toms)

Sunday, August 24, 2014

Grilled Coconut Kale

Life with two young kids is so chaotic that I don't actually remember sprinkling kale seeds in one of our raised garden beds this spring. But I must have because we're afloat in a sea of ragged jack kale now. It's gorgeous stuff -- wide, silvery green leaves with slender, dusky purple stems. The plants are so prolific that it's a struggle to keep up - a stark contrast to last summer when soft, green cabbage looper caterpillars would devour the plants within hours if I wasn't out there pulling them off and squishing them - an experience that I find to be equal parts gross, guilt-inducing, and thrilling - multiple times a day.

Our jack kale plants by Eve Fox, the Garden of Eating blog, copyright 2014

In addition to kale salads, kale chips (stay tuned for the results of my latest experiment - I tried out eight different flavors!) and just chopping, blanching and freezing bunches of it for the winter, I was looking for some new ideas. My friend, Pat, responded to my call for kale inspiration by sharing this recipe along with a short note, "Try this--it sounds like it won't work, but it's delicious." So I tried it and, of course, he's right.

Grilled Coconut Kale by Eve Fox, The Garden of Eating, copyright 2014

There is something a little weird about marinating kale in coconut milk spiked with lime juice and spices for hours and grilling it. But there's nothing strange about the pile of slightly charred greens you'll be left with at the end of the process. The kale has a remarkable flavor - smoky, rich, and complex.

It's not hard but you do need to start it earlier in the day to allow time for the marinating. First step - get yerself some kale. If you're not growing your own, lots of people around you probably are so check your local farmer's market or scan the roadside farm stands.

First kale harvest by Eve Fox, the Garden of Eating blog, copyright 2014

Wash it and remove the leaves from the ribs. This is actually pretty easy and you don't even need to use a knife - in fact, it's easier if you just use your hands. Grasp the leaf in one hand and grab the rib in the other, then pull down from the bottom of the leaf to the top. You should be left with the leaf in one hand and the rib in the other.

Removing the ribs from the kale is easy by Eve Fox, The Garden of Eating, copyright 2014

I'd recommend not slicing the leaves since it is much easier to grill them in large pieces. Dinosaur kale may actually be the best choice for this dish since it's tougher than other varieties and can stand up to grilling a bit better.

Then make your marinade. Start by juicing a lemon.

Juicing the lemon by Eve Fox, The Garden of Eating, copyright 2014

Heat up the coconut milk until it softens then add the spices and the lemon juice and stir.

Creating the spiced coconut milk marinade for the kale by Eve Fox, The Garden of Eating, copyright 2014

Mix the kale with the marinade in a large, non-reactive bowl making sure it all gets well coated. Cover it with a big plate or a plastic bag (I'm not a fan of plastic wrap) and let it sit for four hours, turning a few times.

Marinating the kale in coconut milk, lime juice and spices by Eve Fox, The Garden of Eating, copyright 2014

Then it's grilling time! Fire 'er up and clean your grate. Bring your tongs and a plate to put them on as it's a very quick grilling process and you won't have time to run back into the house for anything once you start.

Coconut marinated kale awaits grilling by Eve Fox, The Garden of Eating, copyright 2014

Once you've got a nice even medium-high heat going, lay the kale leaves on the grill for between 30-60 seconds, then turn them over and repeat with the other side. Some of mine burst into flames but I just blew them out and carried on. I think the dino kale probably can withstand slightly longer grilling (we're talking seconds here) since it is thicker and tougher.

Grilling the coconut kale by Eve Fox, The Garden of Eating, copyright 2014

You'll have a pile of gorgeously charred, lightly spiced, coconut kale.

Grilled Coconut Kale by Eve Fox, The Garden of Eating, copyright 2014

Since I can't stomach the idea of tossing out a whole bunch of perfectly good coconut milk, I used the leftover marinade to make a delicious curried coconut basmati rice with cinnamon and currants that I've adapted from the Moosewood Restaurant Cooks at Home cookbook and hope to post about someday soon. The curried rice went perfectly with the grilled kale and grilled ginger-lime shrimps I made.

-- print recipe --
Grilled Coconut Kale
adapted from Sam Sifton's recipe for the NYTimes which was, in turn, adapted from  a dish served byVij's Restaurant in Vancouver
Serves 4-6

Ingredients
* 2 bunches of kale
* 2 cans of organic coconut milk
* 1 Tbsp sea salt
* Generous pinch of red pepper flakes
* 1 Tbsp garam masala or curry powder
* Juice of one lemon

Directions

1. Rinse the kale thoroughly (I counted no less than 19 green caterpillars in the water I used and while they're a great source of protein,  I'd rather skip eating them.) Remove the ribs from the leaves and put the ribs in the compost or set them aside to use in your next batch of homemade vegetable stock.

2. Heat the coconut milk over a low flame until it's lukewarm then pour it into a large ceramic or stainless steel bowl and add the spices and lemon juice and stir. Add the kale leaves and give everything a good stir to ensure that the leaves are evenly coated. Cover it with a plate or a plastic bag and marinate, turning a few times, for about four hours. In a large pot set over a low flame, heat the coconut milk until it is thoroughly mixed and just lukewarm.

3. Get your grill hot then clean it and turn the flame down to create a medium to high heat. Using metal tongs (or your fingers - I did some of both) lay the kale leaves on the grill in a single layer. Cook for 30-60 seconds (this will vary a bit depending on what type of kale you're using), until the leaves begin to brown at the edges and sizzle, then flip them and do the other side for another 30 seconds or so until the leaves have softened. Serve right away though the leftovers are surprisingly tasty. I chopped mine up and added them right to the curried coconut rice - delicious!

You might also like:
For more delicious recipes, gardening ideas, foraging tips, and food-related inspiration "like" the Garden of Eating on Facebook, or follow me on Twitter and Pinterest.