Baked Macaroni and Cheese

Saturday, October 25, 2008

Homemade baked mac n cheese

The weather here in Berkeley has been unseasonable for the past few weeks - a string of dazzlingly sunny, hot days. But before Indian summer began, we had a brief spate of fall-like weather with crisp, windy days and very chilly nights.

Homemade mac n cheese - close up

It was during this "cold" spell that I got the urge to make mac 'n cheese. Oddly enough, I had never made real mac 'n cheese before. I checked out several recipes online and consulted a few cookbooks before I ended up settling on this classic recipe from the Joy of Cooking

The result was delicious -- creamy, melty pasta with a hint of sweetness from the onions topped with crispy browned fresh breadcrumbs. This classic comfort food is also quite addictive -- my husband and I both went back to the stove for seconds and thirds and so on...

Forkful of mac n cheese

-- print recipe --Baked Macaroni and Cheese
Serves 4-6 as a main dish
Ingredients

* 2 cups (8 oz) macaroni (elbow mac is the classic but you can use whatever you like)
* 2 1/4 cups grated sharp cheddar or Colby cheese
* 2 Tbsps butter (plus an additional tbsp for the breadcrumbs)
* 2 Tbsps all-purpose flour
* 2 cups milk
* 1/2 large onion, minced
* 1 bay leaf
* 1/4 tsp sweet paprika
* Sea salt and freshly ground black pepper to taste
* 1/2 cup fresh breadcrumbs

Directions

1. Preheat oven to 350 and grease a 1 1/2 quart baking dish.

2. Bring 6 cups of water to a boil and add the macaroni. While the pasta is cooking, grate the cheese. Cook the pasta until al dente then drain and move it to a bowl or put it back in the pot.

3. Melt the butter in a large saucepan over medium-low heat then whisk in the flour and cook, whisking constantly to remove lumps, for three minutes.

4. Gradually whisk in the milk then stir in the onion and add the bay leaf and paprika. Simmer gently for 15 minutes, stirring often. Remove from the heat and stir in 2/3 of the cheese. Season with salt and pepper to taste.

5. Add the macaroni and stir to combine. Pour half the mixture into the baking dish and sprinkle it with half of the remaining cheese. Add the rest of the macaroni mixture and top with the rest of the cheese.

6. Melt 1 tbsp butter in a small skillet and add the breadcrumbs. Toss to coat and cook for 30-60 seconds. Sprinkle the buttered breadcrumbs over the top of the macaroni in the baking dish and bake until the breadcrumbs are lightly browned, about 30-35 minutes. Let stand for 5 minutes before serving.

You might also like:
For more delicious recipes, gardening ideas, foraging tips, and food-related inspiration "like" the Garden of Eating on Facebook, or follow me on Twitter and Pinterest.

Hummus With Caramelized Onions & Garlic Topped With Beets, Pine Nuts & Greek Yogurt

Saturday, October 18, 2008

Hummous with caramelized onions & garlic topped with golden beets, pinenuts and greek yogurt

Hummus is one of those wonderfully earthy, satisfying foods. It can be simple or sophisticated and it can serve as the heart of a basic meal or a tasty component of a complicated one. Best of all, it's easy to make.

I'd made hummus half a dozen times before I found this recipe by chef Ana Sortun (though I have made a few small modifications on her original.) Previously, my hummus recipe had included a small amount of raw garlic and lots of cilantro in addition to the usual chickpeas, tahini, olive oil, lemon juice and salt. And it was good! But now I am so partial to this version that I may never go back...


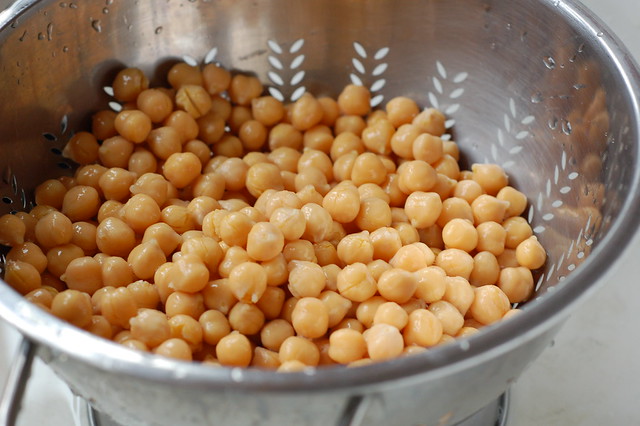
Rinsing the chickpeas by Eve Fox, Garden of Eating blog, copyright 2011

The thing that makes this hummus special is the big dose of caramelized onions and garlic it includes. It does take a little more time to prepare since you have to add in an extra peeling and cooking step but I think the sweet, mellow taste (and the fact that you will not reek of garlic for half a day after eating it) are well worth the extra 10 or 15 minutes of prep time.


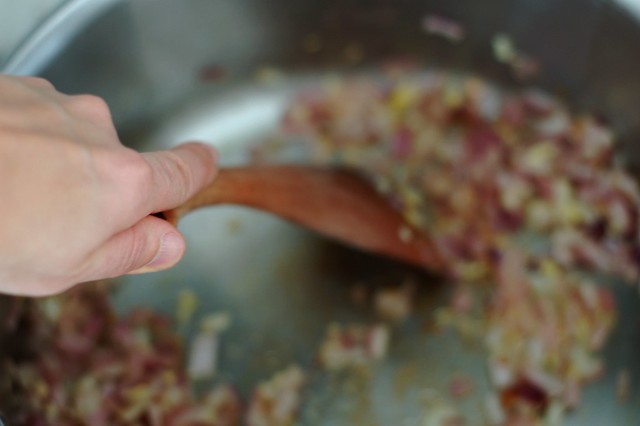
Sauteeing onions, garlic & ginger by Eve Fox, The Garden of Eating, copyright 2015

As Nadia and I planned the menu for our
Mediterranean feast, including this hummus seemed like a no-brainer, even though it is technically Middle Eastern.

You can make extra hummus if you like. Kept in an airtight dish in the fridge without the toppings, this will keep for several days and makes an awesome snack with some pita or flat bread.


Hummous with caramelized onions and garlic topped with golden beets, pinenuts and greek yogurt

-- print recipe --Caramelized Onion & Garlic Hummus with Golden Beets, Pine Nuts & Greek Yogurt
Serves 6

Ingredients

Hummus
* 2 cans organic chickpeas, rinsed and drained (you can also use 1 cup dried but I never leave enough time for all that soaking and cooking)
* 6 tbsp organic olive oil, plus more for caramelizing the onions & garlic
* 3 large garlic cloves, minced or pressed
* 2 large or 3 small yellow onions, chopped
* 1/4 cup fresh lemon juice
* 2 tbsp tahini
* Sea salt and freshly ground black pepper to taste

Toppings
* 4 large beets, preferably the golden or chioggia varieties
* 2 tbsp pine nuts
* 1/4 cup thick greek yogurt

Directions

1. Prepare the beets: remove the beet greens (you can reserve them for some other purpose if you like) and place the beets in a small saucepan. Cover with water by one inch and bring to a boil, then reduce the heat to simmer gently. Cook until the beets are tender when pierced with a fork, about 35-45 minutes, depending on the size of the beets. Drain and peel once they are cool enough to handle (the skins will slip off in the most satisfying way.) Cut the beets into a 1/4 inch dice. Toss with 1 tbsp olive oil and set aside.

2. Caramelize the onions and garlic: heat 2-3 tbsp olive oil in a medium frying pan or skillet until medium hot. Add the onions and garlic and cook, stirring often, for 5 minutes. Reduce the heat to medium-low and cook, stirring often, until the onions are very soft and a rich caramel color, about 25 minutes total. Season with salt and pepper.

3. In the bowl of a Cuisinart (you can use a blender if that is all you have but I warn you that it will be quite challenging), combine the drained chickpeas, caramelized onions and garlic, tahini, lemon juice, a tsp or 2 of salt, and several tbsps of olive oil. Process on medium speed, stopping to add more oil as needed. Taste as you go and adjust the amounts - you can add more lemon juice, tahini, salt, pepper or olive oil, depending on the taste and texture that appeals most to you (some people like their hummus chunky, others prefer it smooth and silky.)

4. Toast the pine nuts in a small skillet, turning often, until light brown (watch closely or they will burn - it does not take very long.)

5. Turn the hummus into a shallow, wide bowl and top with the yogurt, cubed beets and pine nuts (I included some sprigs of cilantro, as well).

You might also like:
For even more recipes, photos, giveaways, and food-related inspiration "Like" the Garden of Eating on Facebook, or follow me on Twitter or Pinterest.

Lemon-Scented Quinoa With Tahini & Chickpeas

Wednesday, October 15, 2008

You simply cannot live in Berkeley without running into quinoa (pronounced keen-wah) at every turn. But popular as it is with my hippie brethren, I did not want to like this scrappy little grain everyone was so in looooove with (probably because everyone was so in love with it...) So I avoided eating quinoa even though it meant I was often forced to go hungry at potluck dinners. And I certainly did not cook the stuff!

But after reading several glowing posts about it from other food bloggers that I respect, and hearing
my friend Nadia's warm endorsement, I decided I was ready to cast my prejudice aside and give it a try. Nadia and I decided to include this recipe for Lemon-Scented Quinoa that I'd seen on 101Cookbooks in our Mediterranean feast. Happily, it was delicious - hearty, flavorful, and interesting. I was sold!

Lemon-scented quinoa with tahini and chickpeas

Like farro, quinoa is an ancient grain. It was first cultivated in the Andean region of South America by the Incas over 6,000 years ago. So crucial was quinoa to their civilization that they called it "chisaya mama," the mother of all grains.

It is even more nutritious than farro, earning it a well-deserved designation as a "Super Grain." Not only is quinoa high in protein, it also contains all 8 essential amino acids, making it a complete protein which is very rare in vegetarian foods, not to mention large doses of fiber, folate, magnesium and iron. And for those who are allergic to wheat, it is happily gluten-free.


Close-up of uncooked quinoa grains

If you do not buy a boxed version, you may need to soak it for several hours to remove its protective coating of bitter saponins that keep the birds from devouring the crop before it can be harvested. However, boxed quinoa has generally been processed in this way already so it only needs to be rinsed before cooking. 

You'll notice that a funny little tail or curlicue appears outside the grain during cooking - this is a surefire way to tell that it's done. The cooked grains have a mild, slightly nutty flavor that goes well with both savory and sweet accompaniments.

-- print recipe --Lemon-Scented Quinoa With Tahini & Chickpeas
Serves 4

Ingredients

* 1 cup quinoa
* 2 cups water
* 1/2 teaspoon fine grain sea salt
* 1 can garbanzo beans, or dried equivalent
* 1/2 cup cilantro, chopped
* 1/2 red onion, chopped

Tahini Dressing:
* 1 garlic clove, smashed and chopped
* 1/4 cup tahini
* Zest of one lemon
* 1/4 cup fresh lemon juice
* 2 tablespoons olive oil
* 2 tablespoons hot water
* 1/2 teaspoon fine grain sea salt

Directions

1. Rinse the quinoa in a fine-meshed strainer.

2. In a medium saucepan heat the quinoa and water until boiling. Reduce heat and simmer until water is absorbed and quinoa fluffs up, about 15 minutes. Quinoa is done when you can see the curlicue in each grain, and it is tender with a bit of pop to each bite. Drain any extra water and set aside.

3. While the quinoa is cooking make the dressing. Whisk together the garlic, tahini, lemon zest and juice, and olive oil. Add the hot water to thin a bit and then the salt.

4. Toss the cooked quinoa, beans, cilantro, red onion, and half of the dressing. Add more dressing and season with more salt to taste. Serve garnished with a bit of cilantro.

For more delicious recipes, gardening ideas, foraging tips, and food-related inspiration "like" the Garden of Eating on Facebook, or follow me on Twitter and Pinterest.

Spiced Lamb Kabobs With Tomato Jam

Sunday, October 12, 2008

I came across this recipe when I was on vacation in Hawaii two years ago. We were staying in a little condo on Molokai, a very beautiful and very tiny island. The owners of the condo had left a pile of books and magazines for their renters to enjoy. Among them was an issue of Met Home that included an article with lots of tasty-sounding Middle Eastern-style recipes.

I had never cooked lamb (ground or otherwise) before I tried these kabobs and was pleasantly surprised by how easy it was to manipulate and how yummy the end result was. These kabobs are simple and easy to prepare and only take a few minutes to cook on the grill.


Lamb kabobs on the barbie

I had also never heard of tomato jam before finding this recipe. Oddly enough, just two days after Nadia and I cooked our Mediterranean feast, Mark Bittman did a piece about tomato jam in the NYTimes. What a coinkydink! I actually liked Bittman's recipe better than the one from Met Home so I've substituted it here.

Tomato jam

Spiced Lamb Kabobs
Makes 12 kabobs (serves 6)

Ingredients

* 12 six-inch bamboo skewers
* 2 tbsp cinnamon
* 1 1/4 freshly ground black pepper
* 3/8 tsp grated nutmeg
* 3/8 tsp ground coriander
* 2 tsp salt
* small pinch of cayenne pepper
* 1 tbsp tomato paste or red pepper paste
* 2 egg whites
* 2 lbs ground lamb (use organic, free range lamb if at all possible)

Directions

1. Soak the bamboo skewers in water to prevent them from charring on the grill (you can do this overnight or a few hours before you're planning to grill.)

2. Combine all the ingredients in the bowl of a cuisinart and mix until completely blended (you want it to break down so that it becomes almost creamy.)

3. Divide the mixture into 12 equal portions. Shape each portion into a short, thick sausage and push onto the bamboo skewer.

4. Prepare the grill and grill the kebabs on all sides until done to your taste.

Tomato Jam
Makes about 1 cup

Ingredients

* 3/4 pound good ripe tomatoes (Roma are best), cored and coarsely chopped
* 1/2 cup sugar
* 1 tablespoons freshly squeezed lime juice
* 1/2 tablespoon fresh grated or minced ginger
* 1/2 teaspoon ground cumin
* 1/8 teaspoon ground cinnamon
* a pinch of ground cloves
* 1/2 teaspoon salt
* 1/2 a jalapeño pepper, stemmed, seeded and minced, or a pinch of red pepper flakes or cayenne to taste.

Directions

1. Combine all the ingredients in a heavy medium saucepan and bring to a boil over medium heat, stirring often.

2. Reduce the heat and simmer, stirring occasionally, until the mixture has the consistency of thick jam, about 1 hour 15 minutes.

3. Taste and adjust seasoning, then cool and refrigerate until ready to use; this will keep at least a week.

A Mediterranean Feast (In Several Installments)

Saturday, October 4, 2008

I have a few friends with whom I love to cook. Luckily for me, one of them came out to Berkeley for a visit recently. I had not seen Nadia in a long time but once we'd covered the basics, we spent a lot of time talking about food.

Nadia's interesting heritage (her mom is from Italy and her dad is an Armenian from Syria) has exposed her to a wide range of flavors and spices and her enthusiasm about food is infectious. We decided to wind up her visit by making a big mediterranean feast for dinner.


After spending some time leafing through my voluminous recipe files, we settled on:

We shopped in the morning and then prepared the quinoa, hummous, tomato jam, and tzatziki, saving only the salad and kabobs for the evening. I had made all but the tomato jam and quinoa dishes before so I was pretty sure the results would be good.

But I was pleasantly surprised by how delicious everything turned out. The combination of flavors was perfect (luckily, we had enough for leftovers for the next day, too.) And, of course, the company (Nadia and her boyfriend, Martin) was a big part of what made the meal so good!

Mediterranean Feast, sorry the pic is not great - we were all REALLY hungry by this time.

Since this meal includes far too many recipes to post in one fell swoop, I'll leave you with this taste of the meal and will post each recipe separately (minus the tzatziki, since I've already written about that - you can find the recipe here, the green salad, since it was so straight-forward, and the pita, since it was store-bought) over the next week. I will also link to the recipes from this post once they've been posted to make your browsing easier.

Here's to good friends and good food!

Saturday, October 25, 2008

Baked Macaroni and Cheese

Homemade baked mac n cheese

The weather here in Berkeley has been unseasonable for the past few weeks - a string of dazzlingly sunny, hot days. But before Indian summer began, we had a brief spate of fall-like weather with crisp, windy days and very chilly nights.

Homemade mac n cheese - close up

It was during this "cold" spell that I got the urge to make mac 'n cheese. Oddly enough, I had never made real mac 'n cheese before. I checked out several recipes online and consulted a few cookbooks before I ended up settling on this classic recipe from the Joy of Cooking

The result was delicious -- creamy, melty pasta with a hint of sweetness from the onions topped with crispy browned fresh breadcrumbs. This classic comfort food is also quite addictive -- my husband and I both went back to the stove for seconds and thirds and so on...

Forkful of mac n cheese

-- print recipe --Baked Macaroni and Cheese
Serves 4-6 as a main dish
Ingredients

* 2 cups (8 oz) macaroni (elbow mac is the classic but you can use whatever you like)
* 2 1/4 cups grated sharp cheddar or Colby cheese
* 2 Tbsps butter (plus an additional tbsp for the breadcrumbs)
* 2 Tbsps all-purpose flour
* 2 cups milk
* 1/2 large onion, minced
* 1 bay leaf
* 1/4 tsp sweet paprika
* Sea salt and freshly ground black pepper to taste
* 1/2 cup fresh breadcrumbs

Directions

1. Preheat oven to 350 and grease a 1 1/2 quart baking dish.

2. Bring 6 cups of water to a boil and add the macaroni. While the pasta is cooking, grate the cheese. Cook the pasta until al dente then drain and move it to a bowl or put it back in the pot.

3. Melt the butter in a large saucepan over medium-low heat then whisk in the flour and cook, whisking constantly to remove lumps, for three minutes.

4. Gradually whisk in the milk then stir in the onion and add the bay leaf and paprika. Simmer gently for 15 minutes, stirring often. Remove from the heat and stir in 2/3 of the cheese. Season with salt and pepper to taste.

5. Add the macaroni and stir to combine. Pour half the mixture into the baking dish and sprinkle it with half of the remaining cheese. Add the rest of the macaroni mixture and top with the rest of the cheese.

6. Melt 1 tbsp butter in a small skillet and add the breadcrumbs. Toss to coat and cook for 30-60 seconds. Sprinkle the buttered breadcrumbs over the top of the macaroni in the baking dish and bake until the breadcrumbs are lightly browned, about 30-35 minutes. Let stand for 5 minutes before serving.

You might also like:
For more delicious recipes, gardening ideas, foraging tips, and food-related inspiration "like" the Garden of Eating on Facebook, or follow me on Twitter and Pinterest.

Saturday, October 18, 2008

Hummus With Caramelized Onions & Garlic Topped With Beets, Pine Nuts & Greek Yogurt

Hummous with caramelized onions & garlic topped with golden beets, pinenuts and greek yogurt

Hummus is one of those wonderfully earthy, satisfying foods. It can be simple or sophisticated and it can serve as the heart of a basic meal or a tasty component of a complicated one. Best of all, it's easy to make.

I'd made hummus half a dozen times before I found this recipe by chef Ana Sortun (though I have made a few small modifications on her original.) Previously, my hummus recipe had included a small amount of raw garlic and lots of cilantro in addition to the usual chickpeas, tahini, olive oil, lemon juice and salt. And it was good! But now I am so partial to this version that I may never go back...


Rinsing the chickpeas by Eve Fox, Garden of Eating blog, copyright 2011

The thing that makes this hummus special is the big dose of caramelized onions and garlic it includes. It does take a little more time to prepare since you have to add in an extra peeling and cooking step but I think the sweet, mellow taste (and the fact that you will not reek of garlic for half a day after eating it) are well worth the extra 10 or 15 minutes of prep time.


Sauteeing onions, garlic & ginger by Eve Fox, The Garden of Eating, copyright 2015

As Nadia and I planned the menu for our
Mediterranean feast, including this hummus seemed like a no-brainer, even though it is technically Middle Eastern.

You can make extra hummus if you like. Kept in an airtight dish in the fridge without the toppings, this will keep for several days and makes an awesome snack with some pita or flat bread.


Hummous with caramelized onions and garlic topped with golden beets, pinenuts and greek yogurt

-- print recipe --Caramelized Onion & Garlic Hummus with Golden Beets, Pine Nuts & Greek Yogurt
Serves 6

Ingredients

Hummus
* 2 cans organic chickpeas, rinsed and drained (you can also use 1 cup dried but I never leave enough time for all that soaking and cooking)
* 6 tbsp organic olive oil, plus more for caramelizing the onions & garlic
* 3 large garlic cloves, minced or pressed
* 2 large or 3 small yellow onions, chopped
* 1/4 cup fresh lemon juice
* 2 tbsp tahini
* Sea salt and freshly ground black pepper to taste

Toppings
* 4 large beets, preferably the golden or chioggia varieties
* 2 tbsp pine nuts
* 1/4 cup thick greek yogurt

Directions

1. Prepare the beets: remove the beet greens (you can reserve them for some other purpose if you like) and place the beets in a small saucepan. Cover with water by one inch and bring to a boil, then reduce the heat to simmer gently. Cook until the beets are tender when pierced with a fork, about 35-45 minutes, depending on the size of the beets. Drain and peel once they are cool enough to handle (the skins will slip off in the most satisfying way.) Cut the beets into a 1/4 inch dice. Toss with 1 tbsp olive oil and set aside.

2. Caramelize the onions and garlic: heat 2-3 tbsp olive oil in a medium frying pan or skillet until medium hot. Add the onions and garlic and cook, stirring often, for 5 minutes. Reduce the heat to medium-low and cook, stirring often, until the onions are very soft and a rich caramel color, about 25 minutes total. Season with salt and pepper.

3. In the bowl of a Cuisinart (you can use a blender if that is all you have but I warn you that it will be quite challenging), combine the drained chickpeas, caramelized onions and garlic, tahini, lemon juice, a tsp or 2 of salt, and several tbsps of olive oil. Process on medium speed, stopping to add more oil as needed. Taste as you go and adjust the amounts - you can add more lemon juice, tahini, salt, pepper or olive oil, depending on the taste and texture that appeals most to you (some people like their hummus chunky, others prefer it smooth and silky.)

4. Toast the pine nuts in a small skillet, turning often, until light brown (watch closely or they will burn - it does not take very long.)

5. Turn the hummus into a shallow, wide bowl and top with the yogurt, cubed beets and pine nuts (I included some sprigs of cilantro, as well).

You might also like:
For even more recipes, photos, giveaways, and food-related inspiration "Like" the Garden of Eating on Facebook, or follow me on Twitter or Pinterest.

Wednesday, October 15, 2008

Lemon-Scented Quinoa With Tahini & Chickpeas

You simply cannot live in Berkeley without running into quinoa (pronounced keen-wah) at every turn. But popular as it is with my hippie brethren, I did not want to like this scrappy little grain everyone was so in looooove with (probably because everyone was so in love with it...) So I avoided eating quinoa even though it meant I was often forced to go hungry at potluck dinners. And I certainly did not cook the stuff!

But after reading several glowing posts about it from other food bloggers that I respect, and hearing
my friend Nadia's warm endorsement, I decided I was ready to cast my prejudice aside and give it a try. Nadia and I decided to include this recipe for Lemon-Scented Quinoa that I'd seen on 101Cookbooks in our Mediterranean feast. Happily, it was delicious - hearty, flavorful, and interesting. I was sold!

Lemon-scented quinoa with tahini and chickpeas

Like farro, quinoa is an ancient grain. It was first cultivated in the Andean region of South America by the Incas over 6,000 years ago. So crucial was quinoa to their civilization that they called it "chisaya mama," the mother of all grains.

It is even more nutritious than farro, earning it a well-deserved designation as a "Super Grain." Not only is quinoa high in protein, it also contains all 8 essential amino acids, making it a complete protein which is very rare in vegetarian foods, not to mention large doses of fiber, folate, magnesium and iron. And for those who are allergic to wheat, it is happily gluten-free.


Close-up of uncooked quinoa grains

If you do not buy a boxed version, you may need to soak it for several hours to remove its protective coating of bitter saponins that keep the birds from devouring the crop before it can be harvested. However, boxed quinoa has generally been processed in this way already so it only needs to be rinsed before cooking. 

You'll notice that a funny little tail or curlicue appears outside the grain during cooking - this is a surefire way to tell that it's done. The cooked grains have a mild, slightly nutty flavor that goes well with both savory and sweet accompaniments.

-- print recipe --Lemon-Scented Quinoa With Tahini & Chickpeas
Serves 4

Ingredients

* 1 cup quinoa
* 2 cups water
* 1/2 teaspoon fine grain sea salt
* 1 can garbanzo beans, or dried equivalent
* 1/2 cup cilantro, chopped
* 1/2 red onion, chopped

Tahini Dressing:
* 1 garlic clove, smashed and chopped
* 1/4 cup tahini
* Zest of one lemon
* 1/4 cup fresh lemon juice
* 2 tablespoons olive oil
* 2 tablespoons hot water
* 1/2 teaspoon fine grain sea salt

Directions

1. Rinse the quinoa in a fine-meshed strainer.

2. In a medium saucepan heat the quinoa and water until boiling. Reduce heat and simmer until water is absorbed and quinoa fluffs up, about 15 minutes. Quinoa is done when you can see the curlicue in each grain, and it is tender with a bit of pop to each bite. Drain any extra water and set aside.

3. While the quinoa is cooking make the dressing. Whisk together the garlic, tahini, lemon zest and juice, and olive oil. Add the hot water to thin a bit and then the salt.

4. Toss the cooked quinoa, beans, cilantro, red onion, and half of the dressing. Add more dressing and season with more salt to taste. Serve garnished with a bit of cilantro.

For more delicious recipes, gardening ideas, foraging tips, and food-related inspiration "like" the Garden of Eating on Facebook, or follow me on Twitter and Pinterest.

Sunday, October 12, 2008

Spiced Lamb Kabobs With Tomato Jam

I came across this recipe when I was on vacation in Hawaii two years ago. We were staying in a little condo on Molokai, a very beautiful and very tiny island. The owners of the condo had left a pile of books and magazines for their renters to enjoy. Among them was an issue of Met Home that included an article with lots of tasty-sounding Middle Eastern-style recipes.

I had never cooked lamb (ground or otherwise) before I tried these kabobs and was pleasantly surprised by how easy it was to manipulate and how yummy the end result was. These kabobs are simple and easy to prepare and only take a few minutes to cook on the grill.


Lamb kabobs on the barbie

I had also never heard of tomato jam before finding this recipe. Oddly enough, just two days after Nadia and I cooked our Mediterranean feast, Mark Bittman did a piece about tomato jam in the NYTimes. What a coinkydink! I actually liked Bittman's recipe better than the one from Met Home so I've substituted it here.

Tomato jam

Spiced Lamb Kabobs
Makes 12 kabobs (serves 6)

Ingredients

* 12 six-inch bamboo skewers
* 2 tbsp cinnamon
* 1 1/4 freshly ground black pepper
* 3/8 tsp grated nutmeg
* 3/8 tsp ground coriander
* 2 tsp salt
* small pinch of cayenne pepper
* 1 tbsp tomato paste or red pepper paste
* 2 egg whites
* 2 lbs ground lamb (use organic, free range lamb if at all possible)

Directions

1. Soak the bamboo skewers in water to prevent them from charring on the grill (you can do this overnight or a few hours before you're planning to grill.)

2. Combine all the ingredients in the bowl of a cuisinart and mix until completely blended (you want it to break down so that it becomes almost creamy.)

3. Divide the mixture into 12 equal portions. Shape each portion into a short, thick sausage and push onto the bamboo skewer.

4. Prepare the grill and grill the kebabs on all sides until done to your taste.

Tomato Jam
Makes about 1 cup

Ingredients

* 3/4 pound good ripe tomatoes (Roma are best), cored and coarsely chopped
* 1/2 cup sugar
* 1 tablespoons freshly squeezed lime juice
* 1/2 tablespoon fresh grated or minced ginger
* 1/2 teaspoon ground cumin
* 1/8 teaspoon ground cinnamon
* a pinch of ground cloves
* 1/2 teaspoon salt
* 1/2 a jalapeño pepper, stemmed, seeded and minced, or a pinch of red pepper flakes or cayenne to taste.

Directions

1. Combine all the ingredients in a heavy medium saucepan and bring to a boil over medium heat, stirring often.

2. Reduce the heat and simmer, stirring occasionally, until the mixture has the consistency of thick jam, about 1 hour 15 minutes.

3. Taste and adjust seasoning, then cool and refrigerate until ready to use; this will keep at least a week.

Saturday, October 4, 2008

A Mediterranean Feast (In Several Installments)

I have a few friends with whom I love to cook. Luckily for me, one of them came out to Berkeley for a visit recently. I had not seen Nadia in a long time but once we'd covered the basics, we spent a lot of time talking about food.

Nadia's interesting heritage (her mom is from Italy and her dad is an Armenian from Syria) has exposed her to a wide range of flavors and spices and her enthusiasm about food is infectious. We decided to wind up her visit by making a big mediterranean feast for dinner.


After spending some time leafing through my voluminous recipe files, we settled on:

We shopped in the morning and then prepared the quinoa, hummous, tomato jam, and tzatziki, saving only the salad and kabobs for the evening. I had made all but the tomato jam and quinoa dishes before so I was pretty sure the results would be good.

But I was pleasantly surprised by how delicious everything turned out. The combination of flavors was perfect (luckily, we had enough for leftovers for the next day, too.) And, of course, the company (Nadia and her boyfriend, Martin) was a big part of what made the meal so good!

Mediterranean Feast, sorry the pic is not great - we were all REALLY hungry by this time.

Since this meal includes far too many recipes to post in one fell swoop, I'll leave you with this taste of the meal and will post each recipe separately (minus the tzatziki, since I've already written about that - you can find the recipe here, the green salad, since it was so straight-forward, and the pita, since it was store-bought) over the next week. I will also link to the recipes from this post once they've been posted to make your browsing easier.

Here's to good friends and good food!