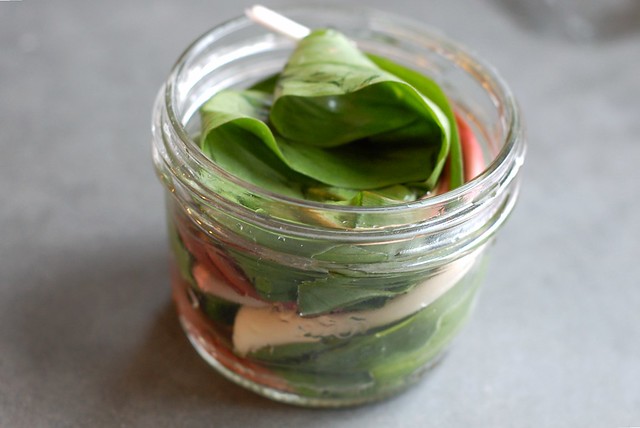
Spring is birthday season in my family. My mom's, mine, my big brother's, my son's and my husband's birthday all fall within April and May. This means there is lots of cake baking and eating going on. Which brings me to this particularly delicious cake.
It's the only chocolate cake I've made since I discovered it last year (and I have made it a number of times...) I love the moistness, the amount of sweetness (not overpowering), and the fact that it is wonderfully chocolatey without being at all overwhelming. I also like that I can turn leftover sour cream into something so yummy when it might otherwise just sprout green mold while languishing in the back of our fridge...
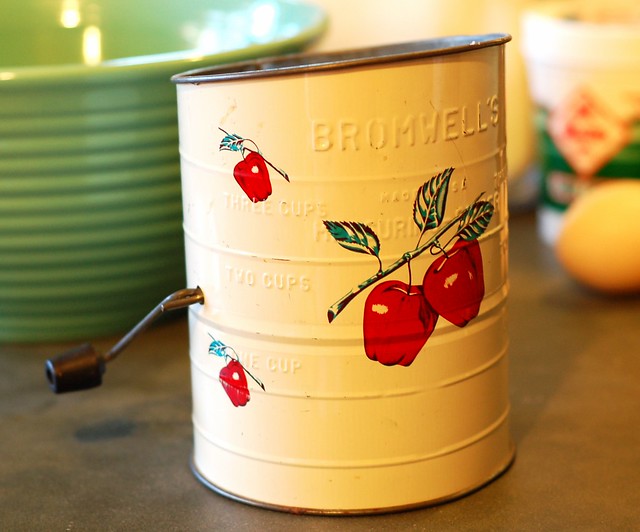
So I got out the cake flour, chocolate, sugar, eggs, butter, sour cream, vanilla and more one early morning to make one for my mom's 65th b-day. I like this cake enough that I have a semi-reverent approach to it. Which means that I do not cut any of the baking corners I might normally cut. For example - I bought cake flour instead of just using all-purpose like I normally would, and I dug out this adorable flour sifter that I've loved since I was a child (another hand-me-down from my mom) to actually sift the flour - something I almost never do.
And I actually made the cake release of butter and fine bread crumbs as Maida instructed (though I'm not actually convinced it works any better than butter and flour).
Then I got down to business...This is what it looked like.
About an hour later, two pans of chocolate cake were cooling on the counter and the house was filled with the smell of sheer happiness.
After everything cooled, it was time to frost those suckers. Unfortunately, I failed to read Maida's excellent instructions before I began so I ended up having to flip one of the layers after I'd frosted it already (a sticky situation, you might say) but I had enough frosting to make it all come out okay in the end. And now I'm pretty sure I'll never forget to FLIP THE BOTTOM LAYER UPSIDE DOWN BEFORE FROSTING IT again. It's brilliant advice - no need to mess with cutting layers flat or any of that crap - the weight of the cake on top presses it nice and flat.
I decorated my brown beauty with a few of the lovely little violets growing in our yard. Then there was nothing left to do but light some candles, sing Happy Birthday to my dear maman and devour a big slice with some
Ronnybrook Farm vanilla ice cream.

-- print recipe --Chocolate Sour Cream Layer Cake (
from Maida Heatter's Book of Great Desserts)
Makes one gorgeous cake
Ingredients
* 3 squares (3 ounces) unsweetened chocolate
* 1/2 cup boiling water
* 2 cups sifted flour
* 1 1/2 teaspoons double-acting baking powder
* 1 teaspoon baking soda
* 1/4 teaspoon salt
* 3/4 cups butter (use organic)
* 2 teaspoons vanilla extract
* 1 cup granulated sugar
* 2/3 cup light brown sugar, firmly packed
* 3 eggs (use organic, free range if you can get 'em)
* 1 cup sour cream (use organic)
Directions
1. Adjust rack to center of oven and preheat oven to 375°F. Butter two 9 inch round layer cake pans and dust both lightly with fine, dry bread crumbs (though I think flour works just as well if you don't have any breadcrumbs on hand.)
2. In a small heavy saucepan over low heat melt the chocolate with the boiling water. Stir occasionally with a small wire whisk until smooth. Set aside. You can also zap these things together in the microwave for about 30 seconds if you're in a hurry.
3. Meanwhile, sift together the flour, baking powder, baking soda and salt. Set aside. In large bowl of electric mixer, cream the butter. Add vanilla, granulated sugar and brown sugar and beat well, scraping the bowl with a rubber spatula as necessary to keep mixture smooth. Beat in eggs one at a time, beating well after each.
4. Stir sour cream and cooled chocolate together until smooth and add to batter, beating only until mixed. On lowest speed, add the sifted ingredients continuing to scrape the bowl with a rubber spatula. Beat only until smooth.
5. Turn into prepared pans. With rubber spatula spread tops smooth and then run the batter up on the sides a bit, leaving the batter slightly lower in the centers.
6. Bake 35 minutes or until tops spring back when lightly touched and layers come away from sides of pans. Cool in pans for about 5 minutes. Place racks over the cakes and invert. Remove pans. Cover with racks and invert again to cool right side up.
For the Icing/Frosting
Ingredients
* 3 squares (3 ounces) unsweetened chocolate)
* 2 Tablespoons butter
* 3/4 cup sour cream
* 1 teaspoon vanilla extract
* 1/4 teaspoon salt
* 1 pound unsifted confectioners sugar.
Directions
1. In top of small double boiler over hot water on low heat, melt butter and chocolate together. Stir until smooth and let cool completely.
2. In small bowl of electric mixer at low speed, beat sour cream, vanilla and salt just to mix. Gradually beat in the sugar, scraping the bowl with a rubber spatula. When smooth, add cooled melted chocolate and beat at high speed for 1/2 a minute or until very smooth.
3. Place four strips of wax paper around the edges of a cake plate to protect it while icing cake. (Note, this is one step I skipped - you can always just wipe the frosting off the plate later - it's actually rather enjoyable...)
4. Place one layer
upside down. Spread with filling. Cover with second layer, right side up so that both bottom sides meet in the middle (brilliant, Maida!!!) Cover the sides and then the top with remaining filling and icing, smoothing it with a long, narrow, metal spatula; then if you wish use the pack of a teaspoon to form swirls and peaks all over the sides and the top.
5. If you did the wax paper bit in step 3, remove the wax paper by pulling each strip by a narrow end. Needless to say, this goes well with ice cream! I'd say vanilla, coffee or hazelnut are all good bets.
You might also like: