Summer Pasta With Tomatoes, Corn, Basil, Bacon & Arugula

Sunday, July 22, 2012

Summer pasta with corn, cherry tomatoes, basil & bacony onions by Eve Fox, Garden of Eating blog copyright 2012

This simple but yummy summer pasta salad was inspired by a Food52 post I saw last week. 'Tis the season for this type of fresh, light, easy meal. At this time of year, delicious meals practically cooks themselves - it's often a matter of just combining a few fresh, flavorful ingredients.

I used cavatappi (which translates to "corkscrew" - makes sense, right?) but anything will do, penne, orechiette, elbows, etc.

Cavatappi by Eve Fox, Garden of Eating blog copyright 2012

I made use of the first ripe cherry tomatoes from our little container garden and a generous handful of fresh basil from our potted plants. Seeing those first 'maters turn red never fails to thrill me.

First cherry tomatoes and basil from our garden by Eve Fox, Garden of Eating blog copyright 2012

I added some onions cooked with chunks of thick slab bacon I bought from Northwinds Farm at our little Woodstock Farm Festival.

Sauteeing onions and bacon chunks by Eve Fox, Garden of Eating blog copyright 2012

Then tossed in some surprisingly sweet local corn we had left over from a meal earlier in the week. Fresh arugula (I used a mix of our own tender greens and a bunch from our CSA) added a nice peppery green counterpoint to the sweetness of the onions, corn and tomatoes.

Arugala by Eve Fox, Garden of Eating blog copyright 2012

You can either mix the greens in with the pasta or serve the pasta on a bed of them. Then cover the whole thing with a blizzard of grated Parmesan.

Summer pasta with corn, cherry tomatoes, basil & bacony onions by Eve Fox, Garden of Eating blog copyright 2012

I made enough for us to have for dinner and for lunch the next day and we were delighted anew both times.

-- print recipe --
Summer Pasta With Tomatoes, Corn, Basil, Bacon & Arugula
Serves 4

Ingredients

* 1 lb pasta - shape is up to you
* 1 bunch arugula leaves washed and dried
* 1 cup fresh basil leaves, washed, dried and torn up or chopped (if you have fresh oregano or parsley on hand, throw some in)
* 2-3 ears of corn kernels, cooked and cut off the cob
* 2 medium sized, ripe tomatoes (or a cup of ripe cherry tomatoes), diced
* 1 small red onion, diced
* 2-3 strips of bacon, chopped
* Sea salt and black pepper, to taste
* Olive oil
* A LOT of Parmesan cheese

Directions

1. Boil a large pot of salted water for the pasta and get it started cooking.

2. Saute the bacon pieces and the onion in a frying pan until the onion is translucent and the bacon is crisp. You may need to add more fat (but probably not) in which case you can either use some olive oil or some bacon fat if you've headed my recent tip about saving your bacon drippings.

3. Once the pasta is al dente, drain it and toss it with some olive oil in a large serving bowl. Add the tomatoes, onions and bacon, herbs, corn kernels, and arugula and toss to combine. Season with salt and pepper to taste and top with grated Parmesan cheese.

You might also like:
Want even more recipes, photos, giveaways, and food-related inspiration? "Like" the Garden of Eating on Facebook, or follow me on Twitter or Pinterest.

Grilled Fish Tacos - Easy, Simple & Healthy

Thursday, July 19, 2012

One of the first recipes I ever posted on this here blawg way back in 2007 was for Baja-style fish tacos. The fish is beer battered and then fried and served on corn tortillas with finely shredded cabbage, salsa and a host of delicious sides and condiments. They. Are. Simply. To. Die. For.

But they are also a lot of work to make, thanks to the beer battering and frying aspect of the recipe. And a lot has changed at our house since 2007, namely that we now have a very cute, very demanding three-year-old and another baby on the way this fall. Also, it's been roughly 98 degrees a lot of the time lately which makes the idea of standing over a skillet of boiling oil for 20 minutes even less appealing than I'd usually find it. (What I really excel at lately is lying down in an air-conditioned room, reading -- I find I'm quite good at it...)

But we still have to eat! And I still want everything to taste really good, in spite of the heat and our limited time and energy. So I've adapted a new, much easier, equally delicious, and far healthier version of fish tacos that we now make all the time.

Grilled fish tacos by Eve Fox, Garden of Eating blog, copyright 2012

The key is that the fish is grilled, instead of battered and fried. And in addition to being quick and easy, it's so light and flavorful and delicious this way, that I don't think I will ever go back to Baja unless I am at a restaurant or maybe when both my kids have gone off to college in about a million years from now.

You can use any kind of meaty white fish - tilapia, halibut, Mahi Mahi, etc. I used tilapia for this batch. You marinate the fillets in citrus juice (lemon, lime, orange or any combo thereof is good), olive oil, salt and pepper, some cilantro or other herbs and either a little thinly sliced onion or shallot or a pressed clove of garlic.

Marinating the tilapia fillets by Eve Fox, Garden of Eating blog, copyright 2012

Then prep your sauces and sides. These are all really easy and yummy.

Grilled fish taco fixings by Eve Fox, Garden of Eating blog, copyright 2012

One of the most important is finely shredded cabbage - it gives the tacos a nice, fresh crunch that is mildly sweet and nutty. I usually use red cabbage as I love the color it lends but had green on hand from our CSA for this meal. I use my little hand-held Kyocera mandoline to make quick, fine work of it - it only takes about 40 seconds to get a big pile (the mandoline is magic!)

Shredded cabbage by Eve Fox, Garden of Eating blog, copyright 2012

Then the mayonesa sauce which is just mayo, lime juice and salt but somehow transforms the whole taco into a mouthful of deliciousness. Do NOT skip the mayo sauce! Even people who do not like mayo usually love this sauce (though you may have to gently prod them to try it the first time.)

Then salsa. You can make your own salsa fresh or use bottled. I usually use salsa we've canned - here's my recipe. Tomato season is almost upon us and it's a great way to line your shelves with delicious homemade salsa for the entire year to come.

Freshly canned salsa by Eve Fox, Garden of Eating blog, copyright 2011

Then some fresh cilantro. Just wash, dry and remove the stems.

Cilantro by Eve Fox, Garden of Eating blog, copyright 2011

Then some finely sliced red onion - it's nice if you can almost see through the slices. That way people can get the flavor of the onion on their tacos without becoming a fire breathing onion monster in the process.

Then the avocado. Normally, I make the avocado sauce you'll find described in the Baja post, but this last time, I made one more time-saving concession, nixing the avocado sauce in favor of plain old sliced avocados. I found it equally tasty but mucho mas quick as there was no need to tangle with the Cuisinart or wash it afterwards (a chore I despise.) So you can either slice it and be done with it, as I did, make the avocado sauce (recipe in the Baja-style post), or make your favorite guacamole to throw on the tacos. It's all up to you.

Sliced avocado by Eve Fox, Garden of Eating blog, copyright 2012

Then grill your fish. We've taken to grilling it on a piece of tinfoil since it has a tendency to fall apart otherwise (probably a bigger fish like halibut, mahi mahi or cod sticks together a little better than tilapia but this works beautifully, regardless...)

Grilling the tilapia fillets by Eve Fox, Garden of Eating blog, copyright 2012

And heat up your corn tortillas - either right on the grill (easiest and quickest) or over a burner on your stove. Fish tacos should be served on corn tortillas. Despite the fact that I am a white girl and typically prefer flour tortillas, I have to say that corn is the way to go here - the taste is right. Flour would just be wrong...

Warming the corn tortillas by Eve Fox, Garden of Eating blog, copyright 2012

Then put it all out and go to town! You should probably plan on each person eating between 2-4 tacos (and maybe more for a large man with a big appetite) as they are smallish in size.

Grilled fish tacos by Eve Fox, Garden of Eating blog, copyright 2012

-- print recipe --
Grilled Fish Tacos
Serves 4

Sides
* 1-2 ripe avocados, peeled and sliced
* 1/4 large (or 1/2 small) red onion, finely sliced
* 1-2 cups cilantro leaves, rinsed, dried and with stems removed
* 2 cups finely shredded red or green cabbage
* Salsa of your choice - fresh or jarred
* 12-16 corn tortillas

Mayonesa Sauce
* 1/2 cup mayonnaise
* 2 tsps lime juice
* Sea salt to taste

Fish
* 1 1/2 pounds firm, meaty white fish like halibut, tilapia, striped bass, mahi mahi or cod
* Juice of 1-2 limes (depending on size and juiciness), or one lemon or orange
* 1/4 cup olive oil
* Sea salt
* Freshly ground black pepper
* A little chopped cilantro or oregano
* A little finely chopped red onion or garlic

1. Marinate the fish in the lime juice, olive oil, herbs, onion or garlic, salt and pepper. Cover and put in fridge for at least 20 minutes and up to an hour.

2. Make the mayonesa sauce: place the mayonnaise in a small bowl and add the lime juice and salt, stirring until smooth and creamy. Taste and adjust the lime and salt ratios as needed to taste.

3. Prepare the sides - this is just washing, slicing and dicing unless you decide to get fancy and make your own salsa or decide to try the avocado sauce.

4.Grill the fish. Turn your grill to high, let it heat up, then reduce the flame to medium. Place the fish on a sheet of tinfoil and roll the edges up to prevent juices from spilling into the flames. Grill for 5-8 minutes (time will depend on the size of the fillets you're using), until fish is cooked through and flaky but still tender and moist. Transfer to a plate and break into serving-sized pieces.

5. Heat the tortillas - place on grill for 10-20 seconds per side, until grill marks appear. Then transfer to a basket and cover with a dishcloth to keep them warm and prevent them from drying out.

6. Put everything out on the table and let everyone assemble their own tacos.

You might also like:
Want even more recipes, photos, giveaways, and food-related inspiration? "Like" the Garden of Eating on Facebook, or follow me on Twitter or Pinterest.

Grilled Radicchio Salad With Balsamic Dressing & Shaved Parmesan Cheese

Sunday, July 15, 2012

Head of radicchio from Hearty Roots Community Farm by Eve Fox, Garden of Eating blog, copyright 2012

Although I never buy it, I love the look of radicchio - those thick, crisp, maroon leaves with raised white veins are so pretty! But we got a simply beautiful head of the stuff in our most recent Hearty Roots CSA share, the typical coloring of the outer leaves tinged all over with a surprising and lovely green.

Since I never buy radicchio, I'd never cooked with it, either. So I turned to the internet for inspiration, of course (how did we do anything before the internet???) I found several simple yet yummy-looking recipes for grilled radicchio. I liked the idea that grilling the veg over high heat has a way of transforming its decidedly bitter taste to something mellowier and vaguely nutty.

Tossing the quartered radicchio with olive oil, salt and pepper by Eve Fox, Garden of Eating blog, copyright 2012

The rest was history. I quartered the radicchio (you want to include part of the core in each piece to prevent it from falling apart), tossed the pieces with a generous mixture of olive oil, fresh orange juice, sea salt, and freshly ground black pepper (don't skimp!) and asked my husband, our resident grillmaster, to go fire things up.

Tossing the quartered radicchio with olive oil, salt and pepper by Eve Fox, Garden of Eating blog, copyright 2012

You will need to watch the radicchio wedges closely as they can burn easily and turn them often. A little char is good, too much is BAD.

Grilling the radicchio by Eve Fox, Garden of Eating blog, copyright 2012

Although you could just drizzle some good quality balsamic vinegar over them once they're done and tuck in, I found the idea of a salad more appealing. Cut the wedges into chunks, drizzle with a simple balsamic vinaigrette (suggested recipe below or feel free to use your own), and shave some Parmesan cheese over the whole thing.

The grilled radicchio resting by Eve Fox, Garden of Eating blog, copyright 2012

The flavor is divine! Although some bites were still on the bitter side, I found it surprisingly addictive (sort of similar to the way I feel about this divine salad of shaved brussels sprouts, raw kale, toasted almonds and Parmesan.) The combination of the salty cheese, the sweet balsamic and the nutty, slightly bitter greens is goooood.

Green beans with lemon basil aioli, club steak and grilled radicchio salad with herbs & balsamic by Eve Fox, Garden of Eating blog, copyright 2012

I only had one head of radicchio but I've doubled the recipe below so you can feed four (or maybe five - depends how many people find it addictive...) with it. We ate ours with the scrumptious green beans with herby lemon aioli I posted recently and a delicious grilled shell steak.

Green beans with lemon basil aioli, club steak and grilled radicchio salad with herbs & balsamic by Eve Fox, Garden of Eating blog, copyright 2012

-- print recipe --Grilled Radicchio Salad With Balsamic Dressing & Shaved Parmesan
Serves 4-5 as a side

Ingredients

For the salad:
* 2 heads of radicchio, quartered, so that each chunk has some of the core/stem holding it together (otherwise, you might need to put the leaves in a grill basket as they won't hold together)
* A big handful of fresh basil leaves, rinsed and dried, stems removed
* A big handful of fresh parsley leaves, rinsed and dried, stems removed
* Several glugs of olive oil
* 1/2 cup orange juice (optional)
* Parmesan, Pecorino or Romano cheese to taste
* Sea salt and freshly ground black pepper

For the dressing:
* Roughly 1/2 cup olive oil
* 1/4 cup balsamic vinegar
* 1 teaspoon sea salt
* 1-2 garlic cloves, chopped or pressed
* 1 Tbsp maple syrup or honey
* 1/2 teaspoon Dijon mustard

Directions

1. Make the dressing. Put the salt, garlic, mustard, maple syrup or honey and balsamic vinegar into a food processor or blender and pulse to combine. With the motor running, drizzle in the olive oil slowly until the dressing comes together. Or, you can also just whisk it all together with a fork if that is more your speed or you don't feel like washing a food processor (I know I never do...)

2. Prepare your grill for high, direct heat. Coat quartered radicchio with olive oil and orange juice, then sprinkle with salt and pepper - make sure each piece is well-covered.

3. Grill the radicchio over high heat, uncovered. Watch closely and turn often to prevent them from charring too much. You want them cooked and lightly charred in spots but not totally blackened. Remove to a bowl, plate or cutting board.

4. Chop the radicchio quarters into bite-sized pieces and toss with the dressing. Garnish with shaved or grated Parmesan, Pecorino or Romano cheese (I urge you not to skimp on the cheese.) Serve hot or let cool down - it'd be good both ways.

You might also like:

For more delicious recipes, gardening ideas, foraging tips, and food-related inspiration "like" the Garden of Eating on Facebook, or follow me on Twitter and Pinterest.

Green Beans With Quick Lemon Basil Aioli

Thursday, July 12, 2012

Summertime and the livin' is easy... I love all the delicious, flavorful veggies and fruits that are dropping off the vine/stalk/tree at this time of year. It makes cooking a joy.

Green beans with lemon basil aioli by Eve Fox, Garden of Eating blog, copyright 2012

We grow herbs, green beans, tomatoes, cukes and some lettuce and arugula out on our deck. But due to limited space in the container garden, we only get a few green beans a day which I then wash, dry and put in the fridge until I've amassed enough to use. But it still only adds up to a handful or so of the delicious green monsters a week (see photo below.) So I bought some more at the Woodstock Farm Festival yesterday to supplement.

Green beans from the garden by Eve Fox, Garden of Eating blog, copyright 2012

Although I have finally mastered the art of making aioli from scratch (and it is an out-of-this-world treat), I have to admit that I am usually too lazy busy to do it. Instead, I get great, quick results by just doctoring store-bought mayonnaise. I used a new Hellmann's mayo that includes olive oil for this batch of aioli and it turned out great. They're offering a dollar off the stuff if you want to try it (just click the Coupon tab on that page if you're interested.)

Olive oil mayo by Hellmann's by Eve Fox, Garden of Eating blog, copyright 2012

The herbs you use are up to you but basil and dill are great choices to start with if you have either on hand (I used both.)

Basil and dill by Eve Fox, Garden of Eating blog, copyright 2012

I love the creamy, garlicky, herb-filled taste you can achieve in just a matter of minutes. My suggestion is not to skimp on the salt!

Lemon basil dill aioli by Eve Fox, Garden of Eating blog, copyright 2012

Take care not to overcook the green beans as you want to blanch them just long enough to make them tender-crisp but not so much that they get limp and bland looking. One of the keys to getting the beans right is having an ice water bath ready to stop the cooking once you remove them from the boiling water - otherwise, they will continue to cook for a number of minutes as they cool down.

Green beans in ice water bath by Eve Fox, Garden of Eating blog, copyright 2012

Toss it all together and you have a gorgeous summer side that should please everyone as it's both dairy and gluten-free (although it's not vegan due to the eggs in the mayo) which can be a plus if there are people in your life who can't or won't eat dairy/wheat/gluten. Ours accompanied grilled shell steak and a grilled radicchio and herb salad that I hope to post a recipe for very soon.

Green beans with lemon basil aioli by Eve Fox, Garden of Eating blog, copyright 2012

Green Beans With Quick Lemon Basil Aioli
Serves 4 as a side

Ingredients

For the salad
* 6 cups of fresh green beans, rinsed with the ends trimmed off
* Tray or two of ice cubes and lots of cold water

For the aioli
* 1 tsp sea salt
* 1 tsp freshly ground black pepper
* 3/4 cup mayonnaise
* 2 medium garlic cloves, minced or pressed (you can use more if you like garlic or less if you're not a fan)
* 3-4 tsp fresh lemon juice
* 3 tsp fresh dill, chopped
* 3 tsp fresh basil, chopped

Directions

1. Make the aioli by combining all the sauce ingredients and stirring well. Taste and adjust the flavors as needed. It's okay if it seems a bit salty and garlicky - remember, this is going to provide the sole seasoning for a lot of green beans. You can make the aioli a day in advance if you like - the flavors only improve with a little extra time.

2. Bring a large pot of water to the boil. Then add the green beans and blanch then until they're just a little bit tender but still bright green - probably just 2-4 minutes (depending on the size and toughness of the beans you're working with.) While they're cooking, prepare a large pot of very cold water mixed with ice cubes so that you'll have it at the ready to put the blanched beans in - this is important so that you can stop the cooking process (otherwise, they'll continue to cook and end up overdone). Once the beans are done, remove them from the water with a slotted spoon or by pouring them into a colander, then place them in the ice water bath for 5 minutes to ensure that the cooking stops.

3. Combine the cooled down blanched beans and the sauce, stirring with a large spoon to ensure that everything gets well-coated with the aioli and serve. It's delicious warm or cold and goes well with nearly everything (especially anything grilled.) If it looks like there's too much sauce, save what's leftover in the fridge - it's great with grilled salmon or other fish, steamed potatoes and more. 

You might also like:

Want even more recipes, photos, giveaways, and food-related inspiration? "Like" the Garden of Eating on Facebook, or follow me on Twitter or Pinterest.

Disclaimer: I received a sample of Hellmann's Mayonnaise with Olive Oil to try, and was compensated for my ingredients and time in creating this recipe, but my opinions are 100% my own.

Save Your Bacon Drippings: Greening Your Kitchen

Sunday, July 8, 2012

For years, I avoided cooking bacon. Lest you mistakenly think me more principled than I really am, it was not because bacon is made from pig or because it clogs your arteries, it was just because I never knew what to do with all the fat that's inevitably left in the pan.

Photo courtesy Robert S. Donovan - http://www.flickr.com/photos/booleansplit/

I knew It would be a bad idea to pour it down the drain since it congeals when it cools down, creating an unfortunate, pipe-clogging effect. So I would usually pour it all into a used sour cream or yogurt container, put a top on it and put it in the garbage. It was a decent solution but, nonetheless, it just never sat right with me...

But I had a flash of brilliance as I was facing a pan of bacon grease about a year ago - why not pour the fat into a glass jar, put a lid on it and put it in the fridge to cook with later???

Save your bacon grease to cook with by Eve Fox, Garden of Eating blog, copyright 2012

Those of you who already know this trick are probably saying "No, duh!" and feeling rather disappointed in how long it took me to catch on. There's really no need for you to keep reading...

But for those of you to whom this is news, let me just say that it opens up a whole new world (to quote Ariel from the Little Mermaid) of culinary possibilities. In addition to being less wasteful, reusing the bacon grease for cooking also just makes things taste really good...

Here are a few of the uses I've found so far (I'm sure there are many more):
  • Greasing a pan (I now use a spoonful of bacon fat in my cast iron skillet whenever I make corn bread and I just used some to grease the muffin tins for a batch of popovers this morning - so good!)
  • Frying potatoes
  • Cooking eggs
  • Sautéeing onions and/or garlic
  • Sautéeing greens like kale, chard or spinach
The bacon fat lends all of these things an irresistibly smokey bacon flavor. I've also found this little bit of extra flavor to be a helpful substitute in cases when I would actually like to include some bacon but don't have any on hand.

A few notes:

1. One thing to be aware of is that, unless you were to go the extra mile and actually strain the bacon grease (which I'm not going to do), there will be little particles of bacon left in it. They'll show up dark brown against the creamy white of the fat when it all cools down. Be warned that those little bits will burn when they get hot enough. That is why I would not recommend using the recycled fat for something like stir-frying where you really need an oil like peanut (or a pure rendered fat like lard) that has a high smoke point.

Save your bacon grease to cook with by Eve Fox, Garden of Eating blog, copyright 2012

2. Also, wait for the pan to cool down before you pour the fat off - you don't want to burn yourself or risk cracking the jar due to a sudden change in temperature.

3. If you can't get bacon from a pig farm near you (which would be ideal), I think the best alternative is probably Applegate Farms organic Sunday bacon.


Please share any other suggested uses via comments. And don't forget to check out the other entries in the Greening Your Kitchen series.

You might also like:
Want even more recipes, photos, giveaways, and food-related inspiration? "Like" the Garden of Eating on Facebook, or follow me on Twitter or Pinterest.

Blueberry Yogurt Tart With Gingery Graham Cracker Crust

Wednesday, July 4, 2012

I made this beautiful summertime treat for the first time last night and am happy to report that it's delicious, satisfying, cool and easy to make. In short, I think you're going to love it...

Blueberry yogurt tart with ginger graham crust by Eve Fox, Garden of Eating blog, copyright 2012

We spent a mighty pleasant morning picking blueberries at Greig Farm yesterday - it was hot but there was a nice breeze and the blueberry bushes are actually tall enough to create a little shade. Every time we go, I am amazed all over again by how beautiful the berries are - perfectly plump and juicy with that soft, lush dusky coating that rubs off when you touch them, exposing the darker, shiny blue underneath.

Bluberries by Eve Fox, Garden of Eating blog, copyright 2011

And there are just many of them, too. Sadly, this is not the case with the raspberries this year - they got frost damaged in the wacky weather we had in the late winter/early spring. But the blueberries are going strong!

Blueberries from Grieg Farms by Eve Fox, Garden of Eating blog, copyright 2012

I saw the recipe that inspired this tart show up via Food & Wine over the weekend and knew I wanted to earmark some of the fresh berries to try it out. Although I am typically only interested in desserts that contain chocolate, something about this one appealed to me very strongly. I think it was the spicy ginger in combination with tart yogurt and sweet berries. And since my husband is a confirmed ginger hound, I figured I could not go wrong...

Ginger and grahams by Eve Fox, Garden of Eating blog, copyright 2012

I  more or less stuck with the recipe though I have made it tastier and less healthy (but come on, this is a DESSERT!) by substituting whole milk Greek yogurt for the non-fat and by basically doubling the amount of butter in the crust, adding more sugar, and removing the egg white as I did not feel like wasting an egg yolk.

Ginger graham cracker crust by Eve Fox, Garden of Eating blog, copyright 2012

I also added a sprinkling of cinnamon to the crust mixture. And think it would be good to include some lemon zest in the honeyed yogurt (though I had used up my last lemon so I could not try it.)

Draining the Greek yogurt by Eve Fox, Garden of Eating blog, copyright 2012

Despite the fact that all Greek yogurt has already been drained (I believe the extra draining is the only difference between Greek yogurt and other yogurts and what accounts for its characteristically firm texture), I followed the directions and drained the Greek yogurt for a number of hours before composing the tart. It did shed a little more water weight, becoming even firmer and creamier in the process. However, I think that if you were pressed for time, you could probably just use it as is.

Adding honey to the yogurt by Eve Fox, Garden of Eating blog, copyright 2012

I could not have been more pleased with the results - it is really just scrumptious.

Blueberry yogurt tart with ginger graham crust by Eve Fox, Garden of Eating blog, copyright 2012

A perfect summer dessert using fresh, local berries. Go pick some or just pick some up at your local farmers' market this week - you won't regret it!

Blueberry yogurt tart with ginger graham crust by Eve Fox, Garden of Eating blog, copyright 2012

Blueberry Yogurt Tart With Gingery Graham Cracker Crust
Makes one 9-inch tart

Ingredients

* 10-20 whole graham crackers, broken in half - enough to make 1 1/2 cups of crumbs (the grahams I used were on the small side being some health food variety and I needed closer to 20 -- if you're not sure just measure your crumbs and then dump them back in the food processor)
* 1/4 cup crystallized ginger, finely chopped
* 1/4 cup sugar
* Pinch of salt
* 1/2 tsp ground cinnamon
* 1 tsp lemon zest (optional)
* 5-6 Tbsps unsalted butter, melted
* 2 cups Greek yogurt (I used a tub of Fage's whole milk yogurt), drained overnight or for several hours
* 2 tablespoons honey
* 1- 1 1/2 cups fresh blueberries

Directions

1. Preheat the oven to 350° and grease a pie dish or tart pan with removable bottom. In a food processor, pulse the graham crackers with the crystallized ginger, sugar, salt and cinnamon until finely ground. Add the melted butter and pulse until the crumbs are evenly coated.

2. Press the crumbs evenly over the bottom and up the sides of the pie dish or tart pan. Bake for about 20 minutes, until the crust is lightly browned. Let the crust cool completely. (You can make the crust up to a day ahead of time and just keep it wrapped in a plastic bag in the fridge if you like.)

3. In a medium bowl, mix the drained yogurt with the honey and (optional) lemon zest. Spread the yogurt in the crust and arrange the blueberries over the surface of the yogurt in any pattern you like. You could also throw some raspberries in there for added color if you feel like it. Cut the tart in slices and sit back to enjoy the oohs and aahs...

You might also like:
Want even more recipes, photos, giveaways, and food-related inspiration? "Like" the Garden of Eating on Facebook, or follow me on Twitter or Pinterest.

Pickled Garlic Scapes

Monday, July 2, 2012

We got another big bunch of garlic scapes from our CSA this week. As we've still got plenty of garlic scape pesto in the freezer from the last haul, I figured I'd try something new. And we've been really loving both the pickled ramps and pickled asparagus we made recently so pickling seemed like the way to go.

A mess of garlic scapes by Eve Fox, Garden of Eating blog, copyright 2012

I turned to my new go-to canning Bible, Marisa McClellan's lovely, new book, Food in Jars: Preserving in Small Batches Year-Round. Sure enough, she had a good-sounding and very simple recipe for pickled garlic scapes. I cut her original recipe in half since I only had half a pound (have I mentioned yet how much I love my little OXO kitchen scale?!) of scapes, but if you have more, just double or triple the amounts below to fit.

Making sure the garlic scapes will fit in the jar by Eve Fox, Garden of Eating blog, copyright 2012

As usual, I was trying to do at least three things at once while I made these and missed the little note at the very bottom of the page about her preferred method of packing since I was slightly at a loss because the scapes inevitably end up in both straight and curly pieces. I've included it higher up here so that YOU won't miss it. And mine will still taste just as good as if I'd packed them more neatly.

Jar of pickled garlic scapes by Eve Fox, Garden of Eating blog, copyright 2012

Also, a note on the pickling spices - I included a lot of spices but you could also do this with just peppercorns, bay leaf and dill or coriander seeds if you don't have all of these things - nothing is set in stone!

Line up of pickling spices by Eve Fox, Garden of Eating blog, copyright 2012

In my opinion, the only downside to this (or any pickles) is the intensely vinegar-y smell that pervades your house for a few hours after you boil your brine. But it fades and it's so worth it once you finally crack open a jar of whatever you've made.

Jar of pickled garlic scapes by Eve Fox, Garden of Eating blog, copyright 2012

Pickled Garlic Scapes adapted from the Food in Jars cookbook
Makes one pint jar

Ingredients

* 1/2 pound garlic scapes (1 decent-sized bunch)
* 1/4 teaspoon coriander seeds
* 1/4 teaspoon mustard seeds
* a few whole cloves
* a bay leaf
* 1/4 teaspoon dill seed
* an allspice berry
* a juniper berry
* a pinch of hot pepper flakes
* 1/2 teaspoon whole black peppercorns
* 3/4 cups apple cider vinegar
* 3/4 cups water
* 1 tablespoon pickling salt

Directions

1. Trim the ends of the scapes, both the blossom end and the hard bit that formed at the original cut, and cut them into lengths that will fit in your jar. Prepare a small boiling water bath and sterilize a single pint jar, lid and band.

2. Combine the vinegar, water and pickling salt in a pot and bring to a boil.

3. Remove the jar from the boiling water bath, empty and set on a kitchen towel. Place the spices in the sterilized pint jar along with a pinch of salt.

4. Pack the trimmed scapes into the jar. Note: since you'll be dealing with both straight and curved pieces, Marisa suggests packing the curved pieces along the sides of the jar and the straighter pieces inside standing straight up - kind of a like a curly log cabin look (or vice versa) - I ended up just putting mine all in there in no order which is also fine.

5. Slowly pour the hot brine over the garlic scapes, leaving 1/2-inch headspace. Once the jar is full, tap the jar lightly to dislodge any air bubbles. Check the headspace again and add more brine if necessary.

6. Wipe the rim, apply the lid and ring, and process in a hot water bath for 10 minutes. Let these pickles cure for at least a week before eating. Pickles will last for several weeks in refrigerator after initial seal is broken.

You might also like:

Want even more recipes, photos, giveaways, and food-related inspiration? "Like" the Garden of Eating on Facebook, or follow me on Twitter or Pinterest.

Sunday, July 22, 2012

Summer Pasta With Tomatoes, Corn, Basil, Bacon & Arugula

Summer pasta with corn, cherry tomatoes, basil & bacony onions by Eve Fox, Garden of Eating blog copyright 2012

This simple but yummy summer pasta salad was inspired by a Food52 post I saw last week. 'Tis the season for this type of fresh, light, easy meal. At this time of year, delicious meals practically cooks themselves - it's often a matter of just combining a few fresh, flavorful ingredients.

I used cavatappi (which translates to "corkscrew" - makes sense, right?) but anything will do, penne, orechiette, elbows, etc.

Cavatappi by Eve Fox, Garden of Eating blog copyright 2012

I made use of the first ripe cherry tomatoes from our little container garden and a generous handful of fresh basil from our potted plants. Seeing those first 'maters turn red never fails to thrill me.

First cherry tomatoes and basil from our garden by Eve Fox, Garden of Eating blog copyright 2012

I added some onions cooked with chunks of thick slab bacon I bought from Northwinds Farm at our little Woodstock Farm Festival.

Sauteeing onions and bacon chunks by Eve Fox, Garden of Eating blog copyright 2012

Then tossed in some surprisingly sweet local corn we had left over from a meal earlier in the week. Fresh arugula (I used a mix of our own tender greens and a bunch from our CSA) added a nice peppery green counterpoint to the sweetness of the onions, corn and tomatoes.

Arugala by Eve Fox, Garden of Eating blog copyright 2012

You can either mix the greens in with the pasta or serve the pasta on a bed of them. Then cover the whole thing with a blizzard of grated Parmesan.

Summer pasta with corn, cherry tomatoes, basil & bacony onions by Eve Fox, Garden of Eating blog copyright 2012

I made enough for us to have for dinner and for lunch the next day and we were delighted anew both times.

-- print recipe --
Summer Pasta With Tomatoes, Corn, Basil, Bacon & Arugula
Serves 4

Ingredients

* 1 lb pasta - shape is up to you
* 1 bunch arugula leaves washed and dried
* 1 cup fresh basil leaves, washed, dried and torn up or chopped (if you have fresh oregano or parsley on hand, throw some in)
* 2-3 ears of corn kernels, cooked and cut off the cob
* 2 medium sized, ripe tomatoes (or a cup of ripe cherry tomatoes), diced
* 1 small red onion, diced
* 2-3 strips of bacon, chopped
* Sea salt and black pepper, to taste
* Olive oil
* A LOT of Parmesan cheese

Directions

1. Boil a large pot of salted water for the pasta and get it started cooking.

2. Saute the bacon pieces and the onion in a frying pan until the onion is translucent and the bacon is crisp. You may need to add more fat (but probably not) in which case you can either use some olive oil or some bacon fat if you've headed my recent tip about saving your bacon drippings.

3. Once the pasta is al dente, drain it and toss it with some olive oil in a large serving bowl. Add the tomatoes, onions and bacon, herbs, corn kernels, and arugula and toss to combine. Season with salt and pepper to taste and top with grated Parmesan cheese.

You might also like:
Want even more recipes, photos, giveaways, and food-related inspiration? "Like" the Garden of Eating on Facebook, or follow me on Twitter or Pinterest.

Thursday, July 19, 2012

Grilled Fish Tacos - Easy, Simple & Healthy

One of the first recipes I ever posted on this here blawg way back in 2007 was for Baja-style fish tacos. The fish is beer battered and then fried and served on corn tortillas with finely shredded cabbage, salsa and a host of delicious sides and condiments. They. Are. Simply. To. Die. For.

But they are also a lot of work to make, thanks to the beer battering and frying aspect of the recipe. And a lot has changed at our house since 2007, namely that we now have a very cute, very demanding three-year-old and another baby on the way this fall. Also, it's been roughly 98 degrees a lot of the time lately which makes the idea of standing over a skillet of boiling oil for 20 minutes even less appealing than I'd usually find it. (What I really excel at lately is lying down in an air-conditioned room, reading -- I find I'm quite good at it...)

But we still have to eat! And I still want everything to taste really good, in spite of the heat and our limited time and energy. So I've adapted a new, much easier, equally delicious, and far healthier version of fish tacos that we now make all the time.

Grilled fish tacos by Eve Fox, Garden of Eating blog, copyright 2012

The key is that the fish is grilled, instead of battered and fried. And in addition to being quick and easy, it's so light and flavorful and delicious this way, that I don't think I will ever go back to Baja unless I am at a restaurant or maybe when both my kids have gone off to college in about a million years from now.

You can use any kind of meaty white fish - tilapia, halibut, Mahi Mahi, etc. I used tilapia for this batch. You marinate the fillets in citrus juice (lemon, lime, orange or any combo thereof is good), olive oil, salt and pepper, some cilantro or other herbs and either a little thinly sliced onion or shallot or a pressed clove of garlic.

Marinating the tilapia fillets by Eve Fox, Garden of Eating blog, copyright 2012

Then prep your sauces and sides. These are all really easy and yummy.

Grilled fish taco fixings by Eve Fox, Garden of Eating blog, copyright 2012

One of the most important is finely shredded cabbage - it gives the tacos a nice, fresh crunch that is mildly sweet and nutty. I usually use red cabbage as I love the color it lends but had green on hand from our CSA for this meal. I use my little hand-held Kyocera mandoline to make quick, fine work of it - it only takes about 40 seconds to get a big pile (the mandoline is magic!)

Shredded cabbage by Eve Fox, Garden of Eating blog, copyright 2012

Then the mayonesa sauce which is just mayo, lime juice and salt but somehow transforms the whole taco into a mouthful of deliciousness. Do NOT skip the mayo sauce! Even people who do not like mayo usually love this sauce (though you may have to gently prod them to try it the first time.)

Then salsa. You can make your own salsa fresh or use bottled. I usually use salsa we've canned - here's my recipe. Tomato season is almost upon us and it's a great way to line your shelves with delicious homemade salsa for the entire year to come.

Freshly canned salsa by Eve Fox, Garden of Eating blog, copyright 2011

Then some fresh cilantro. Just wash, dry and remove the stems.

Cilantro by Eve Fox, Garden of Eating blog, copyright 2011

Then some finely sliced red onion - it's nice if you can almost see through the slices. That way people can get the flavor of the onion on their tacos without becoming a fire breathing onion monster in the process.

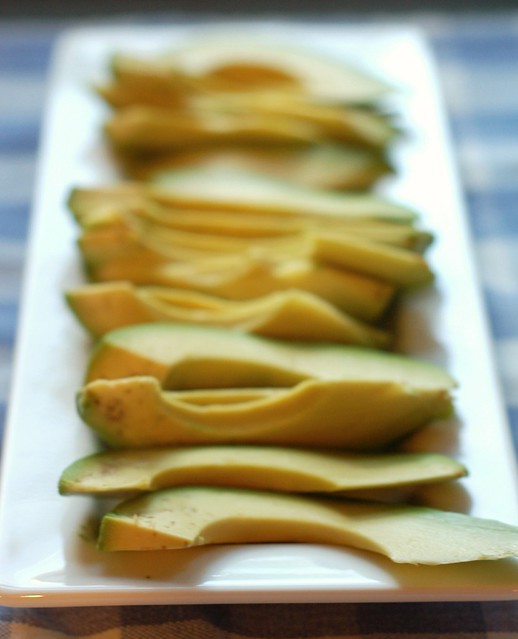
Then the avocado. Normally, I make the avocado sauce you'll find described in the Baja post, but this last time, I made one more time-saving concession, nixing the avocado sauce in favor of plain old sliced avocados. I found it equally tasty but mucho mas quick as there was no need to tangle with the Cuisinart or wash it afterwards (a chore I despise.) So you can either slice it and be done with it, as I did, make the avocado sauce (recipe in the Baja-style post), or make your favorite guacamole to throw on the tacos. It's all up to you.

Sliced avocado by Eve Fox, Garden of Eating blog, copyright 2012

Then grill your fish. We've taken to grilling it on a piece of tinfoil since it has a tendency to fall apart otherwise (probably a bigger fish like halibut, mahi mahi or cod sticks together a little better than tilapia but this works beautifully, regardless...)

Grilling the tilapia fillets by Eve Fox, Garden of Eating blog, copyright 2012

And heat up your corn tortillas - either right on the grill (easiest and quickest) or over a burner on your stove. Fish tacos should be served on corn tortillas. Despite the fact that I am a white girl and typically prefer flour tortillas, I have to say that corn is the way to go here - the taste is right. Flour would just be wrong...

Warming the corn tortillas by Eve Fox, Garden of Eating blog, copyright 2012

Then put it all out and go to town! You should probably plan on each person eating between 2-4 tacos (and maybe more for a large man with a big appetite) as they are smallish in size.

Grilled fish tacos by Eve Fox, Garden of Eating blog, copyright 2012

-- print recipe --
Grilled Fish Tacos
Serves 4

Sides
* 1-2 ripe avocados, peeled and sliced
* 1/4 large (or 1/2 small) red onion, finely sliced
* 1-2 cups cilantro leaves, rinsed, dried and with stems removed
* 2 cups finely shredded red or green cabbage
* Salsa of your choice - fresh or jarred
* 12-16 corn tortillas

Mayonesa Sauce
* 1/2 cup mayonnaise
* 2 tsps lime juice
* Sea salt to taste

Fish
* 1 1/2 pounds firm, meaty white fish like halibut, tilapia, striped bass, mahi mahi or cod
* Juice of 1-2 limes (depending on size and juiciness), or one lemon or orange
* 1/4 cup olive oil
* Sea salt
* Freshly ground black pepper
* A little chopped cilantro or oregano
* A little finely chopped red onion or garlic

1. Marinate the fish in the lime juice, olive oil, herbs, onion or garlic, salt and pepper. Cover and put in fridge for at least 20 minutes and up to an hour.

2. Make the mayonesa sauce: place the mayonnaise in a small bowl and add the lime juice and salt, stirring until smooth and creamy. Taste and adjust the lime and salt ratios as needed to taste.

3. Prepare the sides - this is just washing, slicing and dicing unless you decide to get fancy and make your own salsa or decide to try the avocado sauce.

4.Grill the fish. Turn your grill to high, let it heat up, then reduce the flame to medium. Place the fish on a sheet of tinfoil and roll the edges up to prevent juices from spilling into the flames. Grill for 5-8 minutes (time will depend on the size of the fillets you're using), until fish is cooked through and flaky but still tender and moist. Transfer to a plate and break into serving-sized pieces.

5. Heat the tortillas - place on grill for 10-20 seconds per side, until grill marks appear. Then transfer to a basket and cover with a dishcloth to keep them warm and prevent them from drying out.

6. Put everything out on the table and let everyone assemble their own tacos.

You might also like:
Want even more recipes, photos, giveaways, and food-related inspiration? "Like" the Garden of Eating on Facebook, or follow me on Twitter or Pinterest.

Sunday, July 15, 2012

Grilled Radicchio Salad With Balsamic Dressing & Shaved Parmesan Cheese

Head of radicchio from Hearty Roots Community Farm by Eve Fox, Garden of Eating blog, copyright 2012

Although I never buy it, I love the look of radicchio - those thick, crisp, maroon leaves with raised white veins are so pretty! But we got a simply beautiful head of the stuff in our most recent Hearty Roots CSA share, the typical coloring of the outer leaves tinged all over with a surprising and lovely green.

Since I never buy radicchio, I'd never cooked with it, either. So I turned to the internet for inspiration, of course (how did we do anything before the internet???) I found several simple yet yummy-looking recipes for grilled radicchio. I liked the idea that grilling the veg over high heat has a way of transforming its decidedly bitter taste to something mellowier and vaguely nutty.

Tossing the quartered radicchio with olive oil, salt and pepper by Eve Fox, Garden of Eating blog, copyright 2012

The rest was history. I quartered the radicchio (you want to include part of the core in each piece to prevent it from falling apart), tossed the pieces with a generous mixture of olive oil, fresh orange juice, sea salt, and freshly ground black pepper (don't skimp!) and asked my husband, our resident grillmaster, to go fire things up.

Tossing the quartered radicchio with olive oil, salt and pepper by Eve Fox, Garden of Eating blog, copyright 2012

You will need to watch the radicchio wedges closely as they can burn easily and turn them often. A little char is good, too much is BAD.

Grilling the radicchio by Eve Fox, Garden of Eating blog, copyright 2012

Although you could just drizzle some good quality balsamic vinegar over them once they're done and tuck in, I found the idea of a salad more appealing. Cut the wedges into chunks, drizzle with a simple balsamic vinaigrette (suggested recipe below or feel free to use your own), and shave some Parmesan cheese over the whole thing.

The grilled radicchio resting by Eve Fox, Garden of Eating blog, copyright 2012

The flavor is divine! Although some bites were still on the bitter side, I found it surprisingly addictive (sort of similar to the way I feel about this divine salad of shaved brussels sprouts, raw kale, toasted almonds and Parmesan.) The combination of the salty cheese, the sweet balsamic and the nutty, slightly bitter greens is goooood.

Green beans with lemon basil aioli, club steak and grilled radicchio salad with herbs & balsamic by Eve Fox, Garden of Eating blog, copyright 2012

I only had one head of radicchio but I've doubled the recipe below so you can feed four (or maybe five - depends how many people find it addictive...) with it. We ate ours with the scrumptious green beans with herby lemon aioli I posted recently and a delicious grilled shell steak.

Green beans with lemon basil aioli, club steak and grilled radicchio salad with herbs & balsamic by Eve Fox, Garden of Eating blog, copyright 2012

-- print recipe --Grilled Radicchio Salad With Balsamic Dressing & Shaved Parmesan
Serves 4-5 as a side

Ingredients

For the salad:
* 2 heads of radicchio, quartered, so that each chunk has some of the core/stem holding it together (otherwise, you might need to put the leaves in a grill basket as they won't hold together)
* A big handful of fresh basil leaves, rinsed and dried, stems removed
* A big handful of fresh parsley leaves, rinsed and dried, stems removed
* Several glugs of olive oil
* 1/2 cup orange juice (optional)
* Parmesan, Pecorino or Romano cheese to taste
* Sea salt and freshly ground black pepper

For the dressing:
* Roughly 1/2 cup olive oil
* 1/4 cup balsamic vinegar
* 1 teaspoon sea salt
* 1-2 garlic cloves, chopped or pressed
* 1 Tbsp maple syrup or honey
* 1/2 teaspoon Dijon mustard

Directions

1. Make the dressing. Put the salt, garlic, mustard, maple syrup or honey and balsamic vinegar into a food processor or blender and pulse to combine. With the motor running, drizzle in the olive oil slowly until the dressing comes together. Or, you can also just whisk it all together with a fork if that is more your speed or you don't feel like washing a food processor (I know I never do...)

2. Prepare your grill for high, direct heat. Coat quartered radicchio with olive oil and orange juice, then sprinkle with salt and pepper - make sure each piece is well-covered.

3. Grill the radicchio over high heat, uncovered. Watch closely and turn often to prevent them from charring too much. You want them cooked and lightly charred in spots but not totally blackened. Remove to a bowl, plate or cutting board.

4. Chop the radicchio quarters into bite-sized pieces and toss with the dressing. Garnish with shaved or grated Parmesan, Pecorino or Romano cheese (I urge you not to skimp on the cheese.) Serve hot or let cool down - it'd be good both ways.

You might also like:

For more delicious recipes, gardening ideas, foraging tips, and food-related inspiration "like" the Garden of Eating on Facebook, or follow me on Twitter and Pinterest.

Thursday, July 12, 2012

Green Beans With Quick Lemon Basil Aioli

Summertime and the livin' is easy... I love all the delicious, flavorful veggies and fruits that are dropping off the vine/stalk/tree at this time of year. It makes cooking a joy.

Green beans with lemon basil aioli by Eve Fox, Garden of Eating blog, copyright 2012

We grow herbs, green beans, tomatoes, cukes and some lettuce and arugula out on our deck. But due to limited space in the container garden, we only get a few green beans a day which I then wash, dry and put in the fridge until I've amassed enough to use. But it still only adds up to a handful or so of the delicious green monsters a week (see photo below.) So I bought some more at the Woodstock Farm Festival yesterday to supplement.

Green beans from the garden by Eve Fox, Garden of Eating blog, copyright 2012

Although I have finally mastered the art of making aioli from scratch (and it is an out-of-this-world treat), I have to admit that I am usually too lazy busy to do it. Instead, I get great, quick results by just doctoring store-bought mayonnaise. I used a new Hellmann's mayo that includes olive oil for this batch of aioli and it turned out great. They're offering a dollar off the stuff if you want to try it (just click the Coupon tab on that page if you're interested.)

Olive oil mayo by Hellmann's by Eve Fox, Garden of Eating blog, copyright 2012

The herbs you use are up to you but basil and dill are great choices to start with if you have either on hand (I used both.)

Basil and dill by Eve Fox, Garden of Eating blog, copyright 2012

I love the creamy, garlicky, herb-filled taste you can achieve in just a matter of minutes. My suggestion is not to skimp on the salt!

Lemon basil dill aioli by Eve Fox, Garden of Eating blog, copyright 2012

Take care not to overcook the green beans as you want to blanch them just long enough to make them tender-crisp but not so much that they get limp and bland looking. One of the keys to getting the beans right is having an ice water bath ready to stop the cooking once you remove them from the boiling water - otherwise, they will continue to cook for a number of minutes as they cool down.

Green beans in ice water bath by Eve Fox, Garden of Eating blog, copyright 2012

Toss it all together and you have a gorgeous summer side that should please everyone as it's both dairy and gluten-free (although it's not vegan due to the eggs in the mayo) which can be a plus if there are people in your life who can't or won't eat dairy/wheat/gluten. Ours accompanied grilled shell steak and a grilled radicchio and herb salad that I hope to post a recipe for very soon.

Green beans with lemon basil aioli by Eve Fox, Garden of Eating blog, copyright 2012

Green Beans With Quick Lemon Basil Aioli
Serves 4 as a side

Ingredients

For the salad
* 6 cups of fresh green beans, rinsed with the ends trimmed off
* Tray or two of ice cubes and lots of cold water

For the aioli
* 1 tsp sea salt
* 1 tsp freshly ground black pepper
* 3/4 cup mayonnaise
* 2 medium garlic cloves, minced or pressed (you can use more if you like garlic or less if you're not a fan)
* 3-4 tsp fresh lemon juice
* 3 tsp fresh dill, chopped
* 3 tsp fresh basil, chopped

Directions

1. Make the aioli by combining all the sauce ingredients and stirring well. Taste and adjust the flavors as needed. It's okay if it seems a bit salty and garlicky - remember, this is going to provide the sole seasoning for a lot of green beans. You can make the aioli a day in advance if you like - the flavors only improve with a little extra time.

2. Bring a large pot of water to the boil. Then add the green beans and blanch then until they're just a little bit tender but still bright green - probably just 2-4 minutes (depending on the size and toughness of the beans you're working with.) While they're cooking, prepare a large pot of very cold water mixed with ice cubes so that you'll have it at the ready to put the blanched beans in - this is important so that you can stop the cooking process (otherwise, they'll continue to cook and end up overdone). Once the beans are done, remove them from the water with a slotted spoon or by pouring them into a colander, then place them in the ice water bath for 5 minutes to ensure that the cooking stops.

3. Combine the cooled down blanched beans and the sauce, stirring with a large spoon to ensure that everything gets well-coated with the aioli and serve. It's delicious warm or cold and goes well with nearly everything (especially anything grilled.) If it looks like there's too much sauce, save what's leftover in the fridge - it's great with grilled salmon or other fish, steamed potatoes and more. 

You might also like:

Want even more recipes, photos, giveaways, and food-related inspiration? "Like" the Garden of Eating on Facebook, or follow me on Twitter or Pinterest.

Disclaimer: I received a sample of Hellmann's Mayonnaise with Olive Oil to try, and was compensated for my ingredients and time in creating this recipe, but my opinions are 100% my own.

Sunday, July 8, 2012

Save Your Bacon Drippings: Greening Your Kitchen

For years, I avoided cooking bacon. Lest you mistakenly think me more principled than I really am, it was not because bacon is made from pig or because it clogs your arteries, it was just because I never knew what to do with all the fat that's inevitably left in the pan.

Photo courtesy Robert S. Donovan - http://www.flickr.com/photos/booleansplit/

I knew It would be a bad idea to pour it down the drain since it congeals when it cools down, creating an unfortunate, pipe-clogging effect. So I would usually pour it all into a used sour cream or yogurt container, put a top on it and put it in the garbage. It was a decent solution but, nonetheless, it just never sat right with me...

But I had a flash of brilliance as I was facing a pan of bacon grease about a year ago - why not pour the fat into a glass jar, put a lid on it and put it in the fridge to cook with later???

Save your bacon grease to cook with by Eve Fox, Garden of Eating blog, copyright 2012

Those of you who already know this trick are probably saying "No, duh!" and feeling rather disappointed in how long it took me to catch on. There's really no need for you to keep reading...

But for those of you to whom this is news, let me just say that it opens up a whole new world (to quote Ariel from the Little Mermaid) of culinary possibilities. In addition to being less wasteful, reusing the bacon grease for cooking also just makes things taste really good...

Here are a few of the uses I've found so far (I'm sure there are many more):
  • Greasing a pan (I now use a spoonful of bacon fat in my cast iron skillet whenever I make corn bread and I just used some to grease the muffin tins for a batch of popovers this morning - so good!)
  • Frying potatoes
  • Cooking eggs
  • Sautéeing onions and/or garlic
  • Sautéeing greens like kale, chard or spinach
The bacon fat lends all of these things an irresistibly smokey bacon flavor. I've also found this little bit of extra flavor to be a helpful substitute in cases when I would actually like to include some bacon but don't have any on hand.

A few notes:

1. One thing to be aware of is that, unless you were to go the extra mile and actually strain the bacon grease (which I'm not going to do), there will be little particles of bacon left in it. They'll show up dark brown against the creamy white of the fat when it all cools down. Be warned that those little bits will burn when they get hot enough. That is why I would not recommend using the recycled fat for something like stir-frying where you really need an oil like peanut (or a pure rendered fat like lard) that has a high smoke point.

Save your bacon grease to cook with by Eve Fox, Garden of Eating blog, copyright 2012

2. Also, wait for the pan to cool down before you pour the fat off - you don't want to burn yourself or risk cracking the jar due to a sudden change in temperature.

3. If you can't get bacon from a pig farm near you (which would be ideal), I think the best alternative is probably Applegate Farms organic Sunday bacon.


Please share any other suggested uses via comments. And don't forget to check out the other entries in the Greening Your Kitchen series.

You might also like:
Want even more recipes, photos, giveaways, and food-related inspiration? "Like" the Garden of Eating on Facebook, or follow me on Twitter or Pinterest.

Wednesday, July 4, 2012

Blueberry Yogurt Tart With Gingery Graham Cracker Crust

I made this beautiful summertime treat for the first time last night and am happy to report that it's delicious, satisfying, cool and easy to make. In short, I think you're going to love it...

Blueberry yogurt tart with ginger graham crust by Eve Fox, Garden of Eating blog, copyright 2012

We spent a mighty pleasant morning picking blueberries at Greig Farm yesterday - it was hot but there was a nice breeze and the blueberry bushes are actually tall enough to create a little shade. Every time we go, I am amazed all over again by how beautiful the berries are - perfectly plump and juicy with that soft, lush dusky coating that rubs off when you touch them, exposing the darker, shiny blue underneath.

Bluberries by Eve Fox, Garden of Eating blog, copyright 2011

And there are just many of them, too. Sadly, this is not the case with the raspberries this year - they got frost damaged in the wacky weather we had in the late winter/early spring. But the blueberries are going strong!

Blueberries from Grieg Farms by Eve Fox, Garden of Eating blog, copyright 2012

I saw the recipe that inspired this tart show up via Food & Wine over the weekend and knew I wanted to earmark some of the fresh berries to try it out. Although I am typically only interested in desserts that contain chocolate, something about this one appealed to me very strongly. I think it was the spicy ginger in combination with tart yogurt and sweet berries. And since my husband is a confirmed ginger hound, I figured I could not go wrong...

Ginger and grahams by Eve Fox, Garden of Eating blog, copyright 2012

I  more or less stuck with the recipe though I have made it tastier and less healthy (but come on, this is a DESSERT!) by substituting whole milk Greek yogurt for the non-fat and by basically doubling the amount of butter in the crust, adding more sugar, and removing the egg white as I did not feel like wasting an egg yolk.

Ginger graham cracker crust by Eve Fox, Garden of Eating blog, copyright 2012

I also added a sprinkling of cinnamon to the crust mixture. And think it would be good to include some lemon zest in the honeyed yogurt (though I had used up my last lemon so I could not try it.)

Draining the Greek yogurt by Eve Fox, Garden of Eating blog, copyright 2012

Despite the fact that all Greek yogurt has already been drained (I believe the extra draining is the only difference between Greek yogurt and other yogurts and what accounts for its characteristically firm texture), I followed the directions and drained the Greek yogurt for a number of hours before composing the tart. It did shed a little more water weight, becoming even firmer and creamier in the process. However, I think that if you were pressed for time, you could probably just use it as is.

Adding honey to the yogurt by Eve Fox, Garden of Eating blog, copyright 2012

I could not have been more pleased with the results - it is really just scrumptious.

Blueberry yogurt tart with ginger graham crust by Eve Fox, Garden of Eating blog, copyright 2012

A perfect summer dessert using fresh, local berries. Go pick some or just pick some up at your local farmers' market this week - you won't regret it!

Blueberry yogurt tart with ginger graham crust by Eve Fox, Garden of Eating blog, copyright 2012

Blueberry Yogurt Tart With Gingery Graham Cracker Crust
Makes one 9-inch tart

Ingredients

* 10-20 whole graham crackers, broken in half - enough to make 1 1/2 cups of crumbs (the grahams I used were on the small side being some health food variety and I needed closer to 20 -- if you're not sure just measure your crumbs and then dump them back in the food processor)
* 1/4 cup crystallized ginger, finely chopped
* 1/4 cup sugar
* Pinch of salt
* 1/2 tsp ground cinnamon
* 1 tsp lemon zest (optional)
* 5-6 Tbsps unsalted butter, melted
* 2 cups Greek yogurt (I used a tub of Fage's whole milk yogurt), drained overnight or for several hours
* 2 tablespoons honey
* 1- 1 1/2 cups fresh blueberries

Directions

1. Preheat the oven to 350° and grease a pie dish or tart pan with removable bottom. In a food processor, pulse the graham crackers with the crystallized ginger, sugar, salt and cinnamon until finely ground. Add the melted butter and pulse until the crumbs are evenly coated.

2. Press the crumbs evenly over the bottom and up the sides of the pie dish or tart pan. Bake for about 20 minutes, until the crust is lightly browned. Let the crust cool completely. (You can make the crust up to a day ahead of time and just keep it wrapped in a plastic bag in the fridge if you like.)

3. In a medium bowl, mix the drained yogurt with the honey and (optional) lemon zest. Spread the yogurt in the crust and arrange the blueberries over the surface of the yogurt in any pattern you like. You could also throw some raspberries in there for added color if you feel like it. Cut the tart in slices and sit back to enjoy the oohs and aahs...

You might also like:
Want even more recipes, photos, giveaways, and food-related inspiration? "Like" the Garden of Eating on Facebook, or follow me on Twitter or Pinterest.

Monday, July 2, 2012

Pickled Garlic Scapes

We got another big bunch of garlic scapes from our CSA this week. As we've still got plenty of garlic scape pesto in the freezer from the last haul, I figured I'd try something new. And we've been really loving both the pickled ramps and pickled asparagus we made recently so pickling seemed like the way to go.

A mess of garlic scapes by Eve Fox, Garden of Eating blog, copyright 2012

I turned to my new go-to canning Bible, Marisa McClellan's lovely, new book, Food in Jars: Preserving in Small Batches Year-Round. Sure enough, she had a good-sounding and very simple recipe for pickled garlic scapes. I cut her original recipe in half since I only had half a pound (have I mentioned yet how much I love my little OXO kitchen scale?!) of scapes, but if you have more, just double or triple the amounts below to fit.

Making sure the garlic scapes will fit in the jar by Eve Fox, Garden of Eating blog, copyright 2012

As usual, I was trying to do at least three things at once while I made these and missed the little note at the very bottom of the page about her preferred method of packing since I was slightly at a loss because the scapes inevitably end up in both straight and curly pieces. I've included it higher up here so that YOU won't miss it. And mine will still taste just as good as if I'd packed them more neatly.

Jar of pickled garlic scapes by Eve Fox, Garden of Eating blog, copyright 2012

Also, a note on the pickling spices - I included a lot of spices but you could also do this with just peppercorns, bay leaf and dill or coriander seeds if you don't have all of these things - nothing is set in stone!

Line up of pickling spices by Eve Fox, Garden of Eating blog, copyright 2012

In my opinion, the only downside to this (or any pickles) is the intensely vinegar-y smell that pervades your house for a few hours after you boil your brine. But it fades and it's so worth it once you finally crack open a jar of whatever you've made.

Jar of pickled garlic scapes by Eve Fox, Garden of Eating blog, copyright 2012

Pickled Garlic Scapes adapted from the Food in Jars cookbook
Makes one pint jar

Ingredients

* 1/2 pound garlic scapes (1 decent-sized bunch)
* 1/4 teaspoon coriander seeds
* 1/4 teaspoon mustard seeds
* a few whole cloves
* a bay leaf
* 1/4 teaspoon dill seed
* an allspice berry
* a juniper berry
* a pinch of hot pepper flakes
* 1/2 teaspoon whole black peppercorns
* 3/4 cups apple cider vinegar
* 3/4 cups water
* 1 tablespoon pickling salt

Directions

1. Trim the ends of the scapes, both the blossom end and the hard bit that formed at the original cut, and cut them into lengths that will fit in your jar. Prepare a small boiling water bath and sterilize a single pint jar, lid and band.

2. Combine the vinegar, water and pickling salt in a pot and bring to a boil.

3. Remove the jar from the boiling water bath, empty and set on a kitchen towel. Place the spices in the sterilized pint jar along with a pinch of salt.

4. Pack the trimmed scapes into the jar. Note: since you'll be dealing with both straight and curved pieces, Marisa suggests packing the curved pieces along the sides of the jar and the straighter pieces inside standing straight up - kind of a like a curly log cabin look (or vice versa) - I ended up just putting mine all in there in no order which is also fine.

5. Slowly pour the hot brine over the garlic scapes, leaving 1/2-inch headspace. Once the jar is full, tap the jar lightly to dislodge any air bubbles. Check the headspace again and add more brine if necessary.

6. Wipe the rim, apply the lid and ring, and process in a hot water bath for 10 minutes. Let these pickles cure for at least a week before eating. Pickles will last for several weeks in refrigerator after initial seal is broken.

You might also like:

Want even more recipes, photos, giveaways, and food-related inspiration? "Like" the Garden of Eating on Facebook, or follow me on Twitter or Pinterest.