
But they are also a lot of work to make, thanks to the beer battering and frying aspect of the recipe. And a lot has changed at our house since 2007, namely that we now have a very cute, very demanding three-year-old and another baby on the way this fall. Also, it's been roughly 98 degrees a lot of the time lately which makes the idea of standing over a skillet of boiling oil for 20 minutes even less appealing than I'd usually find it. (What I really excel at lately is lying down in an air-conditioned room, reading -- I find I'm quite good at it...)
But we still have to eat! And I still want everything to taste really good, in spite of the heat and our limited time and energy. So I've adapted a new, much easier, equally delicious, and far healthier version of fish tacos that we now make all the time.

The key is that the fish is grilled, instead of battered and fried. And in addition to being quick and easy, it's so light and flavorful and delicious this way, that I don't think I will ever go back to Baja unless I am at a restaurant or maybe when both my kids have gone off to college in about a million years from now.
You can use any kind of meaty white fish - tilapia, halibut, Mahi Mahi, etc. I used tilapia for this batch. You marinate the fillets in citrus juice (lemon, lime, orange or any combo thereof is good), olive oil, salt and pepper, some cilantro or other herbs and either a little thinly sliced onion or shallot or a pressed clove of garlic.

Then prep your sauces and sides. These are all really easy and yummy.

One of the most important is finely shredded cabbage - it gives the tacos a nice, fresh crunch that is mildly sweet and nutty. I usually use red cabbage as I love the color it lends but had green on hand from our CSA for this meal. I use my little hand-held Kyocera mandoline to make quick, fine work of it - it only takes about 40 seconds to get a big pile (the mandoline is magic!)

Then the mayonesa sauce which is just mayo, lime juice and salt but somehow transforms the whole taco into a mouthful of deliciousness. Do NOT skip the mayo sauce! Even people who do not like mayo usually love this sauce (though you may have to gently prod them to try it the first time.)
Then salsa. You can make your own salsa fresh or use bottled. I usually use salsa we've canned - here's my recipe. Tomato season is almost upon us and it's a great way to line your shelves with delicious homemade salsa for the entire year to come.

Then some fresh cilantro. Just wash, dry and remove the stems.

Then some finely sliced red onion - it's nice if you can almost see through the slices. That way people can get the flavor of the onion on their tacos without becoming a fire breathing onion monster in the process.
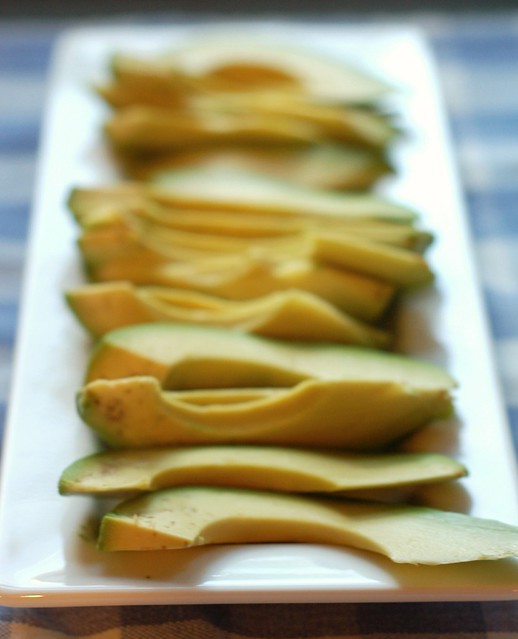
Then the avocado. Normally, I make the avocado sauce you'll find described in the Baja post, but this last time, I made one more time-saving concession, nixing the avocado sauce in favor of plain old sliced avocados. I found it equally tasty but mucho mas quick as there was no need to tangle with the Cuisinart or wash it afterwards (a chore I despise.) So you can either slice it and be done with it, as I did, make the avocado sauce (recipe in the Baja-style post), or make your favorite guacamole to throw on the tacos. It's all up to you.
Then grill your fish. We've taken to grilling it on a piece of tinfoil since it has a tendency to fall apart otherwise (probably a bigger fish like halibut, mahi mahi or cod sticks together a little better than tilapia but this works beautifully, regardless...)

And heat up your corn tortillas - either right on the grill (easiest and quickest) or over a burner on your stove. Fish tacos should be served on corn tortillas. Despite the fact that I am a white girl and typically prefer flour tortillas, I have to say that corn is the way to go here - the taste is right. Flour would just be wrong...

Then put it all out and go to town! You should probably plan on each person eating between 2-4 tacos (and maybe more for a large man with a big appetite) as they are smallish in size.

-- print recipe --
Grilled Fish Tacos
Serves 4
Sides
* 1-2 ripe avocados, peeled and sliced
* 1/4 large (or 1/2 small) red onion, finely sliced
* 1-2 cups cilantro leaves, rinsed, dried and with stems removed
* 2 cups finely shredded red or green cabbage
* Salsa of your choice - fresh or jarred
* 12-16 corn tortillas
Mayonesa Sauce
* 1/2 cup mayonnaise
* 2 tsps lime juice
* Sea salt to taste
Fish
* 1 1/2 pounds firm, meaty white fish like halibut, tilapia, striped bass, mahi mahi or cod
* Juice of 1-2 limes (depending on size and juiciness), or one lemon or orange
* 1/4 cup olive oil
* Sea salt
* Freshly ground black pepper
* A little chopped cilantro or oregano
* A little finely chopped red onion or garlic
1. Marinate the fish in the lime juice, olive oil, herbs, onion or garlic, salt and pepper. Cover and put in fridge for at least 20 minutes and up to an hour.
2. Make the mayonesa sauce: place the mayonnaise in a small bowl and add the lime juice and salt, stirring until smooth and creamy. Taste and adjust the lime and salt ratios as needed to taste.
3. Prepare the sides - this is just washing, slicing and dicing unless you decide to get fancy and make your own salsa or decide to try the avocado sauce.
4.Grill the fish. Turn your grill to high, let it heat up, then reduce the flame to medium. Place the fish on a sheet of tinfoil and roll the edges up to prevent juices from spilling into the flames. Grill for 5-8 minutes (time will depend on the size of the fillets you're using), until fish is cooked through and flaky but still tender and moist. Transfer to a plate and break into serving-sized pieces.
5. Heat the tortillas - place on grill for 10-20 seconds per side, until grill marks appear. Then transfer to a basket and cover with a dishcloth to keep them warm and prevent them from drying out.
6. Put everything out on the table and let everyone assemble their own tacos.
You might also like:
Want even more recipes, photos, giveaways, and food-related inspiration? "Like" the Garden of Eating on Facebook, or follow me on Twitter or Pinterest.


