Apple Rhubarb Chutney

Tuesday, October 18, 2011

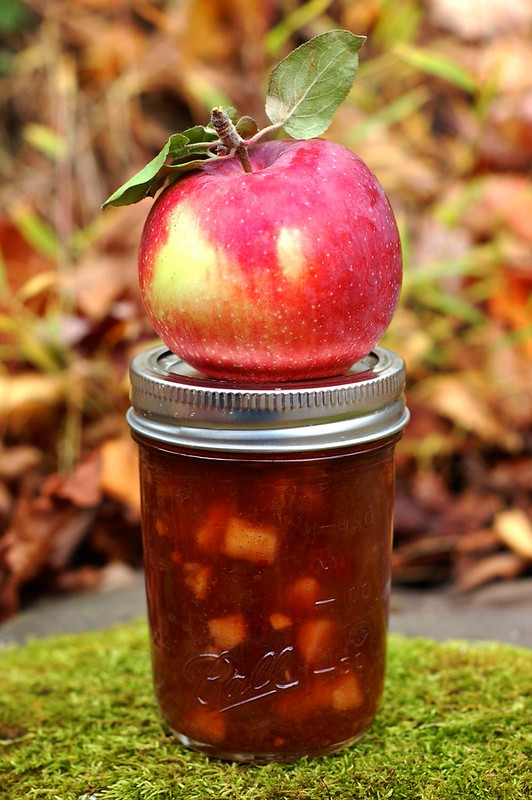
Apple Rhubarb Chutney by Eve Fox, Garden of Eating blog, copyright 2011

I wanted to share the lovely results of yesterday morning's trip to Stone Ridge Orchard with you all - apple rhubarb chutney!

I looooove chutney. It's great with Indian food, on toasted cheese sandwiches with some walnuts, with roast pork, chicken and a million other ways. We tend to stock up on mango chutney whenever we have the good fortune to pass by a Trader Joe's but since we live in the hinterlands now, that's pretty rare. But it's also very easy to make and even tastier and cheaper than anything store bought.

Apples for pressing by Eve Fox, Garden of Eating blog, copyright 2010

I was planning to make curried apple chutney (which I'd still like to do if I find the time...) until I saw this recipe for apple rhubarb chutney and remembered that we had a big bag of rhubarb from Aunt Maggie's garden in our chest freezer. Rhubarb is such great stuff - I love its tangy, unique taste and smell and it's appealing mix of colors - green and pink and red.

Rhubarb by Eve Fox, Garden of Eating blog, copyright 2011

The recipe is simple - mix apples and rhubarb with lemon zest and juice, dried cranberries, spices and a BOATload of sugar and cook it down until it's thick and delicious.

Ingredients for Apple Rhubarb Chutney by Eve Fox, Garden of Eating blog, copyright 2011

Because of all the sugar, you do need to stir it frequently and watch it to make sure it does not burn or overcook but it's a pretty manageable project that will make you and your family happy all winter and spring.

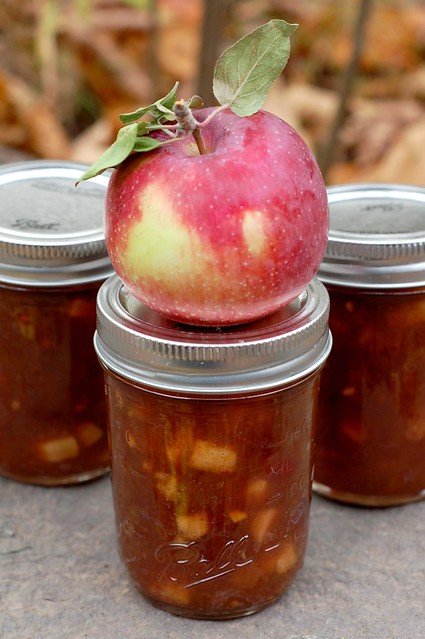
Apple Rhubarb Chutney by Eve Fox, Garden of Eating blog, copyright 2011

The recipe below is adapted from Ball Complete Book of Home Preserving - I decreased the sugar (the original recipe calls for 4 cups in case you want to follow it), increased the lemon juice, added a touch of salt and a bunch of fresh ginger and some cloves.
Apple Rhubarb Chutney by Eve Fox, Garden of Eating blog, copyright 2011

-- print recipe --Apple Rhubarb Chutney
Makes roughly 4 8-oz jars

Ingredients

* 4 cups diced, peeled, cored apples
* 3-4 cups sugar
* 2 cups diced rhubarb, fresh or frozen
* 1/2 cup water
* Zest and juice of 2 lemons
* 1/2 cup dried cranberries
* 2 tsps grated or finely chopped fresh ginger
* 1 tsp ground cinnamon
* 1/2 tsp ground nutmeg
* 1 tsp ground cloves
* 2 tsps salt

Directions

1. In a large stainless steel sauce pan, combine apples, sugar, rhubarb, water and lemon zest and juice. Bring to a hard boil over medium-high heat, stirring constantly. Reduce heat and boil gently, stirring frequently, for 15 minutes. Add cranberries, ginger, cloves, cinnamon, nutmeg and salt. Boil gently, stirring frequently, until thick enough to mound on a spoon. While the chutney cooks down, get the water boiling in your canning pot and sterilize your jars, lids and bands.

2. Ladle the hot chutney into sterilized jars, leaving 1/2 inch headspace. Remove any air bubbles; wipe the rims clean with a clean, wet rag or paper towel, center the lids on the jars and screw the bands down until resistance is met, then increase to finger-tip tight.

3. Submerge the jars completely in a boiling water bath and process for 10 minutes (or your recommended altitude time). Remove the jars from the canner, place on a wire rack or several dishtowels, and allow seals to set and cool for 12-24 hours. Check seals and store any that have not sealed properly in the fridge and use within a week or two. Store the properly sealed jars for up to a year in a cool, dark place.

You might also like:
For more delicious recipes, gardening ideas, foraging tips, and food-related inspiration "like" the Garden of Eating on Facebook, or follow me on Twitter and Pinterest.

Roasted Delicata Squash & Tortellini Salad With Cranberries, Greens & Pepitas

Thursday, October 13, 2011

I modeled this supremely satisfying salad off one that our friend, June, brought when she visited shortly after our son was born a few years ago. I remember it vividly - in part because it was spectacular and in part because I was nursing the baby every two hours at the time and was ravenous around the clock!

Roasted Delicata Squash & Tortellini Salad With Spinach, Cranberries & Pepitas by Eve Fox, Garden of Eating blog, copyright 2011

After I discovered delicata squash a few years ago, it quickly gained "most favored squash" status in my kitchen. In addition to their divine flavor, one of the nice things about delicatas is that you do not have to peel them - just remove the seeds and cut them up - no need to remove the skin.

Delicata squash, my favorite by Eve Fox, Garden of Eating blog, copyright 2010

The lovely, rich, sweet, slightly nutty flavor of the delicata squash is enhanced by roasting and pairs nicely with the salty, creamy tortellini and the grated parmesan cheese. The greens add a light, fresh note (I only had baby spinach on hand but I prefer arugula as it gives the salad a nice peppery bite), the pepitas add a great, smokey crunch and the dried cranberries offer some tart, sweet notes.

Roasted Delicata Squash & Tortellini Salad With Spinach, Cranberries & Pepitas by Eve Fox, Garden of Eating blog, copyright 2011

It's hard to stop eating this salad. We made this for lunch today and my husband and I both had to try several times before we were able to finally lay our forks down for good...

I used some fresh tortellini made by La Bella Pasta, a local company that makes great fresh pasta but this would be good with the frozen kind, too. We found a kind we really like called Putney Pasta though I'm sure there are lotsa good ones around.

Roasted Delicata Squash & Tortellini Salad With Spinach, Cranberries & Pepitas by Eve Fox, Garden of Eating blog, copyright 2011

Roasted Delicata Squash & Tortellini Salad With Cranberries, Greens & Pepitas
Serves 3-4

Ingredients

* 2 delicata squash, halved, seeded and cut into 1 inch chunks
* 1 clove garlic, minced or pressed
* 1 package fresh or frozen cheese tortellini
* 4 cups arugula or baby spinach, washed and dried
* 1/3 cup roasted pepitas
* 1/3 cup sweetened dried cranberries
* 1/4 cup grated parmesan cheese
* Handful fresh parsley and thyme, rinsed, dried and chopped
* Sea salt
* Black pepper
* Olive oil

Directions

1. Preheat the oven to 425 degrees. Toss the squash cubes with the garlic, a sprinkling of sea salt and a healthy amount of olive oil to coat on all sides on a heavy baking sheet. Put in the oven and roast, removing every 10 minutes or so to turn the pieces to prevent any from burning. It will probably take 2-3 flippings with the spatula and a total of 25-30 minutes in the oven until the pieces are soft all the way through. Remove from the oven and let cool a bit.

2. While the squash is roasting, bring a pot of water to boil and cook the tortellini according the directions on the package (will vary for fresh or frozen) then drain and toss with some olive oil in a large shallow bowl.

3. While the pasta and squash are cooking, wash and dry the greens and chop the herbs.

4. Combine the squash, tortellini, greens, herbs, cranberries, and pepitas in the large shallow bowl and top with freshly ground black pepper and freshly grated parmesan cheese to taste.

Here are a few recipes I was inspired by recently:

Preserved Meyer Lemons, Moroccan Style

Saturday, October 8, 2011

We spent last week visiting family and friends back in sunny (well, it was sunny last week, at least) Berkeley. Thanks to the generosity of our former neighbor, Peter, who was out of town, we were able to stay upstairs in our old house.

What a treat to be back in the middle of our beloved Gourmet Ghetto in close proximity to our favorite neighbors and all our old haunts like The Cheeseboard, Moneterey Market, Imperial Tea Court, Saul's, and Guerilla Cafe.

Although our son did not remember Berkeley--not surprising, since he'd only just turned one when we left--he did reconnect with the Meyer lemon tree in our yard in a major way (see here for a brief history of their love affair). Every time we went outside, he insisted on picking at least one lemon from the tree.

There was no way I was going to let these fine fruits go to waste so I packed them very carefully in multiple layers of ziploc bags (they're pretty juicy as lemons go...) in the middle of a suitcase, hoping against hope that all our dirty laundry would provide some protection from the bumps and jostles of baggage handling.

One extremely long day of travel later (we missed the check in window for our flight back by one minute, literally :(), ten Meyer lemons were sitting on our counter back in NY in remarkably good shape!

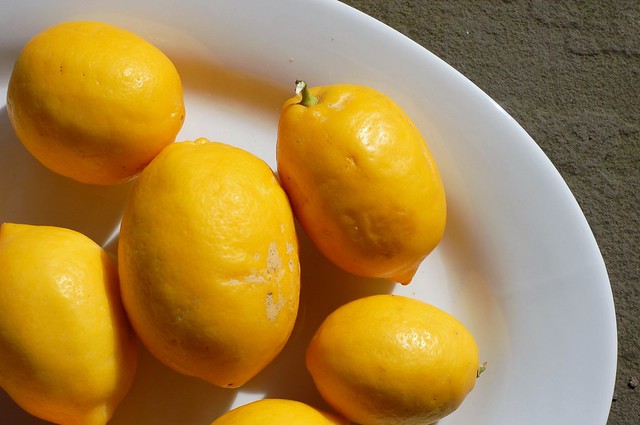
Meyer lemons from Josephine Street by Eve Fox, Garden of Eating blog, copyright 2011

I've been meaning to try making preserved lemons for about five years now, ever since my culinarily gifted friend and food blogger, Kirsten introduced me to them at a lavish Moroccan feast she whipped up.And since Meyer lemons are a particularly good choice for preserving and I had a bunch of 'em, it seemed that the time had finally come. The process is quite simple though it does take roughly three weeks for them to be ready to use.

Making preserved lemons by Eve Fox, Garden of Eating blog, copyright 2011

Since I have not yet made anything with them, I've included some suggestions from other blogs and sites for recipes that call for preserved lemon. The basic rule of thumb is that preserved lemons are good with anything lemons are good with/in -- lamb, fish, beef, chicken, stews, and most Moroccan food.

Preserved Lemons, Moroccan Style
Makes one quart jar

Ingredients

* 6-8 organic meyer lemons, washed and dried
* Salt (use either kosher salt or a coarse sea salt, do NOT use table salt)
* Sterilized quart jar with lid

Directions

1. Remove any stems and slice a deep X into each end of the lemon - you're basically cutting each lemon nearly into quarters but not going all the way through.

Making preserved lemons by Eve Fox, Garden of Eating blog, copyright 2011

2. Working over a large bowl, pour as much salt into both ends of the semi-open lemon as you can.

Making preserved lemons by Eve Fox, Garden of Eating blog, copyright 2011

3. Pour a layer of salt into the bottom of the quart jar and then press the salt-filled lemon into the bottom of jar and repeat with the remaining lemons.

Making preserved lemons by Eve Fox, Garden of Eating blog, copyright 2011

4. Press the lemons down to release their juice - the liquid should cover them or nearly cover them if you're working with less juicy lemons. You can fill the jar right up to the top since the lemons will reduce as they pickle. Top with a couple tablespoons of salt.

Making preserved lemons by Eve Fox, Garden of Eating blog, copyright 2011

You can also add spices if you like - some of the more common options are bay leaf, cinnamon stick, peppercorns and whole cloves.

5. Seal the jar well and leave out for 2-3 days, pressing the lemons down once a day to make sure they're sitting below the lemon juice to ensure preservation.

Preserved lemons by Eve Fox, Garden of Eating blog, copyright 2011

6. Move the lemons to the fridge and wait three weeks before using to allow the rinds to pickle fully. To use, rinse the lemons, scrape off the pulp, discard any seeds and chop or mince the rind. They'll keep in the fridge for up to 6 months.

Preserved Lemon Recipe Inspiration:
You might also like these Meyer Lemon recipes:

Tuesday, October 18, 2011

Apple Rhubarb Chutney

Apple Rhubarb Chutney by Eve Fox, Garden of Eating blog, copyright 2011

I wanted to share the lovely results of yesterday morning's trip to Stone Ridge Orchard with you all - apple rhubarb chutney!

I looooove chutney. It's great with Indian food, on toasted cheese sandwiches with some walnuts, with roast pork, chicken and a million other ways. We tend to stock up on mango chutney whenever we have the good fortune to pass by a Trader Joe's but since we live in the hinterlands now, that's pretty rare. But it's also very easy to make and even tastier and cheaper than anything store bought.

Apples for pressing by Eve Fox, Garden of Eating blog, copyright 2010

I was planning to make curried apple chutney (which I'd still like to do if I find the time...) until I saw this recipe for apple rhubarb chutney and remembered that we had a big bag of rhubarb from Aunt Maggie's garden in our chest freezer. Rhubarb is such great stuff - I love its tangy, unique taste and smell and it's appealing mix of colors - green and pink and red.

Rhubarb by Eve Fox, Garden of Eating blog, copyright 2011

The recipe is simple - mix apples and rhubarb with lemon zest and juice, dried cranberries, spices and a BOATload of sugar and cook it down until it's thick and delicious.

Ingredients for Apple Rhubarb Chutney by Eve Fox, Garden of Eating blog, copyright 2011

Because of all the sugar, you do need to stir it frequently and watch it to make sure it does not burn or overcook but it's a pretty manageable project that will make you and your family happy all winter and spring.

Apple Rhubarb Chutney by Eve Fox, Garden of Eating blog, copyright 2011

The recipe below is adapted from Ball Complete Book of Home Preserving - I decreased the sugar (the original recipe calls for 4 cups in case you want to follow it), increased the lemon juice, added a touch of salt and a bunch of fresh ginger and some cloves.

Apple Rhubarb Chutney by Eve Fox, Garden of Eating blog, copyright 2011

-- print recipe --Apple Rhubarb Chutney
Makes roughly 4 8-oz jars

Ingredients

* 4 cups diced, peeled, cored apples
* 3-4 cups sugar
* 2 cups diced rhubarb, fresh or frozen
* 1/2 cup water
* Zest and juice of 2 lemons
* 1/2 cup dried cranberries
* 2 tsps grated or finely chopped fresh ginger
* 1 tsp ground cinnamon
* 1/2 tsp ground nutmeg
* 1 tsp ground cloves
* 2 tsps salt

Directions

1. In a large stainless steel sauce pan, combine apples, sugar, rhubarb, water and lemon zest and juice. Bring to a hard boil over medium-high heat, stirring constantly. Reduce heat and boil gently, stirring frequently, for 15 minutes. Add cranberries, ginger, cloves, cinnamon, nutmeg and salt. Boil gently, stirring frequently, until thick enough to mound on a spoon. While the chutney cooks down, get the water boiling in your canning pot and sterilize your jars, lids and bands.

2. Ladle the hot chutney into sterilized jars, leaving 1/2 inch headspace. Remove any air bubbles; wipe the rims clean with a clean, wet rag or paper towel, center the lids on the jars and screw the bands down until resistance is met, then increase to finger-tip tight.

3. Submerge the jars completely in a boiling water bath and process for 10 minutes (or your recommended altitude time). Remove the jars from the canner, place on a wire rack or several dishtowels, and allow seals to set and cool for 12-24 hours. Check seals and store any that have not sealed properly in the fridge and use within a week or two. Store the properly sealed jars for up to a year in a cool, dark place.

You might also like:
For more delicious recipes, gardening ideas, foraging tips, and food-related inspiration "like" the Garden of Eating on Facebook, or follow me on Twitter and Pinterest.

Thursday, October 13, 2011

Roasted Delicata Squash & Tortellini Salad With Cranberries, Greens & Pepitas

I modeled this supremely satisfying salad off one that our friend, June, brought when she visited shortly after our son was born a few years ago. I remember it vividly - in part because it was spectacular and in part because I was nursing the baby every two hours at the time and was ravenous around the clock!

Roasted Delicata Squash & Tortellini Salad With Spinach, Cranberries & Pepitas by Eve Fox, Garden of Eating blog, copyright 2011

After I discovered delicata squash a few years ago, it quickly gained "most favored squash" status in my kitchen. In addition to their divine flavor, one of the nice things about delicatas is that you do not have to peel them - just remove the seeds and cut them up - no need to remove the skin.

Delicata squash, my favorite by Eve Fox, Garden of Eating blog, copyright 2010

The lovely, rich, sweet, slightly nutty flavor of the delicata squash is enhanced by roasting and pairs nicely with the salty, creamy tortellini and the grated parmesan cheese. The greens add a light, fresh note (I only had baby spinach on hand but I prefer arugula as it gives the salad a nice peppery bite), the pepitas add a great, smokey crunch and the dried cranberries offer some tart, sweet notes.

Roasted Delicata Squash & Tortellini Salad With Spinach, Cranberries & Pepitas by Eve Fox, Garden of Eating blog, copyright 2011

It's hard to stop eating this salad. We made this for lunch today and my husband and I both had to try several times before we were able to finally lay our forks down for good...

I used some fresh tortellini made by La Bella Pasta, a local company that makes great fresh pasta but this would be good with the frozen kind, too. We found a kind we really like called Putney Pasta though I'm sure there are lotsa good ones around.

Roasted Delicata Squash & Tortellini Salad With Spinach, Cranberries & Pepitas by Eve Fox, Garden of Eating blog, copyright 2011

Roasted Delicata Squash & Tortellini Salad With Cranberries, Greens & Pepitas
Serves 3-4

Ingredients

* 2 delicata squash, halved, seeded and cut into 1 inch chunks
* 1 clove garlic, minced or pressed
* 1 package fresh or frozen cheese tortellini
* 4 cups arugula or baby spinach, washed and dried
* 1/3 cup roasted pepitas
* 1/3 cup sweetened dried cranberries
* 1/4 cup grated parmesan cheese
* Handful fresh parsley and thyme, rinsed, dried and chopped
* Sea salt
* Black pepper
* Olive oil

Directions

1. Preheat the oven to 425 degrees. Toss the squash cubes with the garlic, a sprinkling of sea salt and a healthy amount of olive oil to coat on all sides on a heavy baking sheet. Put in the oven and roast, removing every 10 minutes or so to turn the pieces to prevent any from burning. It will probably take 2-3 flippings with the spatula and a total of 25-30 minutes in the oven until the pieces are soft all the way through. Remove from the oven and let cool a bit.

2. While the squash is roasting, bring a pot of water to boil and cook the tortellini according the directions on the package (will vary for fresh or frozen) then drain and toss with some olive oil in a large shallow bowl.

3. While the pasta and squash are cooking, wash and dry the greens and chop the herbs.

4. Combine the squash, tortellini, greens, herbs, cranberries, and pepitas in the large shallow bowl and top with freshly ground black pepper and freshly grated parmesan cheese to taste.

Here are a few recipes I was inspired by recently:

Saturday, October 8, 2011

Preserved Meyer Lemons, Moroccan Style

We spent last week visiting family and friends back in sunny (well, it was sunny last week, at least) Berkeley. Thanks to the generosity of our former neighbor, Peter, who was out of town, we were able to stay upstairs in our old house.

What a treat to be back in the middle of our beloved Gourmet Ghetto in close proximity to our favorite neighbors and all our old haunts like The Cheeseboard, Moneterey Market, Imperial Tea Court, Saul's, and Guerilla Cafe.

Although our son did not remember Berkeley--not surprising, since he'd only just turned one when we left--he did reconnect with the Meyer lemon tree in our yard in a major way (see here for a brief history of their love affair). Every time we went outside, he insisted on picking at least one lemon from the tree.

There was no way I was going to let these fine fruits go to waste so I packed them very carefully in multiple layers of ziploc bags (they're pretty juicy as lemons go...) in the middle of a suitcase, hoping against hope that all our dirty laundry would provide some protection from the bumps and jostles of baggage handling.

One extremely long day of travel later (we missed the check in window for our flight back by one minute, literally :(), ten Meyer lemons were sitting on our counter back in NY in remarkably good shape!

Meyer lemons from Josephine Street by Eve Fox, Garden of Eating blog, copyright 2011

I've been meaning to try making preserved lemons for about five years now, ever since my culinarily gifted friend and food blogger, Kirsten introduced me to them at a lavish Moroccan feast she whipped up.And since Meyer lemons are a particularly good choice for preserving and I had a bunch of 'em, it seemed that the time had finally come. The process is quite simple though it does take roughly three weeks for them to be ready to use.

Making preserved lemons by Eve Fox, Garden of Eating blog, copyright 2011

Since I have not yet made anything with them, I've included some suggestions from other blogs and sites for recipes that call for preserved lemon. The basic rule of thumb is that preserved lemons are good with anything lemons are good with/in -- lamb, fish, beef, chicken, stews, and most Moroccan food.

Preserved Lemons, Moroccan Style
Makes one quart jar

Ingredients

* 6-8 organic meyer lemons, washed and dried
* Salt (use either kosher salt or a coarse sea salt, do NOT use table salt)
* Sterilized quart jar with lid

Directions

1. Remove any stems and slice a deep X into each end of the lemon - you're basically cutting each lemon nearly into quarters but not going all the way through.

Making preserved lemons by Eve Fox, Garden of Eating blog, copyright 2011

2. Working over a large bowl, pour as much salt into both ends of the semi-open lemon as you can.

Making preserved lemons by Eve Fox, Garden of Eating blog, copyright 2011

3. Pour a layer of salt into the bottom of the quart jar and then press the salt-filled lemon into the bottom of jar and repeat with the remaining lemons.

Making preserved lemons by Eve Fox, Garden of Eating blog, copyright 2011

4. Press the lemons down to release their juice - the liquid should cover them or nearly cover them if you're working with less juicy lemons. You can fill the jar right up to the top since the lemons will reduce as they pickle. Top with a couple tablespoons of salt.

Making preserved lemons by Eve Fox, Garden of Eating blog, copyright 2011

You can also add spices if you like - some of the more common options are bay leaf, cinnamon stick, peppercorns and whole cloves.

5. Seal the jar well and leave out for 2-3 days, pressing the lemons down once a day to make sure they're sitting below the lemon juice to ensure preservation.

Preserved lemons by Eve Fox, Garden of Eating blog, copyright 2011

6. Move the lemons to the fridge and wait three weeks before using to allow the rinds to pickle fully. To use, rinse the lemons, scrape off the pulp, discard any seeds and chop or mince the rind. They'll keep in the fridge for up to 6 months.

Preserved Lemon Recipe Inspiration:
You might also like these Meyer Lemon recipes: