Back To The Root Cellar

Thursday, November 6, 2008

Last week I read Little House in the Big Woods, the first in the series of Little House on the Prairie children's books (I realize that I'm about 20 years behind the curve on this but I figured better late than never...)

To my delight, a great deal of the book is devoted to descriptions of the family's preparations to grow, catch, kill, prepare, and store enough food for the long snowy winter.

I particularly loved reading about how Laura and her big sister Mary help their Ma and Pa bring in the harvest from their crops of oat and wheat, store the pumpkins, squash, onions, and peppers from Ma's garden, preserve the pig they butcher and the deer Pa shoots, and smoke the mess of fish Pa catches in Lake Pepin. Here is a quote from the story - winter has just begun in earnest and the girls are housebound but the house is packed with good food and all is snug and cozy.

"The attic was a lovely place to play. The large, round , colored pumpkins made beautiful tables and chairs. The red peppers and the onions dangled overhead. The hams and the venison hung in their paper wrappings, and all the dried herbs, the spicy herbs for cooking and the bitter herbs for medicine, gave the place a dusty-spicy smell."

The one downside to this literary pleasure was that it reignited my desire for a home of my own, complete with a cool, spacious root cellar, a commodious chest freezer, and a nice dry attic in which to store the summer's bounty long into the bitter cold of winter. I've fantasized about this ever since I left home and my longing grew even stronger last year when I read Barbara Kingsolver's book, Animal, Vegetable, Miracle.

Unfortunately, since I live in a small apartment in Berkeley with neither attic nor cellar (and certainly no room for a chest freezer), it seems this dream of mine will probably just have to wait a bit longer. Luckily, winters here are mild, rainy affairs and one can always find fresh fruits and veggies at the local farmers markets.

But I was pleasantly surprised this afternoon when I stumbled on a NYTimes article about the rebirth of root cellars in New York City and beyond! Viva la root cellar! Here is the link if you're curious: http://www.nytimes.com/2008/11/06/garden/06root.html

Baked Macaroni and Cheese

Saturday, October 25, 2008

Homemade baked mac n cheese

The weather here in Berkeley has been unseasonable for the past few weeks - a string of dazzlingly sunny, hot days. But before Indian summer began, we had a brief spate of fall-like weather with crisp, windy days and very chilly nights.

Homemade mac n cheese - close up

It was during this "cold" spell that I got the urge to make mac 'n cheese. Oddly enough, I had never made real mac 'n cheese before. I checked out several recipes online and consulted a few cookbooks before I ended up settling on this classic recipe from the Joy of Cooking

The result was delicious -- creamy, melty pasta with a hint of sweetness from the onions topped with crispy browned fresh breadcrumbs. This classic comfort food is also quite addictive -- my husband and I both went back to the stove for seconds and thirds and so on...

Forkful of mac n cheese

-- print recipe --Baked Macaroni and Cheese
Serves 4-6 as a main dish
Ingredients

* 2 cups (8 oz) macaroni (elbow mac is the classic but you can use whatever you like)
* 2 1/4 cups grated sharp cheddar or Colby cheese
* 2 Tbsps butter (plus an additional tbsp for the breadcrumbs)
* 2 Tbsps all-purpose flour
* 2 cups milk
* 1/2 large onion, minced
* 1 bay leaf
* 1/4 tsp sweet paprika
* Sea salt and freshly ground black pepper to taste
* 1/2 cup fresh breadcrumbs

Directions

1. Preheat oven to 350 and grease a 1 1/2 quart baking dish.

2. Bring 6 cups of water to a boil and add the macaroni. While the pasta is cooking, grate the cheese. Cook the pasta until al dente then drain and move it to a bowl or put it back in the pot.

3. Melt the butter in a large saucepan over medium-low heat then whisk in the flour and cook, whisking constantly to remove lumps, for three minutes.

4. Gradually whisk in the milk then stir in the onion and add the bay leaf and paprika. Simmer gently for 15 minutes, stirring often. Remove from the heat and stir in 2/3 of the cheese. Season with salt and pepper to taste.

5. Add the macaroni and stir to combine. Pour half the mixture into the baking dish and sprinkle it with half of the remaining cheese. Add the rest of the macaroni mixture and top with the rest of the cheese.

6. Melt 1 tbsp butter in a small skillet and add the breadcrumbs. Toss to coat and cook for 30-60 seconds. Sprinkle the buttered breadcrumbs over the top of the macaroni in the baking dish and bake until the breadcrumbs are lightly browned, about 30-35 minutes. Let stand for 5 minutes before serving.

You might also like:
For more delicious recipes, gardening ideas, foraging tips, and food-related inspiration "like" the Garden of Eating on Facebook, or follow me on Twitter and Pinterest.

Hummus With Caramelized Onions & Garlic Topped With Beets, Pine Nuts & Greek Yogurt

Saturday, October 18, 2008

Hummous with caramelized onions & garlic topped with golden beets, pinenuts and greek yogurt

Hummus is one of those wonderfully earthy, satisfying foods. It can be simple or sophisticated and it can serve as the heart of a basic meal or a tasty component of a complicated one. Best of all, it's easy to make.

I'd made hummus half a dozen times before I found this recipe by chef Ana Sortun (though I have made a few small modifications on her original.) Previously, my hummus recipe had included a small amount of raw garlic and lots of cilantro in addition to the usual chickpeas, tahini, olive oil, lemon juice and salt. And it was good! But now I am so partial to this version that I may never go back...


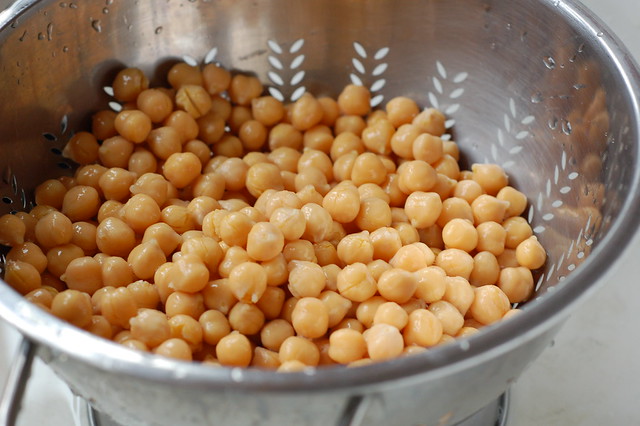
Rinsing the chickpeas by Eve Fox, Garden of Eating blog, copyright 2011

The thing that makes this hummus special is the big dose of caramelized onions and garlic it includes. It does take a little more time to prepare since you have to add in an extra peeling and cooking step but I think the sweet, mellow taste (and the fact that you will not reek of garlic for half a day after eating it) are well worth the extra 10 or 15 minutes of prep time.


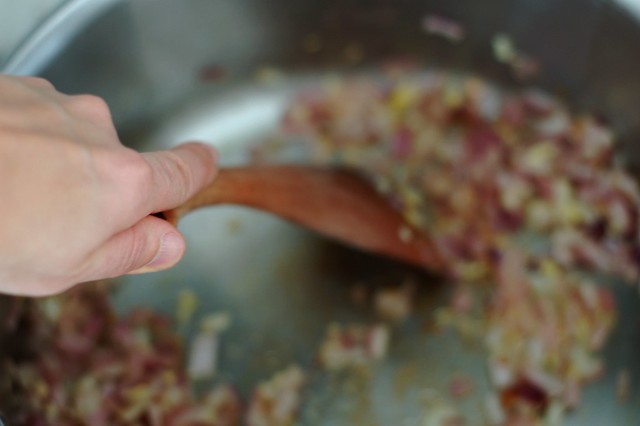
Sauteeing onions, garlic & ginger by Eve Fox, The Garden of Eating, copyright 2015

As Nadia and I planned the menu for our
Mediterranean feast, including this hummus seemed like a no-brainer, even though it is technically Middle Eastern.

You can make extra hummus if you like. Kept in an airtight dish in the fridge without the toppings, this will keep for several days and makes an awesome snack with some pita or flat bread.


Hummous with caramelized onions and garlic topped with golden beets, pinenuts and greek yogurt

-- print recipe --Caramelized Onion & Garlic Hummus with Golden Beets, Pine Nuts & Greek Yogurt
Serves 6

Ingredients

Hummus
* 2 cans organic chickpeas, rinsed and drained (you can also use 1 cup dried but I never leave enough time for all that soaking and cooking)
* 6 tbsp organic olive oil, plus more for caramelizing the onions & garlic
* 3 large garlic cloves, minced or pressed
* 2 large or 3 small yellow onions, chopped
* 1/4 cup fresh lemon juice
* 2 tbsp tahini
* Sea salt and freshly ground black pepper to taste

Toppings
* 4 large beets, preferably the golden or chioggia varieties
* 2 tbsp pine nuts
* 1/4 cup thick greek yogurt

Directions

1. Prepare the beets: remove the beet greens (you can reserve them for some other purpose if you like) and place the beets in a small saucepan. Cover with water by one inch and bring to a boil, then reduce the heat to simmer gently. Cook until the beets are tender when pierced with a fork, about 35-45 minutes, depending on the size of the beets. Drain and peel once they are cool enough to handle (the skins will slip off in the most satisfying way.) Cut the beets into a 1/4 inch dice. Toss with 1 tbsp olive oil and set aside.

2. Caramelize the onions and garlic: heat 2-3 tbsp olive oil in a medium frying pan or skillet until medium hot. Add the onions and garlic and cook, stirring often, for 5 minutes. Reduce the heat to medium-low and cook, stirring often, until the onions are very soft and a rich caramel color, about 25 minutes total. Season with salt and pepper.

3. In the bowl of a Cuisinart (you can use a blender if that is all you have but I warn you that it will be quite challenging), combine the drained chickpeas, caramelized onions and garlic, tahini, lemon juice, a tsp or 2 of salt, and several tbsps of olive oil. Process on medium speed, stopping to add more oil as needed. Taste as you go and adjust the amounts - you can add more lemon juice, tahini, salt, pepper or olive oil, depending on the taste and texture that appeals most to you (some people like their hummus chunky, others prefer it smooth and silky.)

4. Toast the pine nuts in a small skillet, turning often, until light brown (watch closely or they will burn - it does not take very long.)

5. Turn the hummus into a shallow, wide bowl and top with the yogurt, cubed beets and pine nuts (I included some sprigs of cilantro, as well).

You might also like:
For even more recipes, photos, giveaways, and food-related inspiration "Like" the Garden of Eating on Facebook, or follow me on Twitter or Pinterest.

Thursday, November 6, 2008

Back To The Root Cellar

Last week I read Little House in the Big Woods, the first in the series of Little House on the Prairie children's books (I realize that I'm about 20 years behind the curve on this but I figured better late than never...)

To my delight, a great deal of the book is devoted to descriptions of the family's preparations to grow, catch, kill, prepare, and store enough food for the long snowy winter.

I particularly loved reading about how Laura and her big sister Mary help their Ma and Pa bring in the harvest from their crops of oat and wheat, store the pumpkins, squash, onions, and peppers from Ma's garden, preserve the pig they butcher and the deer Pa shoots, and smoke the mess of fish Pa catches in Lake Pepin. Here is a quote from the story - winter has just begun in earnest and the girls are housebound but the house is packed with good food and all is snug and cozy.

"The attic was a lovely place to play. The large, round , colored pumpkins made beautiful tables and chairs. The red peppers and the onions dangled overhead. The hams and the venison hung in their paper wrappings, and all the dried herbs, the spicy herbs for cooking and the bitter herbs for medicine, gave the place a dusty-spicy smell."

The one downside to this literary pleasure was that it reignited my desire for a home of my own, complete with a cool, spacious root cellar, a commodious chest freezer, and a nice dry attic in which to store the summer's bounty long into the bitter cold of winter. I've fantasized about this ever since I left home and my longing grew even stronger last year when I read Barbara Kingsolver's book, Animal, Vegetable, Miracle.

Unfortunately, since I live in a small apartment in Berkeley with neither attic nor cellar (and certainly no room for a chest freezer), it seems this dream of mine will probably just have to wait a bit longer. Luckily, winters here are mild, rainy affairs and one can always find fresh fruits and veggies at the local farmers markets.

But I was pleasantly surprised this afternoon when I stumbled on a NYTimes article about the rebirth of root cellars in New York City and beyond! Viva la root cellar! Here is the link if you're curious: http://www.nytimes.com/2008/11/06/garden/06root.html

Saturday, October 25, 2008

Baked Macaroni and Cheese

Homemade baked mac n cheese

The weather here in Berkeley has been unseasonable for the past few weeks - a string of dazzlingly sunny, hot days. But before Indian summer began, we had a brief spate of fall-like weather with crisp, windy days and very chilly nights.

Homemade mac n cheese - close up

It was during this "cold" spell that I got the urge to make mac 'n cheese. Oddly enough, I had never made real mac 'n cheese before. I checked out several recipes online and consulted a few cookbooks before I ended up settling on this classic recipe from the Joy of Cooking

The result was delicious -- creamy, melty pasta with a hint of sweetness from the onions topped with crispy browned fresh breadcrumbs. This classic comfort food is also quite addictive -- my husband and I both went back to the stove for seconds and thirds and so on...

Forkful of mac n cheese

-- print recipe --Baked Macaroni and Cheese
Serves 4-6 as a main dish
Ingredients

* 2 cups (8 oz) macaroni (elbow mac is the classic but you can use whatever you like)
* 2 1/4 cups grated sharp cheddar or Colby cheese
* 2 Tbsps butter (plus an additional tbsp for the breadcrumbs)
* 2 Tbsps all-purpose flour
* 2 cups milk
* 1/2 large onion, minced
* 1 bay leaf
* 1/4 tsp sweet paprika
* Sea salt and freshly ground black pepper to taste
* 1/2 cup fresh breadcrumbs

Directions

1. Preheat oven to 350 and grease a 1 1/2 quart baking dish.

2. Bring 6 cups of water to a boil and add the macaroni. While the pasta is cooking, grate the cheese. Cook the pasta until al dente then drain and move it to a bowl or put it back in the pot.

3. Melt the butter in a large saucepan over medium-low heat then whisk in the flour and cook, whisking constantly to remove lumps, for three minutes.

4. Gradually whisk in the milk then stir in the onion and add the bay leaf and paprika. Simmer gently for 15 minutes, stirring often. Remove from the heat and stir in 2/3 of the cheese. Season with salt and pepper to taste.

5. Add the macaroni and stir to combine. Pour half the mixture into the baking dish and sprinkle it with half of the remaining cheese. Add the rest of the macaroni mixture and top with the rest of the cheese.

6. Melt 1 tbsp butter in a small skillet and add the breadcrumbs. Toss to coat and cook for 30-60 seconds. Sprinkle the buttered breadcrumbs over the top of the macaroni in the baking dish and bake until the breadcrumbs are lightly browned, about 30-35 minutes. Let stand for 5 minutes before serving.

You might also like:
For more delicious recipes, gardening ideas, foraging tips, and food-related inspiration "like" the Garden of Eating on Facebook, or follow me on Twitter and Pinterest.

Saturday, October 18, 2008

Hummus With Caramelized Onions & Garlic Topped With Beets, Pine Nuts & Greek Yogurt

Hummous with caramelized onions & garlic topped with golden beets, pinenuts and greek yogurt

Hummus is one of those wonderfully earthy, satisfying foods. It can be simple or sophisticated and it can serve as the heart of a basic meal or a tasty component of a complicated one. Best of all, it's easy to make.

I'd made hummus half a dozen times before I found this recipe by chef Ana Sortun (though I have made a few small modifications on her original.) Previously, my hummus recipe had included a small amount of raw garlic and lots of cilantro in addition to the usual chickpeas, tahini, olive oil, lemon juice and salt. And it was good! But now I am so partial to this version that I may never go back...


Rinsing the chickpeas by Eve Fox, Garden of Eating blog, copyright 2011

The thing that makes this hummus special is the big dose of caramelized onions and garlic it includes. It does take a little more time to prepare since you have to add in an extra peeling and cooking step but I think the sweet, mellow taste (and the fact that you will not reek of garlic for half a day after eating it) are well worth the extra 10 or 15 minutes of prep time.


Sauteeing onions, garlic & ginger by Eve Fox, The Garden of Eating, copyright 2015

As Nadia and I planned the menu for our
Mediterranean feast, including this hummus seemed like a no-brainer, even though it is technically Middle Eastern.

You can make extra hummus if you like. Kept in an airtight dish in the fridge without the toppings, this will keep for several days and makes an awesome snack with some pita or flat bread.


Hummous with caramelized onions and garlic topped with golden beets, pinenuts and greek yogurt

-- print recipe --Caramelized Onion & Garlic Hummus with Golden Beets, Pine Nuts & Greek Yogurt
Serves 6

Ingredients

Hummus
* 2 cans organic chickpeas, rinsed and drained (you can also use 1 cup dried but I never leave enough time for all that soaking and cooking)
* 6 tbsp organic olive oil, plus more for caramelizing the onions & garlic
* 3 large garlic cloves, minced or pressed
* 2 large or 3 small yellow onions, chopped
* 1/4 cup fresh lemon juice
* 2 tbsp tahini
* Sea salt and freshly ground black pepper to taste

Toppings
* 4 large beets, preferably the golden or chioggia varieties
* 2 tbsp pine nuts
* 1/4 cup thick greek yogurt

Directions

1. Prepare the beets: remove the beet greens (you can reserve them for some other purpose if you like) and place the beets in a small saucepan. Cover with water by one inch and bring to a boil, then reduce the heat to simmer gently. Cook until the beets are tender when pierced with a fork, about 35-45 minutes, depending on the size of the beets. Drain and peel once they are cool enough to handle (the skins will slip off in the most satisfying way.) Cut the beets into a 1/4 inch dice. Toss with 1 tbsp olive oil and set aside.

2. Caramelize the onions and garlic: heat 2-3 tbsp olive oil in a medium frying pan or skillet until medium hot. Add the onions and garlic and cook, stirring often, for 5 minutes. Reduce the heat to medium-low and cook, stirring often, until the onions are very soft and a rich caramel color, about 25 minutes total. Season with salt and pepper.

3. In the bowl of a Cuisinart (you can use a blender if that is all you have but I warn you that it will be quite challenging), combine the drained chickpeas, caramelized onions and garlic, tahini, lemon juice, a tsp or 2 of salt, and several tbsps of olive oil. Process on medium speed, stopping to add more oil as needed. Taste as you go and adjust the amounts - you can add more lemon juice, tahini, salt, pepper or olive oil, depending on the taste and texture that appeals most to you (some people like their hummus chunky, others prefer it smooth and silky.)

4. Toast the pine nuts in a small skillet, turning often, until light brown (watch closely or they will burn - it does not take very long.)

5. Turn the hummus into a shallow, wide bowl and top with the yogurt, cubed beets and pine nuts (I included some sprigs of cilantro, as well).

You might also like:
For even more recipes, photos, giveaways, and food-related inspiration "Like" the Garden of Eating on Facebook, or follow me on Twitter or Pinterest.