Kings of Corn: Interview with Curt Ellis & Ian Cheney

Wednesday, October 31, 2007

Earlier today, I spoke with Curt Ellis and Ian Cheney, the adorable duo behind King Corn, a new documentary film that's generating a lot of buzz.

The two friends had developed an interest in food and agriculture in college. After graduation, they moved to Greene, Iowa to find out where their food comes from. With the help of government subsidies, friendly neighbors, genetically modified seeds, nitrogen fertilizers, and potent herbicides they planted, grew and harvested a bumper crop of corn from a single acre of farmland. Curt's cousin, documentary-maker, Aaron Woolf, came along to direct this surprising exploration into our food system.

King Corn opens at Shattuck Cinemas in Berkeley this Friday, November 2nd. The film is also showing in many other cities around the country. Check http://www.KingCorn.net for theaters. Please go see it!


Ian Cheney and Curt Ellis, tasting their corn harvest. Photo by Sam CullmanEF: What surprised you most in making the film?

Curt: The most surprising part to me was the reality of farming. I had this pretty romantic notion of what life on a farm was like. Granted we were only growing one acre of corn, not hundreds or thousands of acres, but we really only farmed for a few hours and during those few hours we never really had to touch the dirt at all. It was amazing to me how divorced from the land our experience of farming was.

Ian: I agree with that. I was also surprised that the majority of the country's calories are stored in a few dozen buildings in the Midwest. Photo of a grain elevator, by Brian Cheney
EF: I was really shocked by the use of anhydrous ammonia as a fertilizer.

Curt: We were totally shocked. We actually went to an anhydrous ammonia factory (though it's not in the film). It's made by burning an incredible amount of natural gas. When Ian applied it to our acre before we planted our corn, one of the farmers, Rich, picked up a handful of the dirt and showed us a dead earth worm - and said, "You see here how applying the ammonia kills everything in a four inch swath." It was pretty unbelievable to us that the first act of farming was to kill all the living things in the soil. Seemed kind of counterintuitive.

Ian: That's not what Wendell Berry would do.

EF: Has this exploration changed your interpretation of the term “corn-fed”?

Curt: Very much so. It has this sort of wholesome connotation but it turns out that things that are corn-fed are really very far from wholesome.

EF: I loved all the stop-motion animations - how did you guys come up with the idea to do those?

Curt: Long, long Iowa winters with nothing to do at all except hang out in the basement and move little corn kernels around. I think that was Ian's idea and it ended up being really appropriate to the film because it has that sort of hand-made quality to it in the sense of we really were just trying to figure things out. Throwing glossy, digital effects in would have probably detracted from the experience. It was my childhood Fisher Price barnyard set and Ian's very affordable labor that made it all possible.

Ian: That Fisher Price barn totally reflects the mindset we had when we moved to Iowa in 2004. It was the perfect symbol of what we imagined agriculture to be -- the little red barn and the little animals and the two farmers. And, needless to say, that wasn't the reality at all.

EF: You credit Michael Pollan with being the inspiration for the movie. How did you first get introduced to his work?

Ian: We would read his essays in the New York Times Magazine in college. There was that wonderful article about his experience of buying a steer and following it through the food chain. I think that was undoubtedly an inspiration to us. He became an early advisor to the film. Curt and I were just about to embark on a cross-country research road trip and he advised us to take a good hard look at all the corn we saw along the way. I actually traded him my Masters thesis in exchange for him being our advisor.

Curt: I think we got the good end of that trade.

EF: The tasting scenes were some of my favorites in the film. What did the corn syrup that you two made taste like?

Curt: It tasted sweet and nasty. I don't know that we made it exactly right though we did our best. It's a pretty complicated process but we only had a Cuisinart and a saucepan. We actually tried making it again at the NPR studios last week and it turned out even worse that time.

Ian: I think the kicker was the final filtering process. As it was explained to us we needed to pour it through a pile of diatomaceous earth to filter it but I don't think it filtered through so much as dissolved so we were sort of drinking corn syrup and partially dissolved hardened sea creatures.

Ian Cheney (left) and Curt Ellis (right) taste their harvest in Greene, Iowa. Photo by Sam CullmanEF: Did you feel uneasy about drinking something that you'd made with sulfuric acid?

Curt: The NPR reporter (Robert Smith) certainly did!

EF: Were you surprised by the way your interview with Earl Butz (U.S. Secretary of Agriculture under Presidents Nixon and Ford) went?

Curt: On some level, yeah. We had learned enough by that point to really disagree with his policies and question them. All around us we could see the kind of landscape that his policies had created - giant industrialized farms and de-populated areas. So I think that we did walk into that room kind of wanting to challenge him and be mad at him but as soon as we met the guy we saw that of course he's just a normal person.

He's old and he had ideas that were very reasonable for his generation. When he graduated from college there was a great depression and when we graduated from college there was an obesity epidemic. So it makes sense both that he would want to make food more affordable and also that Ian and I would want to do something very different.

EF: Has this journey changed the way you eat?

Curt: Now that we know the back story to industrial food we're no longer comfortable with it but it is a real challenge to find good food. It's particularly hard right now because we're back on the road to promote the film so the gains we'd made in changing the way we eat have been largely eroded. It's frustrating that it's such a challenge to find something to eat that is not corn-based.

Ian: I'm a card-carrying member of the society that believes in convenient, affordable food. And I really want locally grown, healthful food to be available at my corner store. There are times when I love to play the part of the scavenger and spend a few days trying to find a turkey for Thanksgiving that was raised outside on a good diet but I'm coming to terms with the fact that, like many Americans, I don't want to spend all my time being a hunter-gatherer.

Curt: Ian did find and eat a pecan pie in a dumpster in college.

Ian: It was very convenient. I was already in the dumpster. Affordable, too. Photo of Curt Ellis atop a huge pile of corn, courtesy of King CornEF: What was your goal in making this film?

Ian: I think my goal (beyond doing something with my then 22-year-old life besides sitting at a desk,) my hope was to tell a story about where our food comes from. I don't think we knew all the problems associated with the stories behind our food - all the communities that are affected, all the ways that agriculture takes a toll on the land and our health so we didn't start out with an agenda in that sense. And by the end of our experience we certainly didn't feel like we had a solution to all of Director, Aaron Woolf, by Aaron Woolfthe problems we'd been encountering but more felt that the job of the film was to tell a story and hopefully spark some discussions and debates. I think we're really seeing that happen now as we take the film on the road and talk to people about these issues. Because, at the end of the day, there are a lot of ways of creating a better food system. There is no single solution. And that's actually very exciting and invigorating. The hope is that as people learn more about where their food comes from they'll make more informed decisions.

Curt: I think Ian has it right. It's incredible the number of people who've come up to us after seeing the film and have told us that they've changed the way they eat since watching it. And that was our hope - to transform the system into something that both tastes good and is good for you and the people who produce it.

EF: What’s next for you guys?

Curt: So far it's just been making sure that this film does some real good in the world. Right now that work is mostly in theaters so we've been on the road and will be traveling for the next month or two. Increasingly there are small grassroots screenings that are starting to get off the ground so we're starting to put our energy into the right way to do that. I think we're going to be fairly busy until April when the film will be broadcast on PBS.

Ian: I think that's about the size of it. We spent so long making the film that when we reached the finish line (or what we thought was the finish line) we all gave each other high fives and celebrated a job well-done. But then we woke up the next day and realized that there was a lot of work to be done to make sure the story got heard and made an impact. Hopefully, it won't take us quite as long to get the film out into the world as it did to make the film.

Homemade Granola

Monday, October 29, 2007

My awesome mom-in-law is coming for a visit this week. Whenever the sous-chef and I go to visit her and her husband, she spoils us rotten and stocks the Photo of a bag of really pricey granola, courtesy of the Bear Naked Granola web site.kitchen with our favorite foods. So I figured it would be nice to return the favor when she comes to see us.

One of her favorite breakfast foods is granola (with yogurt) so I figured I'd pick up some fancy-schmancy granola at the Andronicos. But my hand actually flew back involuntarily, as if I'd been burned, when I saw the price next to the teeny tiny bags of nutty, crunchy goodness. $7.49 for a miniscule bag of granola that would only fill two cereal bowls?!?!? You've got to be frikking kidding me...

I decided that I'd make my own since it's pretty easy to make delicious homemade granola (plus, as I think I've mentioned before, I am cheap.) Below is a basic recipe that you can adapt depending on what you like or what you have in the house.

The main trick is to cook it until it's browned and crisp but catch it before it burns - just be vigilant about checking and stirring it while it's baking and you should be fine. My oven is sort of uneven (much hotter in the back and on the bottom) so I turn the pans and rotate them from top to bottom once to keep things cooking more evenly.Jar of my homemade granola goodness

Homemade Granola
Makes about 7 cups


Ingredients

  • 4 cups old-fashioned oats (steelcut or rolled, do not use instant)
  • 1/2 cup packed light brown sugar
  • 1/4 - 1/2 cup honey or maple syrup (depending on how sweet you like your cereal)
  • 1 1/2 cup sliced almonds, walnuts, or pecans (just omit if you don't like nuts)
  • 3 teaspoons sesame seeds
  • 1/4 cup vegetable oil
  • 1/2 teaspoon salt
  • 1/2 teaspoon ground cinnamon
  • 1 teaspoon vanilla
  • 1 1/2 cup raisins, currants, dried cranberries, dried cherries, dried apricots, etc.
Directions

1. Preheat oven to 300 F.

2. In a bowl mix the oats, nuts, seeds, brown sugar, salt and cinnamon.

3. In a saucepan warm the oil and honey and then whisk in the vanilla.

4. Carefully pour the liquid over the oat mixture. Stir gently with a wooden spoon until all dry ingredients are well-coated.

5. Spread granola in a single layer over a heavy baking sheet.

6. Bake 30-35 minutes, stirring carefully every 10 minutes. Should be browned but not burnt.

7. Transfer granola-filled pan to a rack to cool completely. Break up any large clumps while the mixture is still warm.

8. Stir in the dried fruit once the mixture has cooled completely.

9. Seal granola in an airtight container or plastic bag (you can put it in the fridge or on a shelf but it'll keep longer in the fridge.) It should keep for 1-2 weeks (if it does not get eaten first.)

Scary Pumpkins, Tasty Seeds

Sunday, October 28, 2007

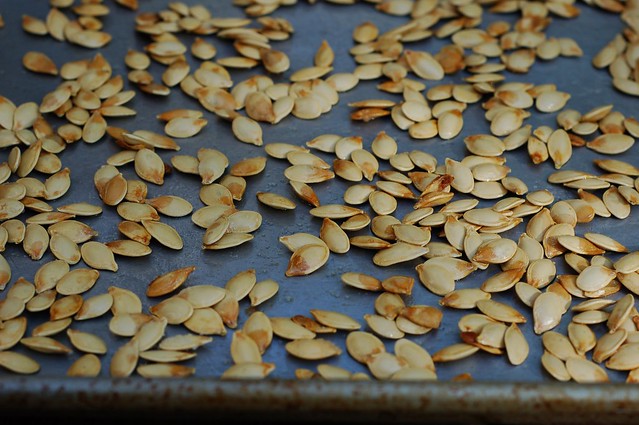
Roasted pumpkin seeds by Eve Fox, Garden of Eating blog, copyright 2011

Yesterday afternoon, we went over to our neighbors' backyard to carve pumpkins with them and their four adorable kids, two of whom are too young to carve anything so they just toddled around entertaining us with their winning smiles.

My pumpkin was inspired by last week's excellent New Yorker cover - what could be scarier than Dick Cheney?


Mine did not turn out quite as well as I'd hoped - more ornery owl than Vice President but it was still fun.

Dick Cheney pumpkin

In the process of creating our jack-o-lanterns, we collected a heaping pile of pumpkin seeds.

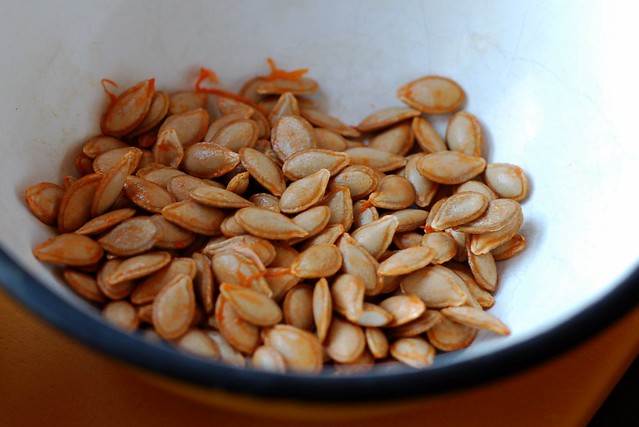
Butternut squash seeds by Eve Fox, Garden of Eating blog, copyright 2013

We roasted them when we got home last night and have been snacking on them all day. They're not only delicious, they're also good for you. Pumpkin seeds are an excellent source of protein, dietary fiber, niacin, iron, zinc, manganese, magnesium and phosphorus and  a good source of riboflavin, folate, pantothenic acid, sodium and potassium. So they got that going for them.

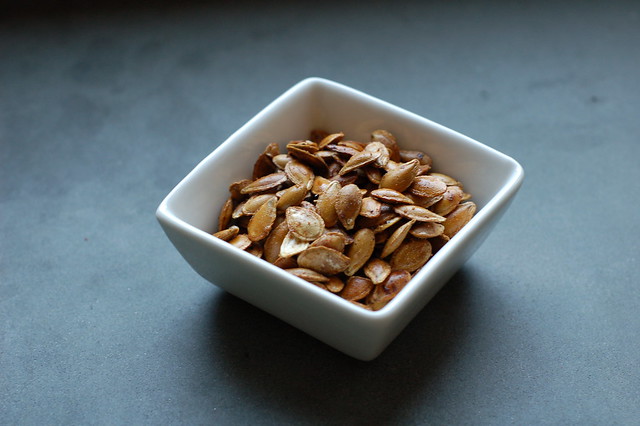
Cumin Roasted Butternut Squash Seeds by Eve Fox, Garden of Eating blog, copyright 2013

And pumpkin seeds are not the only squash seeds you can roast - you can do this with any winter squash and they're all tasty. Kabocha, delicata, butternut are all divine.

If you prefer your seeds a bit more exciting, you can use other spices to flavor them. One option is adding some ground rosemary to the oil and salt. Another spicier option is to use some ground chipotle or ancho chiles, cumin and black pepper. Or, if you have a sweet tooth, use a few tablespoons of melted butter in place of the oil, and coat the seeds with brown sugar, cinammon, nutmeg and ginger.

-- print recipe --Roasted Winter Squash Seeds

Ingredients

* Winter squash seeds, however many you can save
* Olive oil or grapeseed oil
* Sea salt
* Spices (optional)

Directions

1. Place in a colander and rinse thoroughly, removing any clinging pulp with your fingers.

2. Lay the wet seeds on a dry dishtowel or paper towels to dry before roasting.

3. Toss with a few teaspoons (or tablespoons, depending on how many seeds you have - you want enough oil to coat all the seeds lightly) of oil and spread in a single layer on a thick baking sheet.

4. Salt the seeds to taste and bake at 350 for 10-15 minutes or until golden brown, checking often for doneness since the seeds will roast quickly (you'll hear them start to pop) then remove sheet from oven and allow to cool completely

6. Store in an airtight container. Refrigerate if you don't eat them within the first few days - they never last that long at our house.

You might also like:
For more delicious recipes, gardening ideas, foraging tips, and food-related inspiration "like" the Garden of Eating on Facebook, or follow me on Twitter and Pinterest.

Pomegranate Seeds In Salads

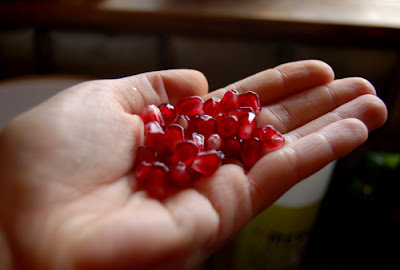
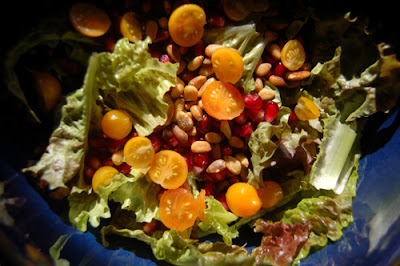
As a kid, I loved pomegranates. How could any child not like an edible puzzle? I still get a thrill from pomegranate's beautiful jewel-like seeds and love their tangy mix of sweet and sour with a little crunch mixed in. A handful of pomegranate rubies.I decided to use my first pomegranate of the season in a salad yesterday. I used some fresh organic red leaf lettuce, the last few yellow cherry tomatoes from our plants outside, and threw in some toasted pinenuts, then tossed the whole thing with a balsamic vinaigrette. It was very tasty but would have been sublime with the addition of a little thinly sliced red onion and some goat cheese (sadly, we had neither in the house.)

My salad using the last of our cherry tomatoes and the pomegranate seeds Yesterday's salad whetted my appetite for more salads with pomegranate so I did a little searching and found this recipe on Epicurious (from Gourmet.) I have not actually made this yet but wanted to share it because I think it sounds really good.

Arugula Salad with Pomegranate & Toasted Pecans
Makes 6-8 servings

Ingredients
  • 1 1/2 teaspoons red wine vinegar
  • 1 tablespoon plus 1 1/2 teaspoons aged balsamic vinegar
  • 1/4 teaspoon kosher salt
  • 1/8 freshly ground pepper
  • 6 tablespoons extra virgin olive oil
  • 2 medium bunches arugula, rinsed well and thick stems removed
  • 1/3 cup pecans, toasted and roughly chopped
  • 1/2 cup pomegranate seeds, from 1 medium pomegranate
Directions

1. In medium, non-reactive bowl, whisk together vinegars, salt, and pepper.

2. Gradually drizzle in olive oil, whisking until emulsified.
3. Toss arugula with just enough vinaigrette to coat.

4. Sprinkle with pecans and pomegranate seeds and serve.

A Heart of Fennel

I was making a chicken dish that called for sliced fennel last week and was struck by how much the trimmed fennel bulb resembled a human heart...

Incredibly Easy Roasted Brussel Sprouts

Wednesday, October 24, 2007

As a kid, I was not crazy about vegetables - tomatoes, peas, spinach, and broccoli were all on my list to avoid. But I always liked brussel sprouts, for some reason.

I bought a bunch of the darling mini-cabbages at the farmers' market last week. I was trawling through the internet for a good, easy way to prepare them when I found this wonderfully simple recipe from
The Barefoot Contessa Cookbook.

It is remarkably easy and delightfully tasty. I have not included any amounts as it's simple enough to adapt to however much or little you want to prepare - just use enough oil to coat the sprouts on all sides.

Ingredients

  • Brussel sprouts, bottom ends trimmed and any brown or yellow leaves removed, and washed
  • Olive oil
  • Salt & pepper to taste
Directions

1. Preheat the oven to 400.

2. Toss the sprouts with the olive oil, salt, and pepper, and spread them in a single layer on a baking sheet or in a baking dish.

3. Roast for 45-50 minutes, turning them every 15-20 minutes.

4. Eat!

Some Organic Matters More Than Others

Tuesday, October 23, 2007

The NYTimes just published an interesting little article called Five Easy Ways To Go Organic. They suggest being strategic in your choices about which organic products to buy as some have a larger impact on both your health and the health of the planet than others.

They recommend prioritizing the following organic products:

1. Milk (and other dairy products, too, no doubt). Avoid factory farming, chemical farming, hormones, antibiotics and pesticides all in one blow!

2. Potatoes. This one surprised me. Apparently, conventionally-farmed potatoes are one of the most highly pesticide contaminated veggies around. 81% still contained pesticides after being washed and peeled!

3. Peanut butter. More acres are devoted to peanuts than any other fruit or vegetable and 99% of them are conventionally farmed which includes using fungicides to combat mold. I think they included this partly because kids eat so much peanut butter.

4. Ketchup. This one seems a bit less important to me as the Times included it partly because it constitutes a vegetable in many American households but if you're reading this blog, chances are you don't consider ketchup a vegetable... However, they did note that organic ketchup has about twice the antioxidant content of conventional ketchup.

5. Apples. As anyone who remembers Alar can tell you, apples have high levels of pesticides compared to many other fruits and veggies. They're also one of the most commonly eaten fruits.

Eating Well With Diane Hatz

Sunday, October 21, 2007

Earlier this week, I had the pleasure of talking with Diane Hatz, Founder and Director of Diane Hatz, photo courtesy of Sustainable TableSustainable Table, the wonderful organization that started the Eat Well Guide , an online consumer directory of sustainably-raised meat and dairy products, and that teamed up with Free Range Studios to create the internet smash-hit, The Meatrix.

Diane is fresh off the bus from her latest adventure, the Eat Well Guided Tour of America . She and her colleagues spent a little over a month traveling across the country in a bio-fueled bus to celebrate local, sustainable food and the people who produce, distribute, and eat it. The tour's theme was "Pie Across America." They stopped in more than 25 towns to visit restaurants, family farms and farmers markets and ate pie in each one of them.

EF: How did you come up with the idea for the tour?

DH: We were having a meeting and I said that I thought there was more happening in sustainable food than people realized. Years ago, I used to roadtrip randomly – no maps, no watches. And I always found that the pies were amazing in the places where we stopped. So I said I thought it’d be great to go across the country promoting sustainable food by eating pie in places all across the country. And my funder happened to be sitting right there and she said, "Okay, we’ll do it!"

I wanted to use pies because I think they’re a metaphor for something bigger -- for family, community, people coming together, sharing. There's nothing more American than apple pie, right?

Eat Well Guided Tour Bus, photo courtesy of Sustainable Table EF: How many different types of pie did you eat on the tour, and what were your favorites?

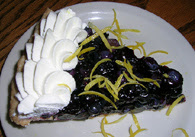
DH: We actually lost count but I know that I sampled over 200. They were all so great that it was really hard to pick, but I do have a top four: Blueberry pie from Solstice Cafe, photo courtesy of Sustainable Table

1. Blueberry pie from Solstice Café in Corvallis, OR – you don’t actually cook the berries – you make a sauce with the berries and then put them in a pie crust and serve it with lemon zest on top and homemade whipped cream. The berries pop in your mouth - it was unbelievable. Click here for the recipe.

2. Tart cherry pie from Ypsilanti, MI (no recipe yet, unfortunately). I didn't even know that they grew cherries in Michigan but it was amazing.

Oyster and shiitake mushroom pie, photo courtesy of Sustainable Table3. Oyster and shiitake mushroom pie at the farmers market in Jackson, WY. It was like all three meals in one. Click here for the recipe.

4. Very berry pie from Marilyn's Bakery in Hobart, IN. It was hard to get a written recipe for this pie because the sweetness of the berries determines how much sugar to put in the pie. Also, these guys are bakers so they don’t really go by measurements - a handful of this, a pinch of that. If you’re ever in Hobart, IN, Marilyn's Bakery is definitely the place to go. Click here for the recipe.

EF: How did you choose the farms and restaurants you stopped at?

DH: The major route was really a bit selfish – we stayed north because it was August and I really hate the heat. In terms of where we stopped, I sent an email out to some people I knew saying that we were doing this cross-country tour, these are the states we’re thinking of going to, etc., and I got a lot of great suggestions back. We also tried to find places in the Eat Well Guide. A lot of our stops on the tour turned out to be more like events – we think we’re just stopping by for a little BBQ and all of a sudden 50 people show up! It was really exciting.

EF: Did the tour meet your expectations?
Eat Well Guided Tour logo, image courtesy of Sustainable Table
DH: The tour totally exceeded our expectations. The people we met and the experiences we had were completely amazing. For example, a group of us got to harvest and winnow our own wheat (it was a heritage variety called Sonora) and pick strawberries and blackberries at Pie Ranch in Pescadero, CA. Then we baked pies using the wheat and the berries we'd harvested, and ate them together. It was the experience of a lifetime.


We’ve also gotten amazing press which has led to some wonderful opportunities and partnerships.

EF: Do you think Americans’ attitudes towards the food they eat are shifting?

DH: I think the shift has already happened and now it’s just a matter of everyone else catching up. The tour was a bit biased but when you’re in Wyoming at an event in a community center with 75 very independent ranchers and they’re talking about working together and opening a food co-op, it's clear that it’s not a coastal thing anymore, not a hippie thing anymore, it's not a trend, not a fad. It’s here to stay.

I think organic suffered from the whole elitism problem but with local, sustainable, there’s none of that sense of elitism.

EF: What do you think is fueling the change?

DH: I notice that it’s not just about food, it’s also about connection and sharing and people in the community coming together. I think that between working crazy hours and iPods and cell phones and computers, people have begun to feel more alienated from each other in the last 15-20 years and we really want to come back together -- we’re social animals. And food has also become so tasteless and processed that people just want better food. I think it just happened organically (no pun intended.)

EF: Do you cook much?

DH: I do. I used to belong to a CSA (I shared it with two other people) but even with the sharing, I found that it was always too much food for one person so now I do farmers markets. I always try to cook a big batch of stuff on Sundays after I get my ingredients at the farmers market. I've found that if you have really great tasting, fresh food, you can cook really simply. The food speaks for itself.

EF: What are your favorite places to get great food in NYC?

DH: My favorite place is probably the Tompkins Square farmers market – it's very small and about a block from my apartment. The Union Square market is great, too. The Hawthorne Valley Farm bread and cheese you can buy there is fantastic. As far as restaurants, I would say that my favorite “fast food” place would be Angelica Kitchen – it's really healthy, local, seasonal, organic, vegan and quick - they're on 12th Street just off 2nd Avenue. Right now, I am also really into the Bourgeois Pig, a wine bar on East 7th Street between 1st Ave and Avenue A. Now that it’s getting colder, it’s a perfect place to meet friends and have a glass of wine and some fondue.

EF: What would you recommend that people do on a daily basis in their own lives to make a difference?

DH: Start small – commit to one thing at a time. Don’t overwhelm yourself. Start by buying tomatoes in season and then go from there. It just tastes better. It’s a rewarding path. And have fun with it – cooking should not be a drag.

I always tell people to Educate, Ask, Act. Do some reading, ask questions – ask your local grocer if they source locally, ask the farmers at the market how they raise their food, and then do something – have a dinner party and ask everyone to bring one dish made from local food.

Pass The Revolver, Please - Pimientos de Padrón

My next-door neighbor, Dale (he and his wife own the quince tree), recently introduced me to Pimientos de Padrón, a traditional, yet surprisingly action-packed, Spanish tapa. When Dale was in college, he spent a semester in Spain. While he was there, he fell in love with Spanish cooking and got hooked on these little green peppers.

What makes this tapa so special, you ask? For some reason, one out of every five or so of these mild, sweet peppers is blisteringly hot! So eating them is akin to playing a casual game of Russian Roulette over dinner and drinks.

Although Pimientos de Padrón are common in Spain, they are extremely rare in the U.S. But Dale managed to track down a source in Palo Alto - Happy Quail Farms. He stopped by the other night to give us a bunch to try (I know, what a great neighbor!)

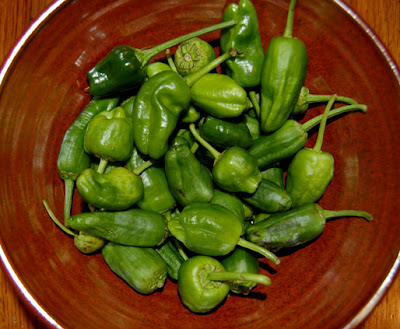
The raw peppers from Dale.

The sous-chef and I made them earlier tonight as an appetizer served with some kalamata olive bread to sop up the tasty, salty oil they were fried in (and some honey to take the edge off the heat when we ran into a spicebomb.) The non-spicy peppers have a mild, slightly nutty, slightly sweet flavor. The hot ones seemed to fall into two groups - tolerable and intolerable. All in all, they were quite good and lots of fun.

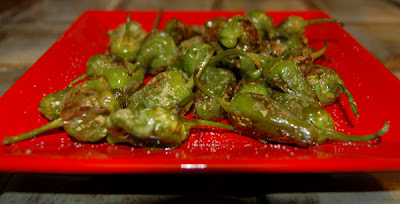
The cooked pimientos, fresh out of the skillet.

The preparation is extremely simple - see below for Happy Quail Farm's recipe.

Ingredients
  • Pimientos de Padrón
  • Olive Oil
  • Ready to tempt fate?Coarse Salt
Directions

1. Take a pan and pour enough oil to generously cover the bottom of the frying pan.

2. Turn the heat up on the burner. When the olive oil starts to sizzle throw the peppers in whole.

3. When the peppers start having small white blisters they are ready. Take the peppers out of the pan, place on plate with a paper towel.

4. Sprinkle with coarse salt. Hold the pepper by the stem and bite!

Eating Locally

Eating locally is the new black. The first time I remember hearing about it was back in 2005 when James Mackinnon and Alisa Smith did their 100 Mile Diet. I remember being incredibly impressed by the novelty of their idea at the time. Now it's become almost trendy. Naturally, I'm all for it, especially since I live in the Bay area where it's actually easier to eat locally than to not.

Yesterday, I picked up a copy of Animal, Vegetable, Miracle, Barbara Kingsolver's new book. I don't usually buy hardcovers (I'm too cheap) but I'd been hearing such good reviews from all sides that I caved.

I haven't had time to get farther than the first page yet but I predict good things. According to the book's web site, it is a mix of memoir and journalistic investigation that tells the story of how her family was changed by one year of deliberately eating food produced where they live. One of the things that convinced me to spend nearly $30 on it (besides its pretty cover) was the fact that it includes some recipes. I like books that do that.

I'll post a longer review of Animal, Vegetable, Miracle later but, in the meantime, I want to share a great article called New York Local with you. It's the same exact premise but on a much shorter timeframe and written by Adam Gopnik, who happens to live in Manhattan... It appeared in the New Yorker's Food Issue last month. A fascinating and funny (especially the part about the chicken) look at the challenges of eating locally when you live in a big city, it's definitely worth reading. Enjoy!

Gifts From The Kitchen Gods: Microplane Zester

Friday, October 19, 2007

You might say that I have a "zest" for cooking with this handy little tool - the amazing Microplane zester!Photo of zester, courtesy of Microplane's web site

I received my Microplane zester as a 23rd birthday present from my friend Ali (she's the same kitchen-savvy friend who introduced me to the immersion blender.)
It is the bomb! You can use it to zest citrus or grate hard cheeses, nutmeg, chocolate, etc. It's shape and lightweight make it versatile and easy to manipulate. Once you use one of these, you can never go back.

Before the microplane zester entered my life, I had to use one of the sides of my box grater to zest citrus. It was a total pain and did not work nearly as well, not to mention that it was nearly impossible to clean that side of the grater.

Microplane sells a bunch of other products including graters which have plastic handles and come in a bunch of sizes - coarse, spice and ribbon.

You can buy them from Amazon for roughly $9 and they're eligible for free shipping if you're getting some other things at the same time. At roughly $8-12 a piece they're also affordable and make great gifts (not to mention that they are the perfect shape for a stocking stuffer...)

Check out more Gifts From The Kitchen Gods:

A Fish Taco Feast!

Tuesday, October 16, 2007

As a kid, my primary exposure to fish was in frozen stick form. Fortunately, I've since been exposed to many other types of fish and tasty ways of preparing them and have learned to appreciate seafood. But, as they say, old habits die hard and, even now, fish is rarely the first thing I order at a restaurant. I've included this little piece of my personal history here only because it is the sole explanation I can offer for the sad fact that, up until Sunday night, I had NEVER eaten a fish taco.

A few months ago, I ran across a recipe for fish tacos in some magazine article about quick dinners. Something about the fact that the tacos are served with shredded cabbage intrigued me so I clipped the recipe. Then the sous-chef (my husband) came home all excited about the yummy fish tacos he'd eaten for lunch at Picante a few weeks ago. My interest was definitely piqued... But the final straw was this great piece about Baja-style fish tacos on NPR's Kitchen Window by Susan Russo. Her great pictures and recipes had me drooling. The time had clearly come to make these suckers!

So I bought limes, beer, tilapia, red cabbage, cilantro, avocado, and red onion and called my brother and sister-in-law and cousin up to invite them to dinner and ask them to make salsa. For the most part, I followed Susan's recipe (see below) although I omitted the chile sauce since I am wimpy about spicy foods, and I also added a topping of thinly sliced red onions.

The end result was a totally delicious combination of salty, crunchy, smooth, rich, and fresh. The beautiful mix of colors is an added aesthetic bonus. Here's one of the tasty little beauties.

The cabbage lends a substantial crispness, the beer-battered fried fish is salty and crunchy and satisfying, the avocado sauce is silky and cilantro-flavored, the mayonesa sauce adds a tangy flavor, the onion gives the whole combo some sweetness and bite, and the salsa lends a light, fresh taste. I know mayo is not the most glamorous condiment but please do not understimate the importance of the mayonesa sauce, I think it's even more key than the avocado sauce.

Fish Tacos

Avocado Sauce

  • 1 ripe avocado, peeled
  • Pinch of salt
  • Juice of 1 lime
  • 1 to 2 tablespoons water or milk
  • 1/4 cup chopped cilantro leaves

Place the avocado, salt and lime juice in a small food processor. Add 1 tablespoon water or milk (for a slightly creamier consistency) and pulse. Add more liquid as necessary until sauce is the consistency of thick cream. Add the cilantro and pulse until just blended.

Mayonesa Secret Sauce

  • 1/2 cup mayonnaise
  • 1 teaspoon white vinegar
  • 1 1/2 tablespoon water or milk

Place the mayonnaise in a small bowl and slowly stir in vinegar. Add water or milk until the sauce is thick and creamy.

Tacos

Serves 4-6 people

  • 1 1/4 cups all-purpose flour
  • 3/4 teaspoon baking powder
  • 1/4 teaspoon granulated garlic
  • Pinch of cayenne
  • 1/2 teaspoon dry mustard
  • 1/2 teaspoon dried Mexican oregano, rubbed to a powder (I did not have this so I used regular oregano and threw in some ground coriander)
  • Kosher salt
  • 1/2 teaspoon freshly ground black pepper
  • 8 ounces cold beer, plus more to thin the batter if necessary
  • 1-1/2 pounds firm, meaty white fish (halibut or tilapia will both work well)
  • Juice of 1 lime
  • Canola oil, for frying

Serve with:

  • 6-inch corn tortillas, warmed (you can substitute flour tortillas, but the corn imparts a more authentic flavor)
  • Avocado sauce
  • Lime wedges
  • Mayonesa secret sauce
  • Salsa of your choice (tomato, tomatillo, or mango would all be good)
  • Finely shredded red cabbage
  • Cilantro leaves

1. For the batter, whisk together the flour, baking powder, garlic, cayenne, mustard, oregano and salt and pepper in a large bowl until well blended. Stir in the beer until there are no lumps. (The batter can be made several hours ahead and refrigerated.)

2. Cut fish into strips the size and shape of your index finger. Sprinkle with some lime juice and salt.

3. Pour oil into a deep, wide pan to the depth of 2 inches and heat over medium-heat to 350 degrees (if you have a deep-fry thermometer). Otherwise, test the heat by dropping a little bit of the batter into the oil. It should quickly bounce to the surface and be surrounded by tiny bubbles.

4. Pat the fish dry with paper towel. Check the thickness of the batter by dipping a piece of fish in it; it should be the consistency of medium-thick pancake batter, coating the fish easily and dripping very little. Add a little beer or water if it seems too thick.

5. Add a few pieces of fish to the batter. Using tongs, lightly swish each piece until thoroughly coated. Remove fish, letting excess batter drip into the bowl before gently placing in the hot oil. Cook a few pieces at a time until they float and the batter is set but still light in color, about 2 to 3 minutes.

6. Remove the fish to a wire rack to drain.

7. To serve, place the fried fish, warmed tortillas and condiments on a table so guests can make their own tacos. To assemble tacos, hold a tortilla in your hand, and spread a spoonful of avocado sauce on it. Place a piece of fried fish on top and sprinkle with a little lime juice. Drizzle with some mayonesa sauce, and top with shredded cabbage, fresh cilantro, onion, and salsa.

"B-Cup" Cakes - Take a Bite Out of Breast Cancer

Monday, October 15, 2007

I'm not known for my optimism but, lately, I feel like I'm wearing rose-colored glasses all the time. Before you get too excited about me adopting a sunnier outlook on life, I should explain that the rosey hue I've been seeing is actually an optical effect caused by the thousands of pink ribbons that have recently sprouted up everywhere I go, like toadstools after a rainstorm. In case you had not noticed already, October is Breast Cancer Awareness Month.

Naturally, I wanted to do my part to help raise awareness of breast cancer so I baked up a batch of delicious "B-Cup" Cakes. I'd really wanted to make them "DD-Cup" Cakes but my muffin tins are just not big enough to support a more "full-figured' cupcake.

Dark chocolate cupcakes, fresh out of the oven

Although I made the batter chocolate (since I would not waste my time eating any other kind of cupcake), I made three kinds of buttercream icing to represent a diversity of boobies. I figured that since breast cancer does not discriminate, neither should I. The basic skin tones were easy - chocolate for our darker sisters, espresso for our coffee-colored sisters, and vanilla bean for all us pasty white sisters. The subtler colors for the aureolas were a bit more challenging but I managed to create them by mixing the three flavors of icing.

My three frostings for diversity

Of course, we know that beauty is only skin-deep, but the "B-Cup" Cakes had good looks and good taste!

B-Cup Cakes!

I hope you'll join me in taking a bite out of breast cancer this month. Here are two easy ways:
Or, if you'd like to bake a batch of your own "B-Cup" Cakes, I would recommend Cooks Illustrated's dark chocolate cupcake recipe (see below.)

Just one final note. I believe in giving credit where it's due so I'd like to give a shout-out to Adam Roberts, The Amateur Gourmet, whose brilliant Janet Jackson Breast Cupcake was my primary inspiration for the "B-Cup" Cakes.

Dark Chocolate Cupcakes

Yields 12 cupcakes

Ingredients
  • 8 tablespoons unsalted butter, cut into 8 pieces
  • 2 ounces bittersweet chocolate, chopped
  • 1/2 cup Dutch-processed cocoa
  • 3/4 cup unbleached all-purpose flour
  • 1/2 teaspoon baking soda
  • 3/4 teaspoon baking powder
  • 2 large eggs
  • 3/4 cup sugar
  • 1 teaspoon vanilla extract
  • 1/2 teaspoon table salt
  • 1/2 cup sour cream
Directions

1. Adjust oven rack to lower-middle position;heat oven to 350 degrees. Line standard-sized muffin pan (cups have 1/2 cup capacity) with baking cup liners.

2. Combine butter, chocolate, and cocoa in medium heatproof bowl. Set bowl over saucepan containing barely simmering water; heat mixture until butter and chocolate are melted and whisk until smooth and fully combined. Set aside to cool until just warm to the touch.

3. Whisk flour, baking soda, and baking powder in small bowl to combine.

4. Whisk eggs in second medium bowl to combine; add sugar, vanilla, and salt and whisk until fully incorporated. Add cooled chocolate mixture and whisk until combined. Sift about one-third of flour mixture over chocolate mixture and whisk until combined; whisk in sour cream until combined, then sift remaining flour mixture over and whisk until batter is homogeneous and thick.

5. Divide batter evenly among muffin pan cups. Bake until skewer inserted into center of cupcakes comes out clean.

6. Cool cupcakes in muffin pan on wire rack until cool enough to handle, about 15 minutes. Carefully lift each cupcake from muffin pan and set on wire rack. Cool to room temperature before icing, about 30 minutes. (To frost: Mound about 2 tablespoons icing on center of each cupcake. Using icing spatula or butter knife, spread icing to edge of cupcake, leaving slight mound in center.)

Storing Chicken Stock

Sunday, October 14, 2007

Last weekend was chilly and gray. Since it felt like fall, I decided to roast a chicken (which is surprisingly easy to do) and make pumpkin pie.

One of the nicest things about roasting a whole chicken is that the bird just keeps on giving. One 4-5 pound chicken will provide dinner for 4, chicken salad for 2 for lunch the next day, and chicken stock to make a big pot of soup for dinner another night.

After dinner, I picked all the meat off the bird and put it aside to make curried chicken salad the next day. Then I threw the carcass into a big pot, added a bunch of water, some chopped carrots and onion, parsley, cilantro, a few bay leaves, and salt and pepper. I simmered it all for an hour or so on medium heat to make chicken stock. I turned it off and let it sit for a few hours.

Once it was cool enough, I removed the bones and strained the stock through a fine meshed sieve to remove all the veggies and herbs and bits of chicken. I was left with about four pints of organic chicken stock. I poured half of it into clean empty yogurt containers, labelled the tops with the date and the contents, and put them in the fridge to cool down some more.

I decided to try storing the remaining two pints of stock as ice cubes - a trick I had read about a few times. Having the stock in ice cube-form gives you much greater flexibility over how much you have to defrost at any given time. The cubes are small so they defrost quickly. You can just throw a few into a saucepan if you need to add stock but don't want to add an entire pint of liquid.

My set up for making chicken stock cubes in the kitchen sink

Making the cubes is easy - just pour the stock into ice cube trays and let them freeze solid. Then unmold the cubes and store in a sturdy freezer bag. Grab a cube or two anytime you need one.

What's the Diff? Parmigiano-Reggiano vs Pecornio Romano

Saturday, October 13, 2007

I've been wondering what the difference between Parmigiano and Pecornio Romano cheeses are for years but have always been too lazy to find out. But Martha (that's Martha Stewart, of course) has done the dirty work for me. According to the September issue of Martha Stewart Living, the primary difference between Parmigiano-Reggiano and Pecorino Romano chesses is that the former is made from cow's milk and the latter is made from sheep's milk!

Beyond that, Parmigiano is aged longer than Pecorino Romano. And as you probably have noticed, the Romano costs a lot less. Pecornio Romano is significantly drier, more crumbly, and less versatile than Parmigiano. Martha says only the Parm can hold its own on a cheese plate or as an element in a salad or veggie dish while the Romano is better suited for use as a finishing element for pasta, pizza or other baked dishes.

And, of course, they are each from the specific regions of Italy for which they are named. Similar cheeses that are not from those regions cannot bear these exact names thanks to Italy's Denomination of Protected Origin certification laws (just as any sparkling white wine that is NOT made in Champagne, France cannot legally be called champagne.)

Immersion Blender: Gifts From The Kitchen Gods

Friday, October 12, 2007

I know it looks like some sort of sex toy but it's really an Immersion Blender - one of the best kitchen gadgets aroundEarly September 1998. My three best friends and I were moving into a run-down rental near campus at the start of our senior year of college. The house was a mess, but there was one small gem amidst the dirt, dust, and broken down furniture the previous tenants had left for us. A strange, white, plastic object with an electric cord had been left sitting on an empty bookcase in the kitchen.

My two friends and I stared at it with dubious distaste - it looked like some sort of odd sex toy (after all, who knew what the previous occupants were into?!) What was it? Should we throw it out? Yes, but then we'd have to touch it... Luckily, our third friend, Alison, whose mom ran a successful restaurant and catering business, swooped down on it with a beaming face. "Don't be stupid, guys, it's an immersion blender," she chided. "These things rock."

Alison was right. I adore my Braun immersion blender - an older model that my husband, Rahm (who I will refer to as "the sous-chef" moving forward because of his superior slicing and dicing skills) and I found at a yard sale about five years ago. It was definitely the best $5 I ever spent!

When it breaks, I will probably go with this Cuisinart immersion blender which seems to be the current favorite on Amazon - I kinda like to crowdsource my gadget buying decisions when I'm unsure.

The immersion blender makes it easy and mess-free to blend soups and sauces right in the pot - no need to haul a hot, heavy pot over to a cuisinart or blender to blend its contents. And no need to pour the blended contents back into the pot to continue cooking, nor to wash the frikkin' cuisinart's many hard to clean pieces.

It gives you much more control over how much to blend things, too - it's very easy to partially blend a soup or sauce.

It is easy to handle, easy to clean, and relatively small. Counter space is in high demand in my tiny kitchen so anything that can be stored in a drawer is a plus for me.

Immersion blenders are pretty cheap, too. Even if you don't find one for $5 at a yardsale you can get a new one for between $30-$60 at a store near you. Or you can buy one online at Amazon - they carry a bunch of different models by Cuisinart and Kitchen Aid.

This is the first installment of "Gifts from the Kitchen Gods" - a series of homages to the kitchen gadgets, appliances, and ingredients that have won our hearts by improving our lives, the food we cook, and the time we spend in the kitchen. Send in your own nominations via comments.

Check out more Gifts From The Kitchen Gods:

Oy Vey, EVOO Is Not So Virgin After All...

Tuesday, October 9, 2007

In August, the New Yorker ran a fascinating piece about olive oil fraud, a practice so widespread that the EU was forced to establish an olive oil task force in the late 90's.

Apparently, the stuff we're led to believe is extra virgin olive oil is often anything but. An insider estimated that as much as 90% of the virgin olive oil sold in Italy is actually adulterated.

There are two types of olive oil fraud. The first is a wholescale substitution of other oils (like soybean and canola) that are colored with chlorophyll and flavored with beta carotene to make them resemble and taste like olive oil. Chemical testing can easily detect this fraud.

However, the more sophisticated type of fraud in which high grade olive oil is mixed with hazelnut and cheap, non-foodgrade olive oil, then packaged and sold as Extra Virgin is nearly impossible to detect through chemical testing. Instead, the EU instituted strict taste and aroma requirements and established special olive oil tasting panels to test the goods.

"According to the E.U. regulations, extra-virgin oil must have appreciable levels of pepperiness, bitterness, and fruitiness, and must be free of sixteen official taste flaws, which include “musty,” “fusty,” “cucumber,” and “grubby.”" What great adjectives! There must have been a Brit or two on that committee -- "musty" and "fusty"...

Unfortunately for food purists around the world, olive oil fraud is likely to continue for the foreseeable future due to the threat of expensive lawsuits by olive oil producers and to widespread corruption in Italy.

It made me wonder - have I ever tasted real extra virgin olive oil and, if I did, would I like it?

A Slice of Autumn - Pumpkin Pie

Monday, October 8, 2007

Now that it is October my hunger for fall foods is in full swing. To kick things off, I baked a pumpkin pie last night. It was my first attempt and probably several years overdue since my husband loves pumpkin pie. I had my doubts but it turned out quite tasty - a pleasing subtle mix of pumpkin, custard, sweet and spice. Here's a picture of my golden beauty!

Photo of Sunday night's pumpkin pie - my first ever attempt!
The recipe came from the Joy of Cooking (I wanted some explanation since I've heard that pumpkin pies can be a little tricky due to their custard-y nature) and I cross-referenced with one from Gourmet via Epicurious.

A few things to note:
  • You'll need to pre-bake the crust, otherwise it will get soggy from the soupy squash/custard mixture.
  • In addition to pre-baking, you'll need to brush the entire crust with a mixture of egg yolk and salt to "seal" it from the wetness and help prevent sogginess.
  • The crust should be warm/hot when you fill it with the pumpkin mixture.
  • Use two eggs for a firmer, more pumpkin flavored pie or three eggs for a softer, more custard-like pie.
  • For some odd reason, prepared pumpkin comes in 15 oz cans. The Joy Of Cooking recipe called for 2 cups (16 oz) but one can should be plenty - I ended up having extra filling that I could not fit in the crust.
Makes one 9-inch pie, 8 servings
Ingredients
  • Prepared pie crust (see recipe)
  • 2 to 3 large eggs
  • 2 cups (1 can) canned pumpkin puree - I used an organic one from Trader Joe's. (You can also prepare your own freshly cooked pumpkin to make the filling but I am just not that hard core.)
  • 1 1/2 cups light cream or mix 3/4 cup heavy cream and 3/4 cup milk
  • 1/2 cup sugar
  • 1/3 cup firmly packed light or dark brown sugar
  • 1 tsp ground cinammon
  • 1 tsp ground ginger (I didn't have this so I left it out but it sounds good)
  • 1/2 tsp freshly grated or ground nutmeg
  • 1/4 tsp ground cloves or allspice
  • 1/2 tsp salt
Directions
1. Position rack in the center of the oven. Preheat oven to 400.
2. Make pie crust and bake at 400 for 20 minutes or until golden brown.
3. Remove the crust, brush thoroughly with a mix of egg yolk and a pinch of salt and bake for another 2 minutes to set the egg wash.
4. Turn oven down to 375.
5. Whisk the eggs together in a large bowl.
6. Add the rest of the ingredients and whisk together thoroughly until combined.
7. If the crust has cooled, warm it in the oven until it is hot to the touch.
8. Pour the pumpkin mixture into the crust and bake until the center of the filling seems set but quivery - like jello - when you nudge the pan. Should take roughly 45 minutes but this varies by oven (as I said, mine took a bit longer).
9. Remove the pie and let cool completely on a wire rack, then refrigerate for up to 1 day.
10. Serve cold or at room temperature with whipped cream.

Pat In the Pan Butter Pie Crust

Pat in the pan crusts are flaky and crumbly. No rolling required although the patting is a bit awkward. This recipe can only be used for a bottom crust as it is not workable enough for a top crust. 

-- print recipe --Pat In the Pan Butter Pie Crust from the Joy of Cooking
Makes one, 9-inch pie crust

Ingredients
  • 1 1/2 cups all-purpose flour
  • 1/2 tsp salt
  • 1 stick of unsalted butter, softened and cut into 8 pieces
  • 3-4 tbsp heavy cream
  • 1 large egg yolk
  • Pinch of salt
Directions

1. Position rack in the center of the oven and preheat the oven to 400.

2. Whisk together the flour and salt or pulse in a food processor for 10 seconds.

3. Add the pieces of butter and mash with the back of a fork or food process until the mixture resembles coarse crumbs.

4. Drizzle the heavy cream over the top and stir or process until the crumbs look damp and hold together when pinched - add more liquid if you're not getting there.

5. Transfer the mixture into a 9-inch pie pan and pat evenly over the bottom and sides with your fingertips and form an even crust edge.

6. Crimp or flute the edge and then use a fork to poke holes regularly around the sides and bottom of the crust then bake until golden brown - between 18- 22 minutes, checking regularly to see if any bubbles are forming and using the fork to deflate them if they do then remove from the oven.

7. If you are filling the crust with an uncooked mixture that will require further baking, whisk together the egg yolk and salt, then brush it thoroughly over the inside of the crust then return to the oven and bake until the egg glaze sets - 1-2 minutes.

You might also like:
For more delicious recipes, gardening ideas, foraging tips, and food-related inspiration "like" the Garden of Eating on Facebook, or follow me on Twitter and Pinterest.

Wednesday, October 31, 2007

Kings of Corn: Interview with Curt Ellis & Ian Cheney

Earlier today, I spoke with Curt Ellis and Ian Cheney, the adorable duo behind King Corn, a new documentary film that's generating a lot of buzz.

The two friends had developed an interest in food and agriculture in college. After graduation, they moved to Greene, Iowa to find out where their food comes from. With the help of government subsidies, friendly neighbors, genetically modified seeds, nitrogen fertilizers, and potent herbicides they planted, grew and harvested a bumper crop of corn from a single acre of farmland. Curt's cousin, documentary-maker, Aaron Woolf, came along to direct this surprising exploration into our food system.

King Corn opens at Shattuck Cinemas in Berkeley this Friday, November 2nd. The film is also showing in many other cities around the country. Check http://www.KingCorn.net for theaters. Please go see it!


Ian Cheney and Curt Ellis, tasting their corn harvest. Photo by Sam CullmanEF: What surprised you most in making the film?

Curt: The most surprising part to me was the reality of farming. I had this pretty romantic notion of what life on a farm was like. Granted we were only growing one acre of corn, not hundreds or thousands of acres, but we really only farmed for a few hours and during those few hours we never really had to touch the dirt at all. It was amazing to me how divorced from the land our experience of farming was.

Ian: I agree with that. I was also surprised that the majority of the country's calories are stored in a few dozen buildings in the Midwest. Photo of a grain elevator, by Brian Cheney
EF: I was really shocked by the use of anhydrous ammonia as a fertilizer.

Curt: We were totally shocked. We actually went to an anhydrous ammonia factory (though it's not in the film). It's made by burning an incredible amount of natural gas. When Ian applied it to our acre before we planted our corn, one of the farmers, Rich, picked up a handful of the dirt and showed us a dead earth worm - and said, "You see here how applying the ammonia kills everything in a four inch swath." It was pretty unbelievable to us that the first act of farming was to kill all the living things in the soil. Seemed kind of counterintuitive.

Ian: That's not what Wendell Berry would do.

EF: Has this exploration changed your interpretation of the term “corn-fed”?

Curt: Very much so. It has this sort of wholesome connotation but it turns out that things that are corn-fed are really very far from wholesome.

EF: I loved all the stop-motion animations - how did you guys come up with the idea to do those?

Curt: Long, long Iowa winters with nothing to do at all except hang out in the basement and move little corn kernels around. I think that was Ian's idea and it ended up being really appropriate to the film because it has that sort of hand-made quality to it in the sense of we really were just trying to figure things out. Throwing glossy, digital effects in would have probably detracted from the experience. It was my childhood Fisher Price barnyard set and Ian's very affordable labor that made it all possible.

Ian: That Fisher Price barn totally reflects the mindset we had when we moved to Iowa in 2004. It was the perfect symbol of what we imagined agriculture to be -- the little red barn and the little animals and the two farmers. And, needless to say, that wasn't the reality at all.

EF: You credit Michael Pollan with being the inspiration for the movie. How did you first get introduced to his work?

Ian: We would read his essays in the New York Times Magazine in college. There was that wonderful article about his experience of buying a steer and following it through the food chain. I think that was undoubtedly an inspiration to us. He became an early advisor to the film. Curt and I were just about to embark on a cross-country research road trip and he advised us to take a good hard look at all the corn we saw along the way. I actually traded him my Masters thesis in exchange for him being our advisor.

Curt: I think we got the good end of that trade.

EF: The tasting scenes were some of my favorites in the film. What did the corn syrup that you two made taste like?

Curt: It tasted sweet and nasty. I don't know that we made it exactly right though we did our best. It's a pretty complicated process but we only had a Cuisinart and a saucepan. We actually tried making it again at the NPR studios last week and it turned out even worse that time.

Ian: I think the kicker was the final filtering process. As it was explained to us we needed to pour it through a pile of diatomaceous earth to filter it but I don't think it filtered through so much as dissolved so we were sort of drinking corn syrup and partially dissolved hardened sea creatures.

Ian Cheney (left) and Curt Ellis (right) taste their harvest in Greene, Iowa. Photo by Sam CullmanEF: Did you feel uneasy about drinking something that you'd made with sulfuric acid?

Curt: The NPR reporter (Robert Smith) certainly did!

EF: Were you surprised by the way your interview with Earl Butz (U.S. Secretary of Agriculture under Presidents Nixon and Ford) went?

Curt: On some level, yeah. We had learned enough by that point to really disagree with his policies and question them. All around us we could see the kind of landscape that his policies had created - giant industrialized farms and de-populated areas. So I think that we did walk into that room kind of wanting to challenge him and be mad at him but as soon as we met the guy we saw that of course he's just a normal person.

He's old and he had ideas that were very reasonable for his generation. When he graduated from college there was a great depression and when we graduated from college there was an obesity epidemic. So it makes sense both that he would want to make food more affordable and also that Ian and I would want to do something very different.

EF: Has this journey changed the way you eat?

Curt: Now that we know the back story to industrial food we're no longer comfortable with it but it is a real challenge to find good food. It's particularly hard right now because we're back on the road to promote the film so the gains we'd made in changing the way we eat have been largely eroded. It's frustrating that it's such a challenge to find something to eat that is not corn-based.

Ian: I'm a card-carrying member of the society that believes in convenient, affordable food. And I really want locally grown, healthful food to be available at my corner store. There are times when I love to play the part of the scavenger and spend a few days trying to find a turkey for Thanksgiving that was raised outside on a good diet but I'm coming to terms with the fact that, like many Americans, I don't want to spend all my time being a hunter-gatherer.

Curt: Ian did find and eat a pecan pie in a dumpster in college.

Ian: It was very convenient. I was already in the dumpster. Affordable, too. Photo of Curt Ellis atop a huge pile of corn, courtesy of King CornEF: What was your goal in making this film?

Ian: I think my goal (beyond doing something with my then 22-year-old life besides sitting at a desk,) my hope was to tell a story about where our food comes from. I don't think we knew all the problems associated with the stories behind our food - all the communities that are affected, all the ways that agriculture takes a toll on the land and our health so we didn't start out with an agenda in that sense. And by the end of our experience we certainly didn't feel like we had a solution to all of Director, Aaron Woolf, by Aaron Woolfthe problems we'd been encountering but more felt that the job of the film was to tell a story and hopefully spark some discussions and debates. I think we're really seeing that happen now as we take the film on the road and talk to people about these issues. Because, at the end of the day, there are a lot of ways of creating a better food system. There is no single solution. And that's actually very exciting and invigorating. The hope is that as people learn more about where their food comes from they'll make more informed decisions.

Curt: I think Ian has it right. It's incredible the number of people who've come up to us after seeing the film and have told us that they've changed the way they eat since watching it. And that was our hope - to transform the system into something that both tastes good and is good for you and the people who produce it.

EF: What’s next for you guys?

Curt: So far it's just been making sure that this film does some real good in the world. Right now that work is mostly in theaters so we've been on the road and will be traveling for the next month or two. Increasingly there are small grassroots screenings that are starting to get off the ground so we're starting to put our energy into the right way to do that. I think we're going to be fairly busy until April when the film will be broadcast on PBS.

Ian: I think that's about the size of it. We spent so long making the film that when we reached the finish line (or what we thought was the finish line) we all gave each other high fives and celebrated a job well-done. But then we woke up the next day and realized that there was a lot of work to be done to make sure the story got heard and made an impact. Hopefully, it won't take us quite as long to get the film out into the world as it did to make the film.

Monday, October 29, 2007

Homemade Granola

My awesome mom-in-law is coming for a visit this week. Whenever the sous-chef and I go to visit her and her husband, she spoils us rotten and stocks the Photo of a bag of really pricey granola, courtesy of the Bear Naked Granola web site.kitchen with our favorite foods. So I figured it would be nice to return the favor when she comes to see us.

One of her favorite breakfast foods is granola (with yogurt) so I figured I'd pick up some fancy-schmancy granola at the Andronicos. But my hand actually flew back involuntarily, as if I'd been burned, when I saw the price next to the teeny tiny bags of nutty, crunchy goodness. $7.49 for a miniscule bag of granola that would only fill two cereal bowls?!?!? You've got to be frikking kidding me...

I decided that I'd make my own since it's pretty easy to make delicious homemade granola (plus, as I think I've mentioned before, I am cheap.) Below is a basic recipe that you can adapt depending on what you like or what you have in the house.

The main trick is to cook it until it's browned and crisp but catch it before it burns - just be vigilant about checking and stirring it while it's baking and you should be fine. My oven is sort of uneven (much hotter in the back and on the bottom) so I turn the pans and rotate them from top to bottom once to keep things cooking more evenly.Jar of my homemade granola goodness

Homemade Granola
Makes about 7 cups


Ingredients

  • 4 cups old-fashioned oats (steelcut or rolled, do not use instant)
  • 1/2 cup packed light brown sugar
  • 1/4 - 1/2 cup honey or maple syrup (depending on how sweet you like your cereal)
  • 1 1/2 cup sliced almonds, walnuts, or pecans (just omit if you don't like nuts)
  • 3 teaspoons sesame seeds
  • 1/4 cup vegetable oil
  • 1/2 teaspoon salt
  • 1/2 teaspoon ground cinnamon
  • 1 teaspoon vanilla
  • 1 1/2 cup raisins, currants, dried cranberries, dried cherries, dried apricots, etc.
Directions

1. Preheat oven to 300 F.

2. In a bowl mix the oats, nuts, seeds, brown sugar, salt and cinnamon.

3. In a saucepan warm the oil and honey and then whisk in the vanilla.

4. Carefully pour the liquid over the oat mixture. Stir gently with a wooden spoon until all dry ingredients are well-coated.

5. Spread granola in a single layer over a heavy baking sheet.

6. Bake 30-35 minutes, stirring carefully every 10 minutes. Should be browned but not burnt.

7. Transfer granola-filled pan to a rack to cool completely. Break up any large clumps while the mixture is still warm.

8. Stir in the dried fruit once the mixture has cooled completely.

9. Seal granola in an airtight container or plastic bag (you can put it in the fridge or on a shelf but it'll keep longer in the fridge.) It should keep for 1-2 weeks (if it does not get eaten first.)

Sunday, October 28, 2007

Scary Pumpkins, Tasty Seeds

Roasted pumpkin seeds by Eve Fox, Garden of Eating blog, copyright 2011

Yesterday afternoon, we went over to our neighbors' backyard to carve pumpkins with them and their four adorable kids, two of whom are too young to carve anything so they just toddled around entertaining us with their winning smiles.

My pumpkin was inspired by last week's excellent New Yorker cover - what could be scarier than Dick Cheney?


Mine did not turn out quite as well as I'd hoped - more ornery owl than Vice President but it was still fun.

Dick Cheney pumpkin

In the process of creating our jack-o-lanterns, we collected a heaping pile of pumpkin seeds.

Butternut squash seeds by Eve Fox, Garden of Eating blog, copyright 2013

We roasted them when we got home last night and have been snacking on them all day. They're not only delicious, they're also good for you. Pumpkin seeds are an excellent source of protein, dietary fiber, niacin, iron, zinc, manganese, magnesium and phosphorus and  a good source of riboflavin, folate, pantothenic acid, sodium and potassium. So they got that going for them.

Cumin Roasted Butternut Squash Seeds by Eve Fox, Garden of Eating blog, copyright 2013

And pumpkin seeds are not the only squash seeds you can roast - you can do this with any winter squash and they're all tasty. Kabocha, delicata, butternut are all divine.

If you prefer your seeds a bit more exciting, you can use other spices to flavor them. One option is adding some ground rosemary to the oil and salt. Another spicier option is to use some ground chipotle or ancho chiles, cumin and black pepper. Or, if you have a sweet tooth, use a few tablespoons of melted butter in place of the oil, and coat the seeds with brown sugar, cinammon, nutmeg and ginger.

-- print recipe --Roasted Winter Squash Seeds

Ingredients

* Winter squash seeds, however many you can save
* Olive oil or grapeseed oil
* Sea salt
* Spices (optional)

Directions

1. Place in a colander and rinse thoroughly, removing any clinging pulp with your fingers.

2. Lay the wet seeds on a dry dishtowel or paper towels to dry before roasting.

3. Toss with a few teaspoons (or tablespoons, depending on how many seeds you have - you want enough oil to coat all the seeds lightly) of oil and spread in a single layer on a thick baking sheet.

4. Salt the seeds to taste and bake at 350 for 10-15 minutes or until golden brown, checking often for doneness since the seeds will roast quickly (you'll hear them start to pop) then remove sheet from oven and allow to cool completely

6. Store in an airtight container. Refrigerate if you don't eat them within the first few days - they never last that long at our house.

You might also like:
For more delicious recipes, gardening ideas, foraging tips, and food-related inspiration "like" the Garden of Eating on Facebook, or follow me on Twitter and Pinterest.

Pomegranate Seeds In Salads

As a kid, I loved pomegranates. How could any child not like an edible puzzle? I still get a thrill from pomegranate's beautiful jewel-like seeds and love their tangy mix of sweet and sour with a little crunch mixed in. A handful of pomegranate rubies.I decided to use my first pomegranate of the season in a salad yesterday. I used some fresh organic red leaf lettuce, the last few yellow cherry tomatoes from our plants outside, and threw in some toasted pinenuts, then tossed the whole thing with a balsamic vinaigrette. It was very tasty but would have been sublime with the addition of a little thinly sliced red onion and some goat cheese (sadly, we had neither in the house.)

My salad using the last of our cherry tomatoes and the pomegranate seeds Yesterday's salad whetted my appetite for more salads with pomegranate so I did a little searching and found this recipe on Epicurious (from Gourmet.) I have not actually made this yet but wanted to share it because I think it sounds really good.

Arugula Salad with Pomegranate & Toasted Pecans
Makes 6-8 servings

Ingredients
  • 1 1/2 teaspoons red wine vinegar
  • 1 tablespoon plus 1 1/2 teaspoons aged balsamic vinegar
  • 1/4 teaspoon kosher salt
  • 1/8 freshly ground pepper
  • 6 tablespoons extra virgin olive oil
  • 2 medium bunches arugula, rinsed well and thick stems removed
  • 1/3 cup pecans, toasted and roughly chopped
  • 1/2 cup pomegranate seeds, from 1 medium pomegranate
Directions

1. In medium, non-reactive bowl, whisk together vinegars, salt, and pepper.

2. Gradually drizzle in olive oil, whisking until emulsified.
3. Toss arugula with just enough vinaigrette to coat.

4. Sprinkle with pecans and pomegranate seeds and serve.

A Heart of Fennel

I was making a chicken dish that called for sliced fennel last week and was struck by how much the trimmed fennel bulb resembled a human heart...

Wednesday, October 24, 2007

Incredibly Easy Roasted Brussel Sprouts

As a kid, I was not crazy about vegetables - tomatoes, peas, spinach, and broccoli were all on my list to avoid. But I always liked brussel sprouts, for some reason.

I bought a bunch of the darling mini-cabbages at the farmers' market last week. I was trawling through the internet for a good, easy way to prepare them when I found this wonderfully simple recipe from
The Barefoot Contessa Cookbook.

It is remarkably easy and delightfully tasty. I have not included any amounts as it's simple enough to adapt to however much or little you want to prepare - just use enough oil to coat the sprouts on all sides.

Ingredients

  • Brussel sprouts, bottom ends trimmed and any brown or yellow leaves removed, and washed
  • Olive oil
  • Salt & pepper to taste
Directions

1. Preheat the oven to 400.

2. Toss the sprouts with the olive oil, salt, and pepper, and spread them in a single layer on a baking sheet or in a baking dish.

3. Roast for 45-50 minutes, turning them every 15-20 minutes.

4. Eat!

Tuesday, October 23, 2007

Some Organic Matters More Than Others

The NYTimes just published an interesting little article called Five Easy Ways To Go Organic. They suggest being strategic in your choices about which organic products to buy as some have a larger impact on both your health and the health of the planet than others.

They recommend prioritizing the following organic products:

1. Milk (and other dairy products, too, no doubt). Avoid factory farming, chemical farming, hormones, antibiotics and pesticides all in one blow!

2. Potatoes. This one surprised me. Apparently, conventionally-farmed potatoes are one of the most highly pesticide contaminated veggies around. 81% still contained pesticides after being washed and peeled!

3. Peanut butter. More acres are devoted to peanuts than any other fruit or vegetable and 99% of them are conventionally farmed which includes using fungicides to combat mold. I think they included this partly because kids eat so much peanut butter.

4. Ketchup. This one seems a bit less important to me as the Times included it partly because it constitutes a vegetable in many American households but if you're reading this blog, chances are you don't consider ketchup a vegetable... However, they did note that organic ketchup has about twice the antioxidant content of conventional ketchup.

5. Apples. As anyone who remembers Alar can tell you, apples have high levels of pesticides compared to many other fruits and veggies. They're also one of the most commonly eaten fruits.

Sunday, October 21, 2007

Eating Well With Diane Hatz

Earlier this week, I had the pleasure of talking with Diane Hatz, Founder and Director of Diane Hatz, photo courtesy of Sustainable TableSustainable Table, the wonderful organization that started the Eat Well Guide , an online consumer directory of sustainably-raised meat and dairy products, and that teamed up with Free Range Studios to create the internet smash-hit, The Meatrix.

Diane is fresh off the bus from her latest adventure, the Eat Well Guided Tour of America . She and her colleagues spent a little over a month traveling across the country in a bio-fueled bus to celebrate local, sustainable food and the people who produce, distribute, and eat it. The tour's theme was "Pie Across America." They stopped in more than 25 towns to visit restaurants, family farms and farmers markets and ate pie in each one of them.

EF: How did you come up with the idea for the tour?

DH: We were having a meeting and I said that I thought there was more happening in sustainable food than people realized. Years ago, I used to roadtrip randomly – no maps, no watches. And I always found that the pies were amazing in the places where we stopped. So I said I thought it’d be great to go across the country promoting sustainable food by eating pie in places all across the country. And my funder happened to be sitting right there and she said, "Okay, we’ll do it!"

I wanted to use pies because I think they’re a metaphor for something bigger -- for family, community, people coming together, sharing. There's nothing more American than apple pie, right?

Eat Well Guided Tour Bus, photo courtesy of Sustainable Table EF: How many different types of pie did you eat on the tour, and what were your favorites?

DH: We actually lost count but I know that I sampled over 200. They were all so great that it was really hard to pick, but I do have a top four: Blueberry pie from Solstice Cafe, photo courtesy of Sustainable Table

1. Blueberry pie from Solstice Café in Corvallis, OR – you don’t actually cook the berries – you make a sauce with the berries and then put them in a pie crust and serve it with lemon zest on top and homemade whipped cream. The berries pop in your mouth - it was unbelievable. Click here for the recipe.

2. Tart cherry pie from Ypsilanti, MI (no recipe yet, unfortunately). I didn't even know that they grew cherries in Michigan but it was amazing.

Oyster and shiitake mushroom pie, photo courtesy of Sustainable Table3. Oyster and shiitake mushroom pie at the farmers market in Jackson, WY. It was like all three meals in one. Click here for the recipe.

4. Very berry pie from Marilyn's Bakery in Hobart, IN. It was hard to get a written recipe for this pie because the sweetness of the berries determines how much sugar to put in the pie. Also, these guys are bakers so they don’t really go by measurements - a handful of this, a pinch of that. If you’re ever in Hobart, IN, Marilyn's Bakery is definitely the place to go. Click here for the recipe.

EF: How did you choose the farms and restaurants you stopped at?

DH: The major route was really a bit selfish – we stayed north because it was August and I really hate the heat. In terms of where we stopped, I sent an email out to some people I knew saying that we were doing this cross-country tour, these are the states we’re thinking of going to, etc., and I got a lot of great suggestions back. We also tried to find places in the Eat Well Guide. A lot of our stops on the tour turned out to be more like events – we think we’re just stopping by for a little BBQ and all of a sudden 50 people show up! It was really exciting.

EF: Did the tour meet your expectations?
Eat Well Guided Tour logo, image courtesy of Sustainable Table
DH: The tour totally exceeded our expectations. The people we met and the experiences we had were completely amazing. For example, a group of us got to harvest and winnow our own wheat (it was a heritage variety called Sonora) and pick strawberries and blackberries at Pie Ranch in Pescadero, CA. Then we baked pies using the wheat and the berries we'd harvested, and ate them together. It was the experience of a lifetime.


We’ve also gotten amazing press which has led to some wonderful opportunities and partnerships.

EF: Do you think Americans’ attitudes towards the food they eat are shifting?

DH: I think the shift has already happened and now it’s just a matter of everyone else catching up. The tour was a bit biased but when you’re in Wyoming at an event in a community center with 75 very independent ranchers and they’re talking about working together and opening a food co-op, it's clear that it’s not a coastal thing anymore, not a hippie thing anymore, it's not a trend, not a fad. It’s here to stay.

I think organic suffered from the whole elitism problem but with local, sustainable, there’s none of that sense of elitism.

EF: What do you think is fueling the change?

DH: I notice that it’s not just about food, it’s also about connection and sharing and people in the community coming together. I think that between working crazy hours and iPods and cell phones and computers, people have begun to feel more alienated from each other in the last 15-20 years and we really want to come back together -- we’re social animals. And food has also become so tasteless and processed that people just want better food. I think it just happened organically (no pun intended.)

EF: Do you cook much?

DH: I do. I used to belong to a CSA (I shared it with two other people) but even with the sharing, I found that it was always too much food for one person so now I do farmers markets. I always try to cook a big batch of stuff on Sundays after I get my ingredients at the farmers market. I've found that if you have really great tasting, fresh food, you can cook really simply. The food speaks for itself.

EF: What are your favorite places to get great food in NYC?

DH: My favorite place is probably the Tompkins Square farmers market – it's very small and about a block from my apartment. The Union Square market is great, too. The Hawthorne Valley Farm bread and cheese you can buy there is fantastic. As far as restaurants, I would say that my favorite “fast food” place would be Angelica Kitchen – it's really healthy, local, seasonal, organic, vegan and quick - they're on 12th Street just off 2nd Avenue. Right now, I am also really into the Bourgeois Pig, a wine bar on East 7th Street between 1st Ave and Avenue A. Now that it’s getting colder, it’s a perfect place to meet friends and have a glass of wine and some fondue.

EF: What would you recommend that people do on a daily basis in their own lives to make a difference?

DH: Start small – commit to one thing at a time. Don’t overwhelm yourself. Start by buying tomatoes in season and then go from there. It just tastes better. It’s a rewarding path. And have fun with it – cooking should not be a drag.

I always tell people to Educate, Ask, Act. Do some reading, ask questions – ask your local grocer if they source locally, ask the farmers at the market how they raise their food, and then do something – have a dinner party and ask everyone to bring one dish made from local food.

Pass The Revolver, Please - Pimientos de Padrón

My next-door neighbor, Dale (he and his wife own the quince tree), recently introduced me to Pimientos de Padrón, a traditional, yet surprisingly action-packed, Spanish tapa. When Dale was in college, he spent a semester in Spain. While he was there, he fell in love with Spanish cooking and got hooked on these little green peppers.

What makes this tapa so special, you ask? For some reason, one out of every five or so of these mild, sweet peppers is blisteringly hot! So eating them is akin to playing a casual game of Russian Roulette over dinner and drinks.

Although Pimientos de Padrón are common in Spain, they are extremely rare in the U.S. But Dale managed to track down a source in Palo Alto - Happy Quail Farms. He stopped by the other night to give us a bunch to try (I know, what a great neighbor!)

The raw peppers from Dale.

The sous-chef and I made them earlier tonight as an appetizer served with some kalamata olive bread to sop up the tasty, salty oil they were fried in (and some honey to take the edge off the heat when we ran into a spicebomb.) The non-spicy peppers have a mild, slightly nutty, slightly sweet flavor. The hot ones seemed to fall into two groups - tolerable and intolerable. All in all, they were quite good and lots of fun.

The cooked pimientos, fresh out of the skillet.

The preparation is extremely simple - see below for Happy Quail Farm's recipe.

Ingredients
  • Pimientos de Padrón
  • Olive Oil
  • Ready to tempt fate?Coarse Salt
Directions

1. Take a pan and pour enough oil to generously cover the bottom of the frying pan.

2. Turn the heat up on the burner. When the olive oil starts to sizzle throw the peppers in whole.

3. When the peppers start having small white blisters they are ready. Take the peppers out of the pan, place on plate with a paper towel.

4. Sprinkle with coarse salt. Hold the pepper by the stem and bite!

Eating Locally

Eating locally is the new black. The first time I remember hearing about it was back in 2005 when James Mackinnon and Alisa Smith did their 100 Mile Diet. I remember being incredibly impressed by the novelty of their idea at the time. Now it's become almost trendy. Naturally, I'm all for it, especially since I live in the Bay area where it's actually easier to eat locally than to not.

Yesterday, I picked up a copy of Animal, Vegetable, Miracle, Barbara Kingsolver's new book. I don't usually buy hardcovers (I'm too cheap) but I'd been hearing such good reviews from all sides that I caved.

I haven't had time to get farther than the first page yet but I predict good things. According to the book's web site, it is a mix of memoir and journalistic investigation that tells the story of how her family was changed by one year of deliberately eating food produced where they live. One of the things that convinced me to spend nearly $30 on it (besides its pretty cover) was the fact that it includes some recipes. I like books that do that.

I'll post a longer review of Animal, Vegetable, Miracle later but, in the meantime, I want to share a great article called New York Local with you. It's the same exact premise but on a much shorter timeframe and written by Adam Gopnik, who happens to live in Manhattan... It appeared in the New Yorker's Food Issue last month. A fascinating and funny (especially the part about the chicken) look at the challenges of eating locally when you live in a big city, it's definitely worth reading. Enjoy!

Friday, October 19, 2007

Gifts From The Kitchen Gods: Microplane Zester

You might say that I have a "zest" for cooking with this handy little tool - the amazing Microplane zester!Photo of zester, courtesy of Microplane's web site

I received my Microplane zester as a 23rd birthday present from my friend Ali (she's the same kitchen-savvy friend who introduced me to the immersion blender.)
It is the bomb! You can use it to zest citrus or grate hard cheeses, nutmeg, chocolate, etc. It's shape and lightweight make it versatile and easy to manipulate. Once you use one of these, you can never go back.

Before the microplane zester entered my life, I had to use one of the sides of my box grater to zest citrus. It was a total pain and did not work nearly as well, not to mention that it was nearly impossible to clean that side of the grater.

Microplane sells a bunch of other products including graters which have plastic handles and come in a bunch of sizes - coarse, spice and ribbon.

You can buy them from Amazon for roughly $9 and they're eligible for free shipping if you're getting some other things at the same time. At roughly $8-12 a piece they're also affordable and make great gifts (not to mention that they are the perfect shape for a stocking stuffer...)

Check out more Gifts From The Kitchen Gods:

Tuesday, October 16, 2007

A Fish Taco Feast!

As a kid, my primary exposure to fish was in frozen stick form. Fortunately, I've since been exposed to many other types of fish and tasty ways of preparing them and have learned to appreciate seafood. But, as they say, old habits die hard and, even now, fish is rarely the first thing I order at a restaurant. I've included this little piece of my personal history here only because it is the sole explanation I can offer for the sad fact that, up until Sunday night, I had NEVER eaten a fish taco.

A few months ago, I ran across a recipe for fish tacos in some magazine article about quick dinners. Something about the fact that the tacos are served with shredded cabbage intrigued me so I clipped the recipe. Then the sous-chef (my husband) came home all excited about the yummy fish tacos he'd eaten for lunch at Picante a few weeks ago. My interest was definitely piqued... But the final straw was this great piece about Baja-style fish tacos on NPR's Kitchen Window by Susan Russo. Her great pictures and recipes had me drooling. The time had clearly come to make these suckers!

So I bought limes, beer, tilapia, red cabbage, cilantro, avocado, and red onion and called my brother and sister-in-law and cousin up to invite them to dinner and ask them to make salsa. For the most part, I followed Susan's recipe (see below) although I omitted the chile sauce since I am wimpy about spicy foods, and I also added a topping of thinly sliced red onions.

The end result was a totally delicious combination of salty, crunchy, smooth, rich, and fresh. The beautiful mix of colors is an added aesthetic bonus. Here's one of the tasty little beauties.

The cabbage lends a substantial crispness, the beer-battered fried fish is salty and crunchy and satisfying, the avocado sauce is silky and cilantro-flavored, the mayonesa sauce adds a tangy flavor, the onion gives the whole combo some sweetness and bite, and the salsa lends a light, fresh taste. I know mayo is not the most glamorous condiment but please do not understimate the importance of the mayonesa sauce, I think it's even more key than the avocado sauce.

Fish Tacos

Avocado Sauce

  • 1 ripe avocado, peeled
  • Pinch of salt
  • Juice of 1 lime
  • 1 to 2 tablespoons water or milk
  • 1/4 cup chopped cilantro leaves

Place the avocado, salt and lime juice in a small food processor. Add 1 tablespoon water or milk (for a slightly creamier consistency) and pulse. Add more liquid as necessary until sauce is the consistency of thick cream. Add the cilantro and pulse until just blended.

Mayonesa Secret Sauce

  • 1/2 cup mayonnaise
  • 1 teaspoon white vinegar
  • 1 1/2 tablespoon water or milk

Place the mayonnaise in a small bowl and slowly stir in vinegar. Add water or milk until the sauce is thick and creamy.

Tacos

Serves 4-6 people

  • 1 1/4 cups all-purpose flour
  • 3/4 teaspoon baking powder
  • 1/4 teaspoon granulated garlic
  • Pinch of cayenne
  • 1/2 teaspoon dry mustard
  • 1/2 teaspoon dried Mexican oregano, rubbed to a powder (I did not have this so I used regular oregano and threw in some ground coriander)
  • Kosher salt
  • 1/2 teaspoon freshly ground black pepper
  • 8 ounces cold beer, plus more to thin the batter if necessary
  • 1-1/2 pounds firm, meaty white fish (halibut or tilapia will both work well)
  • Juice of 1 lime
  • Canola oil, for frying

Serve with:

  • 6-inch corn tortillas, warmed (you can substitute flour tortillas, but the corn imparts a more authentic flavor)
  • Avocado sauce
  • Lime wedges
  • Mayonesa secret sauce
  • Salsa of your choice (tomato, tomatillo, or mango would all be good)
  • Finely shredded red cabbage
  • Cilantro leaves

1. For the batter, whisk together the flour, baking powder, garlic, cayenne, mustard, oregano and salt and pepper in a large bowl until well blended. Stir in the beer until there are no lumps. (The batter can be made several hours ahead and refrigerated.)

2. Cut fish into strips the size and shape of your index finger. Sprinkle with some lime juice and salt.

3. Pour oil into a deep, wide pan to the depth of 2 inches and heat over medium-heat to 350 degrees (if you have a deep-fry thermometer). Otherwise, test the heat by dropping a little bit of the batter into the oil. It should quickly bounce to the surface and be surrounded by tiny bubbles.

4. Pat the fish dry with paper towel. Check the thickness of the batter by dipping a piece of fish in it; it should be the consistency of medium-thick pancake batter, coating the fish easily and dripping very little. Add a little beer or water if it seems too thick.

5. Add a few pieces of fish to the batter. Using tongs, lightly swish each piece until thoroughly coated. Remove fish, letting excess batter drip into the bowl before gently placing in the hot oil. Cook a few pieces at a time until they float and the batter is set but still light in color, about 2 to 3 minutes.

6. Remove the fish to a wire rack to drain.

7. To serve, place the fried fish, warmed tortillas and condiments on a table so guests can make their own tacos. To assemble tacos, hold a tortilla in your hand, and spread a spoonful of avocado sauce on it. Place a piece of fried fish on top and sprinkle with a little lime juice. Drizzle with some mayonesa sauce, and top with shredded cabbage, fresh cilantro, onion, and salsa.

Monday, October 15, 2007

"B-Cup" Cakes - Take a Bite Out of Breast Cancer

I'm not known for my optimism but, lately, I feel like I'm wearing rose-colored glasses all the time. Before you get too excited about me adopting a sunnier outlook on life, I should explain that the rosey hue I've been seeing is actually an optical effect caused by the thousands of pink ribbons that have recently sprouted up everywhere I go, like toadstools after a rainstorm. In case you had not noticed already, October is Breast Cancer Awareness Month.

Naturally, I wanted to do my part to help raise awareness of breast cancer so I baked up a batch of delicious "B-Cup" Cakes. I'd really wanted to make them "DD-Cup" Cakes but my muffin tins are just not big enough to support a more "full-figured' cupcake.

Dark chocolate cupcakes, fresh out of the oven

Although I made the batter chocolate (since I would not waste my time eating any other kind of cupcake), I made three kinds of buttercream icing to represent a diversity of boobies. I figured that since breast cancer does not discriminate, neither should I. The basic skin tones were easy - chocolate for our darker sisters, espresso for our coffee-colored sisters, and vanilla bean for all us pasty white sisters. The subtler colors for the aureolas were a bit more challenging but I managed to create them by mixing the three flavors of icing.

My three frostings for diversity

Of course, we know that beauty is only skin-deep, but the "B-Cup" Cakes had good looks and good taste!

B-Cup Cakes!

I hope you'll join me in taking a bite out of breast cancer this month. Here are two easy ways:
Or, if you'd like to bake a batch of your own "B-Cup" Cakes, I would recommend Cooks Illustrated's dark chocolate cupcake recipe (see below.)

Just one final note. I believe in giving credit where it's due so I'd like to give a shout-out to Adam Roberts, The Amateur Gourmet, whose brilliant Janet Jackson Breast Cupcake was my primary inspiration for the "B-Cup" Cakes.

Dark Chocolate Cupcakes

Yields 12 cupcakes

Ingredients
  • 8 tablespoons unsalted butter, cut into 8 pieces
  • 2 ounces bittersweet chocolate, chopped
  • 1/2 cup Dutch-processed cocoa
  • 3/4 cup unbleached all-purpose flour
  • 1/2 teaspoon baking soda
  • 3/4 teaspoon baking powder
  • 2 large eggs
  • 3/4 cup sugar
  • 1 teaspoon vanilla extract
  • 1/2 teaspoon table salt
  • 1/2 cup sour cream
Directions

1. Adjust oven rack to lower-middle position;heat oven to 350 degrees. Line standard-sized muffin pan (cups have 1/2 cup capacity) with baking cup liners.

2. Combine butter, chocolate, and cocoa in medium heatproof bowl. Set bowl over saucepan containing barely simmering water; heat mixture until butter and chocolate are melted and whisk until smooth and fully combined. Set aside to cool until just warm to the touch.

3. Whisk flour, baking soda, and baking powder in small bowl to combine.

4. Whisk eggs in second medium bowl to combine; add sugar, vanilla, and salt and whisk until fully incorporated. Add cooled chocolate mixture and whisk until combined. Sift about one-third of flour mixture over chocolate mixture and whisk until combined; whisk in sour cream until combined, then sift remaining flour mixture over and whisk until batter is homogeneous and thick.

5. Divide batter evenly among muffin pan cups. Bake until skewer inserted into center of cupcakes comes out clean.

6. Cool cupcakes in muffin pan on wire rack until cool enough to handle, about 15 minutes. Carefully lift each cupcake from muffin pan and set on wire rack. Cool to room temperature before icing, about 30 minutes. (To frost: Mound about 2 tablespoons icing on center of each cupcake. Using icing spatula or butter knife, spread icing to edge of cupcake, leaving slight mound in center.)

Sunday, October 14, 2007

Storing Chicken Stock

Last weekend was chilly and gray. Since it felt like fall, I decided to roast a chicken (which is surprisingly easy to do) and make pumpkin pie.

One of the nicest things about roasting a whole chicken is that the bird just keeps on giving. One 4-5 pound chicken will provide dinner for 4, chicken salad for 2 for lunch the next day, and chicken stock to make a big pot of soup for dinner another night.

After dinner, I picked all the meat off the bird and put it aside to make curried chicken salad the next day. Then I threw the carcass into a big pot, added a bunch of water, some chopped carrots and onion, parsley, cilantro, a few bay leaves, and salt and pepper. I simmered it all for an hour or so on medium heat to make chicken stock. I turned it off and let it sit for a few hours.

Once it was cool enough, I removed the bones and strained the stock through a fine meshed sieve to remove all the veggies and herbs and bits of chicken. I was left with about four pints of organic chicken stock. I poured half of it into clean empty yogurt containers, labelled the tops with the date and the contents, and put them in the fridge to cool down some more.

I decided to try storing the remaining two pints of stock as ice cubes - a trick I had read about a few times. Having the stock in ice cube-form gives you much greater flexibility over how much you have to defrost at any given time. The cubes are small so they defrost quickly. You can just throw a few into a saucepan if you need to add stock but don't want to add an entire pint of liquid.

My set up for making chicken stock cubes in the kitchen sink

Making the cubes is easy - just pour the stock into ice cube trays and let them freeze solid. Then unmold the cubes and store in a sturdy freezer bag. Grab a cube or two anytime you need one.

Saturday, October 13, 2007

What's the Diff? Parmigiano-Reggiano vs Pecornio Romano

I've been wondering what the difference between Parmigiano and Pecornio Romano cheeses are for years but have always been too lazy to find out. But Martha (that's Martha Stewart, of course) has done the dirty work for me. According to the September issue of Martha Stewart Living, the primary difference between Parmigiano-Reggiano and Pecorino Romano chesses is that the former is made from cow's milk and the latter is made from sheep's milk!

Beyond that, Parmigiano is aged longer than Pecorino Romano. And as you probably have noticed, the Romano costs a lot less. Pecornio Romano is significantly drier, more crumbly, and less versatile than Parmigiano. Martha says only the Parm can hold its own on a cheese plate or as an element in a salad or veggie dish while the Romano is better suited for use as a finishing element for pasta, pizza or other baked dishes.

And, of course, they are each from the specific regions of Italy for which they are named. Similar cheeses that are not from those regions cannot bear these exact names thanks to Italy's Denomination of Protected Origin certification laws (just as any sparkling white wine that is NOT made in Champagne, France cannot legally be called champagne.)

Friday, October 12, 2007

Immersion Blender: Gifts From The Kitchen Gods

I know it looks like some sort of sex toy but it's really an Immersion Blender - one of the best kitchen gadgets aroundEarly September 1998. My three best friends and I were moving into a run-down rental near campus at the start of our senior year of college. The house was a mess, but there was one small gem amidst the dirt, dust, and broken down furniture the previous tenants had left for us. A strange, white, plastic object with an electric cord had been left sitting on an empty bookcase in the kitchen.

My two friends and I stared at it with dubious distaste - it looked like some sort of odd sex toy (after all, who knew what the previous occupants were into?!) What was it? Should we throw it out? Yes, but then we'd have to touch it... Luckily, our third friend, Alison, whose mom ran a successful restaurant and catering business, swooped down on it with a beaming face. "Don't be stupid, guys, it's an immersion blender," she chided. "These things rock."

Alison was right. I adore my Braun immersion blender - an older model that my husband, Rahm (who I will refer to as "the sous-chef" moving forward because of his superior slicing and dicing skills) and I found at a yard sale about five years ago. It was definitely the best $5 I ever spent!

When it breaks, I will probably go with this Cuisinart immersion blender which seems to be the current favorite on Amazon - I kinda like to crowdsource my gadget buying decisions when I'm unsure.

The immersion blender makes it easy and mess-free to blend soups and sauces right in the pot - no need to haul a hot, heavy pot over to a cuisinart or blender to blend its contents. And no need to pour the blended contents back into the pot to continue cooking, nor to wash the frikkin' cuisinart's many hard to clean pieces.

It gives you much more control over how much to blend things, too - it's very easy to partially blend a soup or sauce.

It is easy to handle, easy to clean, and relatively small. Counter space is in high demand in my tiny kitchen so anything that can be stored in a drawer is a plus for me.

Immersion blenders are pretty cheap, too. Even if you don't find one for $5 at a yardsale you can get a new one for between $30-$60 at a store near you. Or you can buy one online at Amazon - they carry a bunch of different models by Cuisinart and Kitchen Aid.

This is the first installment of "Gifts from the Kitchen Gods" - a series of homages to the kitchen gadgets, appliances, and ingredients that have won our hearts by improving our lives, the food we cook, and the time we spend in the kitchen. Send in your own nominations via comments.

Check out more Gifts From The Kitchen Gods:

Tuesday, October 9, 2007

Oy Vey, EVOO Is Not So Virgin After All...

In August, the New Yorker ran a fascinating piece about olive oil fraud, a practice so widespread that the EU was forced to establish an olive oil task force in the late 90's.

Apparently, the stuff we're led to believe is extra virgin olive oil is often anything but. An insider estimated that as much as 90% of the virgin olive oil sold in Italy is actually adulterated.

There are two types of olive oil fraud. The first is a wholescale substitution of other oils (like soybean and canola) that are colored with chlorophyll and flavored with beta carotene to make them resemble and taste like olive oil. Chemical testing can easily detect this fraud.

However, the more sophisticated type of fraud in which high grade olive oil is mixed with hazelnut and cheap, non-foodgrade olive oil, then packaged and sold as Extra Virgin is nearly impossible to detect through chemical testing. Instead, the EU instituted strict taste and aroma requirements and established special olive oil tasting panels to test the goods.

"According to the E.U. regulations, extra-virgin oil must have appreciable levels of pepperiness, bitterness, and fruitiness, and must be free of sixteen official taste flaws, which include “musty,” “fusty,” “cucumber,” and “grubby.”" What great adjectives! There must have been a Brit or two on that committee -- "musty" and "fusty"...

Unfortunately for food purists around the world, olive oil fraud is likely to continue for the foreseeable future due to the threat of expensive lawsuits by olive oil producers and to widespread corruption in Italy.

It made me wonder - have I ever tasted real extra virgin olive oil and, if I did, would I like it?

Monday, October 8, 2007

A Slice of Autumn - Pumpkin Pie

Now that it is October my hunger for fall foods is in full swing. To kick things off, I baked a pumpkin pie last night. It was my first attempt and probably several years overdue since my husband loves pumpkin pie. I had my doubts but it turned out quite tasty - a pleasing subtle mix of pumpkin, custard, sweet and spice. Here's a picture of my golden beauty!

Photo of Sunday night's pumpkin pie - my first ever attempt!
The recipe came from the Joy of Cooking (I wanted some explanation since I've heard that pumpkin pies can be a little tricky due to their custard-y nature) and I cross-referenced with one from Gourmet via Epicurious.

A few things to note:
  • You'll need to pre-bake the crust, otherwise it will get soggy from the soupy squash/custard mixture.
  • In addition to pre-baking, you'll need to brush the entire crust with a mixture of egg yolk and salt to "seal" it from the wetness and help prevent sogginess.
  • The crust should be warm/hot when you fill it with the pumpkin mixture.
  • Use two eggs for a firmer, more pumpkin flavored pie or three eggs for a softer, more custard-like pie.
  • For some odd reason, prepared pumpkin comes in 15 oz cans. The Joy Of Cooking recipe called for 2 cups (16 oz) but one can should be plenty - I ended up having extra filling that I could not fit in the crust.
Makes one 9-inch pie, 8 servings
Ingredients
  • Prepared pie crust (see recipe)
  • 2 to 3 large eggs
  • 2 cups (1 can) canned pumpkin puree - I used an organic one from Trader Joe's. (You can also prepare your own freshly cooked pumpkin to make the filling but I am just not that hard core.)
  • 1 1/2 cups light cream or mix 3/4 cup heavy cream and 3/4 cup milk
  • 1/2 cup sugar
  • 1/3 cup firmly packed light or dark brown sugar
  • 1 tsp ground cinammon
  • 1 tsp ground ginger (I didn't have this so I left it out but it sounds good)
  • 1/2 tsp freshly grated or ground nutmeg
  • 1/4 tsp ground cloves or allspice
  • 1/2 tsp salt
Directions
1. Position rack in the center of the oven. Preheat oven to 400.
2. Make pie crust and bake at 400 for 20 minutes or until golden brown.
3. Remove the crust, brush thoroughly with a mix of egg yolk and a pinch of salt and bake for another 2 minutes to set the egg wash.
4. Turn oven down to 375.
5. Whisk the eggs together in a large bowl.
6. Add the rest of the ingredients and whisk together thoroughly until combined.
7. If the crust has cooled, warm it in the oven until it is hot to the touch.
8. Pour the pumpkin mixture into the crust and bake until the center of the filling seems set but quivery - like jello - when you nudge the pan. Should take roughly 45 minutes but this varies by oven (as I said, mine took a bit longer).
9. Remove the pie and let cool completely on a wire rack, then refrigerate for up to 1 day.
10. Serve cold or at room temperature with whipped cream.

Pat In the Pan Butter Pie Crust

Pat in the pan crusts are flaky and crumbly. No rolling required although the patting is a bit awkward. This recipe can only be used for a bottom crust as it is not workable enough for a top crust. 

-- print recipe --Pat In the Pan Butter Pie Crust from the Joy of Cooking
Makes one, 9-inch pie crust

Ingredients
  • 1 1/2 cups all-purpose flour
  • 1/2 tsp salt
  • 1 stick of unsalted butter, softened and cut into 8 pieces
  • 3-4 tbsp heavy cream
  • 1 large egg yolk
  • Pinch of salt
Directions

1. Position rack in the center of the oven and preheat the oven to 400.

2. Whisk together the flour and salt or pulse in a food processor for 10 seconds.

3. Add the pieces of butter and mash with the back of a fork or food process until the mixture resembles coarse crumbs.

4. Drizzle the heavy cream over the top and stir or process until the crumbs look damp and hold together when pinched - add more liquid if you're not getting there.

5. Transfer the mixture into a 9-inch pie pan and pat evenly over the bottom and sides with your fingertips and form an even crust edge.

6. Crimp or flute the edge and then use a fork to poke holes regularly around the sides and bottom of the crust then bake until golden brown - between 18- 22 minutes, checking regularly to see if any bubbles are forming and using the fork to deflate them if they do then remove from the oven.

7. If you are filling the crust with an uncooked mixture that will require further baking, whisk together the egg yolk and salt, then brush it thoroughly over the inside of the crust then return to the oven and bake until the egg glaze sets - 1-2 minutes.

You might also like:
For more delicious recipes, gardening ideas, foraging tips, and food-related inspiration "like" the Garden of Eating on Facebook, or follow me on Twitter and Pinterest.