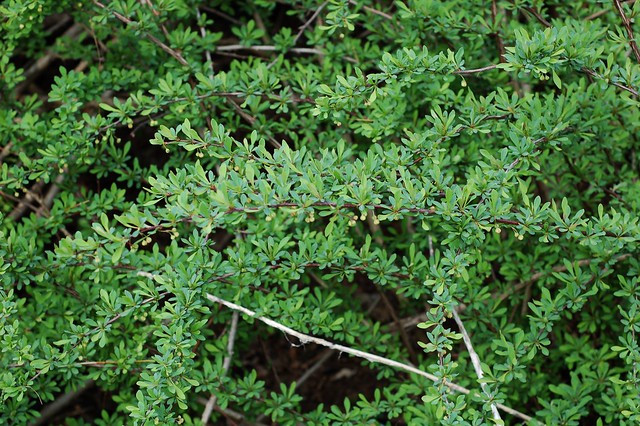
After learning that there's a powerful link between Japanese barberry and Lyme disease, my husband and I have become "barberrians". You're apt to find one or the other of us out in the woods, gloved, hatted, booted, pants tucked into socks (such a sexy look...), pitchfork in hand, dripping sweat as we battle it out with one or more of the massive thorn bushes that are rapidly taking over our woods.
I've just written a new post all about this thorny problem over at Care2.com. Read it and weep (which you may if you have this stuff growing around your home).
As I write this, my hands are covered with tiny, painful splinters -- the razor sharp ends of barberry thorns that poked through my gloves and then broke off in my skin. I plan to purchase a pair of thick, leather gloves and keep on pulling it out by the roots. Barberry, be gone!
The First Strawberries
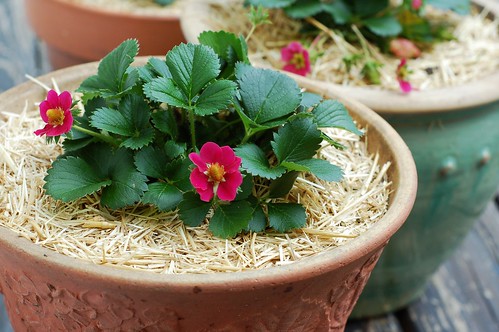
Our son, Will, loves plants and he loves fruit. For his birthday last spring, his grandma bought him two cherry trees which seem to be doing okay so far, even after being ravaged by Japanese beetles last summer. This year, she gave him three strawberry plants. We're still working on putting in our "big garden" so I planted them in these pretty ceramic pots that my mom got at a yard sale last year.
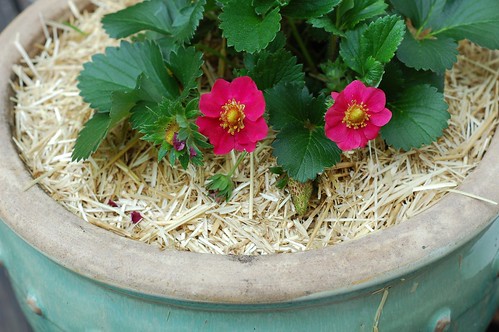
They're such pretty plants - with vivid, pink flowers, something I'd never seen before - I thought all strawberry flowers were white! The first berries appeared a few weeks ago and begin to grow and to turn slightly pink.
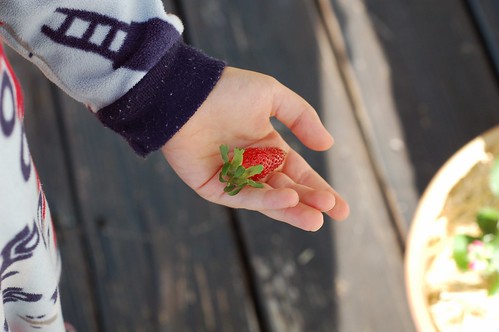
They grew redder and redder until the other morning when Will deemed it time to pick them.
He plucked them off the plant, I washed them and he declared them, "tart at first, delicious at second."
I hope to put them in the ground before too long and to significantly add to their numbers. There are sooooo many good ways to use strawberries -- eating them out of hand, strawberry-mint lemonade, strawberry shortcake, strawberry jam...
You might also like:
Want even more recipes, photos, giveaways, and food-related inspiration? "Like" the Garden of Eating on Facebook, or follow me on Twitter or Pinterest.
They're such pretty plants - with vivid, pink flowers, something I'd never seen before - I thought all strawberry flowers were white! The first berries appeared a few weeks ago and begin to grow and to turn slightly pink.
They grew redder and redder until the other morning when Will deemed it time to pick them.
He plucked them off the plant, I washed them and he declared them, "tart at first, delicious at second."
I hope to put them in the ground before too long and to significantly add to their numbers. There are sooooo many good ways to use strawberries -- eating them out of hand, strawberry-mint lemonade, strawberry shortcake, strawberry jam...
You might also like:
- Wild Blackberry Sorbet With Lavender & Garden Mint
- Chocolate Raspberry Tart
- Homemade Maraschino Cherries
Want even more recipes, photos, giveaways, and food-related inspiration? "Like" the Garden of Eating on Facebook, or follow me on Twitter or Pinterest.
The Great Sweet Potato Experiment
Wednesday, May 28, 2014
In case you missed the backstory, I am experimenting with attempting to use sweet potatoes to outcompete a crapload of Japanese Silvergrass and lemon balm that had completely taken over all the garden beds at our new house. You can catch up here if that's too vague for you.
I've never grown sweet potatoes before but learned that most people buy their sweet potato slips (which is what the part that you plant is called) from seed suppliers. But I found a great post about growing your own sweet potatoes on Outlaw Garden so we're giving it a shot. If it doesn't work, I'll order some slips once it's closer to planting time -- because they're tropical plants, they need the ground to be nice and warm before you can plant them - so we're looking at sometime in June.
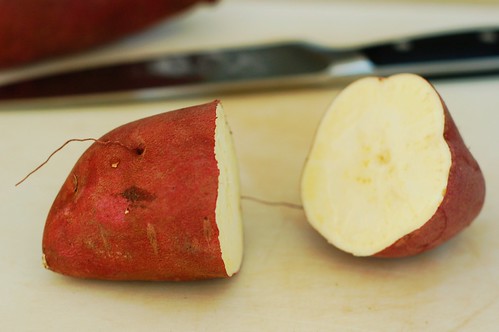
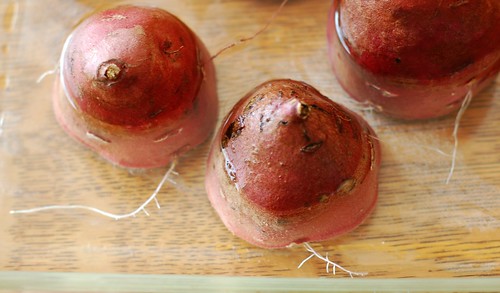
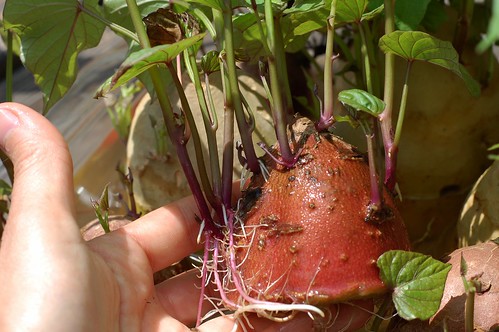
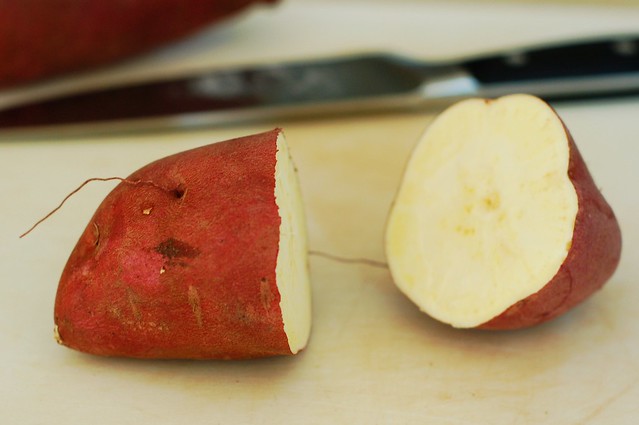
About a month ago, I bought some organic sweet potatoes at Sunflower, cut them in half and put them cut-side down in a Pyrex lasagna tray filled with water per Outlaw Garden's instructions.
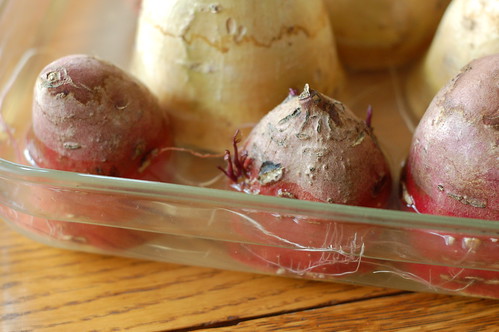
It was a bit slow at first but sure enough, thin white roots began snaking out from the cut ends submerged in the water.
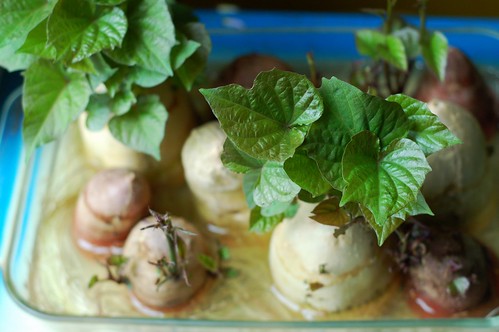
The roots multiplied and grew thicker and the tops began to send out tentative feelers that unfurled into lovely, delicate purple-veined leaves that fade to green as they grow.
As the weather has warmed, they've started to take off, sending up shoots and lush, green leaves tipped with purple. It's been very fun to watch them grow and our five-year-old is following along with interest.
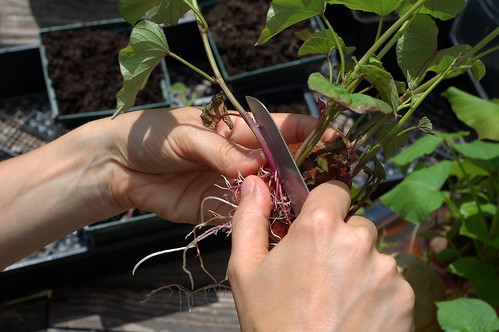
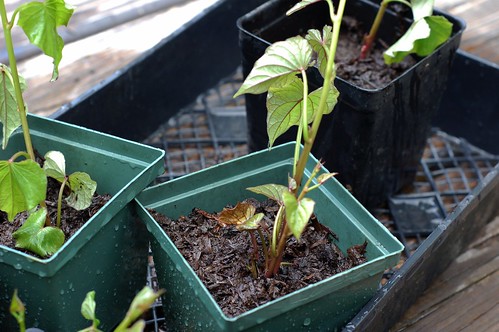
After another couple weeks of growth, the first slips had sprouted roots from the bases of their leaves -- these are different from the roots that sprouted from the cut ends of the potatoes. This was the sign I'd been waiting for that they were ready to plant in small pots which should give them a chance to get even more established before they go into the ground in a few weeks or so.
I cut the slips off and planted them in some mushroom dirt then put the potatoes back into the water so the other sprouts could continue to grow.
I'm still waiting for the yellow sweet potato shoots to sprout roots from the base of the slips - so far it's just been the purple skinned ones that made the move.
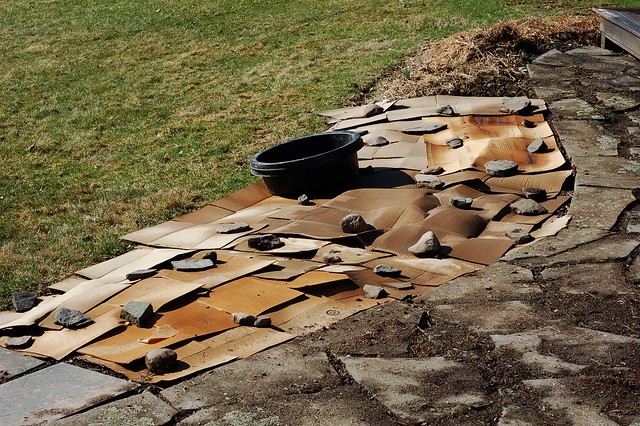
And more good news -- since sweet potatoes thrive in hot weather and warm soil, several of my trusted gardening sources (Maggie and Leila, I'm looking at you two) have recommended planting the slips in holes cut in either black plastic or cardboard. And, in case you hadn't noticed, I happen to have quite a lot of cardboard lying around these days... The hope is twofold: that the cardboard will help keep the heat-loving plants toasty and happy while also depriving the Japanese silvergrass, lemon balm and anything else we'd like to say goodbye to of life-giving sunlight.
We shall see... I'll keep you posted.
---------------------------------
Find out what happened below.
Part II: Sweet Potatoes Are In The Ground!
Part III: Sweet Potato Harvest!!!
You might also like:
- Eat Your Weeds - Wild Garlic
- Garden Reclamation - Trying to Outcompete Invasives
- Grow Your Own Garlic
Garden Reclamation: Trying to Get Rid of Aggressive Invasives
Tuesday, May 27, 2014
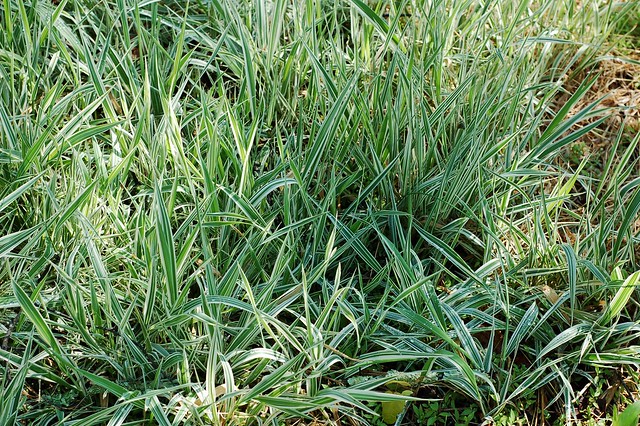
We've been battling a number of rather aggressive plants since we moved into our house last summer. I think there should be a special place reserved in Hell for whoever planted all the Japanese Barberry bushes and Japanese variegated silver grass all around the house... (no offense to the Japanese - I'm sure they're not responsible for bringing them here and they definitely didn't plant them all around my house.)
I've never liked Japanese barberry -- why would you choose to plant a big prickerbush in your yard??? -- but now that I know that barberries serve as nurseries for the black legged a.k.a. "deer" tick - one of the main vectors for Lyme disease, babesiosis and granulocytic anaplasmosis - I like them even less... Worse still, they spread like wildfire - not only do we have them in our yard where some idiot actually planted them, we now have them all throughout our woods...
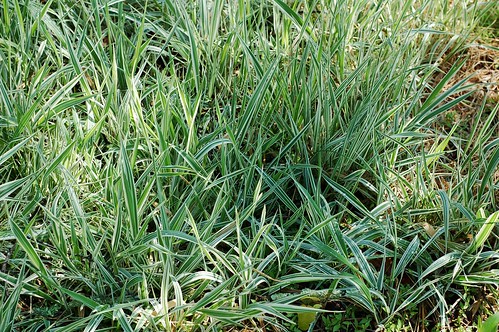
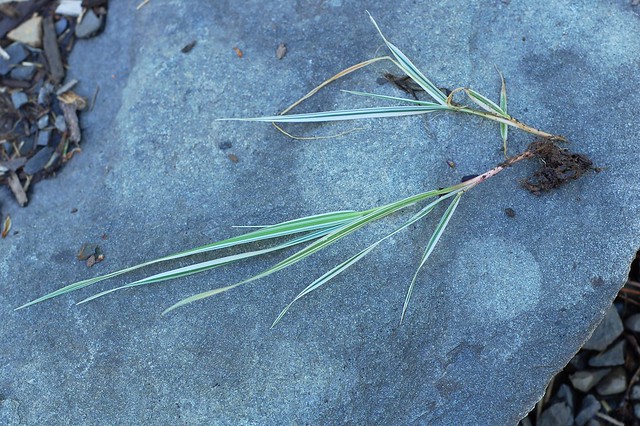
The Japanese silvergrass is a little less offensive -- it's pretty, it has no thorns and no known link to Lyme disease. And I have a grudging respect for its ability to grow and thrive in the crappiest of soils. Pure clay with some rocks mixed in? No problem! And where its roots go, the earthworms follow. I should know, I've pulled enough of them out...
But man, does it take over! There is a sea of it in all the garden beds and it is nigh unto impossible to get rid of as it will sprout again from the tiniest piece left in the soil. It is truly the Terminator of ornamental grasses. And it's also spread to several parts of the woods, undoubtedly where it was unwittingly dropped by previous gardeners after attempting to weed it.
Last summer, I managed to remove most of the Japanese silvergrass from the rocky planting area in our backyard. I'll never get it all since its rhizomes grow right under some of these massive rocks and there is just no lifting them. I'm resigned to simply pulling out the shoots wherever they appear - for the rest of my life...
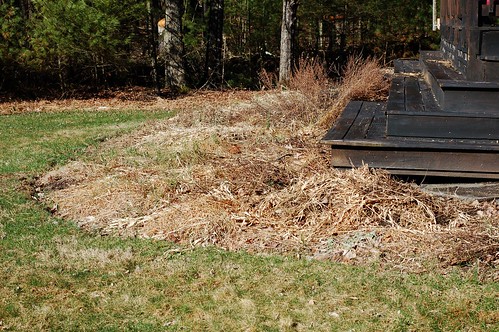
The garden beds in the front yard are an even bigger challenge. At first, I just kind of wanted to give up, overwhelmed by the enormity of the weeding task ahead of me. I mean, look at this! And this is just a little portion of it...
And it's not just silvergrass, there's also quite a bit of lemon balm (another big taker over - but one that I at least like since it smells nice and you can eat it) and some unidentified but very spiky weed mixed into the mess. Here's some lemon balm with a little silvergrass.
But then I started to weed it in sections. I found that it was a little easier to pull out than I'd expected since the soil was richer than in the backyard where it was all clay and rocks. And, of course, it was immensely satisfying. Once I'd dug out everything I could get, I covered what I'd weeded with cardboard to deprive whatever was left of sunlight and moved on.
Meanwhile, I read up on rhizomatous grasses. The most common ones people love to hate are Bermuda grass, crab grass, and quackgrass. And, as with the silvergrass, they are basically impossible to get rid of. But then I happened on a thread where someone talked about planting sweet potatoes as a way of trying to outcompete Bermuda grass. It seems that sweet potatoes have these pretty vines that will pretty much take over whatever space they're allotted and squeeze out the weeds.
So I decided it was worth a shot. We're at the early stages of the great Sweet Potato Experiment right now but I figured I'd write about it in case it ends up working and you want to follow along. I'll be posting more about it soon.
Update: It totally worked! You can read all about it here.
You might also like:
- The Great Sweet Potato Experiment
- Eat Yer Weeds - Wild Garlic
- Don't Piss Away Valuable Fertilizer - Pee On Your Compost
Stir-Fried Garlic Spinach - the Pinnacle of Yum
Monday, May 19, 2014
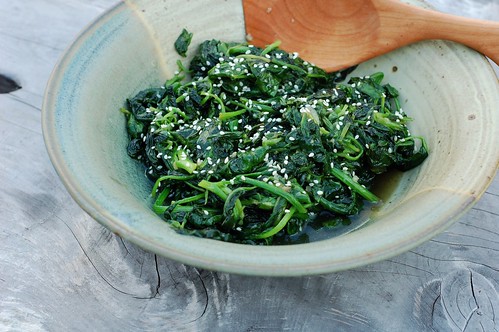
This spinach has earned a permanent place in my kitchen repertoire. It's so tasty, so fast and so easy that I just can't quit it. Not that I'd ever want to quit it...
It comes by way of Grace Young's lovely cookbook, The Breath of a Wok , which my husband gave me as a gift after we returned from a trip to Southeast Asia what feels like a lifetime ago (we were so young...)
I've been making Auntie Yi's Stir-Fried Garlic Spinach ever since. It's so easy that I always feel a little like I'm cheating somehow. The seasoning is incredibly simple - a tablespoon of rice mirin mixed with equal parts sugar and salt.
There are just two things that you need to do to make this a truly stand-out dish:
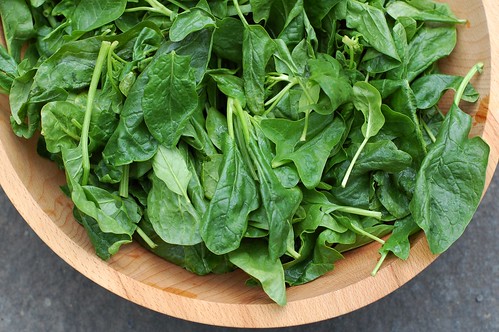
1. Use really fresh, flavorful spinach - it makes a huge difference in the taste.
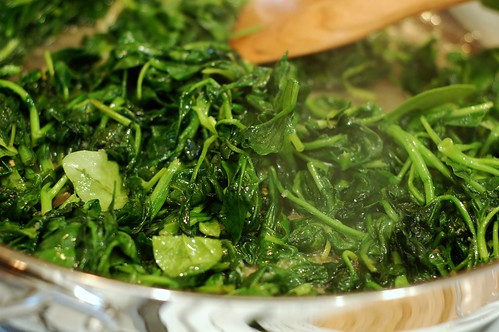
2. Get your wok (or wide, flat-bottomed pan if you don't have a wok) really, really hot and don't crowd the spinach. If you want to make more than one bunch of spinach, do it in two batches to ensure you can really stir-fry it effectively.
When I saw the first spinach of the season from Taliaferro Farms in the produce section of my health food store last week, looking all gorgeous and tender and a practically radioactive shade of green that only occurs in the spring, I knew this would be on the menu.
A little washing and drying, chopping, mixing and stir-frying and BOOM, we were in business.
As always, it was SO GOOD!
Stir-Fried Garlic Spinach minimally adapted from Grace Young's excellent book The Breath of a Wok
Serves 4 as a side
Ingredients
* 2 Tbsp vegetable or peanut oil
* 1 Tbsp minced garlic
* 1 bunch fresh spinach (about 10 ounces)
* 1/2 tsp sea salt
* 1/2 tsp cane sugar
* 1 Tbsp rice mirin or dry sherry
* 1-2 tsps toasted sesame seeds (optional)
Directions
1. Heat a 14-inch flat bottomed wok over high heat until a bead of water vaporizes within 1 to 2 seconds of contact. Swirl in the oil, add the garlic and stir-fry for 10 seconds.
2. Add all the spinach and stir-fry for 10 seconds.
3. Add the salt, sugar and rice wine and stir-fry for 1-2 minutes or until the spinach is just tender but still bright green. Garnish with the sesame seeds (if you like them, that is) and serve.
You might also like:
For even more recipes, photos, giveaways, and food-related inspiration "Like" the Garden of Eating on Facebook, or follow me on Twitter or Pinterest.
It comes by way of Grace Young's lovely cookbook, The Breath of a Wok
I've been making Auntie Yi's Stir-Fried Garlic Spinach ever since. It's so easy that I always feel a little like I'm cheating somehow. The seasoning is incredibly simple - a tablespoon of rice mirin mixed with equal parts sugar and salt.
There are just two things that you need to do to make this a truly stand-out dish:
1. Use really fresh, flavorful spinach - it makes a huge difference in the taste.
2. Get your wok (or wide, flat-bottomed pan if you don't have a wok) really, really hot and don't crowd the spinach. If you want to make more than one bunch of spinach, do it in two batches to ensure you can really stir-fry it effectively.
When I saw the first spinach of the season from Taliaferro Farms in the produce section of my health food store last week, looking all gorgeous and tender and a practically radioactive shade of green that only occurs in the spring, I knew this would be on the menu.
A little washing and drying, chopping, mixing and stir-frying and BOOM, we were in business.
As always, it was SO GOOD!
Stir-Fried Garlic Spinach minimally adapted from Grace Young's excellent book The Breath of a Wok
Serves 4 as a side
Ingredients
* 2 Tbsp vegetable or peanut oil
* 1 Tbsp minced garlic
* 1 bunch fresh spinach (about 10 ounces)
* 1/2 tsp sea salt
* 1/2 tsp cane sugar
* 1 Tbsp rice mirin or dry sherry
* 1-2 tsps toasted sesame seeds (optional)
Directions
1. Heat a 14-inch flat bottomed wok over high heat until a bead of water vaporizes within 1 to 2 seconds of contact. Swirl in the oil, add the garlic and stir-fry for 10 seconds.
2. Add all the spinach and stir-fry for 10 seconds.
3. Add the salt, sugar and rice wine and stir-fry for 1-2 minutes or until the spinach is just tender but still bright green. Garnish with the sesame seeds (if you like them, that is) and serve.
You might also like:
- Curried Quinoa Cakes with Spinach
- Spinach Salad with Warm Bacon Dressing & Caramelized Onions
- Grilled Asparagus with Sesame-Soy-Garlic Marinade
For even more recipes, photos, giveaways, and food-related inspiration "Like" the Garden of Eating on Facebook, or follow me on Twitter or Pinterest.
Herbed Rice & Cucumber Salad With Wild Garlic
Thursday, May 15, 2014
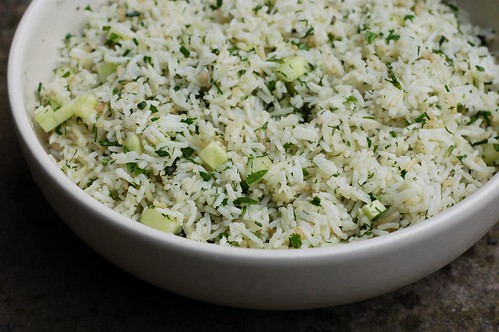
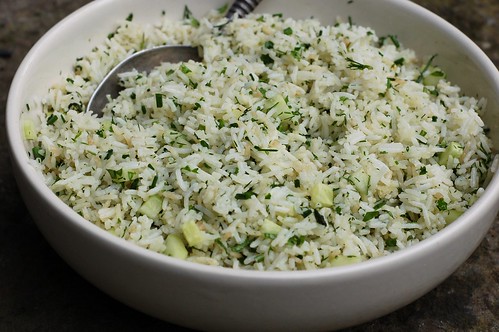
Sometimes I want my rice to be a little more interesting and nutritious. So I make this simple, refreshing salad.
As with almost all of my favorite recipes, it's flexible - you can choose different herbs, leave the scallions or wild garlic out, add more of it, whatever you feel like.
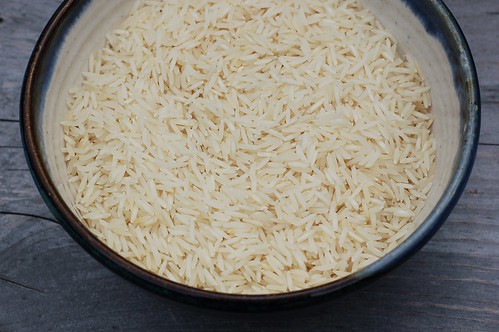
Start by cooking the rice. I used an organic basmati from Thailand as it's apparently got some of the lowest arsenic levels around but you can use any rice you like. Unfortunately, brown rice, which is far more nutritious than white rice, tends to have higher arsenic levels. Damned if you do, damned if you don't. Sigh.
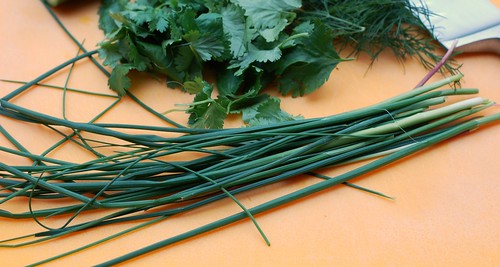
Then wash, dry and chop the herbs of your choice. For this batch, I used a mix of cilantro, dill and wild garlic I'd just harvested from our yard.
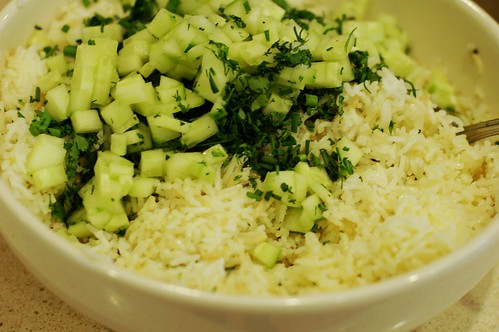
Chop up half a large cucumber. I usually peel mine unless it's coming from the garden in which case, I leave the skin on.
Toss it all together with some olive oil, salt and pepper and you're ready to eat. This salad goes really nicely with grilled veggies, meat or fish.
Herbed Rice & Cucumber Salad
Serves 4-6 as a side
Ingredients
* 1 1/2 cups rice
* 1/2 fresh cucumber, washed, peeled and cut into a medium sized dice
* A big handful of fresh herbs of your choice - cilantro, parsley, dill, etc., washed, dried and coarsely chopped
* 2-3 fresh scallions or wild garlic, cleaned and chopped
* 2 Tbsps olive oil
* Sea salt and freshly ground pepper to taste
Directions
1. Wash and drain the rice and cook according to the directions on the package or for whatever kind you wish to use.
2. While the rice is cooking, prep the herbs, cucumber and scallions or wild garlic.
3. When the rice is finished, add one Tbsp of olive oil, fluff it with a fork, dump it out into whatever bowl you plan to serve the salad in and let it cool off a bit.
4. Once the rice has cooled, add the herbs, cucumber, scallions or wild garlic, final Tbsp of olive oil and season with sea salt and black pepper to taste. Toss it gently to ensure that everything gets evenly distributed and serve.
You might also like:
Want even more recipes, photos, giveaways, and food-related inspiration? "Like" the Garden of Eating on Facebook, or follow me on Twitter or Pinterest.
Eat Your Weeds - Wild Garlic a.k.a. Onion Grass or Field Garlic
Sunday, May 4, 2014
Spring has (sort of) arrived here in the Northeast and despite the somewhat chilly temps, there are signs of life returning. A pair of robins is building a nest on top of the light outside our kitchen window. They're all business, darting and swooping as they carry building material - mostly muddy straw from our garden beds - back to weave it all together. The wild ramps we transplanted last summer have mostly come up (hurray!) Daffodils and forsythias have colored large swathes of the landscape yellow and the green is slowly beginning to creep in. And the wild garlic is up!
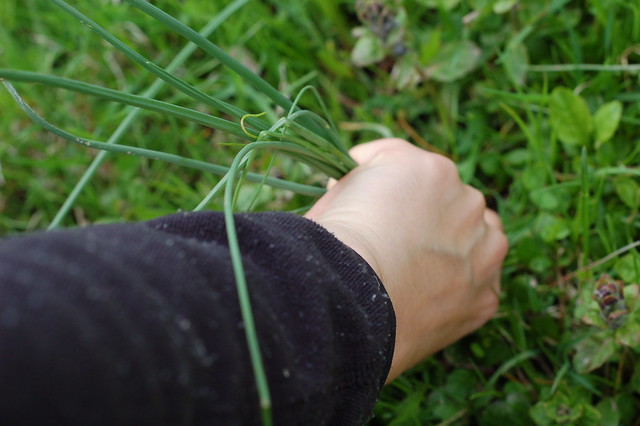
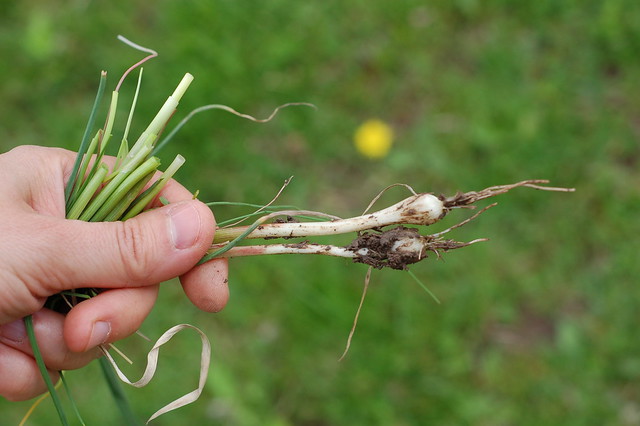
If you're not already familiar with wild garlic, you shouldn't have any trouble finding it. Just look for tall patches of green that make the grass around it look lazy in comparison. As it gets bigger, it sometimes does some crazy curling, too.
If you're not sure if you've got the right plant, break off a blade/leaf and give it a sniff. If it smells like garlic or onion, you're in business. If it does not smell "stinky", drop it -- there are a number of look-alike plants, some of which are toxic. But you can trust anything that smells like garlic or onion (wild garlic and wild onion look very similar.)
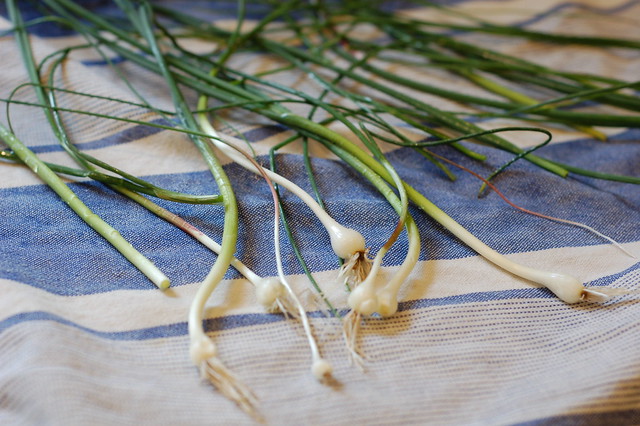
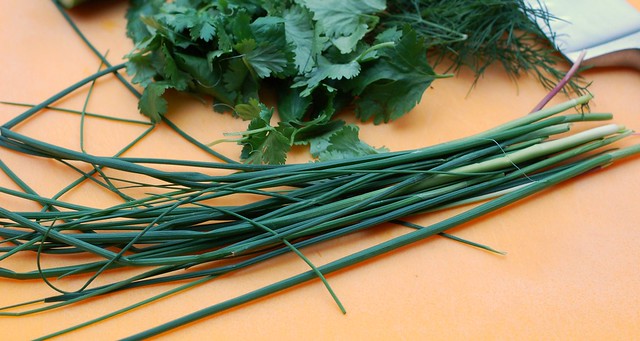
The entire plant is edible from the leaves to the bulb. You can use the greens just like you would use fresh chives. Just snip them off with some scissors, wash them well in a few changes of water to get off dirt, sand and bugs, and chop them up however you like.
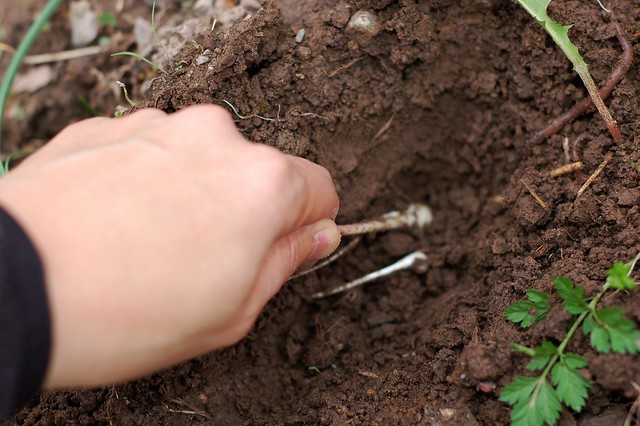
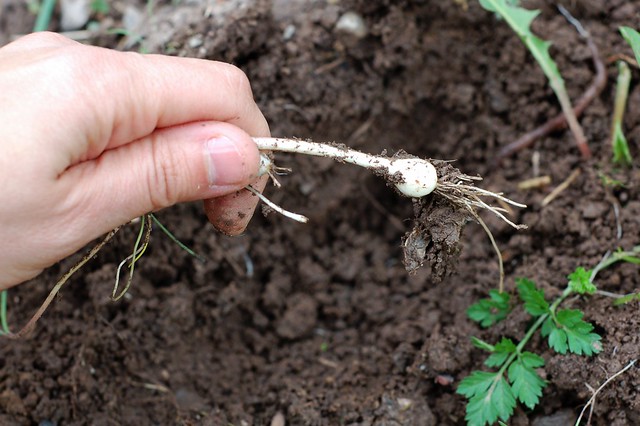
Or you can dig up the whole plant and spend a bit more time cleaning it to make use of the bulb, too. It's similar to a very small shallot. Just a note that our soil is fairly clay-heavy so the bulbs shown here are pretty small - if your dirt is more friable, yours may be bigger!
Sidenote: harvesting wild garlic is a great way to keep kids entertained outdoors and teach them about foraging. I did this with my almost-5-year-old the other day - he got really into it and I got twenty minutes to myself and a whole bunch of wild garlic for the soy-ginger marinade I was making.
What's not to love? It's free, uber local, utterly sustainable (these are considered weeds...), delicious and good for you.
Wild garlic is wonderful in this flavorful, refreshing cucumber rice salad and I also recommend chopping some up and adding them to your next vinaigrette, with or without some fresh herbs.
Or try tossing them with a little olive oil and salt and giving them a quick grill - we did this the other night and had to fight our older son for them!
You could also substitute them in pretty much any recipe that calls for ramps, shallots, scallions or chives with lovely results.
You might also like:
Friday, May 30, 2014
Japanese Barberry & Lyme Disease Go Hand In Hand
After learning that there's a powerful link between Japanese barberry and Lyme disease, my husband and I have become "barberrians". You're apt to find one or the other of us out in the woods, gloved, hatted, booted, pants tucked into socks (such a sexy look...), pitchfork in hand, dripping sweat as we battle it out with one or more of the massive thorn bushes that are rapidly taking over our woods.
I've just written a new post all about this thorny problem over at Care2.com. Read it and weep (which you may if you have this stuff growing around your home).
As I write this, my hands are covered with tiny, painful splinters -- the razor sharp ends of barberry thorns that poked through my gloves and then broke off in my skin. I plan to purchase a pair of thick, leather gloves and keep on pulling it out by the roots. Barberry, be gone!
The First Strawberries
Our son, Will, loves plants and he loves fruit. For his birthday last spring, his grandma bought him two cherry trees which seem to be doing okay so far, even after being ravaged by Japanese beetles last summer. This year, she gave him three strawberry plants. We're still working on putting in our "big garden" so I planted them in these pretty ceramic pots that my mom got at a yard sale last year.
They're such pretty plants - with vivid, pink flowers, something I'd never seen before - I thought all strawberry flowers were white! The first berries appeared a few weeks ago and begin to grow and to turn slightly pink.
They grew redder and redder until the other morning when Will deemed it time to pick them.
He plucked them off the plant, I washed them and he declared them, "tart at first, delicious at second."
I hope to put them in the ground before too long and to significantly add to their numbers. There are sooooo many good ways to use strawberries -- eating them out of hand, strawberry-mint lemonade, strawberry shortcake, strawberry jam...
You might also like:
Want even more recipes, photos, giveaways, and food-related inspiration? "Like" the Garden of Eating on Facebook, or follow me on Twitter or Pinterest.
They're such pretty plants - with vivid, pink flowers, something I'd never seen before - I thought all strawberry flowers were white! The first berries appeared a few weeks ago and begin to grow and to turn slightly pink.
They grew redder and redder until the other morning when Will deemed it time to pick them.
He plucked them off the plant, I washed them and he declared them, "tart at first, delicious at second."
I hope to put them in the ground before too long and to significantly add to their numbers. There are sooooo many good ways to use strawberries -- eating them out of hand, strawberry-mint lemonade, strawberry shortcake, strawberry jam...
You might also like:
- Wild Blackberry Sorbet With Lavender & Garden Mint
- Chocolate Raspberry Tart
- Homemade Maraschino Cherries
Want even more recipes, photos, giveaways, and food-related inspiration? "Like" the Garden of Eating on Facebook, or follow me on Twitter or Pinterest.
Wednesday, May 28, 2014
The Great Sweet Potato Experiment
In case you missed the backstory, I am experimenting with attempting to use sweet potatoes to outcompete a crapload of Japanese Silvergrass and lemon balm that had completely taken over all the garden beds at our new house. You can catch up here if that's too vague for you.
I've never grown sweet potatoes before but learned that most people buy their sweet potato slips (which is what the part that you plant is called) from seed suppliers. But I found a great post about growing your own sweet potatoes on Outlaw Garden so we're giving it a shot. If it doesn't work, I'll order some slips once it's closer to planting time -- because they're tropical plants, they need the ground to be nice and warm before you can plant them - so we're looking at sometime in June.
About a month ago, I bought some organic sweet potatoes at Sunflower, cut them in half and put them cut-side down in a Pyrex lasagna tray filled with water per Outlaw Garden's instructions.
It was a bit slow at first but sure enough, thin white roots began snaking out from the cut ends submerged in the water.
The roots multiplied and grew thicker and the tops began to send out tentative feelers that unfurled into lovely, delicate purple-veined leaves that fade to green as they grow.
As the weather has warmed, they've started to take off, sending up shoots and lush, green leaves tipped with purple. It's been very fun to watch them grow and our five-year-old is following along with interest.
After another couple weeks of growth, the first slips had sprouted roots from the bases of their leaves -- these are different from the roots that sprouted from the cut ends of the potatoes. This was the sign I'd been waiting for that they were ready to plant in small pots which should give them a chance to get even more established before they go into the ground in a few weeks or so.
I cut the slips off and planted them in some mushroom dirt then put the potatoes back into the water so the other sprouts could continue to grow.
I'm still waiting for the yellow sweet potato shoots to sprout roots from the base of the slips - so far it's just been the purple skinned ones that made the move.
And more good news -- since sweet potatoes thrive in hot weather and warm soil, several of my trusted gardening sources (Maggie and Leila, I'm looking at you two) have recommended planting the slips in holes cut in either black plastic or cardboard. And, in case you hadn't noticed, I happen to have quite a lot of cardboard lying around these days... The hope is twofold: that the cardboard will help keep the heat-loving plants toasty and happy while also depriving the Japanese silvergrass, lemon balm and anything else we'd like to say goodbye to of life-giving sunlight.
We shall see... I'll keep you posted.
---------------------------------
Find out what happened below.
Part II: Sweet Potatoes Are In The Ground!
Part III: Sweet Potato Harvest!!!
You might also like:
I've never grown sweet potatoes before but learned that most people buy their sweet potato slips (which is what the part that you plant is called) from seed suppliers. But I found a great post about growing your own sweet potatoes on Outlaw Garden so we're giving it a shot. If it doesn't work, I'll order some slips once it's closer to planting time -- because they're tropical plants, they need the ground to be nice and warm before you can plant them - so we're looking at sometime in June.
About a month ago, I bought some organic sweet potatoes at Sunflower, cut them in half and put them cut-side down in a Pyrex lasagna tray filled with water per Outlaw Garden's instructions.
It was a bit slow at first but sure enough, thin white roots began snaking out from the cut ends submerged in the water.
The roots multiplied and grew thicker and the tops began to send out tentative feelers that unfurled into lovely, delicate purple-veined leaves that fade to green as they grow.
As the weather has warmed, they've started to take off, sending up shoots and lush, green leaves tipped with purple. It's been very fun to watch them grow and our five-year-old is following along with interest.
After another couple weeks of growth, the first slips had sprouted roots from the bases of their leaves -- these are different from the roots that sprouted from the cut ends of the potatoes. This was the sign I'd been waiting for that they were ready to plant in small pots which should give them a chance to get even more established before they go into the ground in a few weeks or so.
I cut the slips off and planted them in some mushroom dirt then put the potatoes back into the water so the other sprouts could continue to grow.
I'm still waiting for the yellow sweet potato shoots to sprout roots from the base of the slips - so far it's just been the purple skinned ones that made the move.
And more good news -- since sweet potatoes thrive in hot weather and warm soil, several of my trusted gardening sources (Maggie and Leila, I'm looking at you two) have recommended planting the slips in holes cut in either black plastic or cardboard. And, in case you hadn't noticed, I happen to have quite a lot of cardboard lying around these days... The hope is twofold: that the cardboard will help keep the heat-loving plants toasty and happy while also depriving the Japanese silvergrass, lemon balm and anything else we'd like to say goodbye to of life-giving sunlight.
We shall see... I'll keep you posted.
---------------------------------
Find out what happened below.
Part II: Sweet Potatoes Are In The Ground!
Part III: Sweet Potato Harvest!!!
You might also like:
- Eat Your Weeds - Wild Garlic
- Garden Reclamation - Trying to Outcompete Invasives
- Grow Your Own Garlic
Tuesday, May 27, 2014
Garden Reclamation: Trying to Get Rid of Aggressive Invasives
We've been battling a number of rather aggressive plants since we moved into our house last summer. I think there should be a special place reserved in Hell for whoever planted all the Japanese Barberry bushes and Japanese variegated silver grass all around the house... (no offense to the Japanese - I'm sure they're not responsible for bringing them here and they definitely didn't plant them all around my house.)
I've never liked Japanese barberry -- why would you choose to plant a big prickerbush in your yard??? -- but now that I know that barberries serve as nurseries for the black legged a.k.a. "deer" tick - one of the main vectors for Lyme disease, babesiosis and granulocytic anaplasmosis - I like them even less... Worse still, they spread like wildfire - not only do we have them in our yard where some idiot actually planted them, we now have them all throughout our woods...
The Japanese silvergrass is a little less offensive -- it's pretty, it has no thorns and no known link to Lyme disease. And I have a grudging respect for its ability to grow and thrive in the crappiest of soils. Pure clay with some rocks mixed in? No problem! And where its roots go, the earthworms follow. I should know, I've pulled enough of them out...
But man, does it take over! There is a sea of it in all the garden beds and it is nigh unto impossible to get rid of as it will sprout again from the tiniest piece left in the soil. It is truly the Terminator of ornamental grasses. And it's also spread to several parts of the woods, undoubtedly where it was unwittingly dropped by previous gardeners after attempting to weed it.
Last summer, I managed to remove most of the Japanese silvergrass from the rocky planting area in our backyard. I'll never get it all since its rhizomes grow right under some of these massive rocks and there is just no lifting them. I'm resigned to simply pulling out the shoots wherever they appear - for the rest of my life...
The garden beds in the front yard are an even bigger challenge. At first, I just kind of wanted to give up, overwhelmed by the enormity of the weeding task ahead of me. I mean, look at this! And this is just a little portion of it...
And it's not just silvergrass, there's also quite a bit of lemon balm (another big taker over - but one that I at least like since it smells nice and you can eat it) and some unidentified but very spiky weed mixed into the mess. Here's some lemon balm with a little silvergrass.
But then I started to weed it in sections. I found that it was a little easier to pull out than I'd expected since the soil was richer than in the backyard where it was all clay and rocks. And, of course, it was immensely satisfying. Once I'd dug out everything I could get, I covered what I'd weeded with cardboard to deprive whatever was left of sunlight and moved on.
Meanwhile, I read up on rhizomatous grasses. The most common ones people love to hate are Bermuda grass, crab grass, and quackgrass. And, as with the silvergrass, they are basically impossible to get rid of. But then I happened on a thread where someone talked about planting sweet potatoes as a way of trying to outcompete Bermuda grass. It seems that sweet potatoes have these pretty vines that will pretty much take over whatever space they're allotted and squeeze out the weeds.
So I decided it was worth a shot. We're at the early stages of the great Sweet Potato Experiment right now but I figured I'd write about it in case it ends up working and you want to follow along. I'll be posting more about it soon.
Update: It totally worked! You can read all about it here.
You might also like:
I've never liked Japanese barberry -- why would you choose to plant a big prickerbush in your yard??? -- but now that I know that barberries serve as nurseries for the black legged a.k.a. "deer" tick - one of the main vectors for Lyme disease, babesiosis and granulocytic anaplasmosis - I like them even less... Worse still, they spread like wildfire - not only do we have them in our yard where some idiot actually planted them, we now have them all throughout our woods...
The Japanese silvergrass is a little less offensive -- it's pretty, it has no thorns and no known link to Lyme disease. And I have a grudging respect for its ability to grow and thrive in the crappiest of soils. Pure clay with some rocks mixed in? No problem! And where its roots go, the earthworms follow. I should know, I've pulled enough of them out...
But man, does it take over! There is a sea of it in all the garden beds and it is nigh unto impossible to get rid of as it will sprout again from the tiniest piece left in the soil. It is truly the Terminator of ornamental grasses. And it's also spread to several parts of the woods, undoubtedly where it was unwittingly dropped by previous gardeners after attempting to weed it.
Last summer, I managed to remove most of the Japanese silvergrass from the rocky planting area in our backyard. I'll never get it all since its rhizomes grow right under some of these massive rocks and there is just no lifting them. I'm resigned to simply pulling out the shoots wherever they appear - for the rest of my life...
The garden beds in the front yard are an even bigger challenge. At first, I just kind of wanted to give up, overwhelmed by the enormity of the weeding task ahead of me. I mean, look at this! And this is just a little portion of it...
And it's not just silvergrass, there's also quite a bit of lemon balm (another big taker over - but one that I at least like since it smells nice and you can eat it) and some unidentified but very spiky weed mixed into the mess. Here's some lemon balm with a little silvergrass.
But then I started to weed it in sections. I found that it was a little easier to pull out than I'd expected since the soil was richer than in the backyard where it was all clay and rocks. And, of course, it was immensely satisfying. Once I'd dug out everything I could get, I covered what I'd weeded with cardboard to deprive whatever was left of sunlight and moved on.
Meanwhile, I read up on rhizomatous grasses. The most common ones people love to hate are Bermuda grass, crab grass, and quackgrass. And, as with the silvergrass, they are basically impossible to get rid of. But then I happened on a thread where someone talked about planting sweet potatoes as a way of trying to outcompete Bermuda grass. It seems that sweet potatoes have these pretty vines that will pretty much take over whatever space they're allotted and squeeze out the weeds.
So I decided it was worth a shot. We're at the early stages of the great Sweet Potato Experiment right now but I figured I'd write about it in case it ends up working and you want to follow along. I'll be posting more about it soon.
Update: It totally worked! You can read all about it here.
You might also like:
- The Great Sweet Potato Experiment
- Eat Yer Weeds - Wild Garlic
- Don't Piss Away Valuable Fertilizer - Pee On Your Compost
Monday, May 19, 2014
Stir-Fried Garlic Spinach - the Pinnacle of Yum
This spinach has earned a permanent place in my kitchen repertoire. It's so tasty, so fast and so easy that I just can't quit it. Not that I'd ever want to quit it...
It comes by way of Grace Young's lovely cookbook, The Breath of a Wok , which my husband gave me as a gift after we returned from a trip to Southeast Asia what feels like a lifetime ago (we were so young...)
I've been making Auntie Yi's Stir-Fried Garlic Spinach ever since. It's so easy that I always feel a little like I'm cheating somehow. The seasoning is incredibly simple - a tablespoon of rice mirin mixed with equal parts sugar and salt.
There are just two things that you need to do to make this a truly stand-out dish:
1. Use really fresh, flavorful spinach - it makes a huge difference in the taste.
2. Get your wok (or wide, flat-bottomed pan if you don't have a wok) really, really hot and don't crowd the spinach. If you want to make more than one bunch of spinach, do it in two batches to ensure you can really stir-fry it effectively.
When I saw the first spinach of the season from Taliaferro Farms in the produce section of my health food store last week, looking all gorgeous and tender and a practically radioactive shade of green that only occurs in the spring, I knew this would be on the menu.
A little washing and drying, chopping, mixing and stir-frying and BOOM, we were in business.
As always, it was SO GOOD!
Stir-Fried Garlic Spinach minimally adapted from Grace Young's excellent book The Breath of a Wok
Serves 4 as a side
Ingredients
* 2 Tbsp vegetable or peanut oil
* 1 Tbsp minced garlic
* 1 bunch fresh spinach (about 10 ounces)
* 1/2 tsp sea salt
* 1/2 tsp cane sugar
* 1 Tbsp rice mirin or dry sherry
* 1-2 tsps toasted sesame seeds (optional)
Directions
1. Heat a 14-inch flat bottomed wok over high heat until a bead of water vaporizes within 1 to 2 seconds of contact. Swirl in the oil, add the garlic and stir-fry for 10 seconds.
2. Add all the spinach and stir-fry for 10 seconds.
3. Add the salt, sugar and rice wine and stir-fry for 1-2 minutes or until the spinach is just tender but still bright green. Garnish with the sesame seeds (if you like them, that is) and serve.
You might also like:
For even more recipes, photos, giveaways, and food-related inspiration "Like" the Garden of Eating on Facebook, or follow me on Twitter or Pinterest.
It comes by way of Grace Young's lovely cookbook, The Breath of a Wok
I've been making Auntie Yi's Stir-Fried Garlic Spinach ever since. It's so easy that I always feel a little like I'm cheating somehow. The seasoning is incredibly simple - a tablespoon of rice mirin mixed with equal parts sugar and salt.
There are just two things that you need to do to make this a truly stand-out dish:
1. Use really fresh, flavorful spinach - it makes a huge difference in the taste.
2. Get your wok (or wide, flat-bottomed pan if you don't have a wok) really, really hot and don't crowd the spinach. If you want to make more than one bunch of spinach, do it in two batches to ensure you can really stir-fry it effectively.
When I saw the first spinach of the season from Taliaferro Farms in the produce section of my health food store last week, looking all gorgeous and tender and a practically radioactive shade of green that only occurs in the spring, I knew this would be on the menu.
A little washing and drying, chopping, mixing and stir-frying and BOOM, we were in business.
As always, it was SO GOOD!
Stir-Fried Garlic Spinach minimally adapted from Grace Young's excellent book The Breath of a Wok
Serves 4 as a side
Ingredients
* 2 Tbsp vegetable or peanut oil
* 1 Tbsp minced garlic
* 1 bunch fresh spinach (about 10 ounces)
* 1/2 tsp sea salt
* 1/2 tsp cane sugar
* 1 Tbsp rice mirin or dry sherry
* 1-2 tsps toasted sesame seeds (optional)
Directions
1. Heat a 14-inch flat bottomed wok over high heat until a bead of water vaporizes within 1 to 2 seconds of contact. Swirl in the oil, add the garlic and stir-fry for 10 seconds.
2. Add all the spinach and stir-fry for 10 seconds.
3. Add the salt, sugar and rice wine and stir-fry for 1-2 minutes or until the spinach is just tender but still bright green. Garnish with the sesame seeds (if you like them, that is) and serve.
You might also like:
- Curried Quinoa Cakes with Spinach
- Spinach Salad with Warm Bacon Dressing & Caramelized Onions
- Grilled Asparagus with Sesame-Soy-Garlic Marinade
For even more recipes, photos, giveaways, and food-related inspiration "Like" the Garden of Eating on Facebook, or follow me on Twitter or Pinterest.
Thursday, May 15, 2014
Herbed Rice & Cucumber Salad With Wild Garlic
Sometimes I want my rice to be a little more interesting and nutritious. So I make this simple, refreshing salad.
As with almost all of my favorite recipes, it's flexible - you can choose different herbs, leave the scallions or wild garlic out, add more of it, whatever you feel like.
Start by cooking the rice. I used an organic basmati from Thailand as it's apparently got some of the lowest arsenic levels around but you can use any rice you like. Unfortunately, brown rice, which is far more nutritious than white rice, tends to have higher arsenic levels. Damned if you do, damned if you don't. Sigh.
Then wash, dry and chop the herbs of your choice. For this batch, I used a mix of cilantro, dill and wild garlic I'd just harvested from our yard.
Chop up half a large cucumber. I usually peel mine unless it's coming from the garden in which case, I leave the skin on.
Toss it all together with some olive oil, salt and pepper and you're ready to eat. This salad goes really nicely with grilled veggies, meat or fish.
Herbed Rice & Cucumber Salad
Serves 4-6 as a side
Ingredients
* 1 1/2 cups rice
* 1/2 fresh cucumber, washed, peeled and cut into a medium sized dice
* A big handful of fresh herbs of your choice - cilantro, parsley, dill, etc., washed, dried and coarsely chopped
* 2-3 fresh scallions or wild garlic, cleaned and chopped
* 2 Tbsps olive oil
* Sea salt and freshly ground pepper to taste
Directions
1. Wash and drain the rice and cook according to the directions on the package or for whatever kind you wish to use.
2. While the rice is cooking, prep the herbs, cucumber and scallions or wild garlic.
3. When the rice is finished, add one Tbsp of olive oil, fluff it with a fork, dump it out into whatever bowl you plan to serve the salad in and let it cool off a bit.
4. Once the rice has cooled, add the herbs, cucumber, scallions or wild garlic, final Tbsp of olive oil and season with sea salt and black pepper to taste. Toss it gently to ensure that everything gets evenly distributed and serve.
You might also like:
Want even more recipes, photos, giveaways, and food-related inspiration? "Like" the Garden of Eating on Facebook, or follow me on Twitter or Pinterest.
As with almost all of my favorite recipes, it's flexible - you can choose different herbs, leave the scallions or wild garlic out, add more of it, whatever you feel like.
Start by cooking the rice. I used an organic basmati from Thailand as it's apparently got some of the lowest arsenic levels around but you can use any rice you like. Unfortunately, brown rice, which is far more nutritious than white rice, tends to have higher arsenic levels. Damned if you do, damned if you don't. Sigh.
Then wash, dry and chop the herbs of your choice. For this batch, I used a mix of cilantro, dill and wild garlic I'd just harvested from our yard.
Chop up half a large cucumber. I usually peel mine unless it's coming from the garden in which case, I leave the skin on.
Toss it all together with some olive oil, salt and pepper and you're ready to eat. This salad goes really nicely with grilled veggies, meat or fish.
Herbed Rice & Cucumber Salad
Serves 4-6 as a side
Ingredients
* 1 1/2 cups rice
* 1/2 fresh cucumber, washed, peeled and cut into a medium sized dice
* A big handful of fresh herbs of your choice - cilantro, parsley, dill, etc., washed, dried and coarsely chopped
* 2-3 fresh scallions or wild garlic, cleaned and chopped
* 2 Tbsps olive oil
* Sea salt and freshly ground pepper to taste
Directions
1. Wash and drain the rice and cook according to the directions on the package or for whatever kind you wish to use.
2. While the rice is cooking, prep the herbs, cucumber and scallions or wild garlic.
3. When the rice is finished, add one Tbsp of olive oil, fluff it with a fork, dump it out into whatever bowl you plan to serve the salad in and let it cool off a bit.
4. Once the rice has cooled, add the herbs, cucumber, scallions or wild garlic, final Tbsp of olive oil and season with sea salt and black pepper to taste. Toss it gently to ensure that everything gets evenly distributed and serve.
You might also like:
Want even more recipes, photos, giveaways, and food-related inspiration? "Like" the Garden of Eating on Facebook, or follow me on Twitter or Pinterest.
Sunday, May 4, 2014
Eat Your Weeds - Wild Garlic a.k.a. Onion Grass or Field Garlic
Spring has (sort of) arrived here in the Northeast and despite the somewhat chilly temps, there are signs of life returning. A pair of robins is building a nest on top of the light outside our kitchen window. They're all business, darting and swooping as they carry building material - mostly muddy straw from our garden beds - back to weave it all together. The wild ramps we transplanted last summer have mostly come up (hurray!) Daffodils and forsythias have colored large swathes of the landscape yellow and the green is slowly beginning to creep in. And the wild garlic is up!
If you're not already familiar with wild garlic, you shouldn't have any trouble finding it. Just look for tall patches of green that make the grass around it look lazy in comparison. As it gets bigger, it sometimes does some crazy curling, too.
If you're not sure if you've got the right plant, break off a blade/leaf and give it a sniff. If it smells like garlic or onion, you're in business. If it does not smell "stinky", drop it -- there are a number of look-alike plants, some of which are toxic. But you can trust anything that smells like garlic or onion (wild garlic and wild onion look very similar.)
The entire plant is edible from the leaves to the bulb. You can use the greens just like you would use fresh chives. Just snip them off with some scissors, wash them well in a few changes of water to get off dirt, sand and bugs, and chop them up however you like.
Or you can dig up the whole plant and spend a bit more time cleaning it to make use of the bulb, too. It's similar to a very small shallot. Just a note that our soil is fairly clay-heavy so the bulbs shown here are pretty small - if your dirt is more friable, yours may be bigger!
Sidenote: harvesting wild garlic is a great way to keep kids entertained outdoors and teach them about foraging. I did this with my almost-5-year-old the other day - he got really into it and I got twenty minutes to myself and a whole bunch of wild garlic for the soy-ginger marinade I was making.
What's not to love? It's free, uber local, utterly sustainable (these are considered weeds...), delicious and good for you.
Wild garlic is wonderful in this flavorful, refreshing cucumber rice salad and I also recommend chopping some up and adding them to your next vinaigrette, with or without some fresh herbs.
Or try tossing them with a little olive oil and salt and giving them a quick grill - we did this the other night and had to fight our older son for them!
You could also substitute them in pretty much any recipe that calls for ramps, shallots, scallions or chives with lovely results.
You might also like:


