Cherry Berry Fruit Leathers

Friday, June 24, 2016

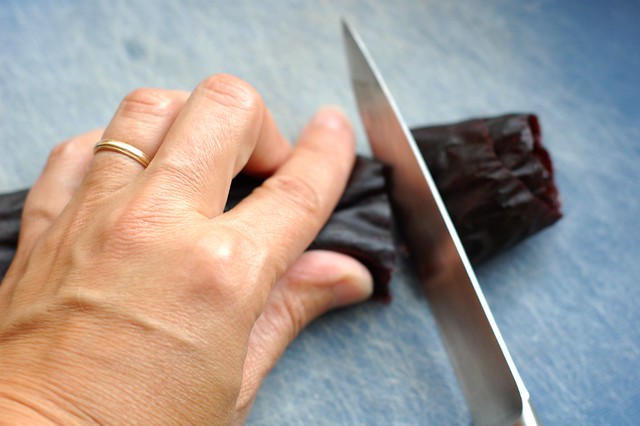
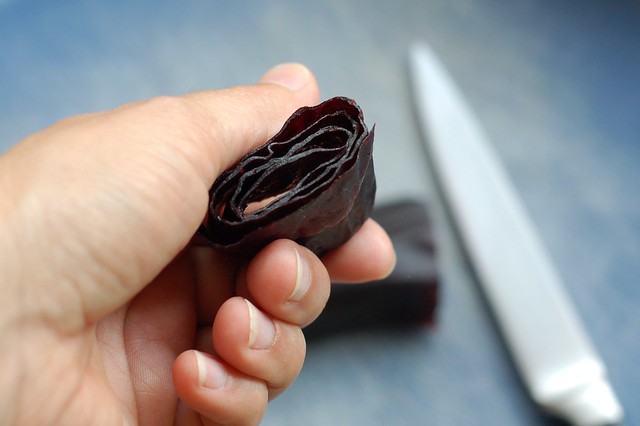
Slicing the first sheet of cherry berry fruit leather by Eve Fox, The Garden of Eating, copyright 2016

We had a strangely snowless winter here in the Hudson Valley. But the tail end caught us by surprise - a late spring storm followed by several days of frigid temps that decimated the cherry crop (and probably some others) hereabouts. So no glorious outing to pick jewel-like fruits from the trees for us this year.

Fortunately, the Washington State Stone Fruit Growers mailed me a case of perfect sweet cherries as part of their Canbassador program earlier this month.

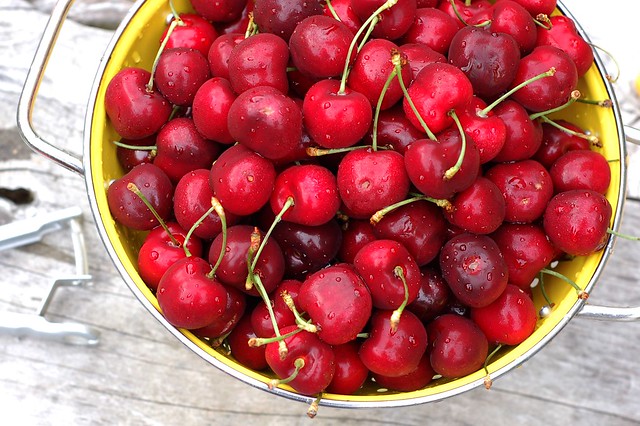
Sweet cherries from WA State Stone Fruit Growers Association by Eve Fox, the Garden of Eating, copyright 2016

Most of them found their way into hungry mouths, leaving little faces stained purple with their sweet juice. But we held enough aside to make a big batch of cherry berry fruit leathers, adding a bag of frozen blueberries to the colorful mix.

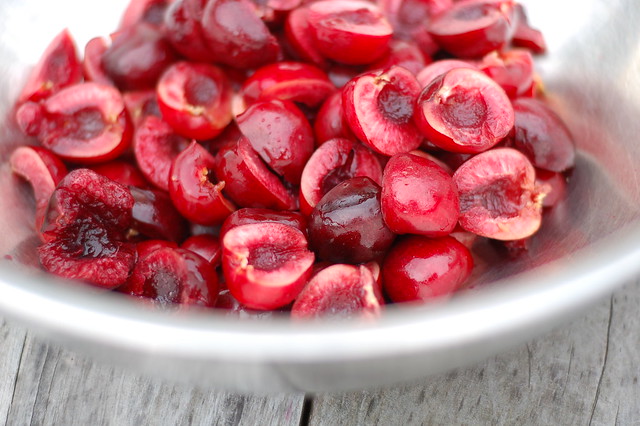
Pitted, sliced cherries by Eve Fox, the Garden of Eating, copyright 2016

Pitting cherries is a messy affair best tackled outdoors unless you want your kitchen to look like a crime scene. It's also way more fun with a crowd to keep the talk and the pits flowing. The only tool you really need is a cherry pitter. They're a good investment if you ever plan to do anything with cherries - I got this simple, metal one for about $10 a few years ago.

Cherry pitting carnage by Eve Fox, Garden of Eating blog, copyright 2011

Once you've got those little suckers removed, the rest is fairly easy. Simmer the fruit with a little water until soft and then puree it until smooth, adding a little sugar or not, according to your taste and the natural sweetness of the fruit you're using. Cook the puree on low heat until it's reduced to the consistency of baby food.

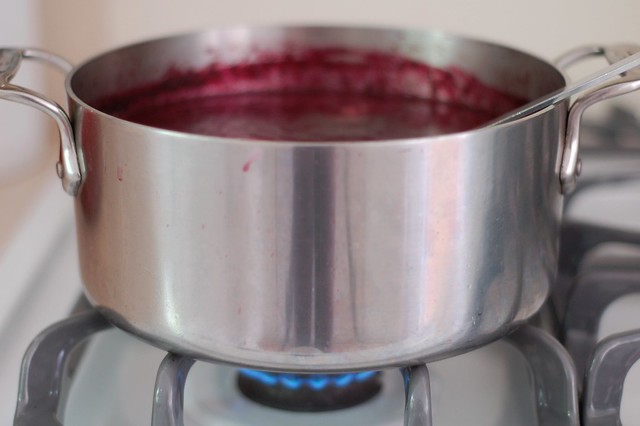
Reducing the cherry berry fruit leather mixture before dehydrating by Eve Fox, The Garden of Eating, copyright 2016

Then spread it onto a sheet of parchment paper or a Silpat and cook it on low heat for a number of hours in either the oven or a food dehydrator until it's only the tiniest bit tacky but still flexible. Our food dehydrator, the excellent Excalibur, allows us to dry foods on a larger scale without heating the house up on hot days but the oven works just fine, too.

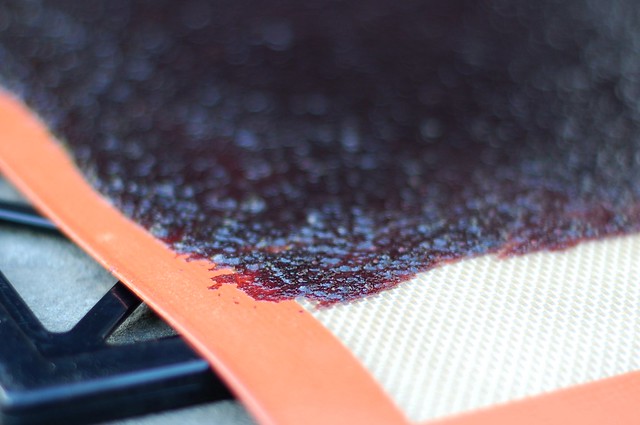
Cherry berry fruit leather in the food dehydrator by Eve Fox, The Garden of Eating, copyright 2016

Then you let it sit until it's cool enough to handle, roll it up and slice it into whatever width strips you like.

Slicing the first sheet of cherry berry fruit leather by Eve Fox, The Garden of Eating, copyright 2016

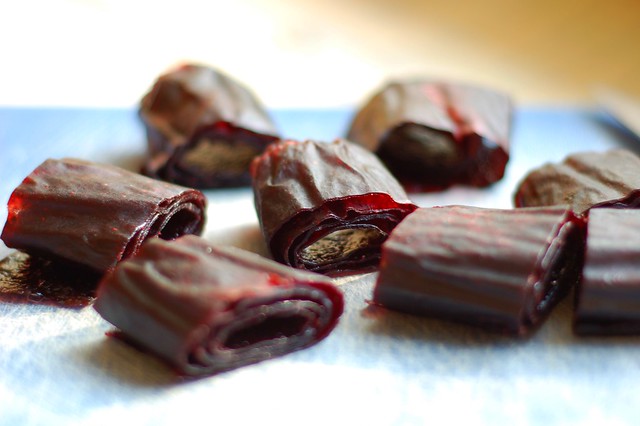
Et voila, delicious, preservative-free fruit leathers! You can store them rolled up in an airtight container at room temperature for about a month (maybe a bit longer during the cold months and a bit shorter during the warm months).

Cherry berry fruit leather by Eve Fox, The Garden of Eating, copyright 2016

Make a big batch, they go quickly (even if you only have one front tooth)...

Will eating the first cherry berry fruit leather by Eve Fox, The Garden of Eating, copyright 2016

-- print recipe --
Cherry Berry Fruit Leather
Adapted from Put 'em Up!

Ingredients

* 4 cups sweet dark cherries, stemmed and pitted (a cherry pitter will definitely come in handy)
* 2 cups blueberries, rinsed and dried
* A large splash (roughly 1/4 cup) of water
* 1/3 cup sugar (optional)
* You will also need either unbleached parchment paper or a Silpat

Directions
1. Put the cherries, blueberries and water in a medium-sized pot (taller sides are better since you'll be blending in the pot) and bring them to a boil. Simmer until the fruit begins to break down, about 10 minutes. Puree the fruit, using an immersion blender or by pouring it into a blender and then back into the pot again.

2. If you're using the oven, preheat it to 175° F. Line a jelly-roll pan or rimmed baking sheet with unbleached parchment paper or a Silpat and set aside.

3. Add the sugar and continue to simmer the fruit puree over low heat, stirring frequently, until it thickens to the consistency of baby food - this may take 10-15 minutes.

4. Spread the sweetened, thickened puree onto the baking sheet, tilting to create an even layer about 1/4-inch thick. The edges will dry out more quickly so try to leave them a tiny bit thicker.

5. If you're using the oven, bake until just tacky to the touch which can take anywhere from 3-6 hours, depending on how juicy your puree is. If you're using a food deyhdrator, set it to 130° F and cook for between 6-12 hours, testing every hour or so until smooth to the touch with no visibly wet spots.

6. Cool to room temperature. Slide the parchment paper or Silpat onto a cutting board and peel the leather off. Then roll each sheet up and slice it into two- to three inch-wide pieces. Store, rolled up in an airtight container on the counter for up to a month.

You might also like:

Roasted Beet Hummus - Pretty In Pink

Monday, June 20, 2016

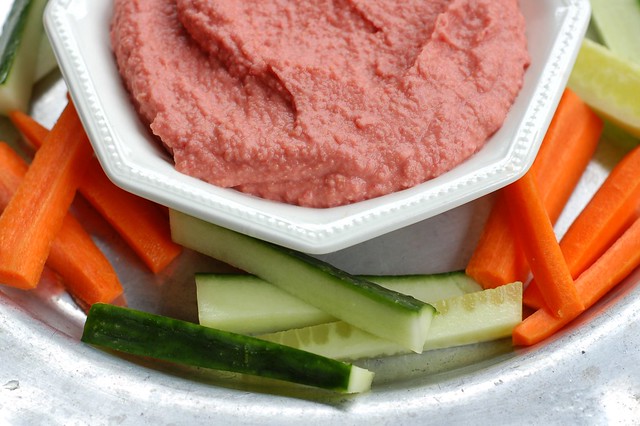
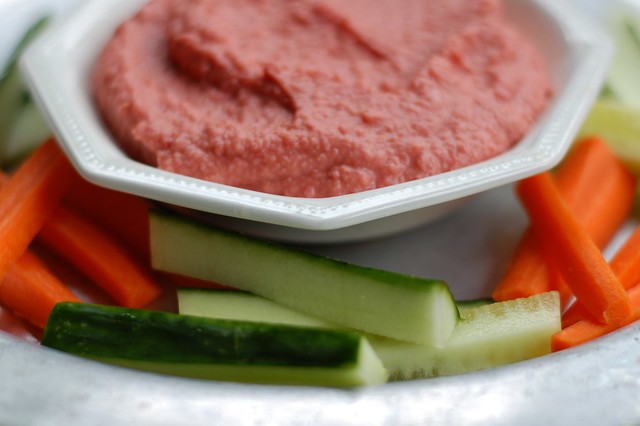
Roasted beet hummus with crudites by Eve Fox, the Garden of Eating, copyright 2016

This hummus has got a lot going for it from its pretty color to the way the lemon and garlic provide a perfect foil for the sweet, earthy flavor of the roasted beets and the nuttiness of the chickpeas to the added folate, vitamin C, fiber, manganese and potassium the beets add to the protein-packed hummus.

Add some cut up veggies and a pita and you have a hearty, filling, super healthy meal. Or make this hummus as part of a mezze-style spread and invite friends over for dinner.

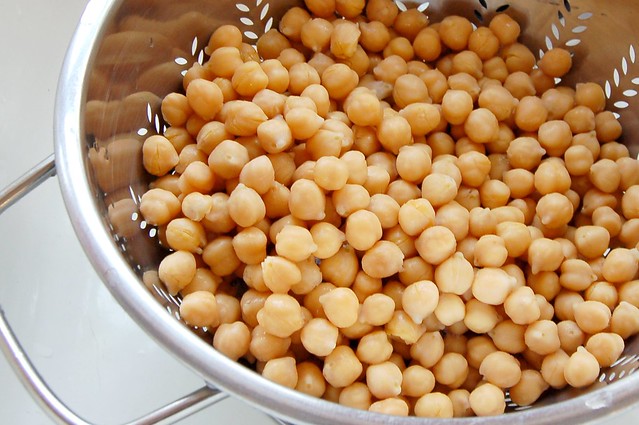
Chickpeas draining in colander in sink by Eve Fox, Garden of Eating blog copyright 2011

I got the idea from some store-bought roasted beet hummus that I tried at a friend's house. I had to be practically pulled away from the hors d'oeuvres table, cracker still in hand, happily spoiling the lovely meal she had prepared for us.

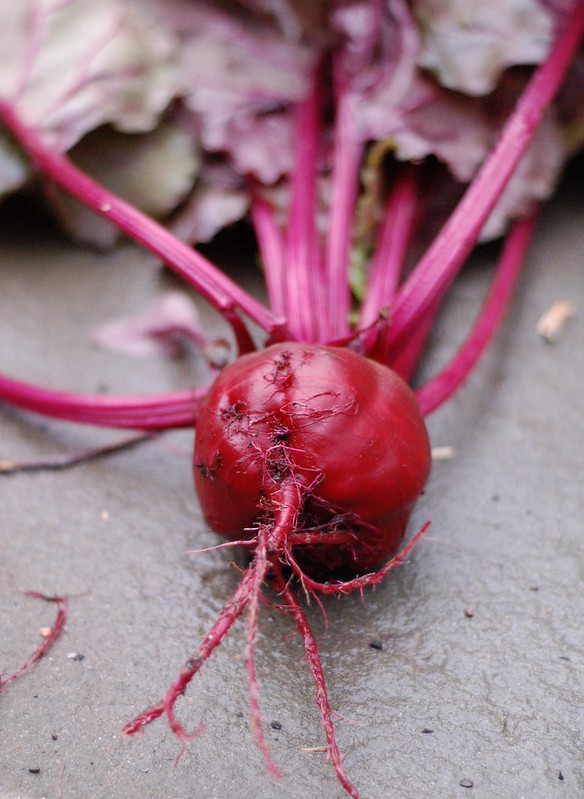
First beets of the season by Eve Fox, the Garden of Eating, copyright 2015

It's easy to make, too, especially if you happen to have a roasted beet lying around. Sadly, I did not have any roasted beets in the fridge so I went out and bought some since the ones in our garden are not ready to harvest just yet. Then I roasted 'em but good, slipped the skins off, cut them up and tossed them into the Cuisinart with a bunch of garlic.

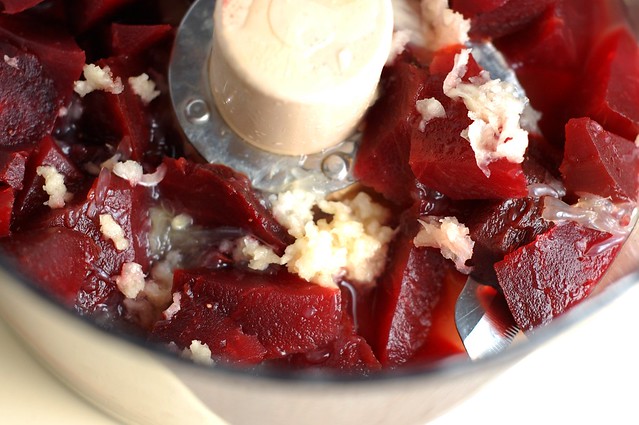
Ingredients for roasted beet hummus in the Cuisinart by Eve Fox, the Garden of Eating, copyright 2016

I've also become a bit of a chickpea snob so I soaked a couple cups of dried garbanzos over night (so I would have enough leftover beans to freeze - makes it so easy later on) and made the hummus after cooking the beans the next day. But there is NO SHAME IN USING A CAN OF CHICKPEAS. Just make sure to get the kind in the BPA-free cans if you go that route.

Chickpeas and tahini in the Cuisinart by Eve Fox, the Garden of Eating, copyright 2016

The cooked chickpeas joined the beets and garlic in the Cuisinart along with some tahini paste, salt and lemon juice. A little blitzing and this lovely, smooth, salmon-colored hummus was ready to eat.

The recipe below is flexible so you should feel free to adapt it to your liking - if you love garlic, add more. If you like the beet flavor, add more. If tahini is your thing, go crazy. It's just hummus, we're not baking anything.

Roasted Beet Hummus by Eve Fox, the Garden of Eating, copyright 2016

-- print recipe --
Roasted Beet Hummus
Serves 4-6

Ingredients

* 1 large or 2 small beets, scrubbed with greens and tops removed
* 1 3/4 cups cooked chickpeas or 1 15 oz can, mostly drained
* Juice of 1 large lemon
* 2 large cloves garlic, pressed
* 2-3 Tbsps tahini paste
* 1/4 cup extra virgin olive oil
* Sea salt and freshly ground black pepper to taste

Directions

1. Begin by roasting the beets. Preheat the oven to 450°F. Place the scrubbed, trimmed beets in a generous pouch of tinfoil, drizzle them with olive oil and fold the foil over them to form a neat, enclosed little package. Place the package on a baking sheet (preferably one you do not care overmuch about as it may end up getting some charred beet juice baked on to it), place it on the rack and bake for roughly 60 minutes, until the beets are tender when poked with a fork. When they're done, remove them from the oven and allow them to cool, then slip the skins off with your fingers or a knife and slice them into quarters.

2. Place the beets in the bowl of the food processor and add all the remaining ingredients except the olive oil. Blend until smooth, drizzling the olive oil in as you go.

3. Taste and adjust the seasonings as needed adding more lemon juice, salt, tahini or garlic according to your likes. If it feels too thick, add a bit more oil and a little water and blend until fully combined. Store in an airtight container in the fridge for up to a week.

You might also like:
Cumin-Scented Quinoa with Grated Beets & Curried Chickpeas
Spicy Sweet Moroccan-Inspired Chickpea Spread with Blood Orange & Chipotles
Hummus with Caramelized Onions & Garlic Topped With Beets, Pine Nuts & Greek Yogurt

Blood (And Guts) On My Hands

Thursday, June 9, 2016

I’m up early after a night of somewhat disturbing dreams, some of them violent and one in which I discovered I had terrifying large head lice inspired by the letter from the school nurse that came home in my son's lunchbox last week telling us to be on the lookout. So far, we’re okay -- except in my dreams. It’s surprisingly chilly downstairs just after 5 AM. I am wrapped in a blanket, waiting for the coffee to steep, listening to the animal kingdom come to life outside and surveying the solemnly overcast skies which look rather bruised.

Apologies for the radio silence the last few weeks. I got set back by yet another round of illness. The older boy and I both caught a bad flu and were knocked flat for a good two plus weeks of fever, aches, and lingering cough and exhaustion. But we’re all well again at the moment and I am experimenting with a new probiotic (S. salivarius) that may help keep upper respiratory infections at bay. So I got that going for me, as Bill Murray said.

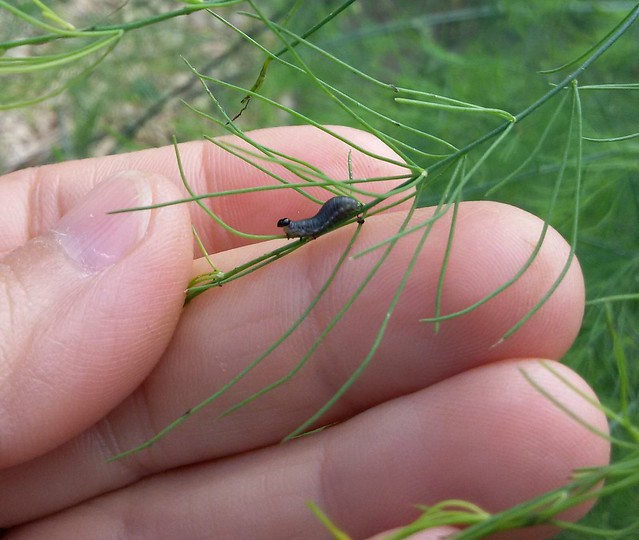
Now that I've got my health back, I’ve been spending a lot of time killing things -- which is the most likely culprit of those violent dreams. Our glorious second year asparagus patch has ferned out nicely but just the other day, my son pointed out that there were grayish black caterpillars on the fronds of all the six foot tall plants. A quick inspection confirmed that there were indeed thousands of ravenous larvae on the plants, along with a smaller number of their parents, the common asparagus beetle.

Asparagus beetle larvae by Eve Fox, the Garden of Eating, copyright 2016

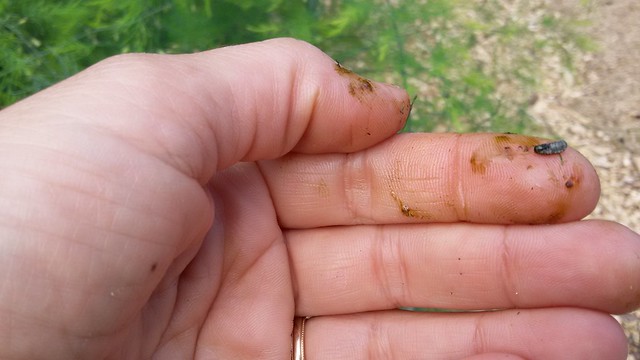
I’ve now spent numerous hours smushing them, at first wearing gloves which were clumsy and limiting and, more recently, with my bare hands which allows me to be a lot more nimble but is simply foul.

My hands after smushing asparagus beetle larvae by Eve Fox, the Garden of Eating, copyright 2016

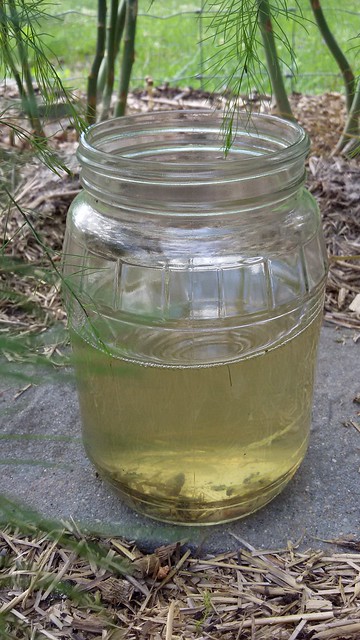
Everything about the experience is gross from the way these little larvae look to the fact that they smell disturbingly like human semen when crushed. Shudder... It’s yucky enough that I’ve switched from crushing them barehanded to the slightly more civilized method of dropping them into The Jar of Death - a canning jar of soapy water which is equally effective and provides a little much-needed remove from the act of killing.

A watery, soapy death by Eve Fox, the Garden of Eating, copyright 2016

Unfortunately, asparagus beetles and their young are not the only pests we’re battling of late. As the weather has warmed, our rat problem seems to have abated (hurray!) only to be replaced by a similarly intense chipmunk problem (hiss!!! boo!!!) Despite being undeniably adorable creatures, they are truly a plague for those of us who garden and I’ve come to hate them with a murderous passion.

Chipmunk, cute but destructive by Eve Fox, the Garden of Eating, copyright 2016

I’ve written about this here in the past but to recap quickly: chipmunks dig and nibble heartlessly, killing plants with reckless abandon. They are particularly destructive to strawberries, beans of all kind, sweet potatoes, tomatoes, and this year for the first time, beets. In short, most of what we’re trying to grow...

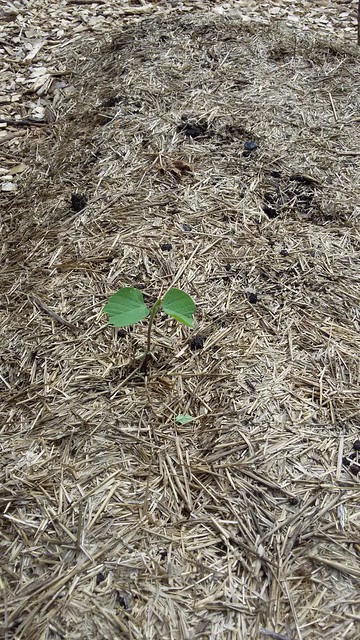
We’ve pretty much given up on growing edamame this year after they mowed down two separate plantings - all that is left is one, lonely plant. They gave the string beans a similar hazing although I had enough of those seeds to keep on trying and some of the third planting has survived long enough to potentially turn into true bean plants --if they can survive the slugs that have come to call with the recent rain.

Lone survivor, the one edamame plant out of 26 or so that made it past the chipmunks by Eve Fox, the Garden of Eating, copyright 2016

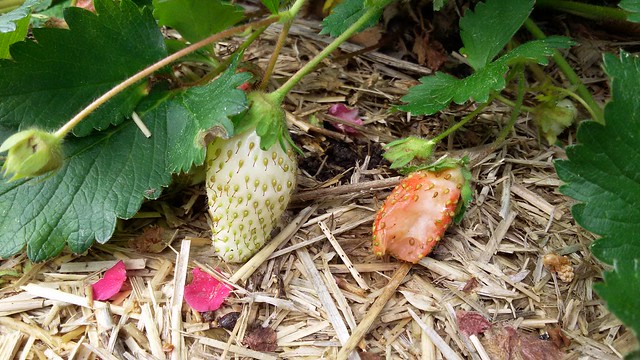
Of the many beets I started from seed inside this spring, only three brave plants have survived the chipmunks’ rage-inducing nibbling. Our beautiful strawberries are scattered haphazardly around the garden, each with a bite or two taken out of it. GRRRRRRRRRRRRRRRR.

Strawberry with some bites taken out of it, the Garden of Eating, copyright 2016

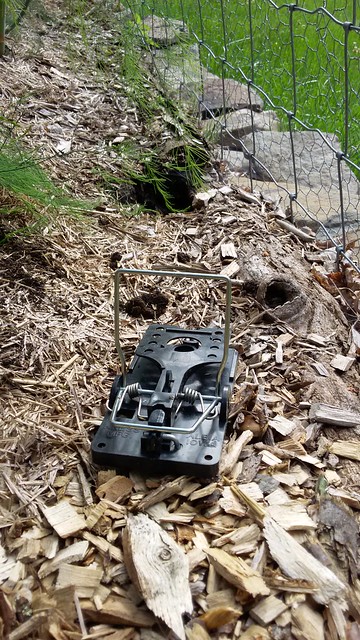
Fortunately, I happened to have a handy twelve pack of rat traps lying around and have been killing them with decent success, though not nearly enough to ensure any kind of strawberry, edamame, bean or beet harvest, it seems.

A trap set outside a chipmunks tunnel by Eve Fox, the Garden of Eating, copyright 2016

It’s an unpleasant business. It takes a decent amount of time to bait and set the traps every day, then there’s the task of what I’ve come to think of as “walking my trap lines” once or twice a day to dispose of anything that’s been caught, re-bait and reset the traps. But the much larger problem is that I do not actually like killing things. And while I am not squeamish (which is why I am the one who deals with the traps, not my husband) there have been several heartbreaking incidents in which the trap failed to kill the poor rodent, catching its leg or tail or something equally non-fatal. Despite my frustration and anger about their impact on the garden, I am not actually immune to their innate worth as living things and to be the author of their pain and misfortune is disturbing.

For these reasons, I am looking into adopting a feral cat from our local SPCA to outsource the killing to – a mercenary, if you will. My hope is to provide this feline with a safe (outdoor) home, de-worming it on occasion and providing water and supplemental food, as needed, and let nature take its course. In my more optimistic moments, I like to think that just the scent of the cat will deter the chipmunks from visiting. It will probably turn out to be way more complicated than that but one can always hope.

I’ll keep you posted. Meanwhile, if you want to like chipmunks, my advice is to stick to growing flowers (though not sunflowers).

You might also like:

Rats - We've Got 'Em

Snapping Turtle In the Garlic Bed!

For Healthier Tomatoes, Save Your Eggshells

Friday, June 24, 2016

Cherry Berry Fruit Leathers

Slicing the first sheet of cherry berry fruit leather by Eve Fox, The Garden of Eating, copyright 2016

We had a strangely snowless winter here in the Hudson Valley. But the tail end caught us by surprise - a late spring storm followed by several days of frigid temps that decimated the cherry crop (and probably some others) hereabouts. So no glorious outing to pick jewel-like fruits from the trees for us this year.

Fortunately, the Washington State Stone Fruit Growers mailed me a case of perfect sweet cherries as part of their Canbassador program earlier this month.

Sweet cherries from WA State Stone Fruit Growers Association by Eve Fox, the Garden of Eating, copyright 2016

Most of them found their way into hungry mouths, leaving little faces stained purple with their sweet juice. But we held enough aside to make a big batch of cherry berry fruit leathers, adding a bag of frozen blueberries to the colorful mix.

Pitted, sliced cherries by Eve Fox, the Garden of Eating, copyright 2016

Pitting cherries is a messy affair best tackled outdoors unless you want your kitchen to look like a crime scene. It's also way more fun with a crowd to keep the talk and the pits flowing. The only tool you really need is a cherry pitter. They're a good investment if you ever plan to do anything with cherries - I got this simple, metal one for about $10 a few years ago.

Cherry pitting carnage by Eve Fox, Garden of Eating blog, copyright 2011

Once you've got those little suckers removed, the rest is fairly easy. Simmer the fruit with a little water until soft and then puree it until smooth, adding a little sugar or not, according to your taste and the natural sweetness of the fruit you're using. Cook the puree on low heat until it's reduced to the consistency of baby food.

Reducing the cherry berry fruit leather mixture before dehydrating by Eve Fox, The Garden of Eating, copyright 2016

Then spread it onto a sheet of parchment paper or a Silpat and cook it on low heat for a number of hours in either the oven or a food dehydrator until it's only the tiniest bit tacky but still flexible. Our food dehydrator, the excellent Excalibur, allows us to dry foods on a larger scale without heating the house up on hot days but the oven works just fine, too.

Cherry berry fruit leather in the food dehydrator by Eve Fox, The Garden of Eating, copyright 2016

Then you let it sit until it's cool enough to handle, roll it up and slice it into whatever width strips you like.

Slicing the first sheet of cherry berry fruit leather by Eve Fox, The Garden of Eating, copyright 2016

Et voila, delicious, preservative-free fruit leathers! You can store them rolled up in an airtight container at room temperature for about a month (maybe a bit longer during the cold months and a bit shorter during the warm months).

Cherry berry fruit leather by Eve Fox, The Garden of Eating, copyright 2016

Make a big batch, they go quickly (even if you only have one front tooth)...

Will eating the first cherry berry fruit leather by Eve Fox, The Garden of Eating, copyright 2016

-- print recipe --
Cherry Berry Fruit Leather
Adapted from Put 'em Up!

Ingredients

* 4 cups sweet dark cherries, stemmed and pitted (a cherry pitter will definitely come in handy)
* 2 cups blueberries, rinsed and dried
* A large splash (roughly 1/4 cup) of water
* 1/3 cup sugar (optional)
* You will also need either unbleached parchment paper or a Silpat

Directions
1. Put the cherries, blueberries and water in a medium-sized pot (taller sides are better since you'll be blending in the pot) and bring them to a boil. Simmer until the fruit begins to break down, about 10 minutes. Puree the fruit, using an immersion blender or by pouring it into a blender and then back into the pot again.

2. If you're using the oven, preheat it to 175° F. Line a jelly-roll pan or rimmed baking sheet with unbleached parchment paper or a Silpat and set aside.

3. Add the sugar and continue to simmer the fruit puree over low heat, stirring frequently, until it thickens to the consistency of baby food - this may take 10-15 minutes.

4. Spread the sweetened, thickened puree onto the baking sheet, tilting to create an even layer about 1/4-inch thick. The edges will dry out more quickly so try to leave them a tiny bit thicker.

5. If you're using the oven, bake until just tacky to the touch which can take anywhere from 3-6 hours, depending on how juicy your puree is. If you're using a food deyhdrator, set it to 130° F and cook for between 6-12 hours, testing every hour or so until smooth to the touch with no visibly wet spots.

6. Cool to room temperature. Slide the parchment paper or Silpat onto a cutting board and peel the leather off. Then roll each sheet up and slice it into two- to three inch-wide pieces. Store, rolled up in an airtight container on the counter for up to a month.

You might also like:
Monday, June 20, 2016

Roasted Beet Hummus - Pretty In Pink

Roasted beet hummus with crudites by Eve Fox, the Garden of Eating, copyright 2016

This hummus has got a lot going for it from its pretty color to the way the lemon and garlic provide a perfect foil for the sweet, earthy flavor of the roasted beets and the nuttiness of the chickpeas to the added folate, vitamin C, fiber, manganese and potassium the beets add to the protein-packed hummus.

Add some cut up veggies and a pita and you have a hearty, filling, super healthy meal. Or make this hummus as part of a mezze-style spread and invite friends over for dinner.

Chickpeas draining in colander in sink by Eve Fox, Garden of Eating blog copyright 2011

I got the idea from some store-bought roasted beet hummus that I tried at a friend's house. I had to be practically pulled away from the hors d'oeuvres table, cracker still in hand, happily spoiling the lovely meal she had prepared for us.

First beets of the season by Eve Fox, the Garden of Eating, copyright 2015

It's easy to make, too, especially if you happen to have a roasted beet lying around. Sadly, I did not have any roasted beets in the fridge so I went out and bought some since the ones in our garden are not ready to harvest just yet. Then I roasted 'em but good, slipped the skins off, cut them up and tossed them into the Cuisinart with a bunch of garlic.

Ingredients for roasted beet hummus in the Cuisinart by Eve Fox, the Garden of Eating, copyright 2016

I've also become a bit of a chickpea snob so I soaked a couple cups of dried garbanzos over night (so I would have enough leftover beans to freeze - makes it so easy later on) and made the hummus after cooking the beans the next day. But there is NO SHAME IN USING A CAN OF CHICKPEAS. Just make sure to get the kind in the BPA-free cans if you go that route.

Chickpeas and tahini in the Cuisinart by Eve Fox, the Garden of Eating, copyright 2016

The cooked chickpeas joined the beets and garlic in the Cuisinart along with some tahini paste, salt and lemon juice. A little blitzing and this lovely, smooth, salmon-colored hummus was ready to eat.

The recipe below is flexible so you should feel free to adapt it to your liking - if you love garlic, add more. If you like the beet flavor, add more. If tahini is your thing, go crazy. It's just hummus, we're not baking anything.

Roasted Beet Hummus by Eve Fox, the Garden of Eating, copyright 2016

-- print recipe --
Roasted Beet Hummus
Serves 4-6

Ingredients

* 1 large or 2 small beets, scrubbed with greens and tops removed
* 1 3/4 cups cooked chickpeas or 1 15 oz can, mostly drained
* Juice of 1 large lemon
* 2 large cloves garlic, pressed
* 2-3 Tbsps tahini paste
* 1/4 cup extra virgin olive oil
* Sea salt and freshly ground black pepper to taste

Directions

1. Begin by roasting the beets. Preheat the oven to 450°F. Place the scrubbed, trimmed beets in a generous pouch of tinfoil, drizzle them with olive oil and fold the foil over them to form a neat, enclosed little package. Place the package on a baking sheet (preferably one you do not care overmuch about as it may end up getting some charred beet juice baked on to it), place it on the rack and bake for roughly 60 minutes, until the beets are tender when poked with a fork. When they're done, remove them from the oven and allow them to cool, then slip the skins off with your fingers or a knife and slice them into quarters.

2. Place the beets in the bowl of the food processor and add all the remaining ingredients except the olive oil. Blend until smooth, drizzling the olive oil in as you go.

3. Taste and adjust the seasonings as needed adding more lemon juice, salt, tahini or garlic according to your likes. If it feels too thick, add a bit more oil and a little water and blend until fully combined. Store in an airtight container in the fridge for up to a week.

You might also like:
Cumin-Scented Quinoa with Grated Beets & Curried Chickpeas
Spicy Sweet Moroccan-Inspired Chickpea Spread with Blood Orange & Chipotles
Hummus with Caramelized Onions & Garlic Topped With Beets, Pine Nuts & Greek Yogurt

Thursday, June 9, 2016

Blood (And Guts) On My Hands

I’m up early after a night of somewhat disturbing dreams, some of them violent and one in which I discovered I had terrifying large head lice inspired by the letter from the school nurse that came home in my son's lunchbox last week telling us to be on the lookout. So far, we’re okay -- except in my dreams. It’s surprisingly chilly downstairs just after 5 AM. I am wrapped in a blanket, waiting for the coffee to steep, listening to the animal kingdom come to life outside and surveying the solemnly overcast skies which look rather bruised.

Apologies for the radio silence the last few weeks. I got set back by yet another round of illness. The older boy and I both caught a bad flu and were knocked flat for a good two plus weeks of fever, aches, and lingering cough and exhaustion. But we’re all well again at the moment and I am experimenting with a new probiotic (S. salivarius) that may help keep upper respiratory infections at bay. So I got that going for me, as Bill Murray said.

Now that I've got my health back, I’ve been spending a lot of time killing things -- which is the most likely culprit of those violent dreams. Our glorious second year asparagus patch has ferned out nicely but just the other day, my son pointed out that there were grayish black caterpillars on the fronds of all the six foot tall plants. A quick inspection confirmed that there were indeed thousands of ravenous larvae on the plants, along with a smaller number of their parents, the common asparagus beetle.

Asparagus beetle larvae by Eve Fox, the Garden of Eating, copyright 2016

I’ve now spent numerous hours smushing them, at first wearing gloves which were clumsy and limiting and, more recently, with my bare hands which allows me to be a lot more nimble but is simply foul.

My hands after smushing asparagus beetle larvae by Eve Fox, the Garden of Eating, copyright 2016

Everything about the experience is gross from the way these little larvae look to the fact that they smell disturbingly like human semen when crushed. Shudder... It’s yucky enough that I’ve switched from crushing them barehanded to the slightly more civilized method of dropping them into The Jar of Death - a canning jar of soapy water which is equally effective and provides a little much-needed remove from the act of killing.

A watery, soapy death by Eve Fox, the Garden of Eating, copyright 2016

Unfortunately, asparagus beetles and their young are not the only pests we’re battling of late. As the weather has warmed, our rat problem seems to have abated (hurray!) only to be replaced by a similarly intense chipmunk problem (hiss!!! boo!!!) Despite being undeniably adorable creatures, they are truly a plague for those of us who garden and I’ve come to hate them with a murderous passion.

Chipmunk, cute but destructive by Eve Fox, the Garden of Eating, copyright 2016

I’ve written about this here in the past but to recap quickly: chipmunks dig and nibble heartlessly, killing plants with reckless abandon. They are particularly destructive to strawberries, beans of all kind, sweet potatoes, tomatoes, and this year for the first time, beets. In short, most of what we’re trying to grow...

We’ve pretty much given up on growing edamame this year after they mowed down two separate plantings - all that is left is one, lonely plant. They gave the string beans a similar hazing although I had enough of those seeds to keep on trying and some of the third planting has survived long enough to potentially turn into true bean plants --if they can survive the slugs that have come to call with the recent rain.

Lone survivor, the one edamame plant out of 26 or so that made it past the chipmunks by Eve Fox, the Garden of Eating, copyright 2016

Of the many beets I started from seed inside this spring, only three brave plants have survived the chipmunks’ rage-inducing nibbling. Our beautiful strawberries are scattered haphazardly around the garden, each with a bite or two taken out of it. GRRRRRRRRRRRRRRRR.

Strawberry with some bites taken out of it, the Garden of Eating, copyright 2016

Fortunately, I happened to have a handy twelve pack of rat traps lying around and have been killing them with decent success, though not nearly enough to ensure any kind of strawberry, edamame, bean or beet harvest, it seems.

A trap set outside a chipmunks tunnel by Eve Fox, the Garden of Eating, copyright 2016

It’s an unpleasant business. It takes a decent amount of time to bait and set the traps every day, then there’s the task of what I’ve come to think of as “walking my trap lines” once or twice a day to dispose of anything that’s been caught, re-bait and reset the traps. But the much larger problem is that I do not actually like killing things. And while I am not squeamish (which is why I am the one who deals with the traps, not my husband) there have been several heartbreaking incidents in which the trap failed to kill the poor rodent, catching its leg or tail or something equally non-fatal. Despite my frustration and anger about their impact on the garden, I am not actually immune to their innate worth as living things and to be the author of their pain and misfortune is disturbing.

For these reasons, I am looking into adopting a feral cat from our local SPCA to outsource the killing to – a mercenary, if you will. My hope is to provide this feline with a safe (outdoor) home, de-worming it on occasion and providing water and supplemental food, as needed, and let nature take its course. In my more optimistic moments, I like to think that just the scent of the cat will deter the chipmunks from visiting. It will probably turn out to be way more complicated than that but one can always hope.

I’ll keep you posted. Meanwhile, if you want to like chipmunks, my advice is to stick to growing flowers (though not sunflowers).

You might also like:
Rats - We've Got 'Em

Snapping Turtle In the Garlic Bed!

For Healthier Tomatoes, Save Your Eggshells