How To Can & Preserve Food

Tuesday, October 2, 2007

Even though supermarkets have made canning and preserving unnecessary, there is still something wonderfully fulfilling about preserving food yourself (and the results are MUCH tastier than anything you can buy in a grocery store.)

Homemade maraschino cherries by Eve Fox, Garden of Eating blog, copyright 2011

When my husband's grandmother, Marcia, a great cook and remarkable woman who I loved, passed away a few years ago, I inherited her preserving cookbook, Putting Food By. I treasure this worn book, not because the recipes are anything special, but because it is speckled by years of use and it includes her notes. Marcia kept a detailed record of everything she "put by" in its blank end pages.

Photo of Grandma Marcia's notes in Putting Food By cookbook

Her notes include where she picked the fruits or vegetables (the names of farms and orchards which must have been near her home in Grafton, VT sprinkle the pages -- Dutton's, Warren's, Harlow's, Allen Brothers, and Lake Warren), comments on the crop ("good yield" or "small onions"), how much of each thing she made, as well as a few recipes, including one for homemade breakfast sausage.

Grandma Marcia was a prolific canner -- rhubarb, peas, applesauce, apple butter, tomatoes, onions, strawberry jam, blueberry jam, etc. She actually had to tape in a few extra pages to keep track of all her canning harvests.

Pickled Beets With Cumin & Cloves by Eve Fox, Garden of Eating blog, copyright 2011

Inspired by Marcia's passion and armed with her annotated copy of Putting Food By, I began my journey into the world of canning. Though it may seem a little daunting at first (any endeavor that could result in botchulism probably seems a little daunting), it's not particularly complicated or difficult.

By and large, my efforts have been successful. Canning does require spending a lot of time over a very hot stove, but there is something incredibly rewarding about opening a jar of bright red tomato sauce or a pint of sweet golden peach halves in the dead of winter. The tastes of summer brighten the short, dark days of winter.
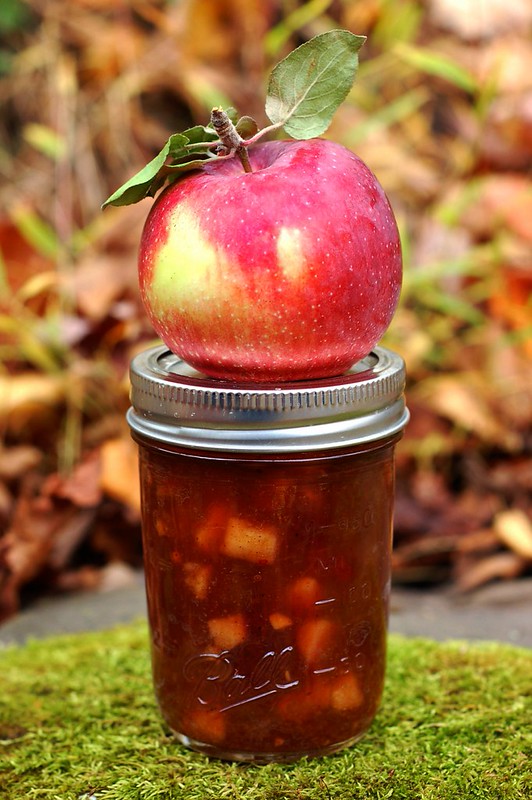
Apple Rhubarb Chutney by Eve Fox, Garden of Eating blog, copyright 2011

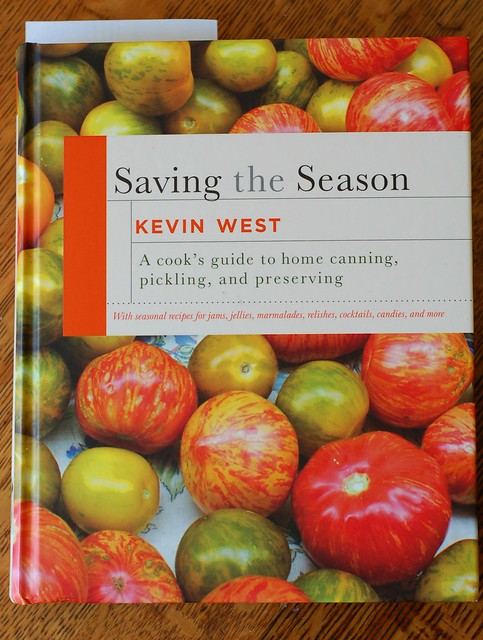
In order to avoid poisoning your family and friends, you will need to follow a recipe closely. If this is something you are interested in, I'd strongly suggest buying or borrowing a canning and preserving cookbook (see below for some suggestions.) However, there are some basic steps that will be the same regardless of what you're making. Hopefully, this little overview will help to make canning clearer and less intimidating.

Oven roasted San Marzano tomatoes by Eve Fox, Garden of Eating blog, copyright 2011

Equipment
  • Canner (basically a big pot - I use the boiling water method, though there is also something called "pressure canning" that uses a pressure cooker - a must if you plan to can low-acid foods or meats)
  • Canning rack (a rack that holds the jars in the canner)
  • Funnel (for pouring hot liquids into the jars)
  • Jar lifter (tool you use to grab the hot jars and lift them out of and into the boiling water in the canner)
  • Jar wrench (tool you use to tighten the lids)
  • Jars, tops, and lids (size will depend on what you're canning and how you want to preserve it)
  • Clean dishtowel or two

You can buy the canning pot, funnel, jar lifter, rack and jar wrench for under $50. Most hardware stores sell them or you can easily buy one online like this Ball canning set on Amazon.

Jars of homemade applesauce with label by Eve Fox

Method

Although the cooking times and packing instructions will vary depending on what you are making, there are some basic guidelines you'll need to follow, no matter what you're preserving.

1. Sterilization. You must sterilize your jars and lids by boiling them (though some recipes also suggest sterilizing them in a dishwasher) for 15 minutes before filling them. As long as the glass jars are not cracked, scratched, or compromised in any way, it's fine to re-use them, however, the tops and lids cannot be used more than once - you must use new ones each time you can.

2. Get Your Food HOT. It's important to pack the jars hot. The jars should be hot from the boiling you just did to sterilize them and in most recipes, the food, itself (applesauce, tomato sauce, jam, etc.) should be bubbling hot on the stove when you pour it into the sterilized jars. Or, if you're making something like dill pickles which you pack into the jars cold, the pickling liquid you're using to fill the jars, should be boiling hot.

3. Acidity Levels. One of the keys to successful canning (meaning that whatever you make will NOT kill anyone!) is to follow the recipe/directions closely. In addition to all the boiling, the thing that will preserve the food you're making is the amount of acid in the recipe. Some foods are naturally acidic and others are not. High-acid foods are easier to work with, while low-acid foods require longer cooking times (and possibly the use of a pressure canner which will cook them at a higher temperature than the hot water bath canner I use.) So it is important to follow the recipe and use the exact amount of the exact ingredients and cook at the exact temperature for the exact length of time.

4. Boiling Times. Boiling the filled jars for the appropriate amount of time is also important to ensure that no bacteria survive. The jars should be sealed tightly and you must leave enough headroom (usually half an inch though this may vary by recipe) to ensure that the food has room to expand in the heat without denting the jar tops and lids (and therefore destroying the seal). You must have enough water in the canner to cover the tops of the jars by two inches.

5. Slow, Even Cooling. Once you've boiled for the specified amount of time, you should remove the jars, and place them on a clean towel with enough space between them to allow air to circulate. All the recipes I've read say that they must be in a draft-free place. I believe this may be due to fears that a cold breeze could cause the hot jars to crack (but I am not 100% sure). Regardless, it's easy enough, so just do it!

6. The Proof is in the "Pop". As the jars cool, the lids should be sucked down by the contracting air in the bottle, resulting in a delightful popping noise as the jar seals. If the tops do not pop down, the seal has failed for some reason. But, as disheartening as it can be when a lid fails to pop, all is not lost, just eat the contents of that jar right away and keep it in the fridge.

7. Storage. Once the jars have cooled completely (let them cool overnight) and the lids have popped down, store them in a cool, dry, dark place. This will help keep the colors of the canned good from fading and help prevent the contents from spoiling.

8. Don't Eat Anything Suspect. If any of the jar lids look misshapen or pushed up or if you notice mold, bubbles, cloudiness, bad smells, or oddly discolored food when you open the jars, do not eat them! Throw the contents (and the jar lids and tops) away.

Jar of tomato jam by Eve Fox, Garden of Eating blog, copyright 2011

Recipes

I've compiled all my tried and true recipes for canned and preserved homemade goodies and am always adding to the list! Check them out to see if anything appeals to you.

Making preserved lemons by Eve Fox, Garden of Eating blog, copyright 2011

Cookbooks

Sites & Blogs

There are sooooo many inspirational web sites and blogs in the realm of canning and preserving. Here are just a few of my favorites:
Suggestions for other cookbooks, blogs and recipes are very welcome! Please just add them in the comments field.

Refrigerator Pickles

Please note: some of the links in this post are Amazon affiliate links which means I will earn a few cents if you purchase the item I've linked to. These are all products I use myself and fully recommend - I do NOT shill for products and companies I do not 100% believe in.

Dinosaur Kale With Cherry Tomatoes & Garlic

Dinosaur kale by Eve Fox, the Garden of Eating, copyright 2015

This is quick, easy and delicious. Last time I made it, I used a mix of supersweet red and yellow cherry tomatoes from the farmers' market which gave it a ton of color and a nice mix of savory and sweet flavors.

Dinosaur kale with cherry tomatoes and garlic

You can make this with any kind of kale, of course, I was just digging the dino kale, partly because it is so cool looking. I think you'll find that dinosaurs are not the only ones who like kale this way...

-- print recipe --Dinosaur Kale with Cherry Tomatoes & Garlic
Serves 2; Prep time 25 minutes

Ingredients

* 1 bunch of kale, washed, with center rib removed and chopped into 1 1/2 inch strips
* 3-4 cloves of garlic, peeled and minced or pressed
* 3/4 cup sweet cherry or grape tomatoes, cut in half
* One cube of vegetable boullion
* 1/2 cup boiling water
* 1 tbsp soy sauce
* 2 tsps olive oil for sauteeing
* Fresh ground black pepper

Directions

1. Heat the olive oil in a deep frying pan until hot then add garlic and cook, stirring, for 30-60 seconds or until it begins to brown slightly.

2. Add cherry tomatoes to the pan and cook, stirring, until the tomatoes soften - about 2-3 minutes.

3. In a small bowl, pour the boiling water over the boullion and smush with a fork to help it dissolve. Add the soy sauce and mix to combine. Set aside.

4. Add the kale to the frying pan with the tomatoes and garlic in batches (as it will be too bulky to add all at once) and continue stirring so that it cooks evenly as you continue to add more kale to the pan. Continue to stir and cook until all the kale has wilted and turned a brighter shade of green. It will cook down a good deal.

5. Pour the boullion/soy liquid over the kale and cook, stirring occasionally, for 3-5 minutes or until most of the liquid has been absorbed and the kale is soft. Season with pepper and serve.

You might also like:
For more delicious recipes, gardening ideas, foraging tips, and food-related inspiration "like" the Garden of Eating on Facebook, or follow me on Twitter and Pinterest.

Chocolate Sour Cream Bundt Cake

This delicious recipe comes from Cooks Illustrated and is a favorite of mine (and my husband and friends). Their recipe suggests serving it with whipped cream and raspberries which is very tasty. However, I am planning to frost it instead the next time I make it as whipped cream does not hold up well over time (we've never polished off the entire cake in one sitting so there are usually leftovers to be eaten over a few days) and the cake feels lacking without some sort of decadent accompaniment.

Serves 12 to 14

Ingredients

Cake Release

  • 1 tablespoon butter, melted
  • 1 tablespoon cocoa
Cake
  • ¾ cup Dutch-processed cocoa (2 1/4 ounces)
  • 6 ounces bittersweet chocolate, chopped
  • 1 teaspoon instant espresso powder (optional)
  • ¾ cup water (boiling)
  • 1 cup sour cream, room temperature
  • 1¾ cups unbleached all-purpose flour (8 3/4 ounces)
  • 1 teaspoon table salt
  • 1 teaspoon baking soda
  • 12 tablespoons unsalted butter (1 1/2 sticks), room temperature
  • 2 cups light brown sugar (14 ounces)
  • 1 tablespoon vanilla extract
  • 5 large eggs, room temperature
  • Confectioners' sugar for dusting
Directions

1. FOR THE PAN: Stir together butter and cocoa in small bowl until paste forms; using a pastry brush, coat all interior surfaces of standard 12-cup Bundt pan. (If mixture becomes too thick to brush on, microwave it for 10 to 20 seconds, or until warm and softened.) Adjust oven rack to lower-middle position; heat oven to 350 degrees.

2. FOR THE CAKE: Combine cocoa, chocolate, and espresso powder (if using) in medium heatproof bowl; pour boiling water over and whisk until smooth. Cool to room temperature; then whisk in sour cream. Whisk flour, salt, and baking soda in second bowl to combine.

3. In standing mixer fitted with flat beater, beat butter, sugar, and vanilla on medium-high speed until pale and fluffy, about 3 minutes. Reduce speed to medium and add eggs one at a time, mixing about 30 seconds after each addition and scraping down bowl with rubber spatula after first 2 additions. Reduce to medium-low speed (batter may appear separated); add about one third of flour mixture and half of chocolate/sour cream mixture and mix until just incorporated, about 20 seconds. Scrape bowl and repeat using half of remaining flour mixture and all of remaining chocolate mixture; add remaining flour mixture and beat until just incorporated, about 10 seconds. Scrape bowl and mix on medium-low until batter is thoroughly combined, about 30 seconds.

4. Pour batter into prepared Bundt pan, being careful not to pour batter on sides of pan. Bake until wooden skewer inserted into center comes out with few crumbs attached, 45 to 50 minutes.

5. Cool in pan 10 minutes, then invert cake onto parchment-lined wire rack; cool to room temperature, about 3 hours.

6. Dust with confectioners' sugar, transfer to serving platter, and cut into wedges; serve with Tangy Whipped Cream and raspberries, if desired.

I'll try to remember to take a picture next time I make this as it's quite pretty - the bundt pan makes a nice mold.

Tuesday, October 2, 2007

How To Can & Preserve Food

Even though supermarkets have made canning and preserving unnecessary, there is still something wonderfully fulfilling about preserving food yourself (and the results are MUCH tastier than anything you can buy in a grocery store.)

Homemade maraschino cherries by Eve Fox, Garden of Eating blog, copyright 2011

When my husband's grandmother, Marcia, a great cook and remarkable woman who I loved, passed away a few years ago, I inherited her preserving cookbook, Putting Food By. I treasure this worn book, not because the recipes are anything special, but because it is speckled by years of use and it includes her notes. Marcia kept a detailed record of everything she "put by" in its blank end pages.

Photo of Grandma Marcia's notes in Putting Food By cookbook

Her notes include where she picked the fruits or vegetables (the names of farms and orchards which must have been near her home in Grafton, VT sprinkle the pages -- Dutton's, Warren's, Harlow's, Allen Brothers, and Lake Warren), comments on the crop ("good yield" or "small onions"), how much of each thing she made, as well as a few recipes, including one for homemade breakfast sausage.

Grandma Marcia was a prolific canner -- rhubarb, peas, applesauce, apple butter, tomatoes, onions, strawberry jam, blueberry jam, etc. She actually had to tape in a few extra pages to keep track of all her canning harvests.

Pickled Beets With Cumin & Cloves by Eve Fox, Garden of Eating blog, copyright 2011

Inspired by Marcia's passion and armed with her annotated copy of Putting Food By, I began my journey into the world of canning. Though it may seem a little daunting at first (any endeavor that could result in botchulism probably seems a little daunting), it's not particularly complicated or difficult.

By and large, my efforts have been successful. Canning does require spending a lot of time over a very hot stove, but there is something incredibly rewarding about opening a jar of bright red tomato sauce or a pint of sweet golden peach halves in the dead of winter. The tastes of summer brighten the short, dark days of winter.

Apple Rhubarb Chutney by Eve Fox, Garden of Eating blog, copyright 2011

In order to avoid poisoning your family and friends, you will need to follow a recipe closely. If this is something you are interested in, I'd strongly suggest buying or borrowing a canning and preserving cookbook (see below for some suggestions.) However, there are some basic steps that will be the same regardless of what you're making. Hopefully, this little overview will help to make canning clearer and less intimidating.

Oven roasted San Marzano tomatoes by Eve Fox, Garden of Eating blog, copyright 2011

Equipment
  • Canner (basically a big pot - I use the boiling water method, though there is also something called "pressure canning" that uses a pressure cooker - a must if you plan to can low-acid foods or meats)
  • Canning rack (a rack that holds the jars in the canner)
  • Funnel (for pouring hot liquids into the jars)
  • Jar lifter (tool you use to grab the hot jars and lift them out of and into the boiling water in the canner)
  • Jar wrench (tool you use to tighten the lids)
  • Jars, tops, and lids (size will depend on what you're canning and how you want to preserve it)
  • Clean dishtowel or two

You can buy the canning pot, funnel, jar lifter, rack and jar wrench for under $50. Most hardware stores sell them or you can easily buy one online like this Ball canning set on Amazon.

Jars of homemade applesauce with label by Eve Fox

Method

Although the cooking times and packing instructions will vary depending on what you are making, there are some basic guidelines you'll need to follow, no matter what you're preserving.

1. Sterilization. You must sterilize your jars and lids by boiling them (though some recipes also suggest sterilizing them in a dishwasher) for 15 minutes before filling them. As long as the glass jars are not cracked, scratched, or compromised in any way, it's fine to re-use them, however, the tops and lids cannot be used more than once - you must use new ones each time you can.

2. Get Your Food HOT. It's important to pack the jars hot. The jars should be hot from the boiling you just did to sterilize them and in most recipes, the food, itself (applesauce, tomato sauce, jam, etc.) should be bubbling hot on the stove when you pour it into the sterilized jars. Or, if you're making something like dill pickles which you pack into the jars cold, the pickling liquid you're using to fill the jars, should be boiling hot.

3. Acidity Levels. One of the keys to successful canning (meaning that whatever you make will NOT kill anyone!) is to follow the recipe/directions closely. In addition to all the boiling, the thing that will preserve the food you're making is the amount of acid in the recipe. Some foods are naturally acidic and others are not. High-acid foods are easier to work with, while low-acid foods require longer cooking times (and possibly the use of a pressure canner which will cook them at a higher temperature than the hot water bath canner I use.) So it is important to follow the recipe and use the exact amount of the exact ingredients and cook at the exact temperature for the exact length of time.

4. Boiling Times. Boiling the filled jars for the appropriate amount of time is also important to ensure that no bacteria survive. The jars should be sealed tightly and you must leave enough headroom (usually half an inch though this may vary by recipe) to ensure that the food has room to expand in the heat without denting the jar tops and lids (and therefore destroying the seal). You must have enough water in the canner to cover the tops of the jars by two inches.

5. Slow, Even Cooling. Once you've boiled for the specified amount of time, you should remove the jars, and place them on a clean towel with enough space between them to allow air to circulate. All the recipes I've read say that they must be in a draft-free place. I believe this may be due to fears that a cold breeze could cause the hot jars to crack (but I am not 100% sure). Regardless, it's easy enough, so just do it!

6. The Proof is in the "Pop". As the jars cool, the lids should be sucked down by the contracting air in the bottle, resulting in a delightful popping noise as the jar seals. If the tops do not pop down, the seal has failed for some reason. But, as disheartening as it can be when a lid fails to pop, all is not lost, just eat the contents of that jar right away and keep it in the fridge.

7. Storage. Once the jars have cooled completely (let them cool overnight) and the lids have popped down, store them in a cool, dry, dark place. This will help keep the colors of the canned good from fading and help prevent the contents from spoiling.

8. Don't Eat Anything Suspect. If any of the jar lids look misshapen or pushed up or if you notice mold, bubbles, cloudiness, bad smells, or oddly discolored food when you open the jars, do not eat them! Throw the contents (and the jar lids and tops) away.

Jar of tomato jam by Eve Fox, Garden of Eating blog, copyright 2011

Recipes

I've compiled all my tried and true recipes for canned and preserved homemade goodies and am always adding to the list! Check them out to see if anything appeals to you.

Making preserved lemons by Eve Fox, Garden of Eating blog, copyright 2011

Cookbooks

Sites & Blogs

There are sooooo many inspirational web sites and blogs in the realm of canning and preserving. Here are just a few of my favorites:
Suggestions for other cookbooks, blogs and recipes are very welcome! Please just add them in the comments field.

Refrigerator Pickles

Please note: some of the links in this post are Amazon affiliate links which means I will earn a few cents if you purchase the item I've linked to. These are all products I use myself and fully recommend - I do NOT shill for products and companies I do not 100% believe in.

Dinosaur Kale With Cherry Tomatoes & Garlic

Dinosaur kale by Eve Fox, the Garden of Eating, copyright 2015

This is quick, easy and delicious. Last time I made it, I used a mix of supersweet red and yellow cherry tomatoes from the farmers' market which gave it a ton of color and a nice mix of savory and sweet flavors.

Dinosaur kale with cherry tomatoes and garlic

You can make this with any kind of kale, of course, I was just digging the dino kale, partly because it is so cool looking. I think you'll find that dinosaurs are not the only ones who like kale this way...

-- print recipe --Dinosaur Kale with Cherry Tomatoes & Garlic
Serves 2; Prep time 25 minutes

Ingredients

* 1 bunch of kale, washed, with center rib removed and chopped into 1 1/2 inch strips
* 3-4 cloves of garlic, peeled and minced or pressed
* 3/4 cup sweet cherry or grape tomatoes, cut in half
* One cube of vegetable boullion
* 1/2 cup boiling water
* 1 tbsp soy sauce
* 2 tsps olive oil for sauteeing
* Fresh ground black pepper

Directions

1. Heat the olive oil in a deep frying pan until hot then add garlic and cook, stirring, for 30-60 seconds or until it begins to brown slightly.

2. Add cherry tomatoes to the pan and cook, stirring, until the tomatoes soften - about 2-3 minutes.

3. In a small bowl, pour the boiling water over the boullion and smush with a fork to help it dissolve. Add the soy sauce and mix to combine. Set aside.

4. Add the kale to the frying pan with the tomatoes and garlic in batches (as it will be too bulky to add all at once) and continue stirring so that it cooks evenly as you continue to add more kale to the pan. Continue to stir and cook until all the kale has wilted and turned a brighter shade of green. It will cook down a good deal.

5. Pour the boullion/soy liquid over the kale and cook, stirring occasionally, for 3-5 minutes or until most of the liquid has been absorbed and the kale is soft. Season with pepper and serve.

You might also like:
For more delicious recipes, gardening ideas, foraging tips, and food-related inspiration "like" the Garden of Eating on Facebook, or follow me on Twitter and Pinterest.

Chocolate Sour Cream Bundt Cake

This delicious recipe comes from Cooks Illustrated and is a favorite of mine (and my husband and friends). Their recipe suggests serving it with whipped cream and raspberries which is very tasty. However, I am planning to frost it instead the next time I make it as whipped cream does not hold up well over time (we've never polished off the entire cake in one sitting so there are usually leftovers to be eaten over a few days) and the cake feels lacking without some sort of decadent accompaniment.

Serves 12 to 14

Ingredients

Cake Release

  • 1 tablespoon butter, melted
  • 1 tablespoon cocoa
Cake
  • ¾ cup Dutch-processed cocoa (2 1/4 ounces)
  • 6 ounces bittersweet chocolate, chopped
  • 1 teaspoon instant espresso powder (optional)
  • ¾ cup water (boiling)
  • 1 cup sour cream, room temperature
  • 1¾ cups unbleached all-purpose flour (8 3/4 ounces)
  • 1 teaspoon table salt
  • 1 teaspoon baking soda
  • 12 tablespoons unsalted butter (1 1/2 sticks), room temperature
  • 2 cups light brown sugar (14 ounces)
  • 1 tablespoon vanilla extract
  • 5 large eggs, room temperature
  • Confectioners' sugar for dusting
Directions

1. FOR THE PAN: Stir together butter and cocoa in small bowl until paste forms; using a pastry brush, coat all interior surfaces of standard 12-cup Bundt pan. (If mixture becomes too thick to brush on, microwave it for 10 to 20 seconds, or until warm and softened.) Adjust oven rack to lower-middle position; heat oven to 350 degrees.

2. FOR THE CAKE: Combine cocoa, chocolate, and espresso powder (if using) in medium heatproof bowl; pour boiling water over and whisk until smooth. Cool to room temperature; then whisk in sour cream. Whisk flour, salt, and baking soda in second bowl to combine.

3. In standing mixer fitted with flat beater, beat butter, sugar, and vanilla on medium-high speed until pale and fluffy, about 3 minutes. Reduce speed to medium and add eggs one at a time, mixing about 30 seconds after each addition and scraping down bowl with rubber spatula after first 2 additions. Reduce to medium-low speed (batter may appear separated); add about one third of flour mixture and half of chocolate/sour cream mixture and mix until just incorporated, about 20 seconds. Scrape bowl and repeat using half of remaining flour mixture and all of remaining chocolate mixture; add remaining flour mixture and beat until just incorporated, about 10 seconds. Scrape bowl and mix on medium-low until batter is thoroughly combined, about 30 seconds.

4. Pour batter into prepared Bundt pan, being careful not to pour batter on sides of pan. Bake until wooden skewer inserted into center comes out with few crumbs attached, 45 to 50 minutes.

5. Cool in pan 10 minutes, then invert cake onto parchment-lined wire rack; cool to room temperature, about 3 hours.

6. Dust with confectioners' sugar, transfer to serving platter, and cut into wedges; serve with Tangy Whipped Cream and raspberries, if desired.

I'll try to remember to take a picture next time I make this as it's quite pretty - the bundt pan makes a nice mold.