I've been waiting for the other shoe to drop ever since I first learned about the dangers of BPA (bisphenol A) a few years back. So when I saw this eye-opening Mother Jones article, The Scary New Evidence on BPA-Free Plastics pop up in my Facebook feed a couple of days ago, I could practically hear the thud of footwear falling from the sky...
It turns out that many BPA-free plastics are just as bad for us as the BPA-laden kind, and possibly worse, in some cases. The endocrine disruptors in most plastics have far-ranging effects that not only make us sick, infertile and genetically wacky but they also mess up our children (assuming you overcome the infertility problems) and our children's children and our children's children's children and, well, you get the idea, right?
Perhaps even more disturbing, companies are not required to determine their level of toxicity before releasing them for sale and marketing them as "safe and non-toxic."
After reading, my guilty, panicked thought was, "Now I MUST get rid of the last few plastic sippy cups we have." We got rid of our Nalgene's back in 2008 when the news broke about BPA's badness. And we ditched all our plastic baby bottles a few years ago in favor of Born Free's sturdy, glass bottles with silicone (which is among the least toxic plastics) nipples. And we've got some stainless steel sippy cups in the mix, too. But we'd never quite managed to rid our house of all of the BPA-free plastic sippy cups.
So I turned to MightyNest - the wonderful company I partnered with on my last non-toxic giveaway three years ago. They've got a great selection of glass and stainless steel water bottles and sippy cups for sale. I ordered a few new cups to take the place of the poisonous plastic ones we've still been using against my better judgment. Then I emailed them to see if they'd be open to doing another giveaway to help people ditch their poisonous plastics, too. They were :)
So read on to find out how you can win $100 worth of safe, non-toxic water bottles and food storage containers PLUS $100 for your school. MightyNest's unique program for schools supports the school of your choice when you buy any of their high quality, eco-friendly, non-toxic products – by donating 15% of your purchase price to your local school.
Take the pledge to stop using plastic water bottles and you'll be automatically entered to win a $100 MightyNest gift certificate. The deadline to enter is March 19th. Even if you don't end up winning this delightful giveaway, I hope you'll pitch your plastic now. You won't regret it.
Maple Crème Brûlée
Thursday, February 20, 2014
I've been wanting to make crème brûlée ever since our friend, Lana, made these for us last winter. Before that, it had never occurred to me that one could make crème brûlée at home. In my mind, this decadently creamy dessert was reserved for French restaurants, alone.
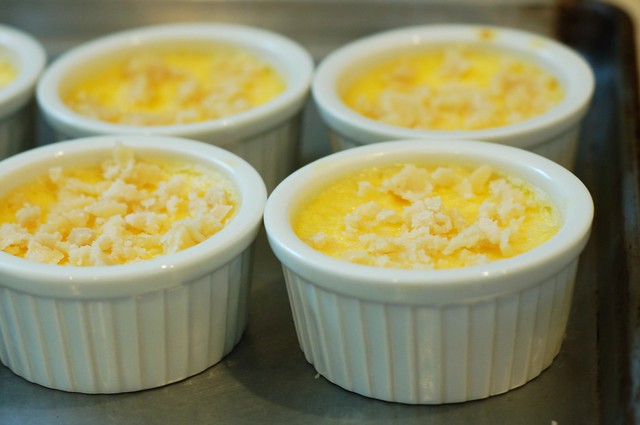
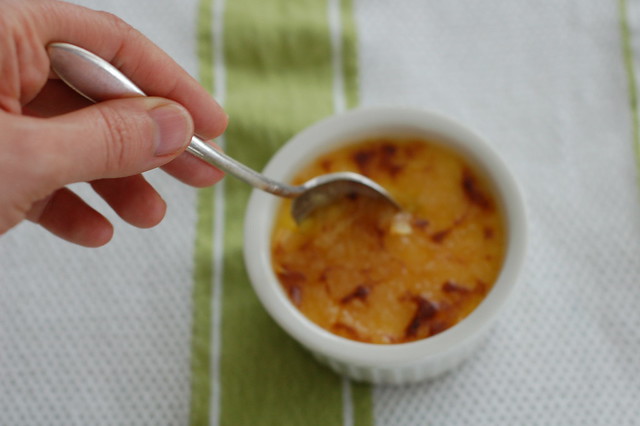
But it turns out that it's not particularly hard - though you do need to plan ahead since there's both baking and cooling time required. And the result is, not surprisingly, completely delicious. Creamy, sweet, and silky with that delightfully crunchy, caramelized sugar crust you crack with your fork just before digging in to take a little taste of heaven. It's the perfect way to end a cold, snowy day.
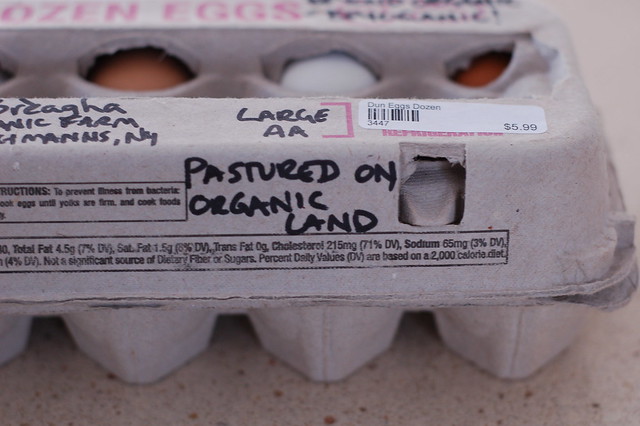
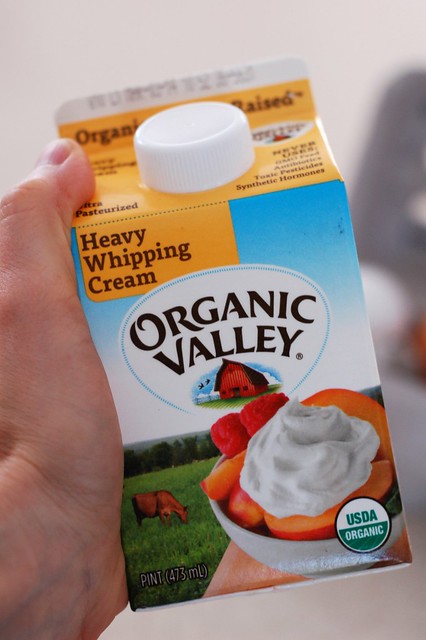
I thought this was cute - I loved these little notes from the farmer. And I really loved that their hens are pasture-raised. I also chose Organic Valley heavy cream for that same reason - their cows are pasture-raised. It makes for healthier, happier animals and tastier, more nourishing eggs and dairy.
After consulting a few recipes, I adapted the one I found on my friend Jen's wonderful blog, Use Real Butter which comes via Elegantly Easy Creme Brulee & Other Custard Desserts by Debbie Puente.
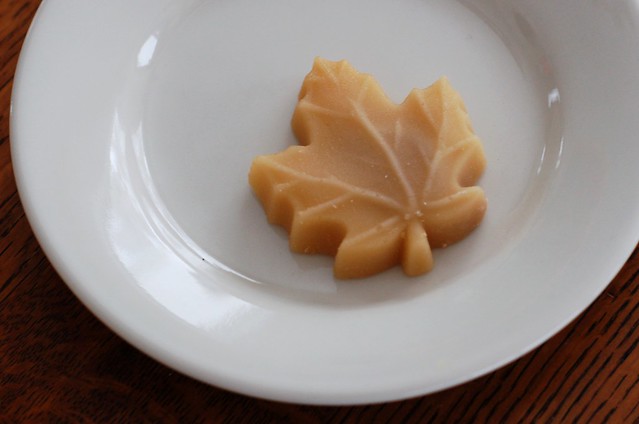
The only real changes I made to the original recipe were to add a pinch of salt and to top these beauties with maple sugar instead of turbinado or brown sugar thanks to a suggestion from my friend, Lynn.
I love all things maple and am always happy to give a little nod to my lovely corner of the world where the sugar maple sap is already flowing whenever the temperature gets above freezing. I've also added a bit more detail to the directions for any of you who are newbies like I was.
Although crème brûlée feels like winter comfort fare to me, I am also really looking forward to making it with some of the lavender that grows in our yard come summer.
I am also intrigued by the yummy-sounding lime crème brûlée my friend Susan at On Rue Tatin makes. So many possibilities, so few ramekins. I may have to invest in a few of my own...
We're getting another 2-4 inches on top of the 18 or so inches we have out there already so this seems like the perfect time for these. Enjoy!
-- print recipe --
Maple Crème Brûlée
Makes 6 servings
Ingredients
* 8 egg yolks
* 1/3 cup granulated sugar
* 2 cups heavy cream
* 1 tsp vanilla extract
* a pinch of sea salt
* 1/4 cup maple sugar (for the tops - you can also substitute turbinado or brown sugar if you don't want to go the maple route)
Directions
1. Preheat the oven to 300°F. Whisk the egg yolks, sugar and pinch of salt together in a medium bowl until the sugar is dissolved and the mixture is thick and pale yellow. Add the cream and vanilla and whisk until well-combined.
2. Divide the mixture evenly between 6 ramekins or custard cups (if you're using tiny ramekins you may get more than 6 out of this recipe, and fewer than 6 if you're using big cups.) Place the ramekins in a large baking dish, making sure that they do not touch each other or the edges of the dish - I didn't have any single dish that was big enough to hold them all so I used two baking dishes - and then pour an inch or so of water into the dish, being careful not to get any water into the ramekins.
3. Bake until the custard is set around the edges, but still loose in the center (just give the dish a gentle shake with your pot-holdered hand to see if they still jiggle a little bit) for between 40-60 minutes.
4. Once the custard is set, remove them from the oven and let them sit out in the water bath until fully cooled. Remove the cups from the water bath and chill, covered, in the refrigerator for at least 2 hours and up to 2 days.
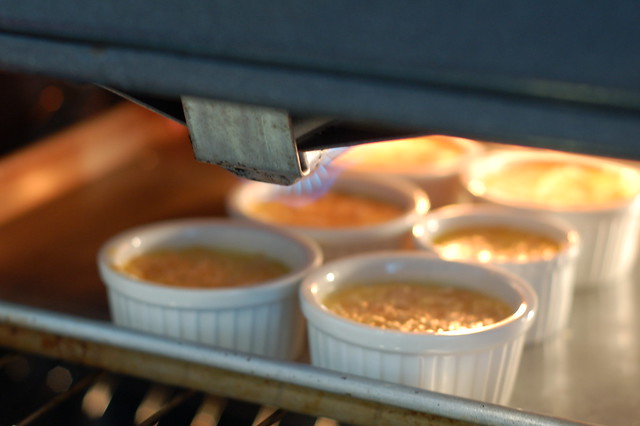
5. When you're ready to serve these treats, remove them from the fridge and use a paper towel or kitchen towel to dab any condensation off the tops of the creme. Spread a thin coating of maple sugar over each custard - enough to cover it evenly but it should not be thick. Set the oven to broil and put the ramekins on a baking sheet right underneath the broiler. Broil the sugar until caramelized and serve. Be very careful not to burn the sugar - it's all too easy to walk away and forget about them. If you're concerned about keeping the custards cool you can either refrigerate them again after you caramelize the sugar (leave yourself a good 35-40 minutes extra if you want to handle it this way) or you can place them in an ice water bath while you're caramelizing the sugar.
Maple Crème Brûlée
Makes 6 servings
Ingredients
* 8 egg yolks
* 1/3 cup granulated sugar
* 2 cups heavy cream
* 1 tsp vanilla extract
* a pinch of sea salt
* 1/4 cup maple sugar (for the tops - you can also substitute turbinado or brown sugar if you don't want to go the maple route)
Directions
1. Preheat the oven to 300°F. Whisk the egg yolks, sugar and pinch of salt together in a medium bowl until the sugar is dissolved and the mixture is thick and pale yellow. Add the cream and vanilla and whisk until well-combined.
2. Divide the mixture evenly between 6 ramekins or custard cups (if you're using tiny ramekins you may get more than 6 out of this recipe, and fewer than 6 if you're using big cups.) Place the ramekins in a large baking dish, making sure that they do not touch each other or the edges of the dish - I didn't have any single dish that was big enough to hold them all so I used two baking dishes - and then pour an inch or so of water into the dish, being careful not to get any water into the ramekins.
3. Bake until the custard is set around the edges, but still loose in the center (just give the dish a gentle shake with your pot-holdered hand to see if they still jiggle a little bit) for between 40-60 minutes.
4. Once the custard is set, remove them from the oven and let them sit out in the water bath until fully cooled. Remove the cups from the water bath and chill, covered, in the refrigerator for at least 2 hours and up to 2 days.
5. When you're ready to serve these treats, remove them from the fridge and use a paper towel or kitchen towel to dab any condensation off the tops of the creme. Spread a thin coating of maple sugar over each custard - enough to cover it evenly but it should not be thick. Set the oven to broil and put the ramekins on a baking sheet right underneath the broiler. Broil the sugar until caramelized and serve. Be very careful not to burn the sugar - it's all too easy to walk away and forget about them. If you're concerned about keeping the custards cool you can either refrigerate them again after you caramelize the sugar (leave yourself a good 35-40 minutes extra if you want to handle it this way) or you can place them in an ice water bath while you're caramelizing the sugar.
You might also like:
Maple Crème Brûlée
I've been wanting to make crème brûlée ever since our friend, Lana, made these for us last winter. Before that, it had never occurred to me that one could make crème brûlée at home. In my mind, this decadently creamy dessert was reserved for French restaurants, alone.
But it turns out that it's not particularly hard - though you do need to plan ahead since there's both baking and cooling time required. And the result is, not surprisingly, completely delicious. Creamy, sweet, and silky with that delightfully crunchy, caramelized sugar crust you crack with your fork just before digging in to take a little taste of heaven. It's the perfect way to end a cold, snowy day.
I thought this was cute - I loved these little notes from the farmer. And I really loved that their hens are pasture-raised. I also chose Organic Valley heavy cream for that same reason - their cows are pasture-raised. It makes for healthier, happier animals and tastier, more nourishing eggs and dairy.
After consulting a few recipes, I adapted the one I found on my friend Jen's wonderful blog, Use Real Butter which comes via Elegantly Easy Creme Brulee & Other Custard Desserts by Debbie Puente.
The only real changes I made to the original recipe were to add a pinch of salt and to top these beauties with maple sugar instead of turbinado or brown sugar thanks to a suggestion from my friend, Lynn.
I love all things maple and am always happy to give a little nod to my lovely corner of the world where the sugar maple sap is already flowing whenever the temperature gets above freezing. I've also added a bit more detail to the directions for any of you who are newbies like I was.
Although crème brûlée feels like winter comfort fare to me, I am also really looking forward to making it with some of the lavender that grows in our yard come summer.
I am also intrigued by the yummy-sounding lime crème brûlée my friend Susan at On Rue Tatin makes. So many possibilities, so few ramekins. I may have to invest in a few of my own...
We're getting another 2-4 inches on top of the 18 or so inches we have out there already so this seems like the perfect time for these. Enjoy!
-- print recipe --
Maple Crème Brûlée
Makes 6 servings
Ingredients
* 8 egg yolks
* 1/3 cup granulated sugar
* 2 cups heavy cream
* 1 tsp vanilla extract
* a pinch of sea salt
* 1/4 cup maple sugar (for the tops - you can also substitute turbinado or brown sugar if you don't want to go the maple route)
Directions
1. Preheat the oven to 300°F. Whisk the egg yolks, sugar and pinch of salt together in a medium bowl until the sugar is dissolved and the mixture is thick and pale yellow. Add the cream and vanilla and whisk until well-combined.
2. Divide the mixture evenly between 6 ramekins or custard cups (if you're using tiny ramekins you may get more than 6 out of this recipe, and fewer than 6 if you're using big cups.) Place the ramekins in a large baking dish, making sure that they do not touch each other or the edges of the dish - I didn't have any single dish that was big enough to hold them all so I used two baking dishes - and then pour an inch or so of water into the dish, being careful not to get any water into the ramekins.
3. Bake until the custard is set around the edges, but still loose in the center (just give the dish a gentle shake with your pot-holdered hand to see if they still jiggle a little bit) for between 40-60 minutes.
4. Once the custard is set, remove them from the oven and let them sit out in the water bath until fully cooled. Remove the cups from the water bath and chill, covered, in the refrigerator for at least 2 hours and up to 2 days.
5. When you're ready to serve these treats, remove them from the fridge and use a paper towel or kitchen towel to dab any condensation off the tops of the creme. Spread a thin coating of maple sugar over each custard - enough to cover it evenly but it should not be thick. Set the oven to broil and put the ramekins on a baking sheet right underneath the broiler. Broil the sugar until caramelized and serve. Be very careful not to burn the sugar - it's all too easy to walk away and forget about them. If you're concerned about keeping the custards cool you can either refrigerate them again after you caramelize the sugar (leave yourself a good 35-40 minutes extra if you want to handle it this way) or you can place them in an ice water bath while you're caramelizing the sugar.
Maple Crème Brûlée
Makes 6 servings
Ingredients
* 8 egg yolks
* 1/3 cup granulated sugar
* 2 cups heavy cream
* 1 tsp vanilla extract
* a pinch of sea salt
* 1/4 cup maple sugar (for the tops - you can also substitute turbinado or brown sugar if you don't want to go the maple route)
Directions
1. Preheat the oven to 300°F. Whisk the egg yolks, sugar and pinch of salt together in a medium bowl until the sugar is dissolved and the mixture is thick and pale yellow. Add the cream and vanilla and whisk until well-combined.
2. Divide the mixture evenly between 6 ramekins or custard cups (if you're using tiny ramekins you may get more than 6 out of this recipe, and fewer than 6 if you're using big cups.) Place the ramekins in a large baking dish, making sure that they do not touch each other or the edges of the dish - I didn't have any single dish that was big enough to hold them all so I used two baking dishes - and then pour an inch or so of water into the dish, being careful not to get any water into the ramekins.
3. Bake until the custard is set around the edges, but still loose in the center (just give the dish a gentle shake with your pot-holdered hand to see if they still jiggle a little bit) for between 40-60 minutes.
4. Once the custard is set, remove them from the oven and let them sit out in the water bath until fully cooled. Remove the cups from the water bath and chill, covered, in the refrigerator for at least 2 hours and up to 2 days.
5. When you're ready to serve these treats, remove them from the fridge and use a paper towel or kitchen towel to dab any condensation off the tops of the creme. Spread a thin coating of maple sugar over each custard - enough to cover it evenly but it should not be thick. Set the oven to broil and put the ramekins on a baking sheet right underneath the broiler. Broil the sugar until caramelized and serve. Be very careful not to burn the sugar - it's all too easy to walk away and forget about them. If you're concerned about keeping the custards cool you can either refrigerate them again after you caramelize the sugar (leave yourself a good 35-40 minutes extra if you want to handle it this way) or you can place them in an ice water bath while you're caramelizing the sugar.
You might also like:
Monday, March 10, 2014
BPA-Free Plastic Is Just as Toxic & A Non-Toxic Water Bottle Giveaway
I've been waiting for the other shoe to drop ever since I first learned about the dangers of BPA (bisphenol A) a few years back. So when I saw this eye-opening Mother Jones article, The Scary New Evidence on BPA-Free Plastics pop up in my Facebook feed a couple of days ago, I could practically hear the thud of footwear falling from the sky...
It turns out that many BPA-free plastics are just as bad for us as the BPA-laden kind, and possibly worse, in some cases. The endocrine disruptors in most plastics have far-ranging effects that not only make us sick, infertile and genetically wacky but they also mess up our children (assuming you overcome the infertility problems) and our children's children and our children's children's children and, well, you get the idea, right?
Perhaps even more disturbing, companies are not required to determine their level of toxicity before releasing them for sale and marketing them as "safe and non-toxic."
After reading, my guilty, panicked thought was, "Now I MUST get rid of the last few plastic sippy cups we have." We got rid of our Nalgene's back in 2008 when the news broke about BPA's badness. And we ditched all our plastic baby bottles a few years ago in favor of Born Free's sturdy, glass bottles with silicone (which is among the least toxic plastics) nipples. And we've got some stainless steel sippy cups in the mix, too. But we'd never quite managed to rid our house of all of the BPA-free plastic sippy cups.
So I turned to MightyNest - the wonderful company I partnered with on my last non-toxic giveaway three years ago. They've got a great selection of glass and stainless steel water bottles and sippy cups for sale. I ordered a few new cups to take the place of the poisonous plastic ones we've still been using against my better judgment. Then I emailed them to see if they'd be open to doing another giveaway to help people ditch their poisonous plastics, too. They were :)
So read on to find out how you can win $100 worth of safe, non-toxic water bottles and food storage containers PLUS $100 for your school. MightyNest's unique program for schools supports the school of your choice when you buy any of their high quality, eco-friendly, non-toxic products – by donating 15% of your purchase price to your local school.
Take the pledge to stop using plastic water bottles and you'll be automatically entered to win a $100 MightyNest gift certificate. The deadline to enter is March 19th. Even if you don't end up winning this delightful giveaway, I hope you'll pitch your plastic now. You won't regret it.
It turns out that many BPA-free plastics are just as bad for us as the BPA-laden kind, and possibly worse, in some cases. The endocrine disruptors in most plastics have far-ranging effects that not only make us sick, infertile and genetically wacky but they also mess up our children (assuming you overcome the infertility problems) and our children's children and our children's children's children and, well, you get the idea, right?
Perhaps even more disturbing, companies are not required to determine their level of toxicity before releasing them for sale and marketing them as "safe and non-toxic."
After reading, my guilty, panicked thought was, "Now I MUST get rid of the last few plastic sippy cups we have." We got rid of our Nalgene's back in 2008 when the news broke about BPA's badness. And we ditched all our plastic baby bottles a few years ago in favor of Born Free's sturdy, glass bottles with silicone (which is among the least toxic plastics) nipples. And we've got some stainless steel sippy cups in the mix, too. But we'd never quite managed to rid our house of all of the BPA-free plastic sippy cups.
So I turned to MightyNest - the wonderful company I partnered with on my last non-toxic giveaway three years ago. They've got a great selection of glass and stainless steel water bottles and sippy cups for sale. I ordered a few new cups to take the place of the poisonous plastic ones we've still been using against my better judgment. Then I emailed them to see if they'd be open to doing another giveaway to help people ditch their poisonous plastics, too. They were :)
So read on to find out how you can win $100 worth of safe, non-toxic water bottles and food storage containers PLUS $100 for your school. MightyNest's unique program for schools supports the school of your choice when you buy any of their high quality, eco-friendly, non-toxic products – by donating 15% of your purchase price to your local school.
Take the pledge to stop using plastic water bottles and you'll be automatically entered to win a $100 MightyNest gift certificate. The deadline to enter is March 19th. Even if you don't end up winning this delightful giveaway, I hope you'll pitch your plastic now. You won't regret it.
Thursday, February 20, 2014
Maple Crème Brûlée
I've been wanting to make crème brûlée ever since our friend, Lana, made these for us last winter. Before that, it had never occurred to me that one could make crème brûlée at home. In my mind, this decadently creamy dessert was reserved for French restaurants, alone.
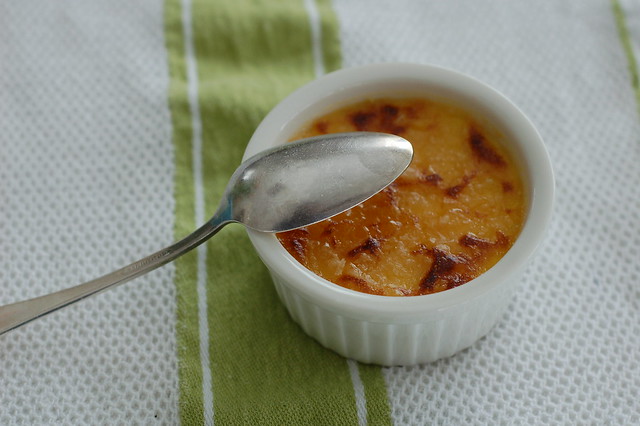
But it turns out that it's not particularly hard - though you do need to plan ahead since there's both baking and cooling time required. And the result is, not surprisingly, completely delicious. Creamy, sweet, and silky with that delightfully crunchy, caramelized sugar crust you crack with your fork just before digging in to take a little taste of heaven. It's the perfect way to end a cold, snowy day.
I thought this was cute - I loved these little notes from the farmer. And I really loved that their hens are pasture-raised. I also chose Organic Valley heavy cream for that same reason - their cows are pasture-raised. It makes for healthier, happier animals and tastier, more nourishing eggs and dairy.
After consulting a few recipes, I adapted the one I found on my friend Jen's wonderful blog, Use Real Butter which comes via Elegantly Easy Creme Brulee & Other Custard Desserts by Debbie Puente.
The only real changes I made to the original recipe were to add a pinch of salt and to top these beauties with maple sugar instead of turbinado or brown sugar thanks to a suggestion from my friend, Lynn.
I love all things maple and am always happy to give a little nod to my lovely corner of the world where the sugar maple sap is already flowing whenever the temperature gets above freezing. I've also added a bit more detail to the directions for any of you who are newbies like I was.
Although crème brûlée feels like winter comfort fare to me, I am also really looking forward to making it with some of the lavender that grows in our yard come summer.
I am also intrigued by the yummy-sounding lime crème brûlée my friend Susan at On Rue Tatin makes. So many possibilities, so few ramekins. I may have to invest in a few of my own...
We're getting another 2-4 inches on top of the 18 or so inches we have out there already so this seems like the perfect time for these. Enjoy!
-- print recipe --
Maple Crème Brûlée
Makes 6 servings
Ingredients
* 8 egg yolks
* 1/3 cup granulated sugar
* 2 cups heavy cream
* 1 tsp vanilla extract
* a pinch of sea salt
* 1/4 cup maple sugar (for the tops - you can also substitute turbinado or brown sugar if you don't want to go the maple route)
Directions
1. Preheat the oven to 300°F. Whisk the egg yolks, sugar and pinch of salt together in a medium bowl until the sugar is dissolved and the mixture is thick and pale yellow. Add the cream and vanilla and whisk until well-combined.
2. Divide the mixture evenly between 6 ramekins or custard cups (if you're using tiny ramekins you may get more than 6 out of this recipe, and fewer than 6 if you're using big cups.) Place the ramekins in a large baking dish, making sure that they do not touch each other or the edges of the dish - I didn't have any single dish that was big enough to hold them all so I used two baking dishes - and then pour an inch or so of water into the dish, being careful not to get any water into the ramekins.
3. Bake until the custard is set around the edges, but still loose in the center (just give the dish a gentle shake with your pot-holdered hand to see if they still jiggle a little bit) for between 40-60 minutes.
4. Once the custard is set, remove them from the oven and let them sit out in the water bath until fully cooled. Remove the cups from the water bath and chill, covered, in the refrigerator for at least 2 hours and up to 2 days.
5. When you're ready to serve these treats, remove them from the fridge and use a paper towel or kitchen towel to dab any condensation off the tops of the creme. Spread a thin coating of maple sugar over each custard - enough to cover it evenly but it should not be thick. Set the oven to broil and put the ramekins on a baking sheet right underneath the broiler. Broil the sugar until caramelized and serve. Be very careful not to burn the sugar - it's all too easy to walk away and forget about them. If you're concerned about keeping the custards cool you can either refrigerate them again after you caramelize the sugar (leave yourself a good 35-40 minutes extra if you want to handle it this way) or you can place them in an ice water bath while you're caramelizing the sugar.
Maple Crème Brûlée
Makes 6 servings
Ingredients
* 8 egg yolks
* 1/3 cup granulated sugar
* 2 cups heavy cream
* 1 tsp vanilla extract
* a pinch of sea salt
* 1/4 cup maple sugar (for the tops - you can also substitute turbinado or brown sugar if you don't want to go the maple route)
Directions
1. Preheat the oven to 300°F. Whisk the egg yolks, sugar and pinch of salt together in a medium bowl until the sugar is dissolved and the mixture is thick and pale yellow. Add the cream and vanilla and whisk until well-combined.
2. Divide the mixture evenly between 6 ramekins or custard cups (if you're using tiny ramekins you may get more than 6 out of this recipe, and fewer than 6 if you're using big cups.) Place the ramekins in a large baking dish, making sure that they do not touch each other or the edges of the dish - I didn't have any single dish that was big enough to hold them all so I used two baking dishes - and then pour an inch or so of water into the dish, being careful not to get any water into the ramekins.
3. Bake until the custard is set around the edges, but still loose in the center (just give the dish a gentle shake with your pot-holdered hand to see if they still jiggle a little bit) for between 40-60 minutes.
4. Once the custard is set, remove them from the oven and let them sit out in the water bath until fully cooled. Remove the cups from the water bath and chill, covered, in the refrigerator for at least 2 hours and up to 2 days.
5. When you're ready to serve these treats, remove them from the fridge and use a paper towel or kitchen towel to dab any condensation off the tops of the creme. Spread a thin coating of maple sugar over each custard - enough to cover it evenly but it should not be thick. Set the oven to broil and put the ramekins on a baking sheet right underneath the broiler. Broil the sugar until caramelized and serve. Be very careful not to burn the sugar - it's all too easy to walk away and forget about them. If you're concerned about keeping the custards cool you can either refrigerate them again after you caramelize the sugar (leave yourself a good 35-40 minutes extra if you want to handle it this way) or you can place them in an ice water bath while you're caramelizing the sugar.
You might also like:
Maple Crème Brûlée
I've been wanting to make crème brûlée ever since our friend, Lana, made these for us last winter. Before that, it had never occurred to me that one could make crème brûlée at home. In my mind, this decadently creamy dessert was reserved for French restaurants, alone.
But it turns out that it's not particularly hard - though you do need to plan ahead since there's both baking and cooling time required. And the result is, not surprisingly, completely delicious. Creamy, sweet, and silky with that delightfully crunchy, caramelized sugar crust you crack with your fork just before digging in to take a little taste of heaven. It's the perfect way to end a cold, snowy day.
I thought this was cute - I loved these little notes from the farmer. And I really loved that their hens are pasture-raised. I also chose Organic Valley heavy cream for that same reason - their cows are pasture-raised. It makes for healthier, happier animals and tastier, more nourishing eggs and dairy.
After consulting a few recipes, I adapted the one I found on my friend Jen's wonderful blog, Use Real Butter which comes via Elegantly Easy Creme Brulee & Other Custard Desserts by Debbie Puente.
The only real changes I made to the original recipe were to add a pinch of salt and to top these beauties with maple sugar instead of turbinado or brown sugar thanks to a suggestion from my friend, Lynn.
I love all things maple and am always happy to give a little nod to my lovely corner of the world where the sugar maple sap is already flowing whenever the temperature gets above freezing. I've also added a bit more detail to the directions for any of you who are newbies like I was.
Although crème brûlée feels like winter comfort fare to me, I am also really looking forward to making it with some of the lavender that grows in our yard come summer.
I am also intrigued by the yummy-sounding lime crème brûlée my friend Susan at On Rue Tatin makes. So many possibilities, so few ramekins. I may have to invest in a few of my own...
We're getting another 2-4 inches on top of the 18 or so inches we have out there already so this seems like the perfect time for these. Enjoy!
-- print recipe --
Maple Crème Brûlée
Makes 6 servings
Ingredients
* 8 egg yolks
* 1/3 cup granulated sugar
* 2 cups heavy cream
* 1 tsp vanilla extract
* a pinch of sea salt
* 1/4 cup maple sugar (for the tops - you can also substitute turbinado or brown sugar if you don't want to go the maple route)
Directions
1. Preheat the oven to 300°F. Whisk the egg yolks, sugar and pinch of salt together in a medium bowl until the sugar is dissolved and the mixture is thick and pale yellow. Add the cream and vanilla and whisk until well-combined.
2. Divide the mixture evenly between 6 ramekins or custard cups (if you're using tiny ramekins you may get more than 6 out of this recipe, and fewer than 6 if you're using big cups.) Place the ramekins in a large baking dish, making sure that they do not touch each other or the edges of the dish - I didn't have any single dish that was big enough to hold them all so I used two baking dishes - and then pour an inch or so of water into the dish, being careful not to get any water into the ramekins.
3. Bake until the custard is set around the edges, but still loose in the center (just give the dish a gentle shake with your pot-holdered hand to see if they still jiggle a little bit) for between 40-60 minutes.
4. Once the custard is set, remove them from the oven and let them sit out in the water bath until fully cooled. Remove the cups from the water bath and chill, covered, in the refrigerator for at least 2 hours and up to 2 days.
5. When you're ready to serve these treats, remove them from the fridge and use a paper towel or kitchen towel to dab any condensation off the tops of the creme. Spread a thin coating of maple sugar over each custard - enough to cover it evenly but it should not be thick. Set the oven to broil and put the ramekins on a baking sheet right underneath the broiler. Broil the sugar until caramelized and serve. Be very careful not to burn the sugar - it's all too easy to walk away and forget about them. If you're concerned about keeping the custards cool you can either refrigerate them again after you caramelize the sugar (leave yourself a good 35-40 minutes extra if you want to handle it this way) or you can place them in an ice water bath while you're caramelizing the sugar.
Maple Crème Brûlée
Makes 6 servings
Ingredients
* 8 egg yolks
* 1/3 cup granulated sugar
* 2 cups heavy cream
* 1 tsp vanilla extract
* a pinch of sea salt
* 1/4 cup maple sugar (for the tops - you can also substitute turbinado or brown sugar if you don't want to go the maple route)
Directions
1. Preheat the oven to 300°F. Whisk the egg yolks, sugar and pinch of salt together in a medium bowl until the sugar is dissolved and the mixture is thick and pale yellow. Add the cream and vanilla and whisk until well-combined.
2. Divide the mixture evenly between 6 ramekins or custard cups (if you're using tiny ramekins you may get more than 6 out of this recipe, and fewer than 6 if you're using big cups.) Place the ramekins in a large baking dish, making sure that they do not touch each other or the edges of the dish - I didn't have any single dish that was big enough to hold them all so I used two baking dishes - and then pour an inch or so of water into the dish, being careful not to get any water into the ramekins.
3. Bake until the custard is set around the edges, but still loose in the center (just give the dish a gentle shake with your pot-holdered hand to see if they still jiggle a little bit) for between 40-60 minutes.
4. Once the custard is set, remove them from the oven and let them sit out in the water bath until fully cooled. Remove the cups from the water bath and chill, covered, in the refrigerator for at least 2 hours and up to 2 days.
5. When you're ready to serve these treats, remove them from the fridge and use a paper towel or kitchen towel to dab any condensation off the tops of the creme. Spread a thin coating of maple sugar over each custard - enough to cover it evenly but it should not be thick. Set the oven to broil and put the ramekins on a baking sheet right underneath the broiler. Broil the sugar until caramelized and serve. Be very careful not to burn the sugar - it's all too easy to walk away and forget about them. If you're concerned about keeping the custards cool you can either refrigerate them again after you caramelize the sugar (leave yourself a good 35-40 minutes extra if you want to handle it this way) or you can place them in an ice water bath while you're caramelizing the sugar.
You might also like: