

It's been a few years since I subscribed to any food mags. Back when we lived in Washington, DC, I subscribed to Food & Wine for a while but ended up dropping it because it read more like Wine & Wine and I am mostly a teetotaler. I also had a brief fling with Cooks Illustrated that lasted for a year or two. Although I liked it, I let it lapse when we moved to California.
After a year or two in Berkeley, I signed up for Sunset, which I loved. But I did NOT love the guilty stacks of paper that continually accumulated in our small apartment. So when we moved back to the east coast two years ago, I decided to cancel everything except the New Yorker which does an excellent job of filling our house with partially read magazines destined for the recycling bin all by itself...
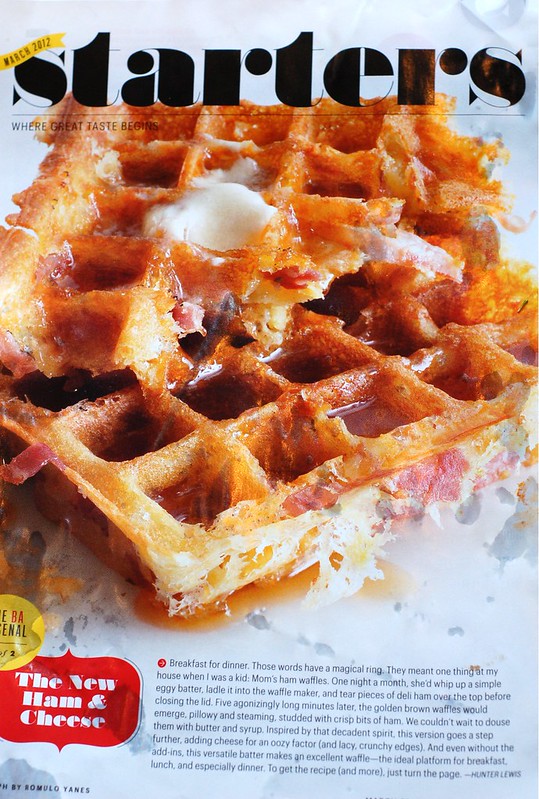
But I kinda miss food magazines. So I usually buy one or two when I fly somewhere. The inspiration for this morning's experiment in decadent deliciousness comes from the the March 2012 issue of Bon Appetit that I bought when we went to Austin this spring - see below and please excuse the water marks on the page - I was cooking and in a bit of a hurry.
Savory waffles - what an amazingly good, simple idea! And one that had never occurred to me before, even though we make waffles fairly regularly and often add raspberries, peaches or blueberries to them. Duh!
After reading the actual recipe, I decided to leave it at "inspiration" as it seemed a little more complicated than necessary - we just went with the basic waffle recipe that we always use from the Joy of Cooking. My main contribution to this recipe is the fresh rosemary but I think it actually makes a BIG difference.

I've had a thing for the combination of rosemary and ham ever since our butcher back in Berkeley encouraged us to try some Fra' mani rosemary ham that we fell for instantly.
These came together pretty quickly - I grated some sharp cheddar, chopped up a sprig of fresh rosemary, and cut a couple slices of Applegate Farms ham which is hormone- and antibiotic-free.

Then I added it all, along with a few grinds of black pepper, to the waffle batter my husband had whipped up.

I'd been a little concerned that the cheese might stick to the waffle iron but my husband, who is the waffle master in our family, reported smooth sailing. Check out my tip for greasing your waffle iron without wasting a ton of butter :)
Served with real maple syrup, these things just make your mouth happy; your heart is probably another story since these officially fall into the category of "fat bomb" but I feel that one must live a little sometimes...

We ate them al fresco on the gorgeous, live-edged cedar picnic table my husband built a few weeks ago. The combination of the crispy waffle, the smoky ham, the sharp, gooey cheese, the fresh, almost piney taste of the rosemary and the sweetness of the maple syrup is to die for. We're all looking forward to the leftovers that we froze for another (happy) morning.

-- print recipe --Savory Ham, Cheddar and Rosemary Waffles
Makes 8-10 waffles in our small, round iron
Ingredients
* 1 3/4 cups all-purpose flour
* 1 tbsp baking powder
* 1 tbsp sugar
* 3/4 tsp salt (original recipe calls for 1/2 tsp)
* 3 free-range, organic eggs (get pasture-raised if you can)
* 1 stick of butter, melted (original recipes calls for between 1/4 cup and 1 cup but this is what we go with)
* 1 1/2 cups milk
* 1/4 - 1/2 cup sharp cheddar cheese, grated
* 2-3 slices of ham, roughly chopped or torn into pieces
* large sprig of rosemary, washed, dried, needles removed and chopped
* several grinds of fresh black pepper
Directions
1. Mix the flour, baking powder, sugar and salt. Mix the eggs, butter and milk.
2. Pour the wet ingredients into the dry ingredients. Add the cheese, ham, rosemary and black pepper and stir to combine. Be careful not to overmix.
3. Cook in a greased waffle iron and serve hot with pure maple syrup (you could put butter on these if you like, it just seems like overkill to me.) Don't forget that you can freeze any leftovers (or make extra to freeze)! Just let them cool on a wire rack, then put the rack in the freezer for 20 minutes to freeze them all individually, then remove the tray and stack the waffles neatly in a large freezer bag, remove the air before sealing (closing the bag almost all the way and using a straw to suck out the air works wonders for this) and freeze. Eat them within a month or two - just reheat them in a toaster oven for a few minutes - they'll taste great.
You might also like:
- Maple Pecan Scones
- Spinach & Cheese Strata
- Garlicky Braised Kale, Roasted Tomato & Egg Breakfast Sandwich


