RESOURCES

Saturday, May 30, 2015

Quick, Gingery Peanut Sauce

Saturday, May 30, 2015

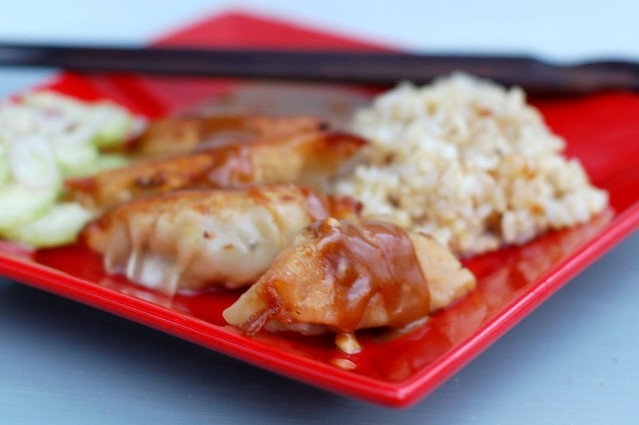
Pork & veggie potstickers with brown rice, peanut sauce & pickled cuke salad by Eve Fox, Garden of Eating blog, copyright 2012

With the obvious exception of people who are deathly allergic to peanuts, I think pretty much everyone loves peanut sauce. I'm always happy when I've made a big batch of it because there are so many ways to use it throughout the week - with tofu, with spring rolls, with broccoli, with rice, with chicken, with shrimp, as the basis for a salad dressing, etc., etc.

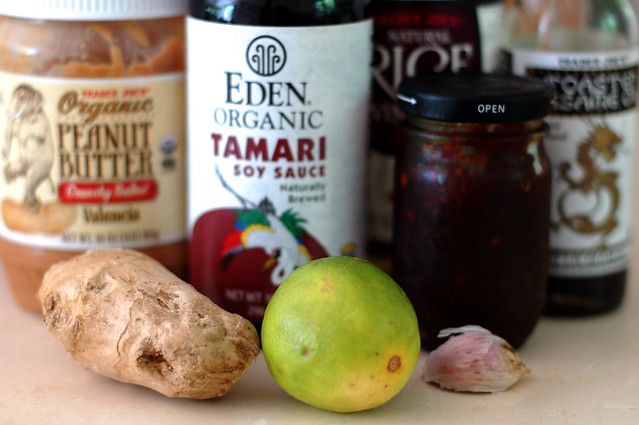
Ingredients for the peanut sauce by Eve Fox, the Garden of Eating, copyright 2015

Although I switch it up sometimes (in fact, I am planning to do a little round up of the many peanut sauces I like to make soon), the recipe below is my default option because I love the combination of spicy, salty and sweet. And it's pretty quick, which is very important to me.

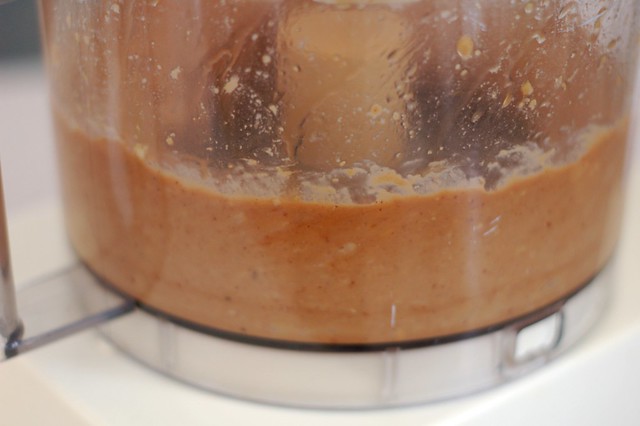
Blending the miso peanut sauce in the Cuisinart by Eve Fox, The Garden of Eating, copyright 2015

You take lots of peanut butter, some soy sauce, fresh ginger, garlic, brown sugar, rice wine vinegar, sesame oil, roasted red chili paste, and lime juice and put them all in a Cuisinart or blender. Add some hot water and blend until smooth. That's it. Boom! You're done! Well, except that now you have to wash your food processor which is not my favorite task but it's worth it.

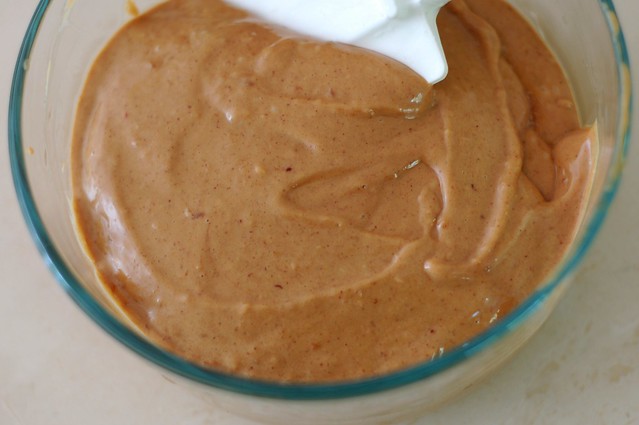
Use a natural peanut butter - the ingredients should be either just peanuts or peanuts and salt. Make a lot. Enjoy!

Peanut sauce by Eve Fox, the Garden of Eating, copyright 2015

-- print recipe --Quick, Gingery Peanut Sauce
Makes about 2 cups

Ingredients

* 1 cup natural peanut butter (chunky or smooth, it's up to you)
* 1/3 cup soy sauce
* 1/4 cup rice wine vinegar
* 2 Tbsps brown sugar
* 2 Tbsps roasted red chili paste
* Juice of one lime
* 2-inch knob of fresh ginger, peeled and roughly chopped
* 1 clove of garlic, peeled and roughly chopped
* 2 Tbsp sesame oil
* Up to 1/2 cup hot water, as needed, to thin the sauce

Directions

1. Place all the ingredients in the bowl of a food processor and blend, adding hot water slowly in a thin stream until the sauce reaches your desired consistency. Taste the sauce and adjust the seasonings to taste.

2. Store in an airtight container for up to a week in the refrigerator and add to anything you want to taste really good.

You might also like:

For more delicious recipes, gardening ideas, foraging tips, and food-related inspiration "like" the Garden of Eating on Facebook, or follow me on Twitter and Pinterest.

Sunday, May 24, 2015

Thai Eggplant Salad with Fresh Herbs & Greens

Sunday, May 24, 2015

Thai eggplant salad with fresh garden greens and herbs by Eve Fox, The Garden of Eating, copyright 2015

A friend recently posed the question "if you could only eat one country's cuisine for the rest of your life, what would it be?" on his Facebook page. I didn't even pause to think before responding "THAILAND!" I find the unique combination of hot, sour, salty and sweet that makes Thai food Thai food utterly addictive in its freshness, complexity and depth of flavors.

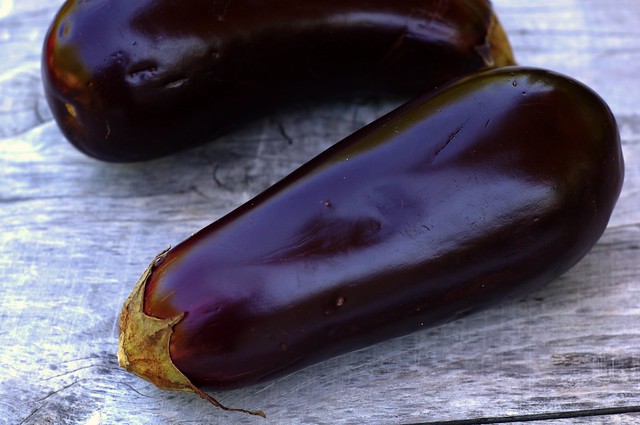
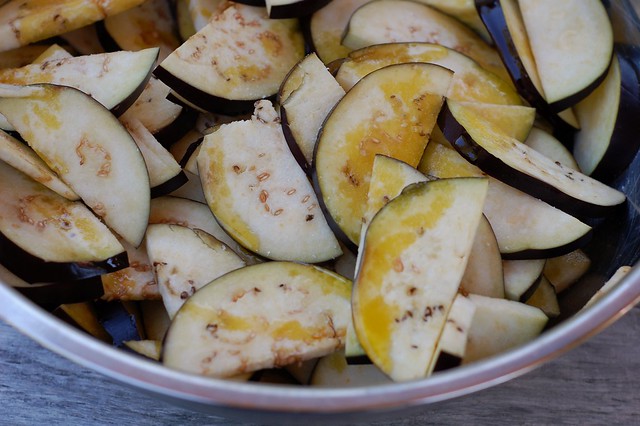
Eggplant for the Thai eggplant salad by Eve Fox, The Garden of Eating, copyright 2015

This salad is a perfect example -- you start with a bed of fresh greens and a generous amount of fresh herbs - basil, cilantro and mint. Then you add some sliced scallions or chives, top with nutty, sweet, roasted eggplant and toss the whole thing in a dressing that is a mouth-watering balance of tart, sweet and spicy.

Eggplant for the Thai eggplant salad by Eve Fox, The Garden of Eating, copyright 2015

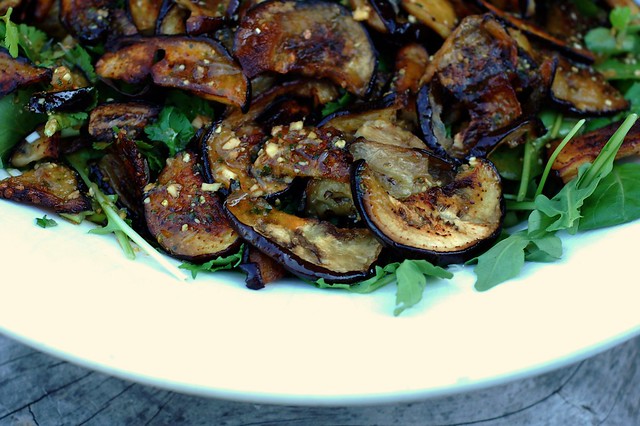
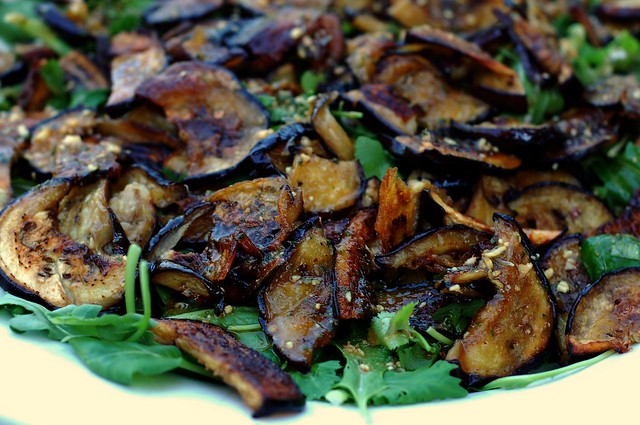
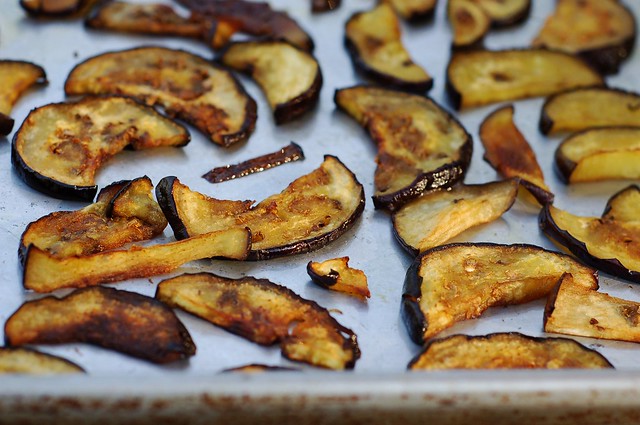
Toss the sliced eggplant with lots of olive oil and sea salt, then spread them out on a couple of heavy baking sheets and roast, flipping once in the middle to ensure even cooking. The roasting turns them into something you'll enjoy eating right off the tray - they get soft and kind of caramelized with a wonderful, nutty flavor that is at least as good as meat.

Roasted eggplant  for the Thai eggplant salad by Eve Fox, The Garden of Eating, copyright 2015

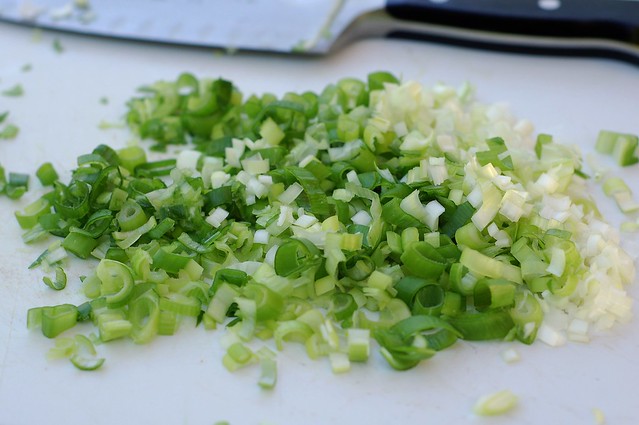
The scallions provide a nice counterpoint to the sweetness and softness of the eggplant slices. I like to chop them fairly finely to distribute the flavor and avoid getting any overpowering bites of allium.

Scallions for the Thai eggplant salad by Eve Fox, The Garden of Eating, copyright 2015

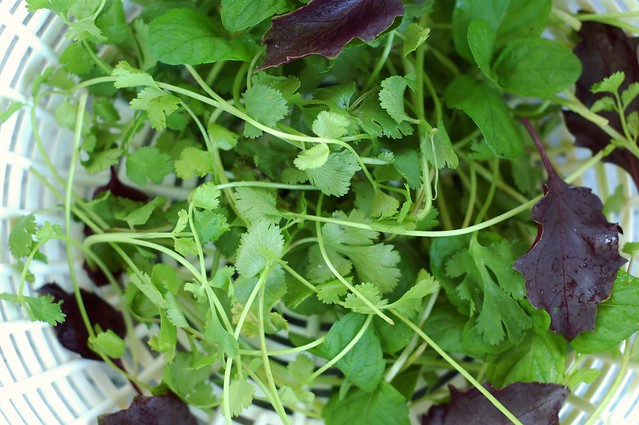
Fresh basil, mint and cilantro - the holy trinity of Thai herbs - give the salad a delightful pop with little bursts of flavor happening all over the place. I am so happy to be able to go outside and snip these straight from the garden again after the long winter. Feels so luxurious! I'm trying out this pretty purple basil (the variety is called dark opal) this year and so far, I am a big fan.

Cilantro, basil and mint for the Thai eggplant salad by Eve Fox, The Garden of Eating, copyright 2015

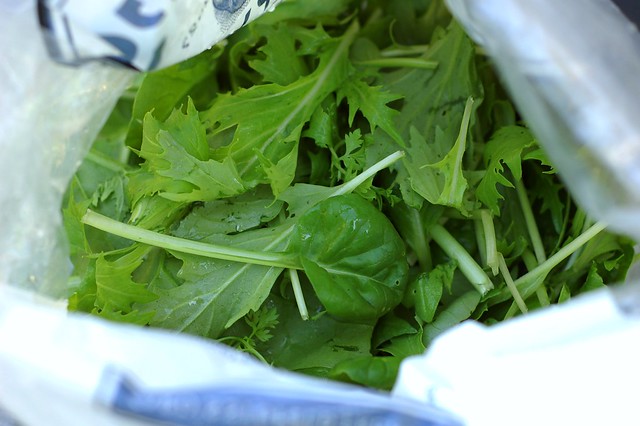
And the greens make a nice, fresh bed for it all. Especially now that there are such tender young thangs growing in the garden (this bunch of lovelies came from our friend, Liza's garden).

Fresh garden greens for the Thai eggplant salad by Eve Fox, The Garden of Eating, copyright 2015

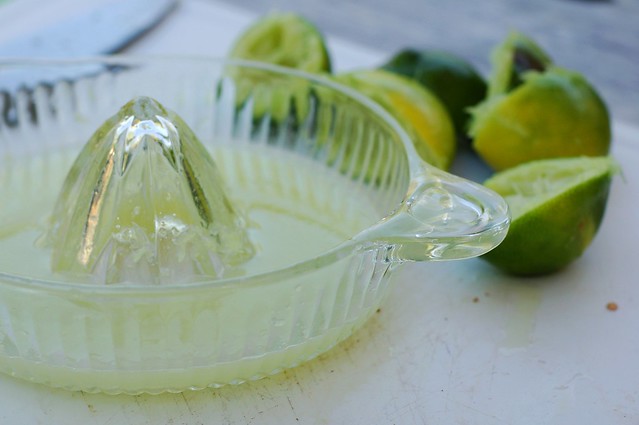
The dressing ties it all together (I can no longer use that phrase without thinking of the Big Lebowski - anyone else?) Lime juice provides all the acid you need. Then you add some fish sauce (substitute soy sauce, if you're a vegan or vegetarian or allergic), some brown sugar, a jot of Sriracha, and a little finely chopped ginger and garlic.

Lime juice for the Thai eggplant salad by Eve Fox, The Garden of Eating, copyright 2015

Pour that dressing over it all and devour it. Sometimes I add some chopped toasted peanuts for a little crunch, too, but it's up to you. SO GOOD!

Thai eggplant salad with fresh garden greens and herbs by Eve Fox, The Garden of Eating, copyright 2015

-- print recipe --
Thai Eggplant Salad with Fresh Herbs & Greens
Serves 4

Ingredients

* 2 medium eggplants, ends removed, sliced into rounds or half rounds (the slender Asian eggplants are the best if you can find them)
* 3 scallions, washed, ends removed and finely chopped
* 4-5 cups of fresh greens - lettuce, arugala, tatsoi, baby spinach, etc., washed, dried and ripped into bite-sized pieces
* 2 cups fresh herbs - equal parts cilantro, basil and mint, rinsed, dried, stems removed and coarsely chopped or ripped
*  Olive oil and sea salt for roasting
* 1/4 cup chopped roasted peanuts (optional)

For the dressing
* Juice of 3 limes
* 2 tsps fish sauce (sub soy sauce if you do not/cannot eat fish)
* 1 tsp Sriracha (you can also use another hot sauce if you prefer or half a jalapeno with the seeds removed - if you like things hot, feel free to use more)
* 1 Tbsp brown sugar or palm sugar
* 1 small clove of garlic, minced or pressed
* 1 tsp chopped ginger root

Directions

1. Preheat the oven to 400. In a medium-large bowl, toss the eggplant slices with a lot of olive oil (eggplant is like a sponge so do your tossing quickly to help ensure that the oil gets distributed evenly before it gets absorbed) and several generous pinches of sea salt. Turn the eggplant slices out onto two heavy baking sheets and lay them out in a single layer. Roast for 15-20 minutes then remove the trays and flip the slices over. Return them to the oven and roast for another 10 minutes or so before removing them to cool.

2. Make the dressing - just mix all the ingredients together in whatever order you like and stir or shake well until the sugar has dissolved. Taste it and adjust the flavors, as needed.

3. Lay the greens and herbs in your serving bowl and top with the eggplant slices (you can either use them as is or cut or tear them into smaller pieces). Sprinkle with the chopped scallions and peanuts (if desired), add the dressing and serve.

You might also like:


For more delicious recipes, gardening ideas, foraging tips, and food-related inspiration "like" the Garden of Eating on Facebook, or follow me on Twitter and Pinterest.
Sunday, May 17, 2015

Three Perfect Hudson Valley Picnics

Sunday, May 17, 2015

The long winter is finally over and I want to share this fun, little piece I recently wrote for Hudson Valley Magazine with you. I got to choose three great picnic spots here in my beloved Hudson Valley and then design three meals made with local ingredients to go with the outings.

I chose a family favorite, the Saugerties Lighthouse, as well as the stately, beautifully manicured marvel known as the Vanderbilt Mansion, and Bear Mountain State Park, an active person's playground that is a bit closer to New York City.

The gorgeous Saugerties Lighthouse on the Hudson River. Photo by Mark (hatschski) via Flickr, copyright 2014.
As for the food, it was a sheer delight researching the many, delicious, locally-made options! Big thanks to my Facebook friends for their super-helpful suggestions including the remarkable baguette du perche at Cafe Le Perche in Hudson, Woodstock's very own Buddhapesto, apple chips from Wrights Farm in Gardiner (one of my favorite vendors at the Woodstock Farm Festival), saucisson provencal from JACüTERIE in Ancramdale and many, many more.

Here's the link to the article if you'd like to read more. Hope you enjoy eating OUT this spring and summer. Below are a few shots of the Saugerties Lighthouse experience to whet your appetite for picnicking.

The picnic table on the deck at the Saugerties Lighthouse on the Hudson River - tree at left is the big mulberry that offers delicious berries in season. Photo by Krissa Corbett Cavouras via Flickr, copyright 2007.
Boardwalk portion of the trail to the lighthouse. Photo by Daniel Mennerich via Flickr, copyright 2011.

You might also like:
For more delicious recipes, gardening ideas, foraging tips, and food-related inspiration "like" the Garden of Eating on Facebook, or follow me on Twitter and Pinterest.
Tuesday, May 5, 2015

Curried Kale Cakes + My Plate, My Planet

Tuesday, May 5, 2015

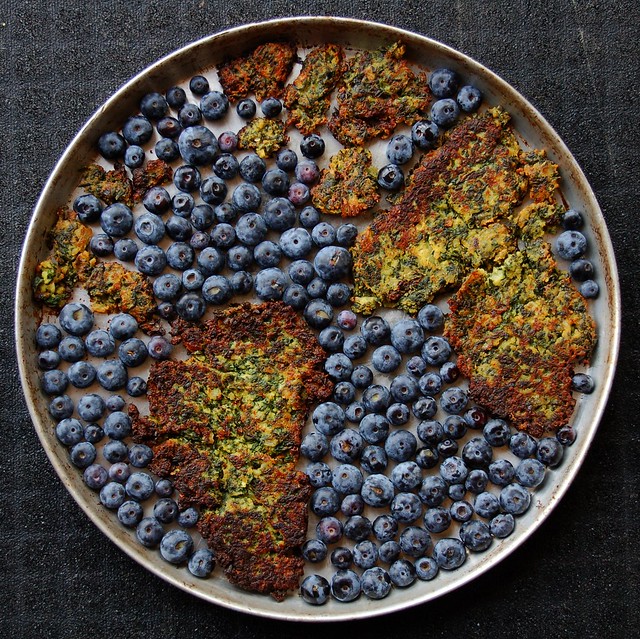
Global South curried kale cakes in a sea of blueberries by Eve Fox, the Garden of Eating, copyright 2015

Greetings, Earthlings. Have you heard about My Plate, My Planet? It's a new campaign that aims to get sustainability included in the 2015 dietary guidelines for Americans. Meaning that the environmental impacts of our diets would be taken into consideration for the first time, well, ever! Kind of a huge deal...

You can help by sending a comment to the Secretary of Health and Human Services and the Secretary of Agriculture by the May 8th deadline this Friday.

In honor of this worthy effort, I created an Edible Earth made of curried kale cakes floating in a sea of blueberries - two sustainable superfoods in one meal. Kale and blueberries are the kinds of foods that are healthy both for us and also for the planet - providing a lot of nutrition without requiring a lot of resources or taking a heavy toll on the environment. And they also taste great - so there's that.

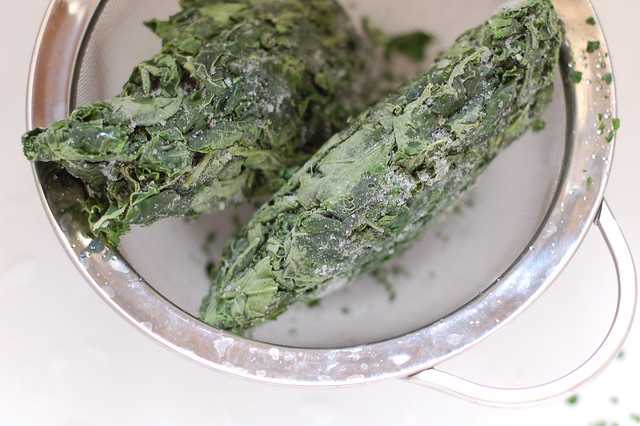
Defrosting frozen kale from my freezer by Eve Fox, the Garden of Eating, copyright 2015

These kale cakes are rather addictive, if I do say so myself. I used some ragged jack kale (seeds from the Hudson Valley Seed Library) from our garden that I'd blanched and frozen back in September. The plants PRODUCED and although it was kind of exhausting to keep up with them, I've been so grateful that I took the time to blanch and freeze that kale all winter long. And we're coming to the end of the frozen goodies right as we begin putting this year's seedlings in the ground. Perfect timing.

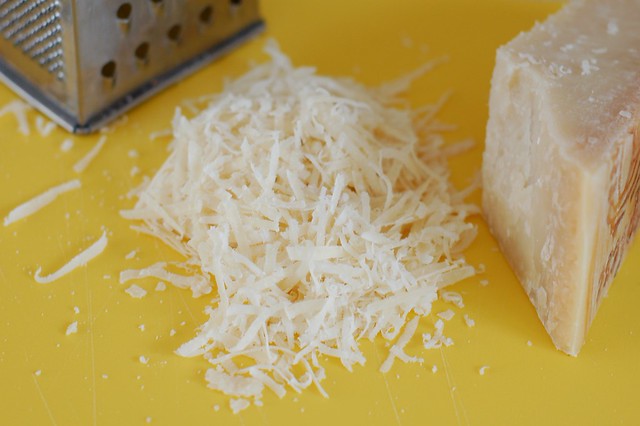
While the kale was defrosting, I grated a small mountain of Parmesan cheese and sauteed a big onion. You can never have too much onion, in my opinion.

Grating Parmesan cheese by Eve Fox, the Garden of Eating, copyright 2015

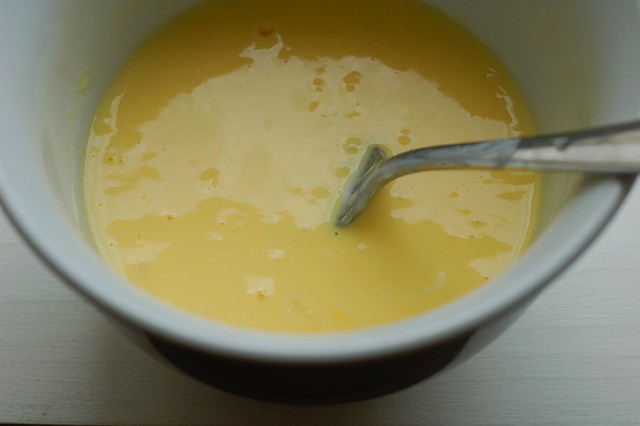
I beat a couple of pasture-raised eggs (more on what pasture-raised is and why it's so much better) and mixed them with a bit of yogurt.

Eggs and yogurt for the curried kale fritters batter by Eve Fox, the Garden of Eating, copyright 2015

Then I mixed all that together with a generous dose of breadcrumbs (you can use a gluten-free flour mix, instead, if you prefer), lots of garam masala and a little dried thyme from our garden, a few pinches sea salt, several grinds of black pepper, and mixed.

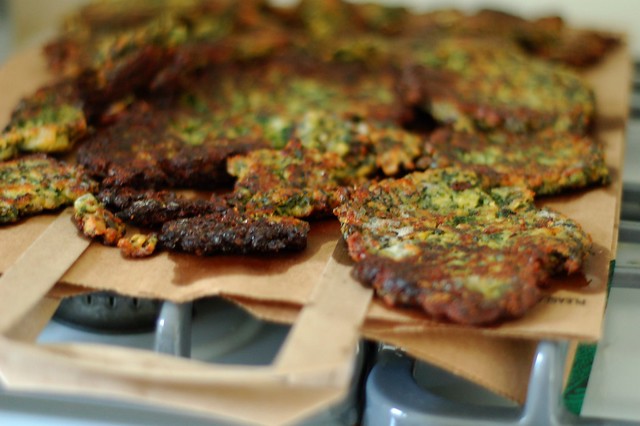
Then came the frying. I like grapeseed or peanut oil for frying because they've both got a nice, high smoke point and a neutral taste. I like to drain greasy things on a used paper grocery bag - way more absorbent than paper towels and less wasteful. Then I either toss it in the woodstove or put it in the compost.

Curried kale cakes by Eve Fox, the Garden of Eating, copyright 2015

Every bite was savory, moist, crunchy and good. Delicious on their own eaten out of hand or with a little yogurt herb sauce or sour cream.

Add your comment by this Friday, May 8th and I hope you like the kale cakes.

-- print recipe --Curried Kale Cakes
Serves 4

Ingredients

* 1/2 cup grated Parmesan cheese
* 3 eggs, beaten
* 1 bunch kale, rinsed, washed, dried, ribs removed and chopped
* 1 large onion, peeled and minced
* 1/2 cup yogurt
* 3/4 cup bread crumbs (or use a gluten-free flour)
* 1-2 Tbsps garam masala or curry powder
* 1 Tbsp sea salt
* 1 tsp freshly ground black pepper
* Milk or water to thin the batter, if needed
* Roughly 1 cup grapeseed, peanut or sunflower oil to fry in

Directions

1. Heat a few teaspoons of the oil in a large cast iron skillet over medium heat. Once hot, add the onions and saute, stirring often until softened. Add the kale and saute briefly to get some of the moisture out of the kale. Pour the onion-kale mixture in a medium sized mixing bowl and set the skillet aside - you don't need to wash it as you're going to use it to fry the cakes in.

2. Add the breadcrumbs, spices, eggs and yogurt and stir well to combine. If the batter is too stiff, add more yogurt or a little milk or water to thin it a bit.

3. Heat the rest of the oil in the cast iron frying pan until hot but not smoking. Test it by dropping a tiny bit of batter in and if it sizzles nicely, it's ready. Ladle large spoonfuls of the batter in and fry until the edges are browned and the cakes are solid enough to flip over then fry for another 3-4 minutes, depending on the size of the cakes and how hot your oil is.

4. When the cakes are nicely browned on both sides, scoop out and drain on a paper bag (this works better than paper towels and is less wasteful - you can compost the bag when you're done with it) and serve warm with sour cream or an herbed yogurt sauce. Chutney can be a nice accompaniment, too.

You might also like:
For more delicious recipes, gardening ideas, foraging tips, and food-related inspiration "like" the Garden of Eating on Facebook, or follow me on Twitter and Pinterest.
Monday, May 4, 2015

The World's Best Rice Bowl with Tahini-Ginger Kale, Avocado, Egg & Pickled Daikon

Monday, May 4, 2015

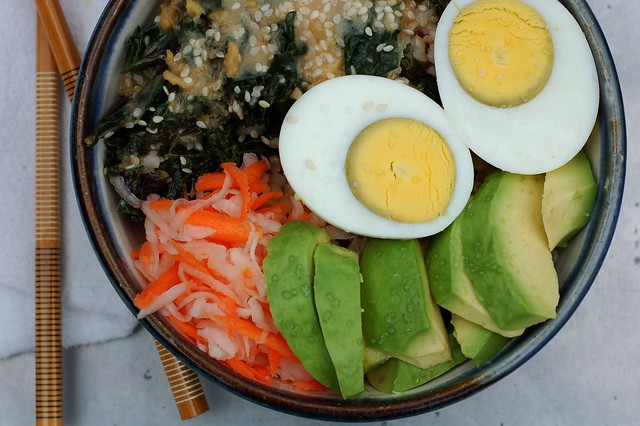
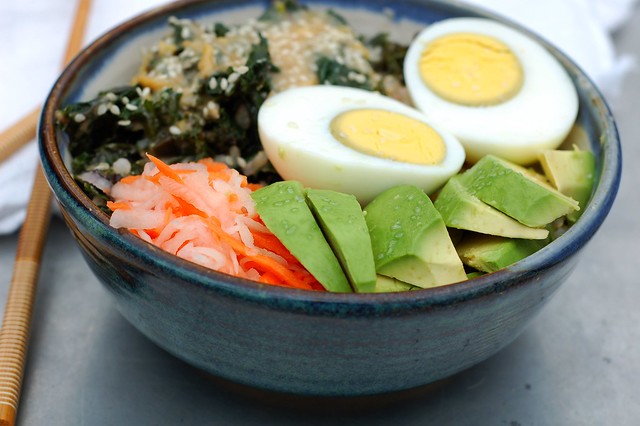
Warm rice bowl with ginger-tamari kale, avocado, pickled daikon and carrot, avocado and hard-boiled egg by Eve Fox, The Garden of Eating, copyright 2015

Lately, I've been enamored of rice bowls and this one really takes the cake. I mounded up a big spoonful of short-grain brown rice, added some of the delicious leftover tahini-ginger kale I wrote about two weeks ago, sliced a perfectly ripe avocado, peeled a hard-boiled egg and topped it with a little mound of quick pickled daikon radish and carrots I'd made. Then dusted the egg and avocado with some sea salt and sprinkled toasted sesame seeds over it all.

It was so good. Not only was it a pleasure to eat - each bite mixing buttery avocado, spiced kale, nutty rice, hearty egg and zingy pickled daikon, I also felt perfectly full and nourished afterwards.

Rice bowls are one of those things that are easy to make if you've got the right components lying around - the rice, the pickled veggies, the eggs, the kale, the avocado, etc. It is a meal born of good leftovers and a little advance planning.

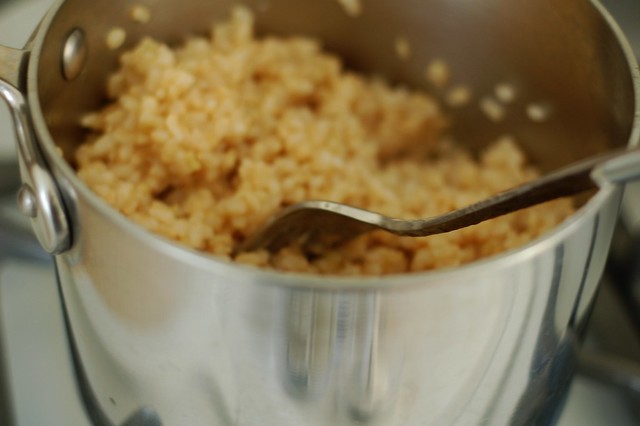
Brown rice by Eve Fox, the Garden of Eating, copyright 2015

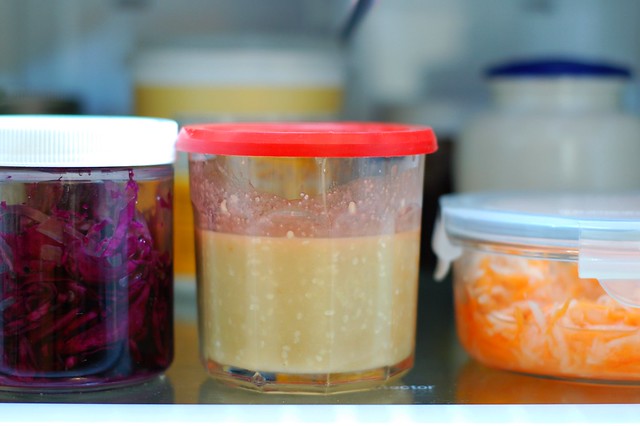
So make a batch of the tahini-ginger dressing and leave it in your fridge. That makes it really easy to make the warm kale with tahini-ginger dressing. And you can either make it fresh or just make more than you think you'll eat and save the leftovers for this purpose.

Tahini ginger sesame dressing by Eve Fox, The Garden of Eating, copyright 2015

Make a jar of pickled daikon and just keep it in your fridge. As I've mentioned, I like to just eat it straight out of the jar with a spoon...

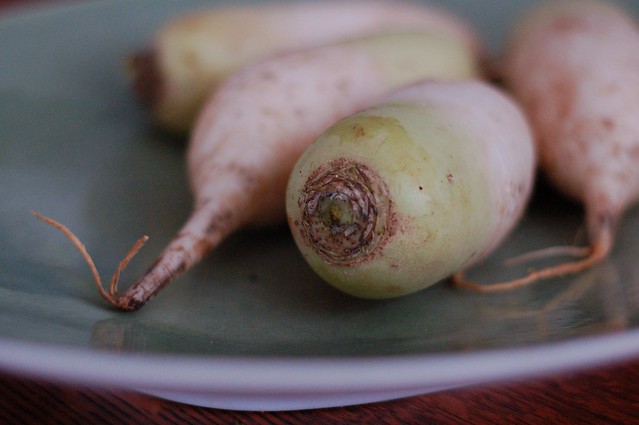
Daikon radishes by Eve Fox, The Garden of Eating, copyright 2015

And hardboil a few eggs just to have them in the refrigerator. You probably already do this if you have kids :)

Warm rice bowl with ginger-tamari kale, avocado, pickled daikon and carrot, avocado and hard-boiled egg by Eve Fox, The Garden of Eating, copyright 2015

The concept is so flexible and so tasty - you can use different vegetables, different dressings - whatever you have on hand. I've included links to a few other ideas that would make for a good rice bowl below this recipe. Enjoy!

-- print recipe --Warm Rice Bowl with Tahini-Ginger Kale, Avocado, Egg & Pickled Daikon
Serves 2

Ingredients

* 1 cup cooked brown rice
* 2 hard-boiled eggs, peeled and sliced in half
* 1 ripe avocado, peeled and sliced
* 1/2 cup pickled daikon (or daikon and carrots)
* 1/2 cup kale with tahini-ginger dressing
* Sea salt to taste
* Pinch of toasted sesame seeds

Directions

1. Put the rice and kale in a ceramic bowl and microwave it for 30-45 seconds to warm it (you can also pop it in the toaster oven for a few minutes if you prefer).

2. Arrange the avocado slices, the pickled daikon and the hard-boiled egg over top of the rice, and sprinkle with a little sea salt and some sesame seeds.

You might also like:


For more delicious recipes, gardening ideas, foraging tips, and food-related inspiration "like" the Garden of Eating on Facebook, or follow me on Twitter and Pinterest.
Friday, May 1, 2015

Planting Asparagus Crowns - Investing In a Tasty Future

Friday, May 1, 2015

Last weekend, we planted two dozen + asparagus crowns in our slowly coalescing garden (fencing, fencing, fencing.) Although it will be a few years before we can begin to harvest the spears in earnest because you must first give the plants time to establish themselves, it was very exciting.

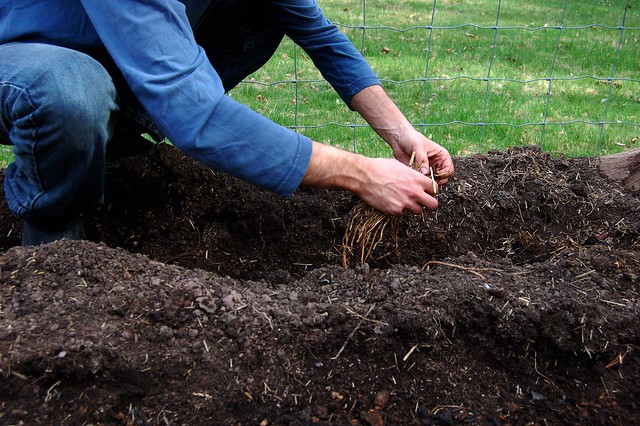
Laying the asparagus crowns over the mounds of compost by Eve Fox, the Garden of Eating, copyright 2015

Just think, in a few short years, we can walk out our door and snap tender green asparagus right out of our own beds. It doesn't get any fresher than that.

Although we're clearly at the beginning of the process, the planting was easy. Here's how it went in case you'd like to make a similar investment in your edible future.

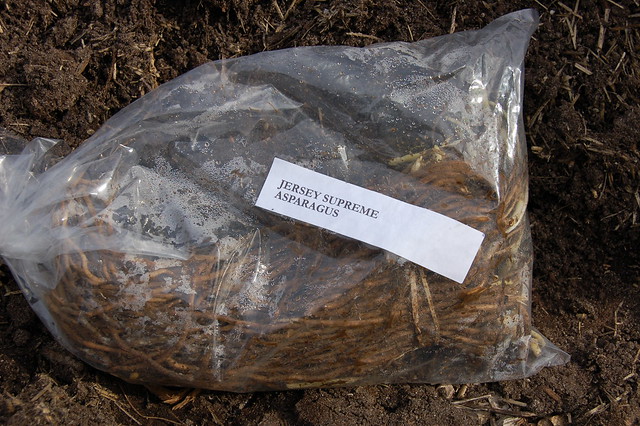
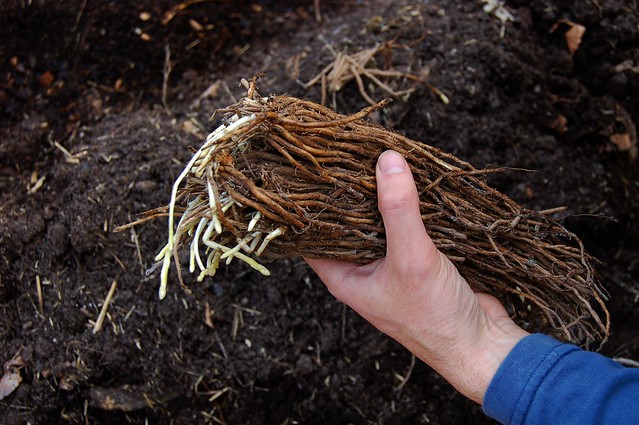
Jersey Supreme second year asparagus crowns by Eve Fox, The Garden of Eating, copyright 2015

1. We ordered 25 second-year Jersey Supreme asparagus crowns from a grower who'd gotten great reviews on Amazon (kind of ironic but we knew the shipping would be quick and liked that we could see real-life reviews from a lot of people.) It cost roughly $20 with the shipping and, as predicted, arrived within a couple of days.

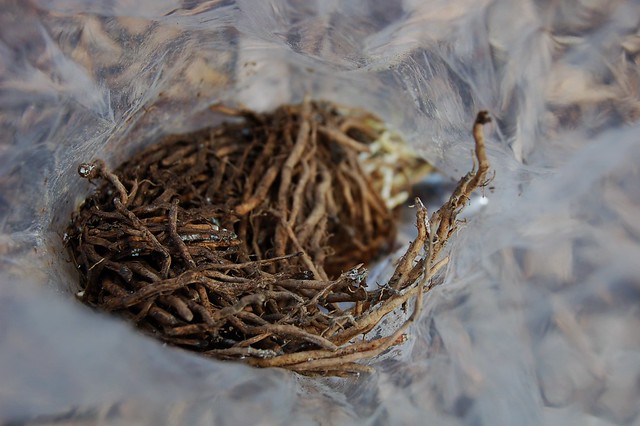
Jersey Supreme second year asparagus crowns by Eve Fox, The Garden of Eating, copyright 2015

If ordering plants online is not your bag, you should be able to get them from a local nursery, in season. Although there are a number of varieties, the basic differences boil down to green or purple. Although the purple ones are really pretty, they turn green when you cook them so we just opted for the plain old green ones. Per the grower's directions, we stored the bag of crowns in the fridge while we readied their bed.

Jersey Supreme second year asparagus crowns by Eve Fox, The Garden of Eating, copyright 2015

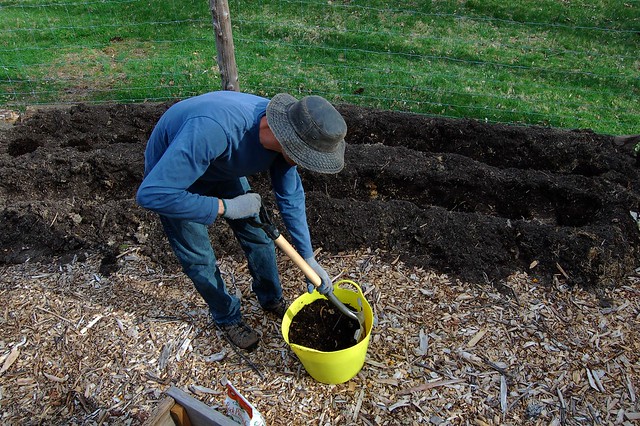
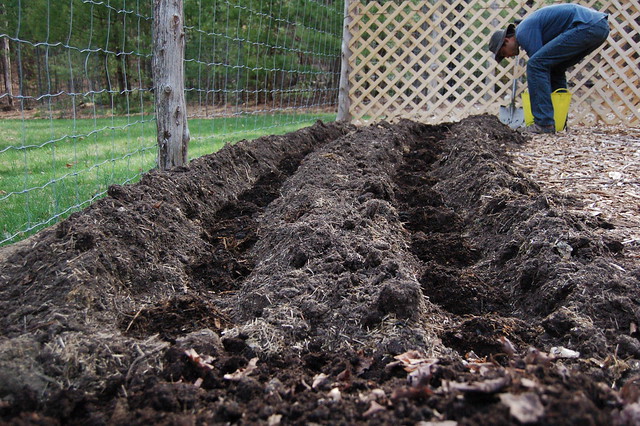
2. My husband, Rahm, dug a roughly 8-inch trench for them to grow in (anything from 6 - 12 inches deep is fine). We planted two rows side by side with about two feet between them.

Turning the compost for the asparagus trench by Eve Fox, The Garden of Eating, copyright 2015

3. He mixed a good amount of our rich composted dirt with a little rock phosphate to help stimulate root growth (follow the directions on the package to get the right amount). Then he dumped a little mound of about four inches of this compost every 12-18 inches along the trench.

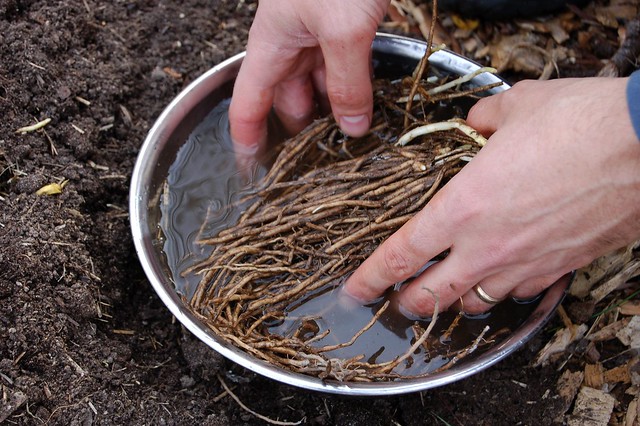
4. Meanwhile, I removed the crowns and soaked them briefly in warm (not hot!) water.

Soaking the asparagus crowns briefly in warm water by Eve Fox, the Garden of Eating, copyright 2015

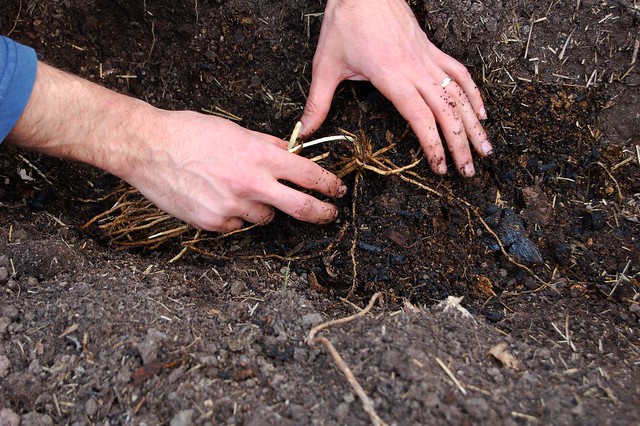
5. Then we untangled the roots of each crown and laid the spidery looking things right on top of the little compost mounds.

Laying the asparagus crowns over the mounds of compost by Eve Fox, the Garden of Eating, copyright 2015

6. Rahm came back through the row and covered the mounds and crowns with about two inches of good dirt, not compost.

Making hillocks of composted dirt in the two trenches for the asparagus crowns by Eve Fox, the Garden of Eating, copyright 2015

7. We would have watered but it was supposed to (and did) rain so we just waited a few hours and they got a good watering in. But you should water if you're not due for a good soaking.

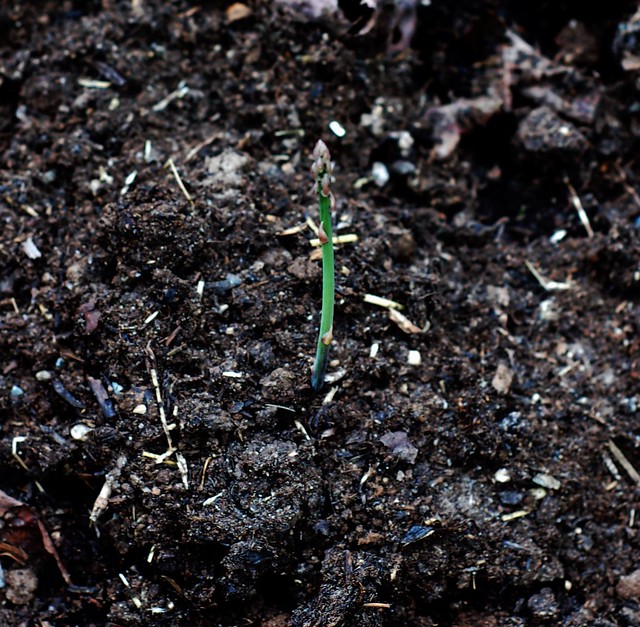
8. Then came the really hard part - waiting for the crowns to put down roots and send up shoots. Everything I read said this takes about a month but we spotted the first proud little sprout two days ago! And a day or so later, little greenish-red heads were breaking through the soil all along the rows.

First asparagus spear is up! by Eve Fox, The Garden of Eating, copyright 2015

Once the greens have poked up about five inches above the surface, we'll cover the trench with another thin layer of soil, leaving the top 3-4 inches of the stems exposed. And we'll repeat that process until the trench is level with the ground around it. Then we'll mulch the bed thickly to discourage weeds and let the plants go "vegetative" as the Farmers Almanac calls it. This lets the roots store up energy and helps them get established. In the fall, we'll cut the dead foliage back and side dress with compost.

9. Apparently, we can harvest a few spears next year but should leave the bulk of them to do their thing and die back on their own, simply trimming the dead foliage in the fall (you can leave it right on top of the dirt to decompose if you like), then dressing with compost and mulching well.

10. Once the beds hit their stride in the third year, we can harvest any spears that are thicker than a pencil. The harvest lasts for about 2-3 weeks. If we have too many, we'll pickle some (so good!) and asparagus also freeze well. Once the harvest has ended, we let the ferns grow to help give the plants more energy for the next year. The beds should produce for at least 20-25 years!!! Just think of all the delicious meals and stinky pee we have ahead of us :)

You might also like:
For more delicious recipes, gardening ideas, foraging tips, and food-related inspiration "like" the Garden of Eating on Facebook, or follow me on Twitter and Pinterest.
Saturday, May 30, 2015

Quick, Gingery Peanut Sauce

Pork & veggie potstickers with brown rice, peanut sauce & pickled cuke salad by Eve Fox, Garden of Eating blog, copyright 2012

With the obvious exception of people who are deathly allergic to peanuts, I think pretty much everyone loves peanut sauce. I'm always happy when I've made a big batch of it because there are so many ways to use it throughout the week - with tofu, with spring rolls, with broccoli, with rice, with chicken, with shrimp, as the basis for a salad dressing, etc., etc.

Ingredients for the peanut sauce by Eve Fox, the Garden of Eating, copyright 2015

Although I switch it up sometimes (in fact, I am planning to do a little round up of the many peanut sauces I like to make soon), the recipe below is my default option because I love the combination of spicy, salty and sweet. And it's pretty quick, which is very important to me.

Blending the miso peanut sauce in the Cuisinart by Eve Fox, The Garden of Eating, copyright 2015

You take lots of peanut butter, some soy sauce, fresh ginger, garlic, brown sugar, rice wine vinegar, sesame oil, roasted red chili paste, and lime juice and put them all in a Cuisinart or blender. Add some hot water and blend until smooth. That's it. Boom! You're done! Well, except that now you have to wash your food processor which is not my favorite task but it's worth it.

Use a natural peanut butter - the ingredients should be either just peanuts or peanuts and salt. Make a lot. Enjoy!

Peanut sauce by Eve Fox, the Garden of Eating, copyright 2015

-- print recipe --Quick, Gingery Peanut Sauce
Makes about 2 cups

Ingredients

* 1 cup natural peanut butter (chunky or smooth, it's up to you)
* 1/3 cup soy sauce
* 1/4 cup rice wine vinegar
* 2 Tbsps brown sugar
* 2 Tbsps roasted red chili paste
* Juice of one lime
* 2-inch knob of fresh ginger, peeled and roughly chopped
* 1 clove of garlic, peeled and roughly chopped
* 2 Tbsp sesame oil
* Up to 1/2 cup hot water, as needed, to thin the sauce

Directions

1. Place all the ingredients in the bowl of a food processor and blend, adding hot water slowly in a thin stream until the sauce reaches your desired consistency. Taste the sauce and adjust the seasonings to taste.

2. Store in an airtight container for up to a week in the refrigerator and add to anything you want to taste really good.

You might also like:

For more delicious recipes, gardening ideas, foraging tips, and food-related inspiration "like" the Garden of Eating on Facebook, or follow me on Twitter and Pinterest.
Sunday, May 24, 2015

Thai Eggplant Salad with Fresh Herbs & Greens

Thai eggplant salad with fresh garden greens and herbs by Eve Fox, The Garden of Eating, copyright 2015

A friend recently posed the question "if you could only eat one country's cuisine for the rest of your life, what would it be?" on his Facebook page. I didn't even pause to think before responding "THAILAND!" I find the unique combination of hot, sour, salty and sweet that makes Thai food Thai food utterly addictive in its freshness, complexity and depth of flavors.

Eggplant for the Thai eggplant salad by Eve Fox, The Garden of Eating, copyright 2015

This salad is a perfect example -- you start with a bed of fresh greens and a generous amount of fresh herbs - basil, cilantro and mint. Then you add some sliced scallions or chives, top with nutty, sweet, roasted eggplant and toss the whole thing in a dressing that is a mouth-watering balance of tart, sweet and spicy.

Eggplant for the Thai eggplant salad by Eve Fox, The Garden of Eating, copyright 2015

Toss the sliced eggplant with lots of olive oil and sea salt, then spread them out on a couple of heavy baking sheets and roast, flipping once in the middle to ensure even cooking. The roasting turns them into something you'll enjoy eating right off the tray - they get soft and kind of caramelized with a wonderful, nutty flavor that is at least as good as meat.

Roasted eggplant  for the Thai eggplant salad by Eve Fox, The Garden of Eating, copyright 2015

The scallions provide a nice counterpoint to the sweetness and softness of the eggplant slices. I like to chop them fairly finely to distribute the flavor and avoid getting any overpowering bites of allium.

Scallions for the Thai eggplant salad by Eve Fox, The Garden of Eating, copyright 2015

Fresh basil, mint and cilantro - the holy trinity of Thai herbs - give the salad a delightful pop with little bursts of flavor happening all over the place. I am so happy to be able to go outside and snip these straight from the garden again after the long winter. Feels so luxurious! I'm trying out this pretty purple basil (the variety is called dark opal) this year and so far, I am a big fan.

Cilantro, basil and mint for the Thai eggplant salad by Eve Fox, The Garden of Eating, copyright 2015

And the greens make a nice, fresh bed for it all. Especially now that there are such tender young thangs growing in the garden (this bunch of lovelies came from our friend, Liza's garden).

Fresh garden greens for the Thai eggplant salad by Eve Fox, The Garden of Eating, copyright 2015

The dressing ties it all together (I can no longer use that phrase without thinking of the Big Lebowski - anyone else?) Lime juice provides all the acid you need. Then you add some fish sauce (substitute soy sauce, if you're a vegan or vegetarian or allergic), some brown sugar, a jot of Sriracha, and a little finely chopped ginger and garlic.

Lime juice for the Thai eggplant salad by Eve Fox, The Garden of Eating, copyright 2015

Pour that dressing over it all and devour it. Sometimes I add some chopped toasted peanuts for a little crunch, too, but it's up to you. SO GOOD!

Thai eggplant salad with fresh garden greens and herbs by Eve Fox, The Garden of Eating, copyright 2015

-- print recipe --
Thai Eggplant Salad with Fresh Herbs & Greens
Serves 4

Ingredients

* 2 medium eggplants, ends removed, sliced into rounds or half rounds (the slender Asian eggplants are the best if you can find them)
* 3 scallions, washed, ends removed and finely chopped
* 4-5 cups of fresh greens - lettuce, arugala, tatsoi, baby spinach, etc., washed, dried and ripped into bite-sized pieces
* 2 cups fresh herbs - equal parts cilantro, basil and mint, rinsed, dried, stems removed and coarsely chopped or ripped
*  Olive oil and sea salt for roasting
* 1/4 cup chopped roasted peanuts (optional)

For the dressing
* Juice of 3 limes
* 2 tsps fish sauce (sub soy sauce if you do not/cannot eat fish)
* 1 tsp Sriracha (you can also use another hot sauce if you prefer or half a jalapeno with the seeds removed - if you like things hot, feel free to use more)
* 1 Tbsp brown sugar or palm sugar
* 1 small clove of garlic, minced or pressed
* 1 tsp chopped ginger root

Directions

1. Preheat the oven to 400. In a medium-large bowl, toss the eggplant slices with a lot of olive oil (eggplant is like a sponge so do your tossing quickly to help ensure that the oil gets distributed evenly before it gets absorbed) and several generous pinches of sea salt. Turn the eggplant slices out onto two heavy baking sheets and lay them out in a single layer. Roast for 15-20 minutes then remove the trays and flip the slices over. Return them to the oven and roast for another 10 minutes or so before removing them to cool.

2. Make the dressing - just mix all the ingredients together in whatever order you like and stir or shake well until the sugar has dissolved. Taste it and adjust the flavors, as needed.

3. Lay the greens and herbs in your serving bowl and top with the eggplant slices (you can either use them as is or cut or tear them into smaller pieces). Sprinkle with the chopped scallions and peanuts (if desired), add the dressing and serve.

You might also like:


For more delicious recipes, gardening ideas, foraging tips, and food-related inspiration "like" the Garden of Eating on Facebook, or follow me on Twitter and Pinterest.
Sunday, May 17, 2015

Three Perfect Hudson Valley Picnics

The long winter is finally over and I want to share this fun, little piece I recently wrote for Hudson Valley Magazine with you. I got to choose three great picnic spots here in my beloved Hudson Valley and then design three meals made with local ingredients to go with the outings.

I chose a family favorite, the Saugerties Lighthouse, as well as the stately, beautifully manicured marvel known as the Vanderbilt Mansion, and Bear Mountain State Park, an active person's playground that is a bit closer to New York City.

The gorgeous Saugerties Lighthouse on the Hudson River. Photo by Mark (hatschski) via Flickr, copyright 2014.
As for the food, it was a sheer delight researching the many, delicious, locally-made options! Big thanks to my Facebook friends for their super-helpful suggestions including the remarkable baguette du perche at Cafe Le Perche in Hudson, Woodstock's very own Buddhapesto, apple chips from Wrights Farm in Gardiner (one of my favorite vendors at the Woodstock Farm Festival), saucisson provencal from JACüTERIE in Ancramdale and many, many more.

Here's the link to the article if you'd like to read more. Hope you enjoy eating OUT this spring and summer. Below are a few shots of the Saugerties Lighthouse experience to whet your appetite for picnicking.

The picnic table on the deck at the Saugerties Lighthouse on the Hudson River - tree at left is the big mulberry that offers delicious berries in season. Photo by Krissa Corbett Cavouras via Flickr, copyright 2007.
Boardwalk portion of the trail to the lighthouse. Photo by Daniel Mennerich via Flickr, copyright 2011.

You might also like:
For more delicious recipes, gardening ideas, foraging tips, and food-related inspiration "like" the Garden of Eating on Facebook, or follow me on Twitter and Pinterest.
Tuesday, May 5, 2015

Curried Kale Cakes + My Plate, My Planet

Global South curried kale cakes in a sea of blueberries by Eve Fox, the Garden of Eating, copyright 2015

Greetings, Earthlings. Have you heard about My Plate, My Planet? It's a new campaign that aims to get sustainability included in the 2015 dietary guidelines for Americans. Meaning that the environmental impacts of our diets would be taken into consideration for the first time, well, ever! Kind of a huge deal...

You can help by sending a comment to the Secretary of Health and Human Services and the Secretary of Agriculture by the May 8th deadline this Friday.

In honor of this worthy effort, I created an Edible Earth made of curried kale cakes floating in a sea of blueberries - two sustainable superfoods in one meal. Kale and blueberries are the kinds of foods that are healthy both for us and also for the planet - providing a lot of nutrition without requiring a lot of resources or taking a heavy toll on the environment. And they also taste great - so there's that.

Defrosting frozen kale from my freezer by Eve Fox, the Garden of Eating, copyright 2015

These kale cakes are rather addictive, if I do say so myself. I used some ragged jack kale (seeds from the Hudson Valley Seed Library) from our garden that I'd blanched and frozen back in September. The plants PRODUCED and although it was kind of exhausting to keep up with them, I've been so grateful that I took the time to blanch and freeze that kale all winter long. And we're coming to the end of the frozen goodies right as we begin putting this year's seedlings in the ground. Perfect timing.

While the kale was defrosting, I grated a small mountain of Parmesan cheese and sauteed a big onion. You can never have too much onion, in my opinion.

Grating Parmesan cheese by Eve Fox, the Garden of Eating, copyright 2015

I beat a couple of pasture-raised eggs (more on what pasture-raised is and why it's so much better) and mixed them with a bit of yogurt.

Eggs and yogurt for the curried kale fritters batter by Eve Fox, the Garden of Eating, copyright 2015

Then I mixed all that together with a generous dose of breadcrumbs (you can use a gluten-free flour mix, instead, if you prefer), lots of garam masala and a little dried thyme from our garden, a few pinches sea salt, several grinds of black pepper, and mixed.

Then came the frying. I like grapeseed or peanut oil for frying because they've both got a nice, high smoke point and a neutral taste. I like to drain greasy things on a used paper grocery bag - way more absorbent than paper towels and less wasteful. Then I either toss it in the woodstove or put it in the compost.

Curried kale cakes by Eve Fox, the Garden of Eating, copyright 2015

Every bite was savory, moist, crunchy and good. Delicious on their own eaten out of hand or with a little yogurt herb sauce or sour cream.

Add your comment by this Friday, May 8th and I hope you like the kale cakes.

-- print recipe --Curried Kale Cakes
Serves 4

Ingredients

* 1/2 cup grated Parmesan cheese
* 3 eggs, beaten
* 1 bunch kale, rinsed, washed, dried, ribs removed and chopped
* 1 large onion, peeled and minced
* 1/2 cup yogurt
* 3/4 cup bread crumbs (or use a gluten-free flour)
* 1-2 Tbsps garam masala or curry powder
* 1 Tbsp sea salt
* 1 tsp freshly ground black pepper
* Milk or water to thin the batter, if needed
* Roughly 1 cup grapeseed, peanut or sunflower oil to fry in

Directions

1. Heat a few teaspoons of the oil in a large cast iron skillet over medium heat. Once hot, add the onions and saute, stirring often until softened. Add the kale and saute briefly to get some of the moisture out of the kale. Pour the onion-kale mixture in a medium sized mixing bowl and set the skillet aside - you don't need to wash it as you're going to use it to fry the cakes in.

2. Add the breadcrumbs, spices, eggs and yogurt and stir well to combine. If the batter is too stiff, add more yogurt or a little milk or water to thin it a bit.

3. Heat the rest of the oil in the cast iron frying pan until hot but not smoking. Test it by dropping a tiny bit of batter in and if it sizzles nicely, it's ready. Ladle large spoonfuls of the batter in and fry until the edges are browned and the cakes are solid enough to flip over then fry for another 3-4 minutes, depending on the size of the cakes and how hot your oil is.

4. When the cakes are nicely browned on both sides, scoop out and drain on a paper bag (this works better than paper towels and is less wasteful - you can compost the bag when you're done with it) and serve warm with sour cream or an herbed yogurt sauce. Chutney can be a nice accompaniment, too.

You might also like:
For more delicious recipes, gardening ideas, foraging tips, and food-related inspiration "like" the Garden of Eating on Facebook, or follow me on Twitter and Pinterest.
Monday, May 4, 2015

The World's Best Rice Bowl with Tahini-Ginger Kale, Avocado, Egg & Pickled Daikon

Warm rice bowl with ginger-tamari kale, avocado, pickled daikon and carrot, avocado and hard-boiled egg by Eve Fox, The Garden of Eating, copyright 2015

Lately, I've been enamored of rice bowls and this one really takes the cake. I mounded up a big spoonful of short-grain brown rice, added some of the delicious leftover tahini-ginger kale I wrote about two weeks ago, sliced a perfectly ripe avocado, peeled a hard-boiled egg and topped it with a little mound of quick pickled daikon radish and carrots I'd made. Then dusted the egg and avocado with some sea salt and sprinkled toasted sesame seeds over it all.

It was so good. Not only was it a pleasure to eat - each bite mixing buttery avocado, spiced kale, nutty rice, hearty egg and zingy pickled daikon, I also felt perfectly full and nourished afterwards.

Rice bowls are one of those things that are easy to make if you've got the right components lying around - the rice, the pickled veggies, the eggs, the kale, the avocado, etc. It is a meal born of good leftovers and a little advance planning.

Brown rice by Eve Fox, the Garden of Eating, copyright 2015

So make a batch of the tahini-ginger dressing and leave it in your fridge. That makes it really easy to make the warm kale with tahini-ginger dressing. And you can either make it fresh or just make more than you think you'll eat and save the leftovers for this purpose.

Tahini ginger sesame dressing by Eve Fox, The Garden of Eating, copyright 2015

Make a jar of pickled daikon and just keep it in your fridge. As I've mentioned, I like to just eat it straight out of the jar with a spoon...

Daikon radishes by Eve Fox, The Garden of Eating, copyright 2015

And hardboil a few eggs just to have them in the refrigerator. You probably already do this if you have kids :)

Warm rice bowl with ginger-tamari kale, avocado, pickled daikon and carrot, avocado and hard-boiled egg by Eve Fox, The Garden of Eating, copyright 2015

The concept is so flexible and so tasty - you can use different vegetables, different dressings - whatever you have on hand. I've included links to a few other ideas that would make for a good rice bowl below this recipe. Enjoy!

-- print recipe --Warm Rice Bowl with Tahini-Ginger Kale, Avocado, Egg & Pickled Daikon
Serves 2

Ingredients

* 1 cup cooked brown rice
* 2 hard-boiled eggs, peeled and sliced in half
* 1 ripe avocado, peeled and sliced
* 1/2 cup pickled daikon (or daikon and carrots)
* 1/2 cup kale with tahini-ginger dressing
* Sea salt to taste
* Pinch of toasted sesame seeds

Directions

1. Put the rice and kale in a ceramic bowl and microwave it for 30-45 seconds to warm it (you can also pop it in the toaster oven for a few minutes if you prefer).

2. Arrange the avocado slices, the pickled daikon and the hard-boiled egg over top of the rice, and sprinkle with a little sea salt and some sesame seeds.

You might also like:


For more delicious recipes, gardening ideas, foraging tips, and food-related inspiration "like" the Garden of Eating on Facebook, or follow me on Twitter and Pinterest.
Friday, May 1, 2015

Planting Asparagus Crowns - Investing In a Tasty Future

Last weekend, we planted two dozen + asparagus crowns in our slowly coalescing garden (fencing, fencing, fencing.) Although it will be a few years before we can begin to harvest the spears in earnest because you must first give the plants time to establish themselves, it was very exciting.

Laying the asparagus crowns over the mounds of compost by Eve Fox, the Garden of Eating, copyright 2015

Just think, in a few short years, we can walk out our door and snap tender green asparagus right out of our own beds. It doesn't get any fresher than that.

Although we're clearly at the beginning of the process, the planting was easy. Here's how it went in case you'd like to make a similar investment in your edible future.

Jersey Supreme second year asparagus crowns by Eve Fox, The Garden of Eating, copyright 2015

1. We ordered 25 second-year Jersey Supreme asparagus crowns from a grower who'd gotten great reviews on Amazon (kind of ironic but we knew the shipping would be quick and liked that we could see real-life reviews from a lot of people.) It cost roughly $20 with the shipping and, as predicted, arrived within a couple of days.

Jersey Supreme second year asparagus crowns by Eve Fox, The Garden of Eating, copyright 2015

If ordering plants online is not your bag, you should be able to get them from a local nursery, in season. Although there are a number of varieties, the basic differences boil down to green or purple. Although the purple ones are really pretty, they turn green when you cook them so we just opted for the plain old green ones. Per the grower's directions, we stored the bag of crowns in the fridge while we readied their bed.

Jersey Supreme second year asparagus crowns by Eve Fox, The Garden of Eating, copyright 2015

2. My husband, Rahm, dug a roughly 8-inch trench for them to grow in (anything from 6 - 12 inches deep is fine). We planted two rows side by side with about two feet between them.

Turning the compost for the asparagus trench by Eve Fox, The Garden of Eating, copyright 2015

3. He mixed a good amount of our rich composted dirt with a little rock phosphate to help stimulate root growth (follow the directions on the package to get the right amount). Then he dumped a little mound of about four inches of this compost every 12-18 inches along the trench.

4. Meanwhile, I removed the crowns and soaked them briefly in warm (not hot!) water.

Soaking the asparagus crowns briefly in warm water by Eve Fox, the Garden of Eating, copyright 2015

5. Then we untangled the roots of each crown and laid the spidery looking things right on top of the little compost mounds.

Laying the asparagus crowns over the mounds of compost by Eve Fox, the Garden of Eating, copyright 2015

6. Rahm came back through the row and covered the mounds and crowns with about two inches of good dirt, not compost.

Making hillocks of composted dirt in the two trenches for the asparagus crowns by Eve Fox, the Garden of Eating, copyright 2015

7. We would have watered but it was supposed to (and did) rain so we just waited a few hours and they got a good watering in. But you should water if you're not due for a good soaking.

8. Then came the really hard part - waiting for the crowns to put down roots and send up shoots. Everything I read said this takes about a month but we spotted the first proud little sprout two days ago! And a day or so later, little greenish-red heads were breaking through the soil all along the rows.

First asparagus spear is up! by Eve Fox, The Garden of Eating, copyright 2015

Once the greens have poked up about five inches above the surface, we'll cover the trench with another thin layer of soil, leaving the top 3-4 inches of the stems exposed. And we'll repeat that process until the trench is level with the ground around it. Then we'll mulch the bed thickly to discourage weeds and let the plants go "vegetative" as the Farmers Almanac calls it. This lets the roots store up energy and helps them get established. In the fall, we'll cut the dead foliage back and side dress with compost.

9. Apparently, we can harvest a few spears next year but should leave the bulk of them to do their thing and die back on their own, simply trimming the dead foliage in the fall (you can leave it right on top of the dirt to decompose if you like), then dressing with compost and mulching well.

10. Once the beds hit their stride in the third year, we can harvest any spears that are thicker than a pencil. The harvest lasts for about 2-3 weeks. If we have too many, we'll pickle some (so good!) and asparagus also freeze well. Once the harvest has ended, we let the ferns grow to help give the plants more energy for the next year. The beds should produce for at least 20-25 years!!! Just think of all the delicious meals and stinky pee we have ahead of us :)

You might also like:
For more delicious recipes, gardening ideas, foraging tips, and food-related inspiration "like" the Garden of Eating on Facebook, or follow me on Twitter and Pinterest.