RESOURCES

Thursday, October 30, 2014

Roasted Butternut Squash Pie

Thursday, October 30, 2014

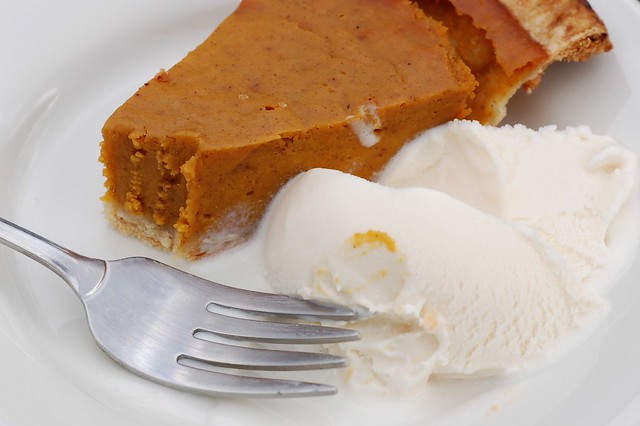
A slice of roasted butternut squash pie with Ronnybrook Farm's Hudson Valley Vanilla ice cream by Eve Fox, The Garden of Eating, copyright 2014

Last Wednesday was bittersweet. Not only was it our final CSA pick-up of the year, it was also the last Woodstock Farm Festival of the season. The weather was fittingly depressing - cold and gray with strong gusts of wind and needle-like rain. The tents at the farmer's market threatened to blow away a number of times.

At the market, I stocked up on essentials - carrots, onions and apples. Also, Twisted Jeanne's delicious pretzel croissants and the world's best apple cider doughnuts from Wrights Farm... The haul from our CSA included a dozen pasture-raised eggs, a bag of potatoes, a bag of sweet potatoes (though we're pretty well set in that area), two heads of beautiful broccoli, some lovely leeks, green lettuce, garlic and two butternut squash. I could barely see the kitchen countertops after unpacking it all...

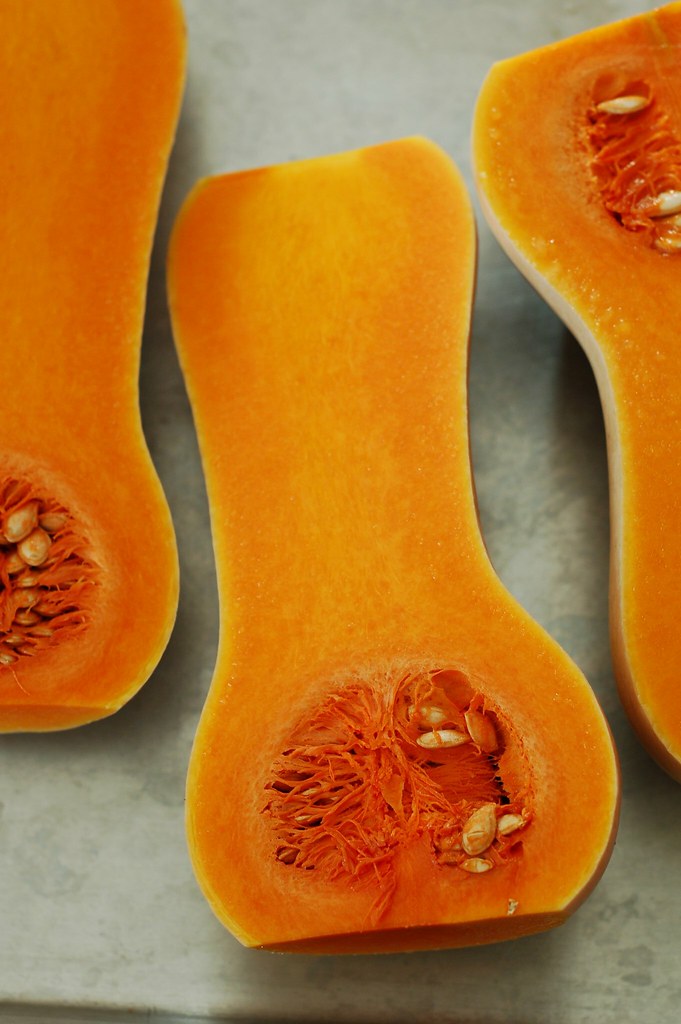
Butternut squash halves by Eve Fox, The Garden of Eating, copyright 2014

Given my gray mood and the chilly weather, I decided to roast the butternut squash and turn them into a sweet, hearty pie. Why should pumpkins get all the glory, after all?

Roasted butternut squash halves by Eve Fox, The Garden of Eating, copyright 2014

I could have steamed the squash but I love the way roasting deepens its flavor and enhances its natural sweetness. While they were roasting, I turned my attention to making the dough for the pie crust. Through some miracle, all you need is flour, fat (butter, in my case) and water. You can use a pastry cutter or a food processor to combine it but, either way, try to touch it as little as possible as you're getting it to clump together and then again when you're rolling it out in order to prevent it from getting tough. I wrapped my dough (hurray for an extra one in the freezer!) in waxed paper and let it rest for half an hour in the fridge before rolling it out and laying it in the pie plate.

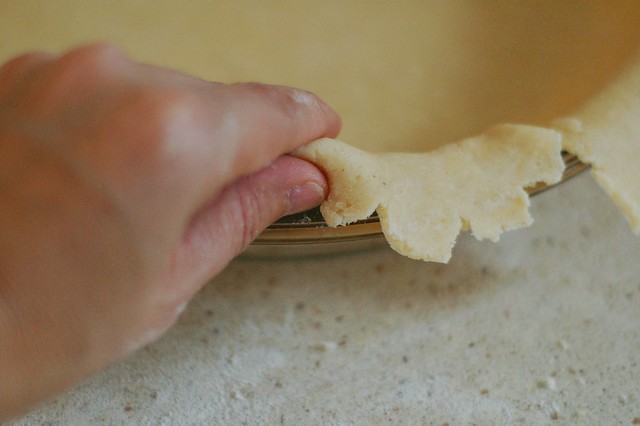
Rolling the edges of the pie crust under by Eve Fox, The Garden of Eating, copyright 2014

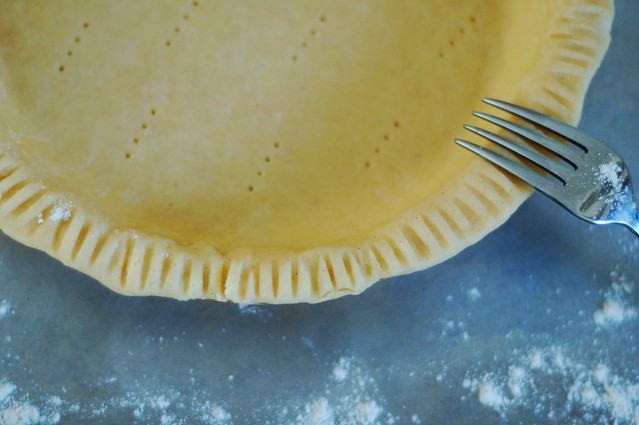
Then I tucked the edges under and crimped them with the tines of a fork. I also poked the bottom of the crust with the fork to keep it from ballooning up when I blind baked it. If you're not familiar with the term, blind baking means baking the crust for a time before you add the pie filling and can be helpful when you're using a more liquid filling.

Crimping the edges of the pie crust by Eve Fox, The Garden of Eating, copyright 2014

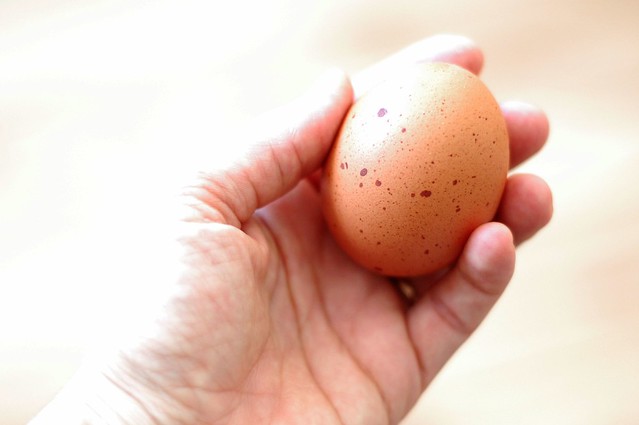
While the crust was blind-baking, I prepared the pie filling by blending two cups of the roasted squash flesh with pasture-raised eggs from our CSA (our last dozen until next spring, sniff), sugar, spices, vanilla extract and roughly half a can of organic coconut milk.

Hand holding an egg by Eve Fox, The Garden of Eating, copyright 2014

Puree it all then pour the mixture into the warm pie crust and into the waiting oven.

Roasted butternut squash filling and pie crust by Eve Fox, the Garden of Eating copyright 2014

Bake until the filling is partly set but jiggles when you move it - basically the consistency of jello.

Sweet butternut squash pie by Eve Fox, The Garden of Eating, copyright 2014

I recommend serving it warm with vanilla ice cream or whipped cream but it is also mighty tasty cold the next day for breakfast.

A slice of roasted butternut squash pie with Ronnybrook Farm's Hudson Valley Vanilla ice cream by Eve Fox, The Garden of Eating, copyright 2014

-- print recipe --Roasted Butternut Squash Pie 
Adapted from Andrea Chesman's coconut-pumpkin pie in her excellent cookbook, Recipes from the Root Cellar
Makes one nine-inch pie

Ingredients

* 2 cups pureed butternut squash from 1 large or two small squash (you can use pumpkin, of course)
* 2 eggs (try to find pasture-raised eggs from a farmer near you)
* 1 pie crust (you can follow this recipe for pate brisee or use whatever crust recipe is your favorite)
* 1 cup coconut milk
* 3/4 cup packed brown sugar
* 1 tsp vanilla extract
* 1/2 tsp sea salt
* 1 tsp ground cinnamon
* 1/4 tsp ground cloves
* 1/8 tsp ground nutmeg
* 1/4 tsp ground allspice

Directions

1. Preheat the oven to 400 degrees. Roll out the pie dough and lay it over the pie pan. Fold the edges under themselves and then either crimp the edges with a fork or flute them with our fingers. Using a fork, punch holes evenly across the bottom of the crust and put it in the oven to pre-bake for 15 minutes, checking once or twice to see if it is ballooning up (if it is, poke another tiny hole with your fork to let the hot air escape and gently push the dough back down with your fork) then remove it and set it aside.

2. Prepare the filling: place the squash, eggs, coconut milk, sugar, salt and spices in the bowl of a food processor or blender and process until smooth.

3. Pour the filling into the blind-baked pie crust and bake at 400 degrees for 15 minutes then lower the heat to 350 and cook for 45-50 minutes longer. The crust should be nicely browned (should it start to get too brown, you can remove it for a moment and cover it with a pie crust shield or some narrow strips of aluminum foil - just be careful not to burn your fingers in the process) and the filling should be partially set - it should jiggle a little when you shake the pie pan - similar to the consistency of Jello.

4. Remove from the oven and allow to cool before serving with your choice of vanilla ice cream, whipped cream or another creamy-non-dairy alternative.

You might also like:
For more delicious recipes, gardening ideas, foraging tips, and food-related inspiration "like" the Garden of Eating on Facebook, or follow me on Twitter and Pinterest.

Monday, October 27, 2014

Gratitude

Monday, October 27, 2014

I'm guilty of wasting a lot of time on Facebook. But amidst the sea of shallow chatter that sucks me in, there is one meme that I think has real value - naming three things you're grateful for each day.


Unfortunately, I tend to view life's metaphorical glass as half empty, rather than half full. When Buzzfeed comes out with a "Which Winnie the Pooh Character Are YOU?" quiz I will most likely be Eeyore...  So I have to work at retraining myself to focus on the multitude of good things in my life.

But even I, dour little pessimist that I am, can't deny the surprising power that simply naming the things I am grateful for has to shift my perspective and let some light into my soul (though I did grimace as I typed the word "soul" just now - this new age sh*t does not come naturally to me.)


I often feel overwhelmed and exhausted - maybe it's life with two young kids, maybe I'm just a wimp, who knows? But when I feel kind of beaten down, I pause for a moment and repeat this little trio of things I'm grateful for in my head: "I am not pregnant, I do not have an infant, I do not have a dog."

Like magic, instead of feeling tired and put-upon, I start to feel lucky. Consider: I don't have to wake up umpteen times tonight to feed and soothe a crying baby! I only have to wipe the butts of two small humans, I do not have to pick up steaming dog turds! If I want to eat raw fish or brie or ham, I can do so without feeling terribly guilty that I might be harming my unborn child, nor do I have to spend the entire day (morning sickness is a sinful misnomer) feeling like I want to puke! This may sound a little snarky but it never fails to make me feel better.

While that is my quick, go-to gratitude list, I also approach this on a much more serious level. Here are a few:
  • I'm grateful that after multiple miscarriages, I have two beautiful, healthy little boys. 
  • I'm grateful to live in a beautiful place where I can step out the door and be in nature, breathe clean air, and get out of my own head. Below is the view from my living room.
  • I'm grateful for my husband who is a steady, loving, loyal, patient, playful, capable, and optimistic partner and quite possibly the world's best father to boot.
  • I'm grateful for my wonderful extended family - for their love, their support and all the fun we have together.
  • I'm grateful for humor.
  • I'm grateful for beauty.
  • I'm grateful for food and that I've always had enough of it. Also, that it tastes so good.
  • I'm grateful to live in a society where I have rights, access to education and the ability to make my own reproductive choices.
  • I'm grateful to have access to good medical care and vaccines.
There's much more, of course, but I'm much more interested in finding out what YOU are grateful for. Please share if you feel like it - I would truly like to know.

Autumn creeping in by Eve Fox, the Garden of Eating, copyright 2014

Tuesday, October 21, 2014

Sweet Potato Harvest!

Tuesday, October 21, 2014

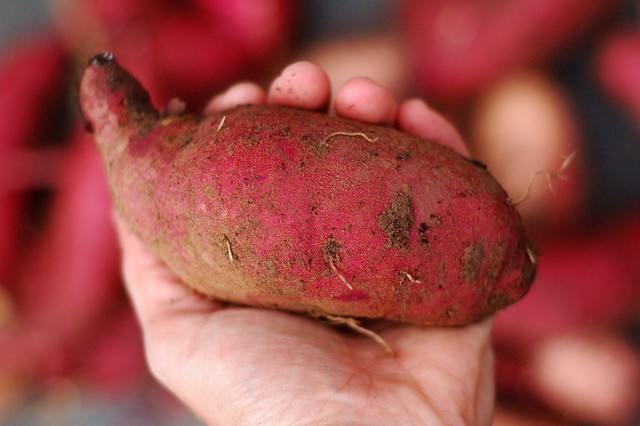
Japanese purple skinned yellow fleshed variety of sweet potato grown from an organic supermarket potato by Eve Fox, The Garden of Eating, copyright 2014

Last weekend, we harvested our sweet potato patch. Hot damn, it was exciting! Like a very hands-on, dirty, Easter egg hunt. My husband and I were just as thrilled as the kids though, thankfully, our interest lasted significantly longer than theirs :)

Sweet potato leaves and vines by Eve Fox, The Garden of Eating, copyright 2014

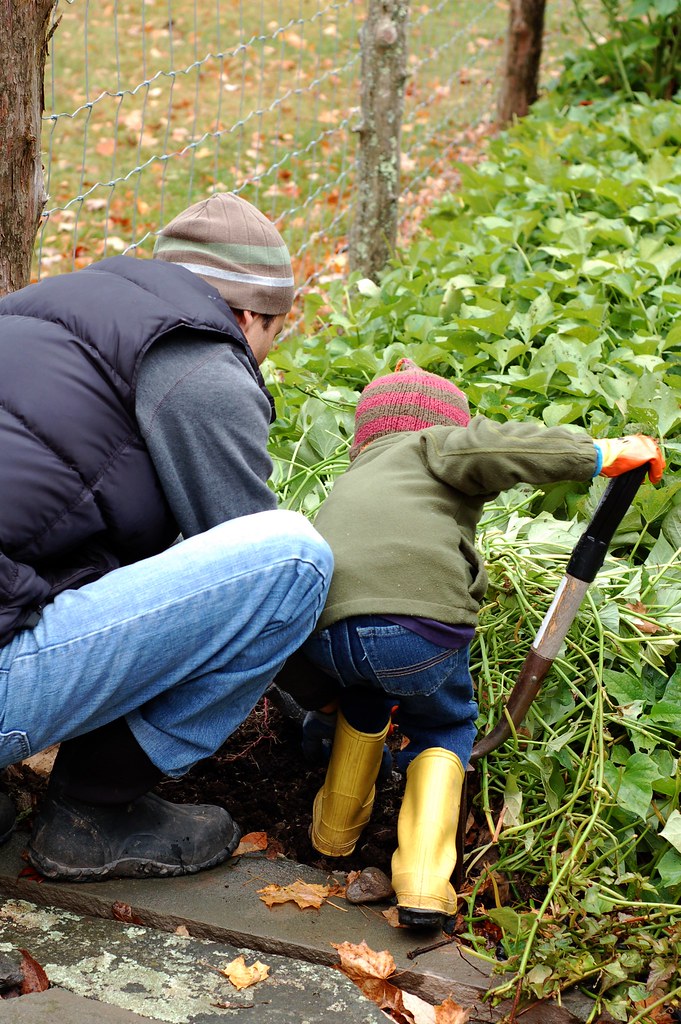
We started at one corner of the patch and began to pull back the thick carpet of beautiful green leaves and tangled vines that's been in residence for the last several months, growing vigorously enough to spill out through the fence and begin exploring the lawn.

Rahm and Will harvesting sweet potatoes by Eve Fox, The Garden of Eating, copyright 2014

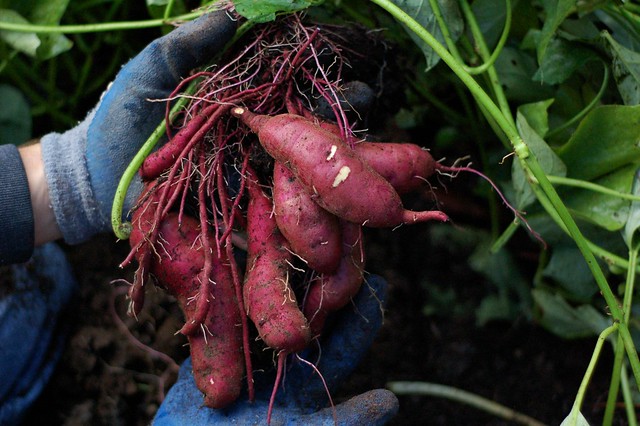
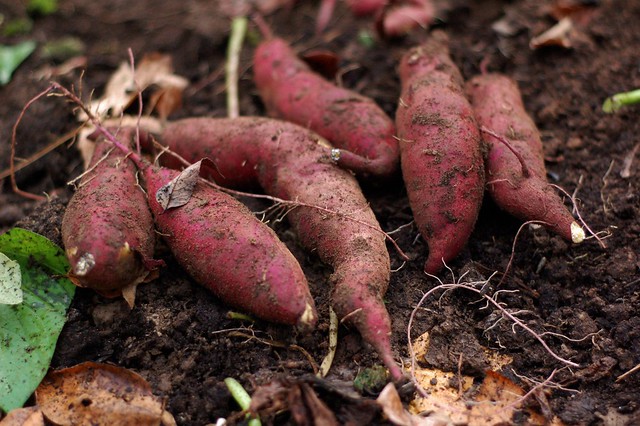
At each place where we'd planted a sweet potato slip back in June, there was a veritable trove of buried treasure. Scrape away the dirt and you'd find anywhere from three to ten perfect sweet taters!

A bunch of sweet potatoes, unearthed by Eve Fox, The Garden of Eating, copyright 2014

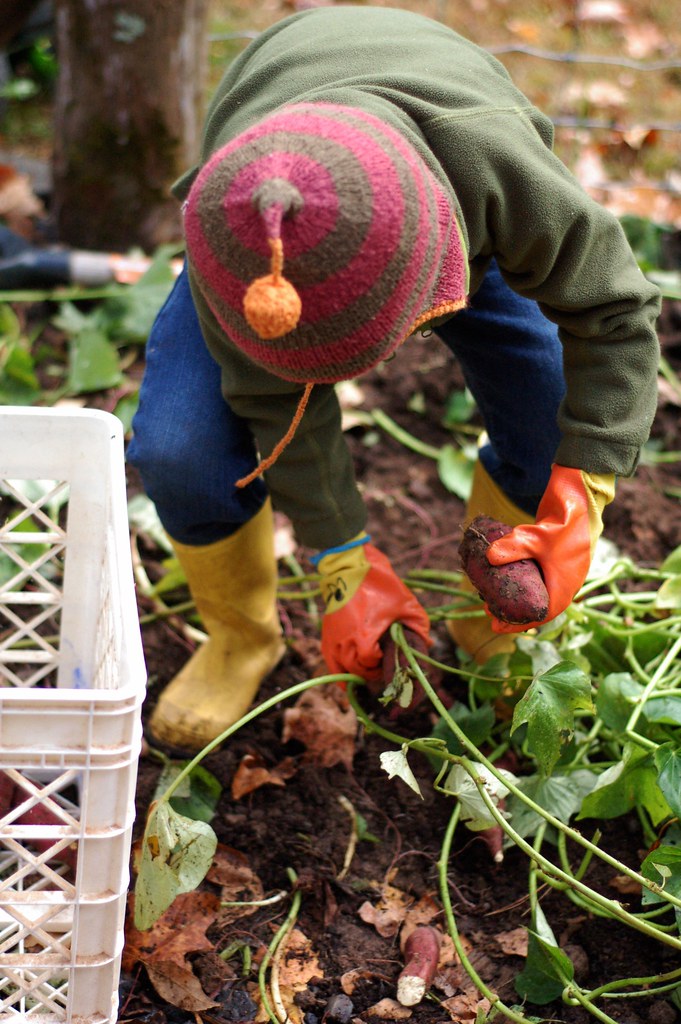
And they just kept on coming and coming and coming. Luckily, the kids thought it was fun to ferry them over to the plastic milk crates we were using to collect them in, prompting my husband to remark that this was the most truly helpful they'd ever been.

Putting sweet potatoes into the crate by Eve Fox, The Garden of Eating, copyright 2014

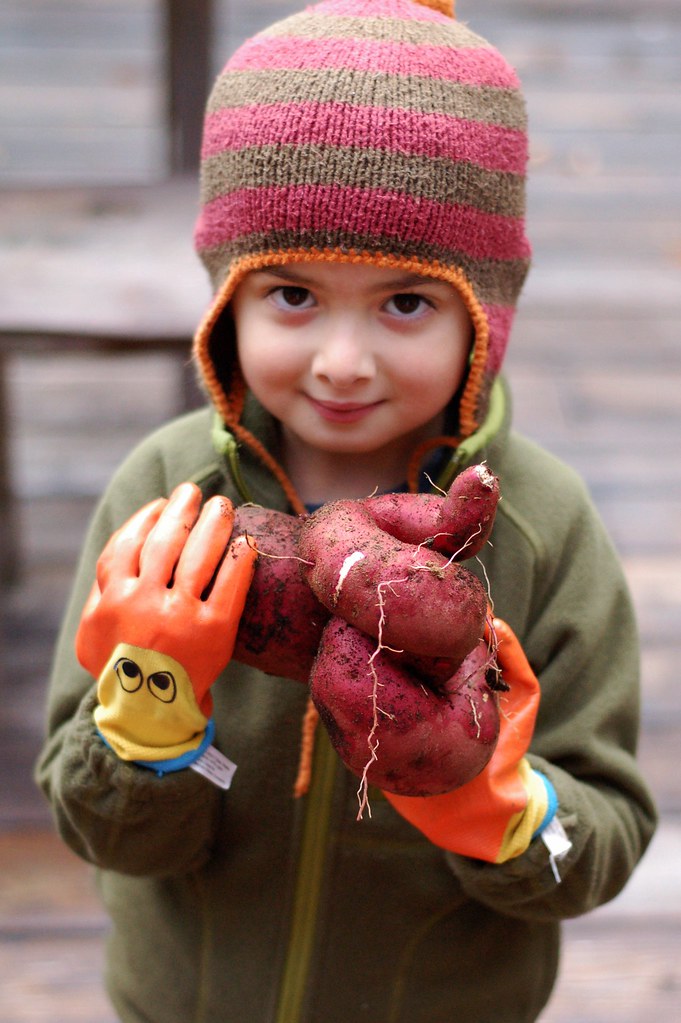
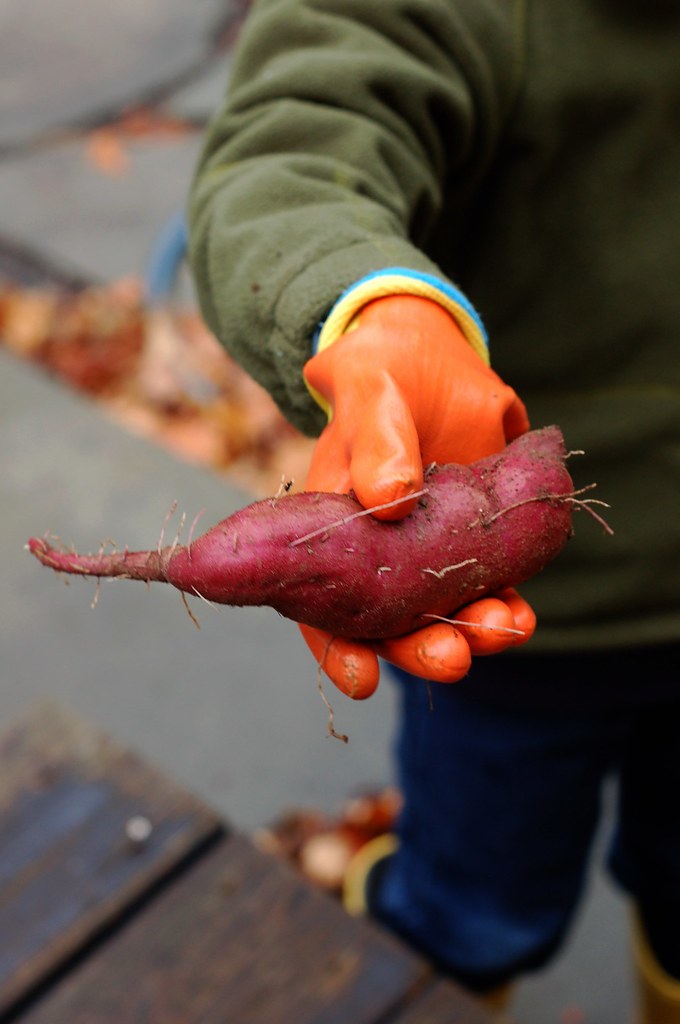
Some of them were tiny and will be perfect for roasting or in stews or soups, others were normal and a few were simply MONSTROUS! Like this one who we nicknamed "King Coil". I'd never seen anything quite like its shape - probably because stuff like this specimen does not make it into grocery stores - it probably gets tossed or left in the field to rot - such a shame and a waste.

Will holding a just-harvested sweet potato from the garden by Eve Fox, The Garden of Eating, copyright 2014

Speaking of which, have you seen this brilliant campaign by Intermarche, one of France's biggest supermarket chains? They're significantly cutting food waste by creating a special "ugly foods" aisle in their stores for produce like "King Coil" that looks odd but tastes just fine. And they're charging 30% less for the "cosmetically challenged" fruits and veggies. The French appear to be eating it up! Very, very cool. We need to do the same thing here in the states.

A bunch of sweet potatoes, unearthed by Eve Fox, The Garden of Eating, copyright 2014

It took a couple of hours, but we got all (or almost all, it's hard to tell for sure) of the sweet potatoes out of the ground. But here's the thing about sweet potatoes, unlike potatoes, you can't eat them right out of the ground. Or rather, you could eat them but you wouldn't want to because they are NOT sweet right away. They need time to cure and to develop their natural sweetness - it takes several weeks. But I'll write more about that next time - the adventure continues...

In the meantime, I'll just sum up by saying that it is, in fact, not hard to grow your own sweet potatoes from whatever your favorite organic variety is at the grocery store, farmer's market, farm stand, etc. It is more work than just ordering slips from a seed catalog but it's also way more fulfilling and magical, in my opinion.

And as for the other part of the Great Sweet Potato Experiment, I am pleased to report that I saw very very few bits of Japanese Silvergrass or other weeds. The spring will be a better test of how well the sweet potatoes may have outcompeted them but I was pretty impressed by the initial results - seems like the weeding followed by cardboard followed by sweet potatoes worked pretty well to smother them.

Will holding a just-harvested sweet potato from the garden by Eve Fox, The Garden of Eating, copyright 2014

You might also like:
For more delicious recipes, gardening ideas, foraging tips, and food-related inspiration "like" the Garden of Eating on Facebook, or follow me on Twitter and Pinterest.

Saturday, October 18, 2014

Swiss Chard, White Bean & Sausage Soup

Saturday, October 18, 2014

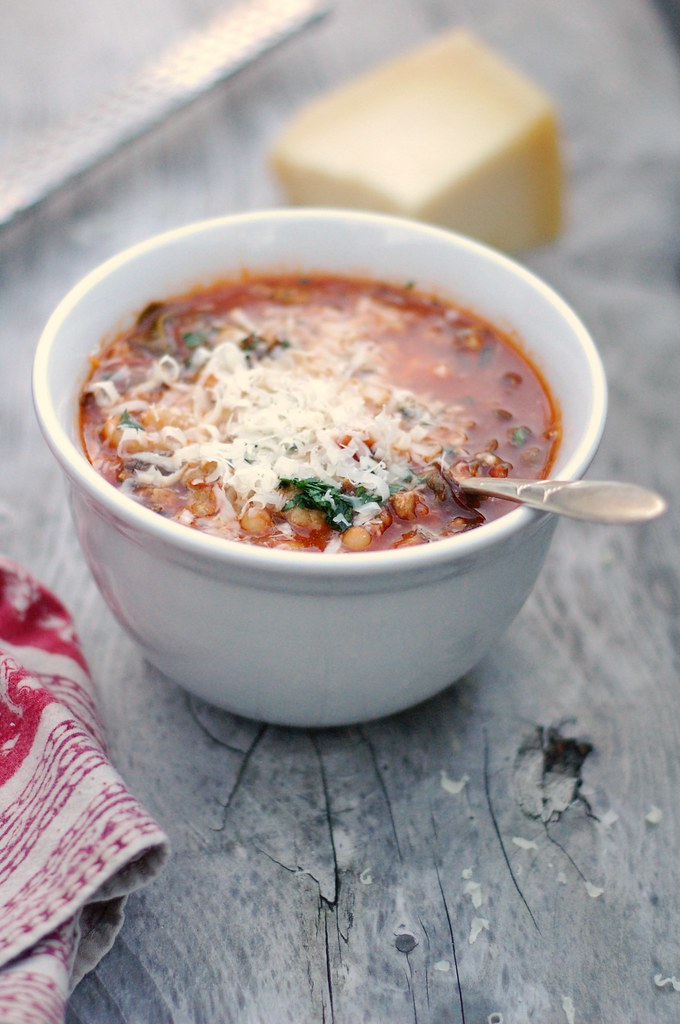
Chard, sausage and white bean soup by Eve Fox, The Garden of Eating, copyright 2014

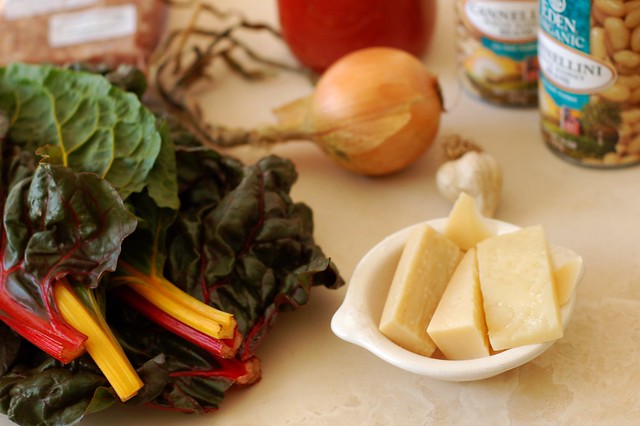
This soup's got everything - hearty greens, chunks of spiced sausage, creamy cannellini beans, sweet carrots, flecks of bright basil and oregano and a deeply flavorful tomato-based broth that's good enough to be a soup in its own right. I start by sauteing a small mountain of onions and garlic, then brown the sausage and throw in the chard ribs and carrots for a couple minutes. Then I add a Mason jar of pureed tomatoes and some vegetable stock.

Ingredients for chard, sausage, white bean soup by Eve Fox, The Garden of Eating, copyright 2014

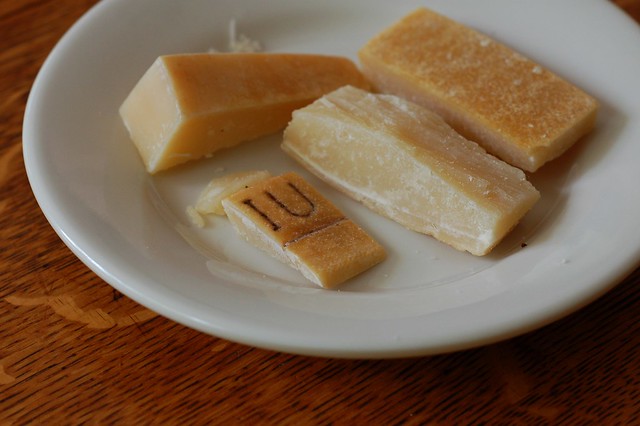
But the secret ingredient is something most people throw away... I add the rind that's left when you've gone as far with a block of Parmesan as you think is wise. I save my Parmesan and Romano rinds in a ziplock bag in the fridge and toss them right into the broth to simmer. It adds depth and a wonderful savory flavor.

Parmesan rinds add great flavor by Eve Fox, the Garden of Eating, copyright 2014

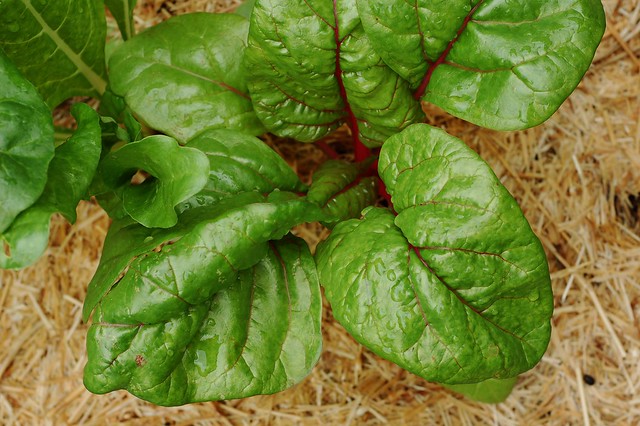
Although this is best with fresh chard (which is one of those vegetables you can usually find fresh for much of the year), you can also use frozen with great results. I've been freezing the excess chard - I planted way too many plants - from my garden.

Chard plants growing by Eve Fox, the Garden of Eating, copyright 2014

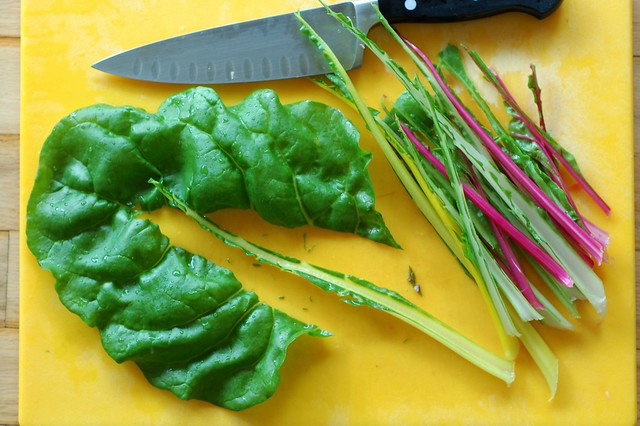
I remove the ribs and chop them up to freeze them separately, then blanch the leaves for about two seconds, ice them, dry them and freeze them in ziplock bags for making soups and stews in the winter. The summertime me thinks it's kind of a pain but the wintertime me will think the summertime me is a genius. If you can't find fresh chard, you can also probably buy it frozen. Around here, the good folks at Hudson Valley Harvest sell great frozen kale, chard and other veggies, all from local farms.

Removing the ribs from the chard leaves by Eve Fox, the Garden of Eating, copyright 2014

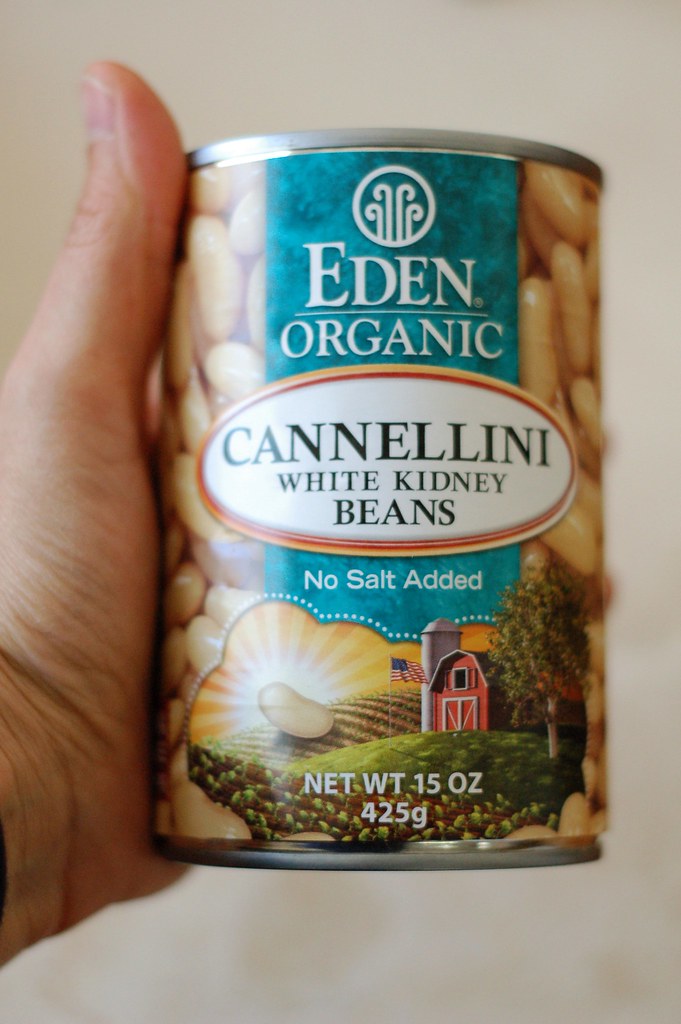
I like to use cannellini because of their firm skin, creamy texture and mild, slightly nutty flavor but you could use navy beans or great northern beans, too. If you have time to cook dried beans from scratch, they'll be tastier, cheaper and probably a little more nutritious. But that's not always realistic so if you're using canned beans, I usually choose Eden Foods because all of their cans are BPA-free (more about buying BPA-free) However, I do NOT endorse the company's stance on birth control.

A can of Eden Organics cannellini beans by Eve Fox, The Garden of Eating, copyright 2014

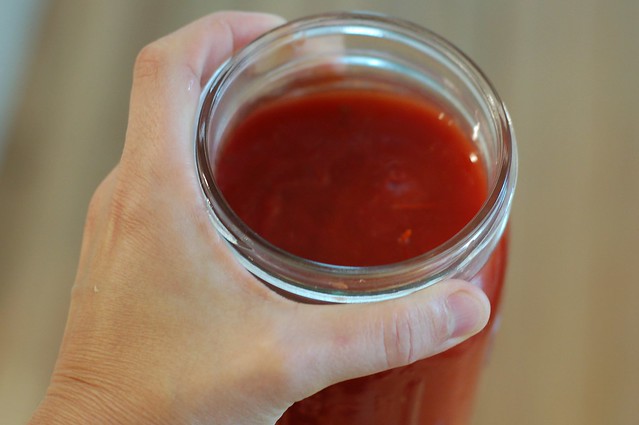
I used a jar of our canned tomatoes (thanks again to the summertime me!) but if you don't go in for that whole canning production, I would recommend using either a container of Pomi tomatoes or a glass jar of Eden's crushed tomatoes for the same reason, they're BPA-free. At this point, I don't believe anyone has yet figured out how to create a metal can that can withstand the acid in tomatoes without using BPA so glass or a Tetrapak package are the only options. Of the two, glass is clearly the safer option.

A jar of our canned tomatoes by Eve Fox, the Garden of Eating, copyright 2014

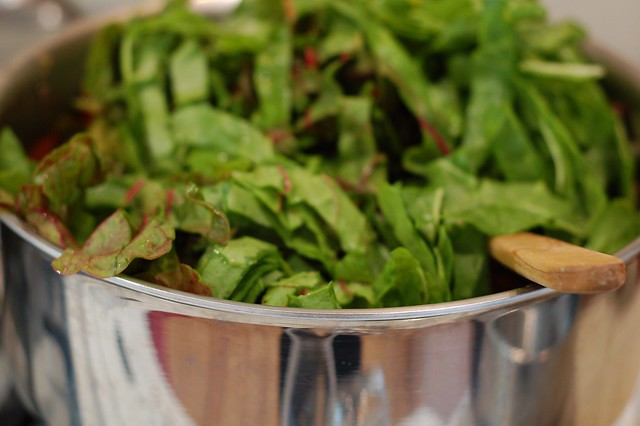
Once the slicing and dicing is done, the rest is a breeze. Just keep on adding things to the pot, bring to a boil, turn down the heat and simmer for half an hour.

Adding the chiffonaded chard leaves by Eve Fox, the Garden of Eating, copyright 2014

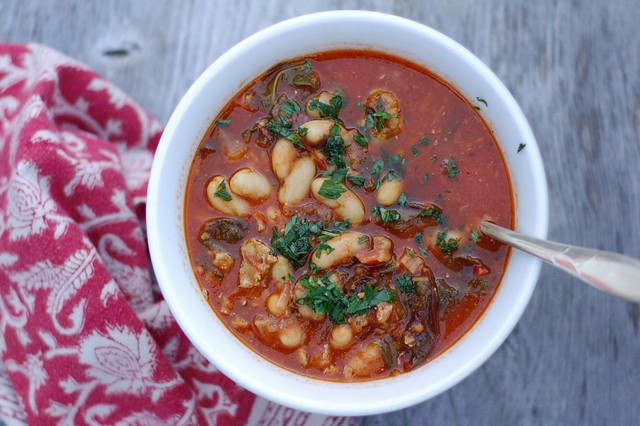
Soon, delicious smells will begin to fill the air and people may start to flock to the kitchen in anticipation... Ladle your steaming, Parmesan-spiked soup into bowls, top with some chopped parsley, a blizzard of fresh Parmesan cheese and serve with a green salad and crusty bread with butter and salt.

Chard, sausage and white bean soup by Eve Fox, The Garden of Eating, copyright 2014

-- print recipe --Swiss Chard, White Bean & Sausage Soup
Serves 6-8

Ingredients

* 1 large bunch Swiss or rainbow chard, washed, dried with the ribs removed, chopped and set aside
* 1 large or 2 medium onions, diced
* 3-4 large cloves of garlic, minced or pressed
* 3-4 carrots, sliced
* 2 cans of cannellini beans, rinsed and drained
* Half a bunch of fresh basil, rinsed, dried and chopped
* Handful of fresh oregano, rinsed, dried and chopped
* 1 lb organic pork sausage, uncased (try to buy from a farmer near you)
* 1 quart of pureed or chopped tomatoes
* 1 quart of vegetable stock  (I often make my own from kitchen scraps but when I don't have any in the freezer, I use Better Than Bouillon's organic veggie base)
* However many Parmesan or Romano rinds you can rustle up
* A few tsps chopped fresh parsley for garnish (optional)
* Freshly grated Parmesan cheese for garnish (optional)
* 2 Tbsps olive oil
* Sea salt and freshly ground black pepper, to taste

Directions

1. Heat the olive oil over medium heat in a large soup pot. Add the onions and saute for 3-4 minutes until they begin to become transparent then add the garlic and cook another 2-3 minutes until the garlic becomes fragrant.

2. Add the chard ribs and carrots and saute for another 3-4 minutes. Clear some space in the middle of all those vegetables and toss the sausage in. Cook, stirring frequently and kind of chopping it up with the spoon or spatula to cut the meat up into manageable chunks. Saute until the meat is browned.

3. Add the tomato and vegetable stock along with the Parmesan rinds and half of the basil and oregano and bring to a boil, then turn the heat down to low and simmer for 20 minutes. Add the chard leaves, the beans and the rest of the herbs, stir, then add salt and pepper, taste it and adjust as needed. Cook for another 10-15 minutes then serve, topped with a sprinkling of fresh parsley and a lot of fresh, grated Parmesan.

You might also like:
For more delicious recipes, gardening ideas, foraging tips, and food-related inspiration "like" the Garden of Eating on Facebook, or follow me on Twitter and Pinterest.
Wednesday, October 15, 2014

I'll Drink To That - How Hard Cider Is Helping to Save Apple Orchards

Wednesday, October 15, 2014

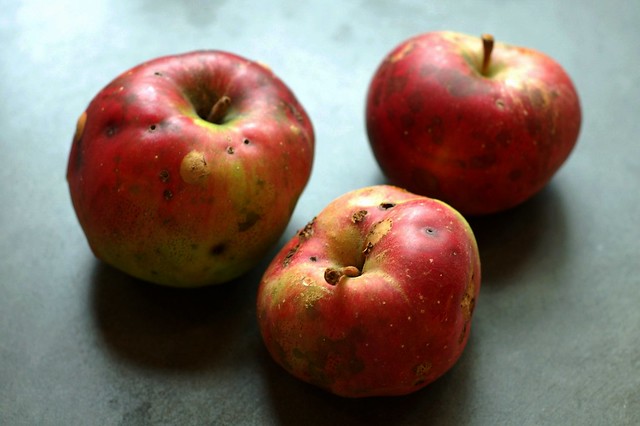
Very local apples by Eve Fox, Garden of Eating blog, copyright 2011

A few years ago, the good folks at Glynwood noticed that New York State's apple orchards had declined by a shocking 25% in just five years. Unacceptable! They stepped in to help keep a time-honored way of life and thousands of acres of prime agricultural acreage alive.

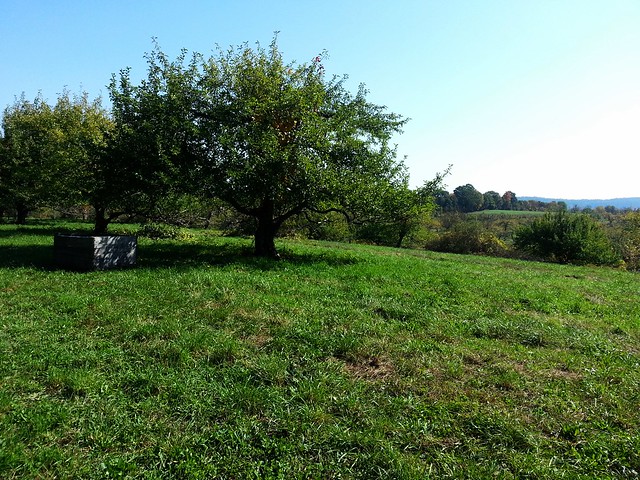
View of Stoneridge Orchard

Their solution was inspired - by helping to boost the popularity of hard cider, a dry, sophisticated drink that bears little resemblance to the sweet, fizzy six-pack ciders you can get in a grocery store - they hoped to create a sustainable market for New York's apples. And so far, it's working remarkably well!

I wrote more about it recently for Civil Eats - you can read the short piece here.

And this seems like a good time to mention the fact that hard cider is the perfect drink for a Thanksgiving feast. Apples are a natural pairing for every single dish on that groaning table...

Visit the Cider Week site to find out if there are events and tastings taking place in your area this month and next. If you're lucky enough to live here in NY's Hudson Valley, check out Cider Week Hudson Valley.

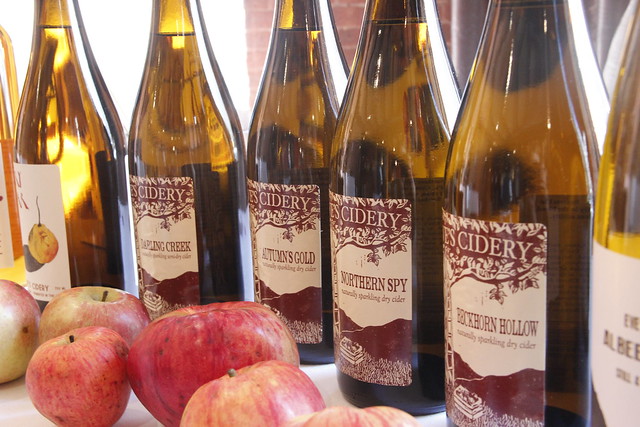
Hard ciders at a tasting

You might also like:
For more delicious recipes, gardening ideas, foraging tips, and food-related inspiration "like" the Garden of Eating on Facebook, or follow me on Twitter and Pinterest.

Sunday, October 12, 2014

Harvest Lasagna

Sunday, October 12, 2014

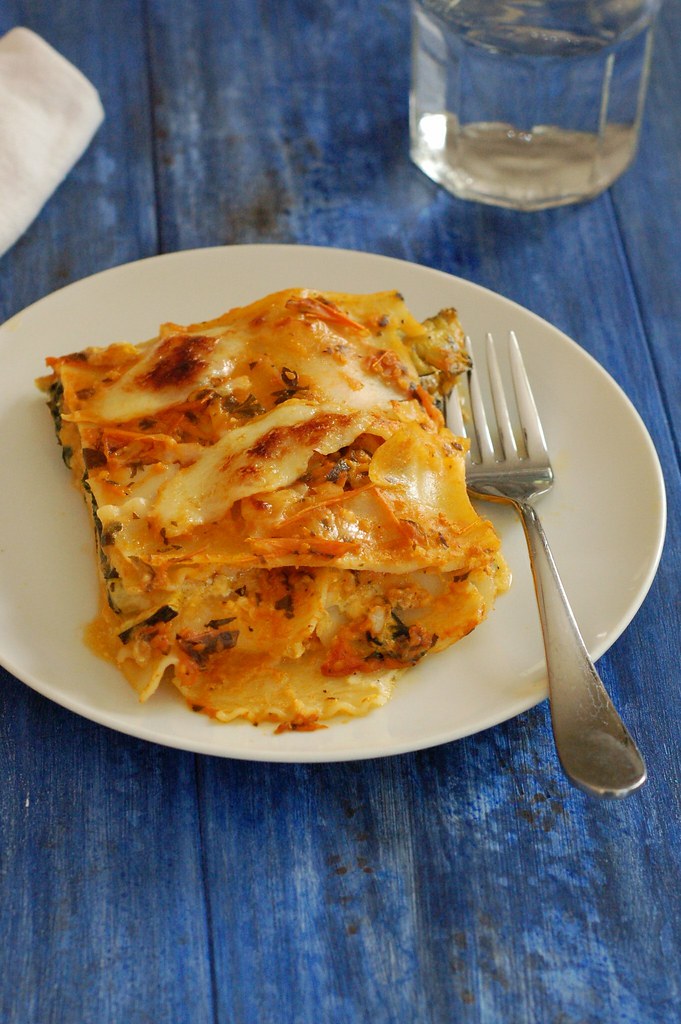
Harvest lasagna by Eve Fox, The Garden of Eating, copyright 2014

This melty lasagna is packed with flavor from roasted summer squash, fresh basil, oregano, spinach and the sweetest garden tomatoes. Plus, it's a perfect way to use up a whole lot of vegetables in one fell swoop.

Between our CSA and our garden, it's kind of hectic around here. Green beans, cherry tomatoes, kale, chard and delicata squash just keep on coming and we haven't even started to think about harvesting our rather large sweet potato patch yet (more on why we planted so many sweet potatoes). And every other week brings another big load of vegetables from the farm across the river, too. I know I'll miss it once everything is withered and brown but, for now, trying to keep up is somewhat stressful.

Basil by Eve Fox, The Garden of Eating, copyright 2014

I find myself fantasizing about making leisurely trips to the grocery store to pick out the ingredients for something I've chosen to make just because it caught my fancy, not because I've got to do something with another towering load of kale from the garden or because I have to use up five pounds of beets to make room in the crispers before our next CSA pick up.

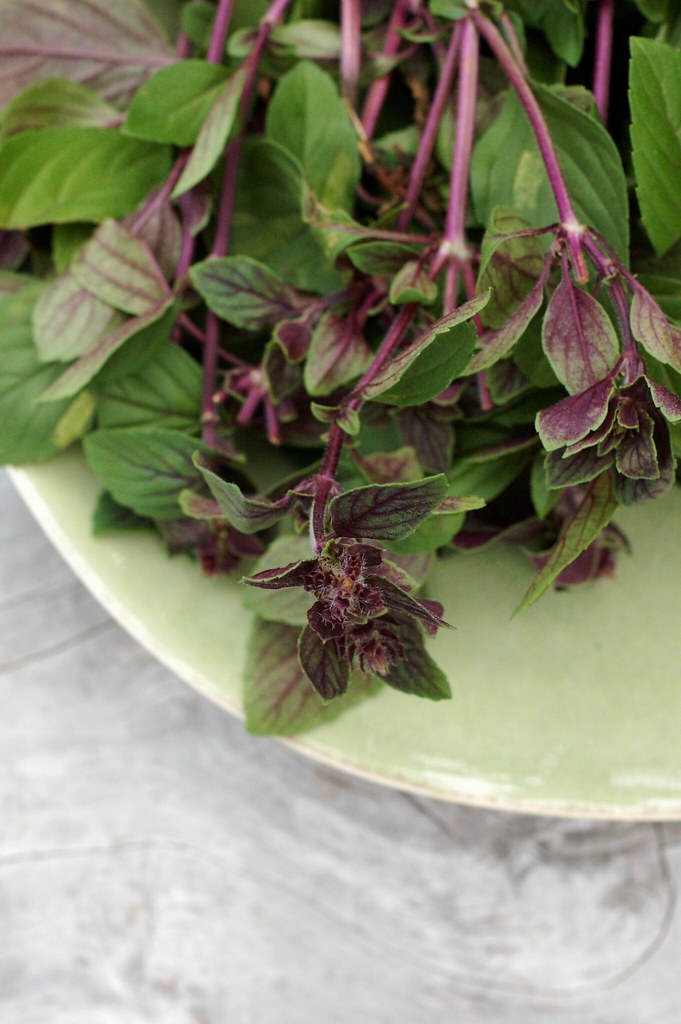
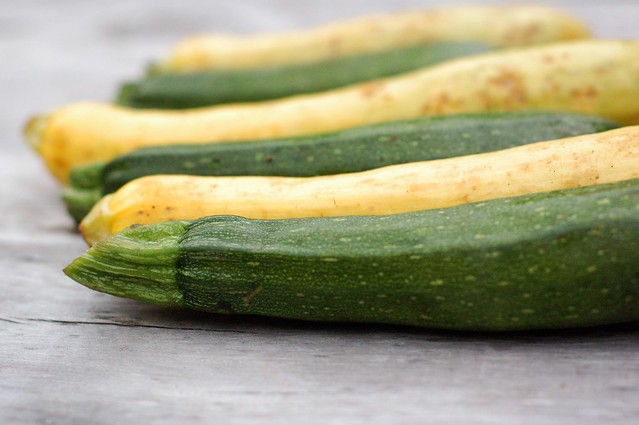
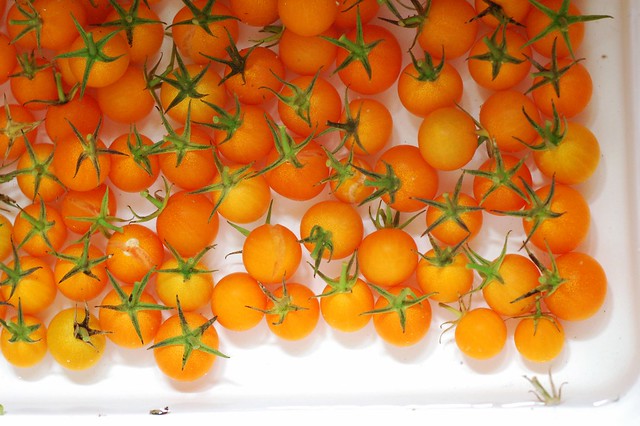
But since this is real life, I want to share this truly delicious way to use a bunch of summer squash, a boatload of sungold cherry tomatoes and lots of fresh basil, oregano and spinach. The other name I was kicking around for this glorious concoction was "Kitchen Sink Lasagna" but in the end, I decided that "harvest" sounded more appetizing. And it really is very appetizing.

Summer squash by Eve Fox, The Garden of Eating, copyright 2014

I won't lie to you and tell you that this is a quick, easy meal. But it is incredibly tasty and you can make enough for several meals and potentially even freeze some for later. I froze a bunch of the tomato sauce I made, too - so much easier than canning!

Lasagna is all about layering and the building blocks that make this harvest version so tasty are roasted summer squash with garlic and herbs, sauteed spinach and a fresh, herb-spiked tomato sauce. That said, nothing is set in stone and you do not have to use those particular ingredients or make your own sauce from scratch. I certainly would not think less of you for using a jar of sauce and it would speed up the process considerably.

Sungold cherry tomatoes for the sauce for the harvest lasagna by Eve Fox, The Garden of Eating, copyright 2014

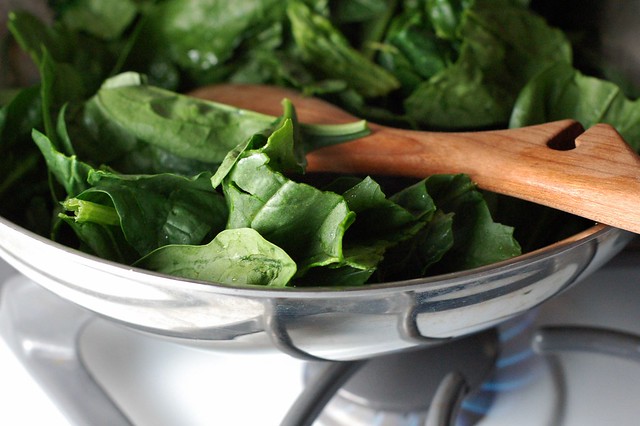
But since I had to use up all those vegetables, this is what I did. First the prep - I washed the beautiful basil, oregano, tomatoes, summer squash and spinach. Then I chopped up a mountain of onions and garlic.

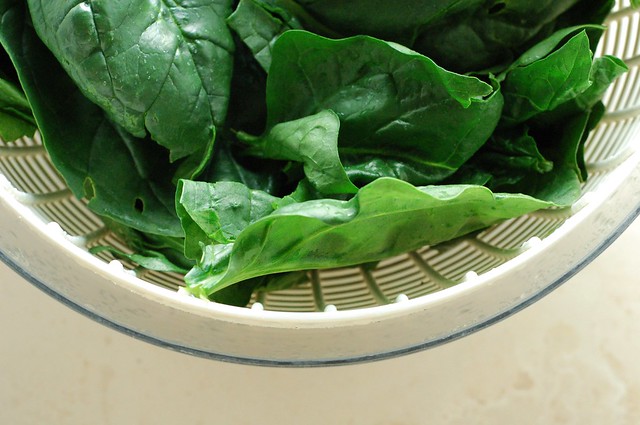
Beautiful fresh spinach by Eve Fox, The Garden of Eating, copyright 2014

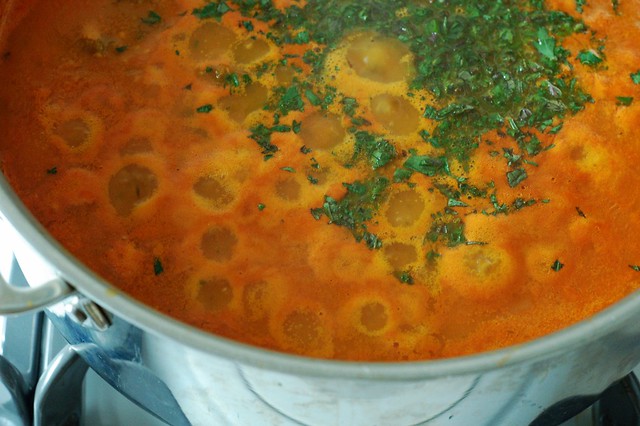
Then I got the sauce started since it needs time to simmer. I sauteed lots of onion and garlic then added a big bowl full of sungolds and a few big red tomatoes from the garden, crushed it none too gently with a potato masher, added salt and pepper and a teaspoon of sugar, tossed in some chopped basil and oregano and let it simmer. Then I attacked it with my immersion blender until it was smooth. Yes, I left the skins in there. I am lazy and they're good for you. The end result was a bubbling pot of brilliantly colored sauce that reminded me of the surface of an active volcano crater if you were to sprinkle some fresh herbs over the magma. I always carry fresh herbs when I'm going to view a volcano...

Sungold cherry tomatoes, oregano, basil, onions and garlic make a great sauce by Eve Fox, The Garden of Eating, copyright 2014

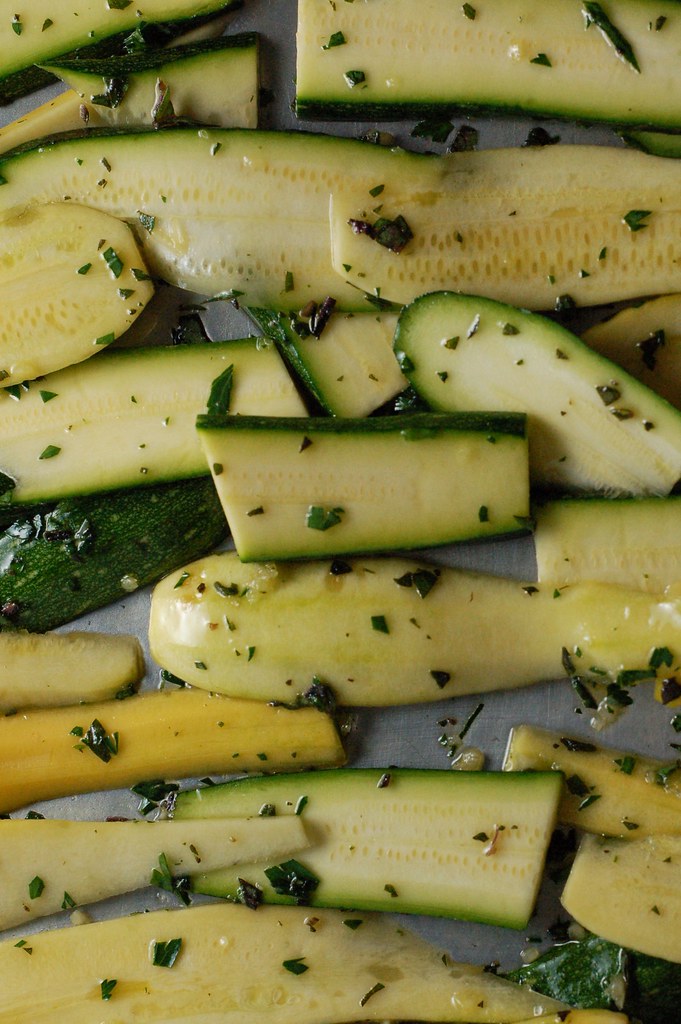
Then I turned my attention to the summer squash. Preheated the oven to 400, got out my knife and sliced them up. I mounded them on a baking sheet, drizzled a healthy amount of olive oil over them, threw a handful of chopped basil and oregano and dosed them liberally with sea salt and black pepper. Then I mixed it all around with my hands until everything seemed to be coated and put them in to roast. About 15 minutes later they were done and I set them aside.

Roasting summer squash with herbs and garlic for the harvest lasagna by Eve Fox, The Garden of Eating, copyright 2014

While the squash cooled and the sauce simmered, I sauteed the spinach with some garlic, salt and pepper until it was soft - two to three minutes. Then I stirred it into the ricotta cheese and added a bit more salt and pepper and a little bit of ground nutmeg.

Sauteeing spinach with herbs and garlic for the harvest lasagna by Eve Fox, The Garden of Eating, copyright 2014

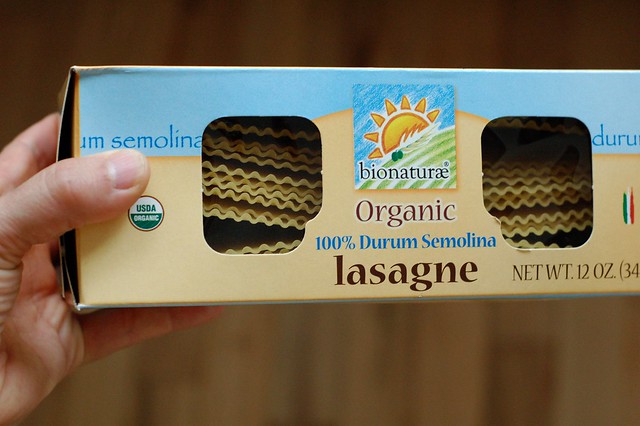
Somewhere in there, I'd put a big pot of water on to boil for the lasagna noodles. I used these organic ones from bionaturae - they're quite tasty. The kids actually enjoyed eating them plain and they are nice and strong which is helpful when you've forgotten to stir the noodles after dumping them in and have to pry them apart after draining them.

Bionaturae organic durum semolina lasagna noodles by Eve Fox, The Garden of Eating, copyright 2014

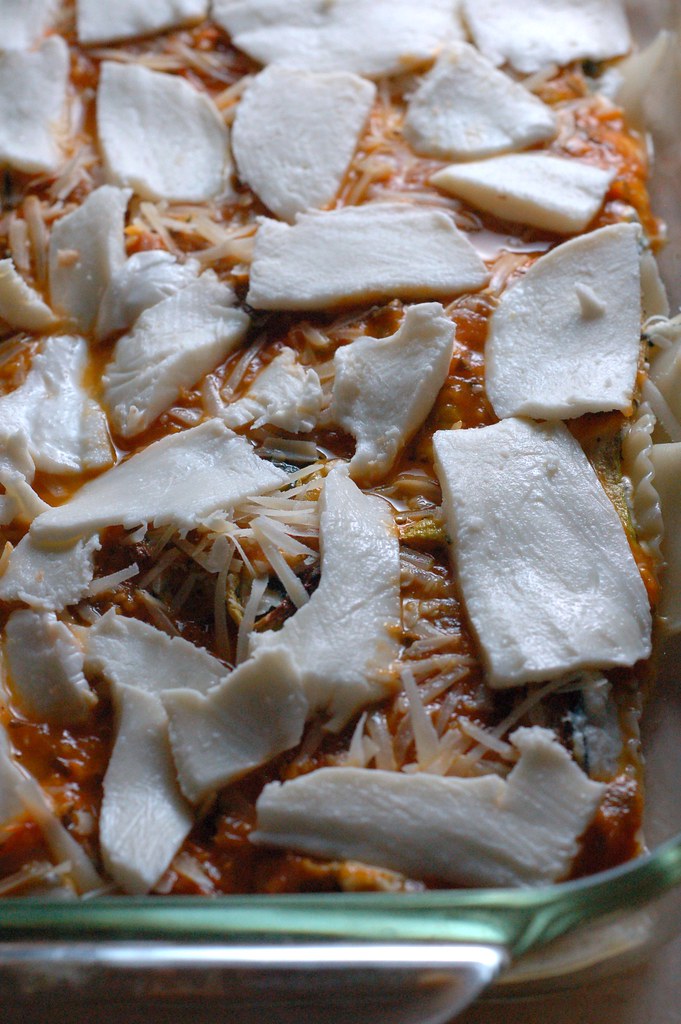
Then it was time to cut the cheese, so to speak :) I made short work of grating a small mountain of Parmesan and slicing the fresh mozzarella as thinly as possible. It is absolutely fine to use pre-grated cheese, by the way. I probably would have done so but didn't have any at the time.

Building time. I put down a layer of my lovely sauce, then a layer of noodles followed by ricotta cheese and spinach and another layer of roasted summer squash and topped it with mozzarella. Then I repeated it as many times as my ingredients allowed for.

Layering mozzarella on the harvest lasagna by Eve Fox, The Garden of Eating, copyright 2014

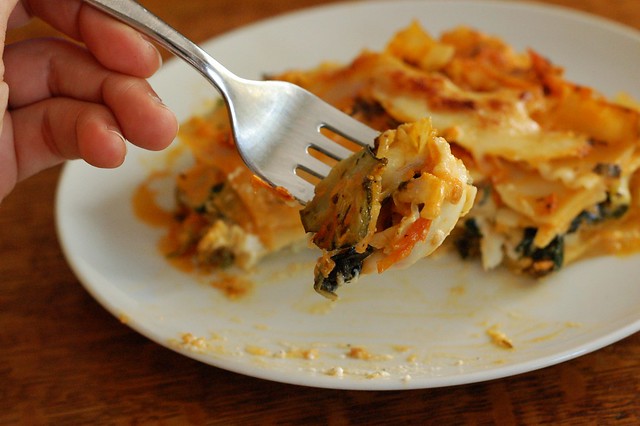
I put it in the oven at 375 for a mere 20 minutes and then we and our good friends sat down to a heavenly meal of harvest lasagna, green salad and garlic bread. Le yum. And that was just the first time. Lasagna is one of those dishes that gets tastier with a little time so the leftovers are even better.

Harvest lasagna by Eve Fox, The Garden of Eating, copyright 2014

-- print recipe --Harvest Lasagna
Makes one pan, serves 6-8

Ingredients (use organic whenever possible)

*4 small to medium summer squash, washed, ends removed and thinly sliced the long way
* 1 quart tomato sauce (if you want to make your own and are not sure how to proceed, try this recipe)
* 1 large onion, peeled and finely diced
* 4 large cloves of garlic, minced or pressed
* 2 1/2 cups shredded or thinly sliced organic whole milk mozzarella cheese
* 15 oz whole milk ricotta cheese
* 1 cup grated Parmesan cheese
* 4-5 cups fresh spinach, washed and dried (one or two large bunches' worth)
* 1 large bunch fresh basil leaves, washed, dried and chopped
* 1 bunch fresh oregano leaves, washed, dried and chopped
* 1 package lasagna noodles (12 oz)
* 1/8 tsp ground nutmeg
* Sea salt and black pepper to taste
* Olive oil

Directions

1. Preheat the oven to 400 degrees F. Mound the sliced summer squash in the center of a heavy baking sheet or dish, add a handful of the chopped fresh herbs and roughly a third of the garlic, sprinkle with salt and pepper, drizzle with olive oil (2 Tbsps or so) and toss well until all the slices are evenly coated. Roast for 10-15 minutes, checking once or twice and turning things, if needed, to ensure even cooking. You want to roast them until the edges have browned but before the slices get crispy. Remove from the oven and set aside to cool and turn the oven down to 375 degrees.

2. Bring a  large pot of water to boil for the lasagna noodles and cook according to the instructions on the package. I recommend only cooking until al dente as they will absorb a lot of liquid from the tomato sauce during baking. Rinse and drain the noodles and set aside until it's time to start layering.

3. Heat 2 Tbsps olive oil in a frying pan over medium heat and saute the onion and the rest of the garlic until the garlic is fragrant and the onion is translucent. Add the spinach and cook it for another two or three minutes, stirring often, until the spinach is wilted and dark green. Combine the spinach mixture with the ricotta cheese, the nutmeg and more salt and pepper and stir well to combine - you can either do this in a medium-sized bowl or right in the frying pan (one less dish to wash.)

4. Build the lasagna. In a 9 x 12" lasagna pan, start by spreading a layer of tomato sauce, then put down a layer of noodles, overlapping the ends slightly to cover the entire base. Add a layer of the ricotta-spinach mixture then a layer of roasted squash, more sauce and top with mozzarella cheese and some grated Parmesan. Repeat as many times as your ingredients and your pan permit. Top with whatever mozzarella and Parmesan you have left and cover tightly with tin foil.

5. Bake at 375 for roughly 15 minutes or until you can see that it's all heated through and melty (a glass pan works best for this kind of lasagna voyeurism) then remove the tinfoil and bake for another few minutes to brown the top. You can also broil it briefly (but don't walk away! a broiler is a powerful thing) to achieve the browning more quickly. When you're satisfied with the level of melty-ness and browning, remove from the oven and let cool for 10-15 minutes before serving so no one burns their tongue. As I've mentioned, it will likely taste even better the next day so you can definitely make this ahead and keep it in the fridge until it's go time. Either way, you are sure to enjoy the leftovers.

You might also like:
For more delicious recipes, gardening ideas, foraging tips, and food-related inspiration "like" the Garden of Eating on Facebook, or follow me on Twitter and Pinterest.
Friday, October 10, 2014

Halloween Costumes Inspiration

Friday, October 10, 2014

I woke up early this morning and got sucked into Pinterest in the hunt for a good Halloween costume idea for my five-year-old. Before I share a few of the ones I liked best, I want to share this barn owl costume I made for Will (the five-year-old) just after his younger brother was born two years ago. Seeing as James (the younger brother) would not sleep unless held, it was a challenge to find the time to cut and sew all those little felt owl feathers. It was down to the wire - I was sewing right up until we headed out the door to the Halloween parade on the village green.

Will in his barn owl costume

James will be wearing it again this year since he's fortunately still too young to have ideas about what he wants to be for Halloween or to really grock the whole concept of the holiday in the first place.

Here's Will hooting and flapping for the camera.

Will in his barn owl costume

Will in his barn owl costume

And here are a few of the other costume ideas that caught my fancy and I've pinned some more here if you want to check 'em out.

This sad-looking child is clearly too young to appreciate his Max costume from Where the Wild Things Are but I think it's beautiful.


I love Ratatouille and think this is so cute for a daddy and little one, especially if dad has red hair.


This one is inspired! And if you add a hunter to the mix (reverse the gender roles to make it even better, methinks) you've got an awesome couples costume.


Check out the rest over on Pinterest and leave me a comment to let me know what you're planning for All Hallow's Eve this year.

Thursday, October 30, 2014

Roasted Butternut Squash Pie

A slice of roasted butternut squash pie with Ronnybrook Farm's Hudson Valley Vanilla ice cream by Eve Fox, The Garden of Eating, copyright 2014

Last Wednesday was bittersweet. Not only was it our final CSA pick-up of the year, it was also the last Woodstock Farm Festival of the season. The weather was fittingly depressing - cold and gray with strong gusts of wind and needle-like rain. The tents at the farmer's market threatened to blow away a number of times.

At the market, I stocked up on essentials - carrots, onions and apples. Also, Twisted Jeanne's delicious pretzel croissants and the world's best apple cider doughnuts from Wrights Farm... The haul from our CSA included a dozen pasture-raised eggs, a bag of potatoes, a bag of sweet potatoes (though we're pretty well set in that area), two heads of beautiful broccoli, some lovely leeks, green lettuce, garlic and two butternut squash. I could barely see the kitchen countertops after unpacking it all...

Butternut squash halves by Eve Fox, The Garden of Eating, copyright 2014

Given my gray mood and the chilly weather, I decided to roast the butternut squash and turn them into a sweet, hearty pie. Why should pumpkins get all the glory, after all?

Roasted butternut squash halves by Eve Fox, The Garden of Eating, copyright 2014

I could have steamed the squash but I love the way roasting deepens its flavor and enhances its natural sweetness. While they were roasting, I turned my attention to making the dough for the pie crust. Through some miracle, all you need is flour, fat (butter, in my case) and water. You can use a pastry cutter or a food processor to combine it but, either way, try to touch it as little as possible as you're getting it to clump together and then again when you're rolling it out in order to prevent it from getting tough. I wrapped my dough (hurray for an extra one in the freezer!) in waxed paper and let it rest for half an hour in the fridge before rolling it out and laying it in the pie plate.

Rolling the edges of the pie crust under by Eve Fox, The Garden of Eating, copyright 2014

Then I tucked the edges under and crimped them with the tines of a fork. I also poked the bottom of the crust with the fork to keep it from ballooning up when I blind baked it. If you're not familiar with the term, blind baking means baking the crust for a time before you add the pie filling and can be helpful when you're using a more liquid filling.

Crimping the edges of the pie crust by Eve Fox, The Garden of Eating, copyright 2014

While the crust was blind-baking, I prepared the pie filling by blending two cups of the roasted squash flesh with pasture-raised eggs from our CSA (our last dozen until next spring, sniff), sugar, spices, vanilla extract and roughly half a can of organic coconut milk.

Hand holding an egg by Eve Fox, The Garden of Eating, copyright 2014

Puree it all then pour the mixture into the warm pie crust and into the waiting oven.

Roasted butternut squash filling and pie crust by Eve Fox, the Garden of Eating copyright 2014

Bake until the filling is partly set but jiggles when you move it - basically the consistency of jello.

Sweet butternut squash pie by Eve Fox, The Garden of Eating, copyright 2014

I recommend serving it warm with vanilla ice cream or whipped cream but it is also mighty tasty cold the next day for breakfast.

A slice of roasted butternut squash pie with Ronnybrook Farm's Hudson Valley Vanilla ice cream by Eve Fox, The Garden of Eating, copyright 2014

-- print recipe --Roasted Butternut Squash Pie 
Adapted from Andrea Chesman's coconut-pumpkin pie in her excellent cookbook, Recipes from the Root Cellar
Makes one nine-inch pie

Ingredients

* 2 cups pureed butternut squash from 1 large or two small squash (you can use pumpkin, of course)
* 2 eggs (try to find pasture-raised eggs from a farmer near you)
* 1 pie crust (you can follow this recipe for pate brisee or use whatever crust recipe is your favorite)
* 1 cup coconut milk
* 3/4 cup packed brown sugar
* 1 tsp vanilla extract
* 1/2 tsp sea salt
* 1 tsp ground cinnamon
* 1/4 tsp ground cloves
* 1/8 tsp ground nutmeg
* 1/4 tsp ground allspice

Directions

1. Preheat the oven to 400 degrees. Roll out the pie dough and lay it over the pie pan. Fold the edges under themselves and then either crimp the edges with a fork or flute them with our fingers. Using a fork, punch holes evenly across the bottom of the crust and put it in the oven to pre-bake for 15 minutes, checking once or twice to see if it is ballooning up (if it is, poke another tiny hole with your fork to let the hot air escape and gently push the dough back down with your fork) then remove it and set it aside.

2. Prepare the filling: place the squash, eggs, coconut milk, sugar, salt and spices in the bowl of a food processor or blender and process until smooth.

3. Pour the filling into the blind-baked pie crust and bake at 400 degrees for 15 minutes then lower the heat to 350 and cook for 45-50 minutes longer. The crust should be nicely browned (should it start to get too brown, you can remove it for a moment and cover it with a pie crust shield or some narrow strips of aluminum foil - just be careful not to burn your fingers in the process) and the filling should be partially set - it should jiggle a little when you shake the pie pan - similar to the consistency of Jello.

4. Remove from the oven and allow to cool before serving with your choice of vanilla ice cream, whipped cream or another creamy-non-dairy alternative.

You might also like:
For more delicious recipes, gardening ideas, foraging tips, and food-related inspiration "like" the Garden of Eating on Facebook, or follow me on Twitter and Pinterest.
Monday, October 27, 2014

Gratitude

I'm guilty of wasting a lot of time on Facebook. But amidst the sea of shallow chatter that sucks me in, there is one meme that I think has real value - naming three things you're grateful for each day.


Unfortunately, I tend to view life's metaphorical glass as half empty, rather than half full. When Buzzfeed comes out with a "Which Winnie the Pooh Character Are YOU?" quiz I will most likely be Eeyore...  So I have to work at retraining myself to focus on the multitude of good things in my life.

But even I, dour little pessimist that I am, can't deny the surprising power that simply naming the things I am grateful for has to shift my perspective and let some light into my soul (though I did grimace as I typed the word "soul" just now - this new age sh*t does not come naturally to me.)


I often feel overwhelmed and exhausted - maybe it's life with two young kids, maybe I'm just a wimp, who knows? But when I feel kind of beaten down, I pause for a moment and repeat this little trio of things I'm grateful for in my head: "I am not pregnant, I do not have an infant, I do not have a dog."

Like magic, instead of feeling tired and put-upon, I start to feel lucky. Consider: I don't have to wake up umpteen times tonight to feed and soothe a crying baby! I only have to wipe the butts of two small humans, I do not have to pick up steaming dog turds! If I want to eat raw fish or brie or ham, I can do so without feeling terribly guilty that I might be harming my unborn child, nor do I have to spend the entire day (morning sickness is a sinful misnomer) feeling like I want to puke! This may sound a little snarky but it never fails to make me feel better.

While that is my quick, go-to gratitude list, I also approach this on a much more serious level. Here are a few:
  • I'm grateful that after multiple miscarriages, I have two beautiful, healthy little boys. 
  • I'm grateful to live in a beautiful place where I can step out the door and be in nature, breathe clean air, and get out of my own head. Below is the view from my living room.
  • I'm grateful for my husband who is a steady, loving, loyal, patient, playful, capable, and optimistic partner and quite possibly the world's best father to boot.
  • I'm grateful for my wonderful extended family - for their love, their support and all the fun we have together.
  • I'm grateful for humor.
  • I'm grateful for beauty.
  • I'm grateful for food and that I've always had enough of it. Also, that it tastes so good.
  • I'm grateful to live in a society where I have rights, access to education and the ability to make my own reproductive choices.
  • I'm grateful to have access to good medical care and vaccines.
There's much more, of course, but I'm much more interested in finding out what YOU are grateful for. Please share if you feel like it - I would truly like to know.

Autumn creeping in by Eve Fox, the Garden of Eating, copyright 2014

Tuesday, October 21, 2014

Sweet Potato Harvest!

Japanese purple skinned yellow fleshed variety of sweet potato grown from an organic supermarket potato by Eve Fox, The Garden of Eating, copyright 2014

Last weekend, we harvested our sweet potato patch. Hot damn, it was exciting! Like a very hands-on, dirty, Easter egg hunt. My husband and I were just as thrilled as the kids though, thankfully, our interest lasted significantly longer than theirs :)

Sweet potato leaves and vines by Eve Fox, The Garden of Eating, copyright 2014

We started at one corner of the patch and began to pull back the thick carpet of beautiful green leaves and tangled vines that's been in residence for the last several months, growing vigorously enough to spill out through the fence and begin exploring the lawn.

Rahm and Will harvesting sweet potatoes by Eve Fox, The Garden of Eating, copyright 2014

At each place where we'd planted a sweet potato slip back in June, there was a veritable trove of buried treasure. Scrape away the dirt and you'd find anywhere from three to ten perfect sweet taters!

A bunch of sweet potatoes, unearthed by Eve Fox, The Garden of Eating, copyright 2014

And they just kept on coming and coming and coming. Luckily, the kids thought it was fun to ferry them over to the plastic milk crates we were using to collect them in, prompting my husband to remark that this was the most truly helpful they'd ever been.

Putting sweet potatoes into the crate by Eve Fox, The Garden of Eating, copyright 2014

Some of them were tiny and will be perfect for roasting or in stews or soups, others were normal and a few were simply MONSTROUS! Like this one who we nicknamed "King Coil". I'd never seen anything quite like its shape - probably because stuff like this specimen does not make it into grocery stores - it probably gets tossed or left in the field to rot - such a shame and a waste.

Will holding a just-harvested sweet potato from the garden by Eve Fox, The Garden of Eating, copyright 2014

Speaking of which, have you seen this brilliant campaign by Intermarche, one of France's biggest supermarket chains? They're significantly cutting food waste by creating a special "ugly foods" aisle in their stores for produce like "King Coil" that looks odd but tastes just fine. And they're charging 30% less for the "cosmetically challenged" fruits and veggies. The French appear to be eating it up! Very, very cool. We need to do the same thing here in the states.

A bunch of sweet potatoes, unearthed by Eve Fox, The Garden of Eating, copyright 2014

It took a couple of hours, but we got all (or almost all, it's hard to tell for sure) of the sweet potatoes out of the ground. But here's the thing about sweet potatoes, unlike potatoes, you can't eat them right out of the ground. Or rather, you could eat them but you wouldn't want to because they are NOT sweet right away. They need time to cure and to develop their natural sweetness - it takes several weeks. But I'll write more about that next time - the adventure continues...

In the meantime, I'll just sum up by saying that it is, in fact, not hard to grow your own sweet potatoes from whatever your favorite organic variety is at the grocery store, farmer's market, farm stand, etc. It is more work than just ordering slips from a seed catalog but it's also way more fulfilling and magical, in my opinion.

And as for the other part of the Great Sweet Potato Experiment, I am pleased to report that I saw very very few bits of Japanese Silvergrass or other weeds. The spring will be a better test of how well the sweet potatoes may have outcompeted them but I was pretty impressed by the initial results - seems like the weeding followed by cardboard followed by sweet potatoes worked pretty well to smother them.

Will holding a just-harvested sweet potato from the garden by Eve Fox, The Garden of Eating, copyright 2014

You might also like:
For more delicious recipes, gardening ideas, foraging tips, and food-related inspiration "like" the Garden of Eating on Facebook, or follow me on Twitter and Pinterest.
Saturday, October 18, 2014

Swiss Chard, White Bean & Sausage Soup

Chard, sausage and white bean soup by Eve Fox, The Garden of Eating, copyright 2014

This soup's got everything - hearty greens, chunks of spiced sausage, creamy cannellini beans, sweet carrots, flecks of bright basil and oregano and a deeply flavorful tomato-based broth that's good enough to be a soup in its own right. I start by sauteing a small mountain of onions and garlic, then brown the sausage and throw in the chard ribs and carrots for a couple minutes. Then I add a Mason jar of pureed tomatoes and some vegetable stock.

Ingredients for chard, sausage, white bean soup by Eve Fox, The Garden of Eating, copyright 2014

But the secret ingredient is something most people throw away... I add the rind that's left when you've gone as far with a block of Parmesan as you think is wise. I save my Parmesan and Romano rinds in a ziplock bag in the fridge and toss them right into the broth to simmer. It adds depth and a wonderful savory flavor.

Parmesan rinds add great flavor by Eve Fox, the Garden of Eating, copyright 2014

Although this is best with fresh chard (which is one of those vegetables you can usually find fresh for much of the year), you can also use frozen with great results. I've been freezing the excess chard - I planted way too many plants - from my garden.

Chard plants growing by Eve Fox, the Garden of Eating, copyright 2014

I remove the ribs and chop them up to freeze them separately, then blanch the leaves for about two seconds, ice them, dry them and freeze them in ziplock bags for making soups and stews in the winter. The summertime me thinks it's kind of a pain but the wintertime me will think the summertime me is a genius. If you can't find fresh chard, you can also probably buy it frozen. Around here, the good folks at Hudson Valley Harvest sell great frozen kale, chard and other veggies, all from local farms.

Removing the ribs from the chard leaves by Eve Fox, the Garden of Eating, copyright 2014

I like to use cannellini because of their firm skin, creamy texture and mild, slightly nutty flavor but you could use navy beans or great northern beans, too. If you have time to cook dried beans from scratch, they'll be tastier, cheaper and probably a little more nutritious. But that's not always realistic so if you're using canned beans, I usually choose Eden Foods because all of their cans are BPA-free (more about buying BPA-free) However, I do NOT endorse the company's stance on birth control.

A can of Eden Organics cannellini beans by Eve Fox, The Garden of Eating, copyright 2014

I used a jar of our canned tomatoes (thanks again to the summertime me!) but if you don't go in for that whole canning production, I would recommend using either a container of Pomi tomatoes or a glass jar of Eden's crushed tomatoes for the same reason, they're BPA-free. At this point, I don't believe anyone has yet figured out how to create a metal can that can withstand the acid in tomatoes without using BPA so glass or a Tetrapak package are the only options. Of the two, glass is clearly the safer option.

A jar of our canned tomatoes by Eve Fox, the Garden of Eating, copyright 2014

Once the slicing and dicing is done, the rest is a breeze. Just keep on adding things to the pot, bring to a boil, turn down the heat and simmer for half an hour.

Adding the chiffonaded chard leaves by Eve Fox, the Garden of Eating, copyright 2014

Soon, delicious smells will begin to fill the air and people may start to flock to the kitchen in anticipation... Ladle your steaming, Parmesan-spiked soup into bowls, top with some chopped parsley, a blizzard of fresh Parmesan cheese and serve with a green salad and crusty bread with butter and salt.

Chard, sausage and white bean soup by Eve Fox, The Garden of Eating, copyright 2014

-- print recipe --Swiss Chard, White Bean & Sausage Soup
Serves 6-8

Ingredients

* 1 large bunch Swiss or rainbow chard, washed, dried with the ribs removed, chopped and set aside
* 1 large or 2 medium onions, diced
* 3-4 large cloves of garlic, minced or pressed
* 3-4 carrots, sliced
* 2 cans of cannellini beans, rinsed and drained
* Half a bunch of fresh basil, rinsed, dried and chopped
* Handful of fresh oregano, rinsed, dried and chopped
* 1 lb organic pork sausage, uncased (try to buy from a farmer near you)
* 1 quart of pureed or chopped tomatoes
* 1 quart of vegetable stock  (I often make my own from kitchen scraps but when I don't have any in the freezer, I use Better Than Bouillon's organic veggie base)
* However many Parmesan or Romano rinds you can rustle up
* A few tsps chopped fresh parsley for garnish (optional)
* Freshly grated Parmesan cheese for garnish (optional)
* 2 Tbsps olive oil
* Sea salt and freshly ground black pepper, to taste

Directions

1. Heat the olive oil over medium heat in a large soup pot. Add the onions and saute for 3-4 minutes until they begin to become transparent then add the garlic and cook another 2-3 minutes until the garlic becomes fragrant.

2. Add the chard ribs and carrots and saute for another 3-4 minutes. Clear some space in the middle of all those vegetables and toss the sausage in. Cook, stirring frequently and kind of chopping it up with the spoon or spatula to cut the meat up into manageable chunks. Saute until the meat is browned.

3. Add the tomato and vegetable stock along with the Parmesan rinds and half of the basil and oregano and bring to a boil, then turn the heat down to low and simmer for 20 minutes. Add the chard leaves, the beans and the rest of the herbs, stir, then add salt and pepper, taste it and adjust as needed. Cook for another 10-15 minutes then serve, topped with a sprinkling of fresh parsley and a lot of fresh, grated Parmesan.

You might also like:
For more delicious recipes, gardening ideas, foraging tips, and food-related inspiration "like" the Garden of Eating on Facebook, or follow me on Twitter and Pinterest.

Wednesday, October 15, 2014

I'll Drink To That - How Hard Cider Is Helping to Save Apple Orchards

Very local apples by Eve Fox, Garden of Eating blog, copyright 2011

A few years ago, the good folks at Glynwood noticed that New York State's apple orchards had declined by a shocking 25% in just five years. Unacceptable! They stepped in to help keep a time-honored way of life and thousands of acres of prime agricultural acreage alive.

View of Stoneridge Orchard

Their solution was inspired - by helping to boost the popularity of hard cider, a dry, sophisticated drink that bears little resemblance to the sweet, fizzy six-pack ciders you can get in a grocery store - they hoped to create a sustainable market for New York's apples. And so far, it's working remarkably well!

I wrote more about it recently for Civil Eats - you can read the short piece here.

And this seems like a good time to mention the fact that hard cider is the perfect drink for a Thanksgiving feast. Apples are a natural pairing for every single dish on that groaning table...

Visit the Cider Week site to find out if there are events and tastings taking place in your area this month and next. If you're lucky enough to live here in NY's Hudson Valley, check out Cider Week Hudson Valley.

Hard ciders at a tasting

You might also like:
For more delicious recipes, gardening ideas, foraging tips, and food-related inspiration "like" the Garden of Eating on Facebook, or follow me on Twitter and Pinterest.

Sunday, October 12, 2014

Harvest Lasagna

Harvest lasagna by Eve Fox, The Garden of Eating, copyright 2014

This melty lasagna is packed with flavor from roasted summer squash, fresh basil, oregano, spinach and the sweetest garden tomatoes. Plus, it's a perfect way to use up a whole lot of vegetables in one fell swoop.

Between our CSA and our garden, it's kind of hectic around here. Green beans, cherry tomatoes, kale, chard and delicata squash just keep on coming and we haven't even started to think about harvesting our rather large sweet potato patch yet (more on why we planted so many sweet potatoes). And every other week brings another big load of vegetables from the farm across the river, too. I know I'll miss it once everything is withered and brown but, for now, trying to keep up is somewhat stressful.

Basil by Eve Fox, The Garden of Eating, copyright 2014

I find myself fantasizing about making leisurely trips to the grocery store to pick out the ingredients for something I've chosen to make just because it caught my fancy, not because I've got to do something with another towering load of kale from the garden or because I have to use up five pounds of beets to make room in the crispers before our next CSA pick up.

But since this is real life, I want to share this truly delicious way to use a bunch of summer squash, a boatload of sungold cherry tomatoes and lots of fresh basil, oregano and spinach. The other name I was kicking around for this glorious concoction was "Kitchen Sink Lasagna" but in the end, I decided that "harvest" sounded more appetizing. And it really is very appetizing.

Summer squash by Eve Fox, The Garden of Eating, copyright 2014

I won't lie to you and tell you that this is a quick, easy meal. But it is incredibly tasty and you can make enough for several meals and potentially even freeze some for later. I froze a bunch of the tomato sauce I made, too - so much easier than canning!

Lasagna is all about layering and the building blocks that make this harvest version so tasty are roasted summer squash with garlic and herbs, sauteed spinach and a fresh, herb-spiked tomato sauce. That said, nothing is set in stone and you do not have to use those particular ingredients or make your own sauce from scratch. I certainly would not think less of you for using a jar of sauce and it would speed up the process considerably.

Sungold cherry tomatoes for the sauce for the harvest lasagna by Eve Fox, The Garden of Eating, copyright 2014

But since I had to use up all those vegetables, this is what I did. First the prep - I washed the beautiful basil, oregano, tomatoes, summer squash and spinach. Then I chopped up a mountain of onions and garlic.

Beautiful fresh spinach by Eve Fox, The Garden of Eating, copyright 2014

Then I got the sauce started since it needs time to simmer. I sauteed lots of onion and garlic then added a big bowl full of sungolds and a few big red tomatoes from the garden, crushed it none too gently with a potato masher, added salt and pepper and a teaspoon of sugar, tossed in some chopped basil and oregano and let it simmer. Then I attacked it with my immersion blender until it was smooth. Yes, I left the skins in there. I am lazy and they're good for you. The end result was a bubbling pot of brilliantly colored sauce that reminded me of the surface of an active volcano crater if you were to sprinkle some fresh herbs over the magma. I always carry fresh herbs when I'm going to view a volcano...

Sungold cherry tomatoes, oregano, basil, onions and garlic make a great sauce by Eve Fox, The Garden of Eating, copyright 2014

Then I turned my attention to the summer squash. Preheated the oven to 400, got out my knife and sliced them up. I mounded them on a baking sheet, drizzled a healthy amount of olive oil over them, threw a handful of chopped basil and oregano and dosed them liberally with sea salt and black pepper. Then I mixed it all around with my hands until everything seemed to be coated and put them in to roast. About 15 minutes later they were done and I set them aside.

Roasting summer squash with herbs and garlic for the harvest lasagna by Eve Fox, The Garden of Eating, copyright 2014

While the squash cooled and the sauce simmered, I sauteed the spinach with some garlic, salt and pepper until it was soft - two to three minutes. Then I stirred it into the ricotta cheese and added a bit more salt and pepper and a little bit of ground nutmeg.

Sauteeing spinach with herbs and garlic for the harvest lasagna by Eve Fox, The Garden of Eating, copyright 2014

Somewhere in there, I'd put a big pot of water on to boil for the lasagna noodles. I used these organic ones from bionaturae - they're quite tasty. The kids actually enjoyed eating them plain and they are nice and strong which is helpful when you've forgotten to stir the noodles after dumping them in and have to pry them apart after draining them.

Bionaturae organic durum semolina lasagna noodles by Eve Fox, The Garden of Eating, copyright 2014

Then it was time to cut the cheese, so to speak :) I made short work of grating a small mountain of Parmesan and slicing the fresh mozzarella as thinly as possible. It is absolutely fine to use pre-grated cheese, by the way. I probably would have done so but didn't have any at the time.

Building time. I put down a layer of my lovely sauce, then a layer of noodles followed by ricotta cheese and spinach and another layer of roasted summer squash and topped it with mozzarella. Then I repeated it as many times as my ingredients allowed for.

Layering mozzarella on the harvest lasagna by Eve Fox, The Garden of Eating, copyright 2014

I put it in the oven at 375 for a mere 20 minutes and then we and our good friends sat down to a heavenly meal of harvest lasagna, green salad and garlic bread. Le yum. And that was just the first time. Lasagna is one of those dishes that gets tastier with a little time so the leftovers are even better.

Harvest lasagna by Eve Fox, The Garden of Eating, copyright 2014

-- print recipe --Harvest Lasagna
Makes one pan, serves 6-8

Ingredients (use organic whenever possible)

*4 small to medium summer squash, washed, ends removed and thinly sliced the long way
* 1 quart tomato sauce (if you want to make your own and are not sure how to proceed, try this recipe)
* 1 large onion, peeled and finely diced
* 4 large cloves of garlic, minced or pressed
* 2 1/2 cups shredded or thinly sliced organic whole milk mozzarella cheese
* 15 oz whole milk ricotta cheese
* 1 cup grated Parmesan cheese
* 4-5 cups fresh spinach, washed and dried (one or two large bunches' worth)
* 1 large bunch fresh basil leaves, washed, dried and chopped
* 1 bunch fresh oregano leaves, washed, dried and chopped
* 1 package lasagna noodles (12 oz)
* 1/8 tsp ground nutmeg
* Sea salt and black pepper to taste
* Olive oil

Directions

1. Preheat the oven to 400 degrees F. Mound the sliced summer squash in the center of a heavy baking sheet or dish, add a handful of the chopped fresh herbs and roughly a third of the garlic, sprinkle with salt and pepper, drizzle with olive oil (2 Tbsps or so) and toss well until all the slices are evenly coated. Roast for 10-15 minutes, checking once or twice and turning things, if needed, to ensure even cooking. You want to roast them until the edges have browned but before the slices get crispy. Remove from the oven and set aside to cool and turn the oven down to 375 degrees.

2. Bring a  large pot of water to boil for the lasagna noodles and cook according to the instructions on the package. I recommend only cooking until al dente as they will absorb a lot of liquid from the tomato sauce during baking. Rinse and drain the noodles and set aside until it's time to start layering.

3. Heat 2 Tbsps olive oil in a frying pan over medium heat and saute the onion and the rest of the garlic until the garlic is fragrant and the onion is translucent. Add the spinach and cook it for another two or three minutes, stirring often, until the spinach is wilted and dark green. Combine the spinach mixture with the ricotta cheese, the nutmeg and more salt and pepper and stir well to combine - you can either do this in a medium-sized bowl or right in the frying pan (one less dish to wash.)

4. Build the lasagna. In a 9 x 12" lasagna pan, start by spreading a layer of tomato sauce, then put down a layer of noodles, overlapping the ends slightly to cover the entire base. Add a layer of the ricotta-spinach mixture then a layer of roasted squash, more sauce and top with mozzarella cheese and some grated Parmesan. Repeat as many times as your ingredients and your pan permit. Top with whatever mozzarella and Parmesan you have left and cover tightly with tin foil.

5. Bake at 375 for roughly 15 minutes or until you can see that it's all heated through and melty (a glass pan works best for this kind of lasagna voyeurism) then remove the tinfoil and bake for another few minutes to brown the top. You can also broil it briefly (but don't walk away! a broiler is a powerful thing) to achieve the browning more quickly. When you're satisfied with the level of melty-ness and browning, remove from the oven and let cool for 10-15 minutes before serving so no one burns their tongue. As I've mentioned, it will likely taste even better the next day so you can definitely make this ahead and keep it in the fridge until it's go time. Either way, you are sure to enjoy the leftovers.

You might also like:
For more delicious recipes, gardening ideas, foraging tips, and food-related inspiration "like" the Garden of Eating on Facebook, or follow me on Twitter and Pinterest.
Friday, October 10, 2014

Halloween Costumes Inspiration

I woke up early this morning and got sucked into Pinterest in the hunt for a good Halloween costume idea for my five-year-old. Before I share a few of the ones I liked best, I want to share this barn owl costume I made for Will (the five-year-old) just after his younger brother was born two years ago. Seeing as James (the younger brother) would not sleep unless held, it was a challenge to find the time to cut and sew all those little felt owl feathers. It was down to the wire - I was sewing right up until we headed out the door to the Halloween parade on the village green.

Will in his barn owl costume

James will be wearing it again this year since he's fortunately still too young to have ideas about what he wants to be for Halloween or to really grock the whole concept of the holiday in the first place.

Here's Will hooting and flapping for the camera.

Will in his barn owl costume

Will in his barn owl costume

And here are a few of the other costume ideas that caught my fancy and I've pinned some more here if you want to check 'em out.
This sad-looking child is clearly too young to appreciate his Max costume from Where the Wild Things Are but I think it's beautiful.

I love Ratatouille and think this is so cute for a daddy and little one, especially if dad has red hair.


This one is inspired! And if you add a hunter to the mix (reverse the gender roles to make it even better, methinks) you've got an awesome couples costume.


Check out the rest over on Pinterest and leave me a comment to let me know what you're planning for All Hallow's Eve this year.