RESOURCES

Sunday, September 25, 2011

Tomato Tart Two Ways

Sunday, September 25, 2011

Tomato tart with caramelized onions, gruyere and thyme by Eve Fox, Garden of Eating blog, copyright 2011

I know, I know. You're probably thinking, "enough with the tomatoes!!" But I can't seem to stop... Bear with me, though, we'll be on to winter squash and root veggies ad nauseum soon enough.

I made these two tomato tarts with a green salad for lunch today. I can't help thinking of this lovely meal as summer's last gasp. The last tomatoes from the garden, the last arugala (I pulled the plants out this morning), the last few heart-breakingly crisp little cukes from our quickly withering vines...

Tomato tarts and green salad by Eve Fox, Garden of Eating blog, copyright 2011

The tarts were inspired by one that our friend, Kali, made for us this summer. The original recipe, which is much simpler than the one below - just pastry, tomatoes, thyme, olive oil, salt and pepper, is from Canal House Cooking Volume No. 4: Farm Markets & Gardens - a delicious set of cookbooks.

While the Canal House tart was delightful, I had a hankering for something a tad more substantial and less appetizer-like today. I also had a big hunk of gruyère cheese that was not getting any younger and a simple chevre that I had no other plans for. And since the package of puff pastry I'd bought came with two sheets, I thought, "why not try this tart two ways?" So I made one with the goat cheese and one with the gruyère. But that is where the differences end, otherwise, they were identical.

Tomato by Eve Fox, Garden of Eating blog, copyright 2011

It's important to use only the best tomatoes -- you want something really sweet and rich for this since the flavor will be first and foremost.

Thankfully, our thyme plant is not bothered by the end of summer (unlike me) and was happy to oblige with a few tender stems.

Thyme by Eve Fox, Garden of Eating blog, copyright 2011

I am a huge fan of caramelized onions (though to be honest these were not truly caramelized, just sautéed with salt, pepper and a splash of balsamic vinegar) so I thought some alliums would make a nice addition, too.

Red onion by Eve Fox, Garden of Eating blog, copyright 2011

The resulting tarts were mighty toothsome. I loved the addition of the cheese and the sweet onions. My only regret was that I had not thought to scatter some pine nuts on them (so I've added that in the recipe below).

Tomato tart with caramelized onions, goat cheese and thyme by Eve Fox, Garden of Eating blog, copyright 2011

My husband and I were divided in our opinions - I thought the goat cheese version was tastier while he favored the gruyère. It's a fortunate difference of opinion since we each have our eyes on the leftovers of our respective favorites...

Tomato tart with caramelized onions, gruyere and thyme by Eve Fox, Garden of Eating blog, copyright 2011

Either way, this tart is easy and scrumptious. The puff pastry makes it look and taste decadent with extremely minimal work on your part. Effortless gourmet dining...

Tomato tarts and green salad by Eve Fox, Garden of Eating blog, copyright 2011

-- print recipe --
Tomato Tart
Makes one tart that serves 4-6 as an appetizer or 2-3 as an entree


Ingredients

* 1 sheet puff pastry, defrosted
* 2 medium or 1 large tomato, cored and sliced (not too thick - you want to avoid too much weight or liquid as it will make the pastry soggy)
* 2-3 branches fresh thyme
* 4 oz goat or gruyère cheese
* 1 large onion, sliced
* Extra-virgin olive oil
* Freshly ground black pepper
* Sea salt
* Handful of toasted pine nuts

Directions

1. Preheat the oven to 375 degrees F. While you're waiting for the pastry to defrost, sautée the onions in a frying pan in olive oil until translucent. Splash with a little balsamic vinegar and continue to cook another 1-2 minutes.

2. Lay the sheet of puff pastry out on a parchment paper-lined baking sheet. Prick the dough inside the border all over with the tines of a fork to prevent it from puffing up too much during baking.

3. Spread a layer of whichever cheese you choose on the pastry. Top with the onions, then arrange the tomatoes on the pastry in a single layer (crowding or overlapping the tomatoes will make the puff pastry soggy). Strip the branches of thyme, scattering the leaves over the tomatoes. Drizzle the tart with some olive oil and season with pepper. If using gruyère, reserve a little cheese to sprinkle over the top.

4. Bake the tart until the pastry is crisp and deeply browned on the bottom and around the edges, 30-40 minutes. Season with salt and serve.

You might also like:
For more delicious recipes, gardening ideas, foraging tips, and food-related inspiration "like" the Garden of Eating on Facebook, or follow me on Twitter and Pinterest.

Wednesday, September 21, 2011

Slow Oven-Roasted Tomatoes

Wednesday, September 21, 2011

You say tomato. I say slow oven-roasted tomato...

Oven roasted San Marzano tomatoes by Eve Fox, Garden of Eating blog, copyright 2011

When I saw these pop up on Food In Jars' Facebook page a couple weeks ago, I knew that I would be making them. They are the most delicious thangs -- sweet, chewy, and intensely tomato-ey (it's my blog so I can make up any words I feel like.) The long roasting concentrates a whole tomato's worth of flavor into the delightfully shriveled, slightly gooey treat that remains at the end of 10-12 hours in the oven.

While not exactly quick, they are sublimely easy to make. All you do is preheat your oven to 200 F. While you're waiting, wash the tomatoes.

Tomatoes by Eve Fox, Garden of Eating blog, copyright 2011

Slice them in half (or into quarters if you're using a rounder, fatter variety) and lay them in a single layer on parchment covered baking sheets.

Tomatoes about to go into the oven by Eve Fox, Garden of Eating blog, copyright 2011

Drizzle with olive oil, then sprinkle with sea salt and freshly ground pepper(you could throw some basil, thyme or oregano into the mix, too, if you feel like it.)

Tomatoes about to go into the oven by Eve Fox, Garden of Eating blog, copyright 2011

Then slide the sheets in and cook them at this low temperature for 10-12 hours (or more like 8 if you're using cherry or grape tomatoes since they're much smaller). Check them periodically to make sure they're not getting too dried out for your taste (and to make sure your oven is still on - ours kept turning off for some reason... Not good!)

Tomatoes roasting in the oven by Eve Fox, Garden of Eating blog, copyright 2011

When they're done, let them cool down. Remove however many you plan to scarf down in the next week and put them in an airtight container with a lid.

Oven-roasted San Marzano tomatoes by Eve Fox, Garden of Eating blog, copyright 2011

Then freeze the rest on their sheets, pack them into glass jars or freezer bags and toss them into the freezer.

Two freezer bags of oven roasted tomatoes by Eve Fox, Garden of Eating blog, copyright 2011

These are DIVINE atop some goat cheese on crackers or baguette, chopped in salad, added to sauces, or just eaten on their own. I think you'll find them quite addictive...

Greens with quinoa, broiled salmon oven roasted tomatoes, cucumber, beets, pinenuts, currants and lemon pesto mayo dressing by Eve Fox, Garden of Eating blog, copyright 2011

You might also like:

Tuesday, September 20, 2011

Tomato Jam

Tuesday, September 20, 2011

I first made tomato jam a few years ago as an accompaniment to a decadent middle eastern-inspired meal in honor of my friend Nadia and her then-boyfriend, Martin who'd made the long trek out from Boston to visit us in Berkeley. Nadia is an adventurous cook and an appreciative eater so we ended up spending a lot of our time together in the kitchen.

Tomato jam

In addition to the spiced tomato jam, the meal feast included spiced lamb kabobs, tzatziki (a.k.a., cucumber yogurt salad), lemon-scented quinoa with tahini and chickpeas, hummous topped with caramelized onions, Greek yogurt, roasted golden beets, pinenuts, and cilantro, and a green salad and some pita to round it all out. Needless to say, no one went hungry.

Jar of tomato jam by Eve Fox, Garden of Eating blog, copyright 2011

So when I saw this enticing recipe for tomato jam on Food In Jars (an awesome canning and preserving blog written by Marisa McClellan) I realized that it's been too long since I've made this delectable jam. In fact, not only have Nadia and Martin had time to tie the knot since I last made tomato jam, they now have an extremely cute 8-month-old, too. Looks like I've been slacking!

A spoonful of sweet, spicy tomato jam by Eve Fox, Garden of Eating blog, copyright 2011

Marisa's recipe below is nearly identical to the Mark Bittman recipe I first used. I don't think you could go wrong with either one but since I've already posted about the Bittman one, I'll give Food In Jars' version a try. As canning projects go, this one is easy.

You wash your tomatoes.

Tomatoes by Eve Fox, Garden of Eating blog, copyright 2011

Chop them up.

Chopping tomatoes for tomato jam by Eve Fox, Garden of Eating blog, copyright 2011

Grate some fresh ginger.

Grating ginger by Eve Fox, Garden of Eating blog, copyright 2011

Simmer it in a pot with lime juice, sugar, salt and a few ground spices until it gets thick and gooey.

Tomato jam reducing by Eve Fox, Garden of Eating blog, copyright 2011

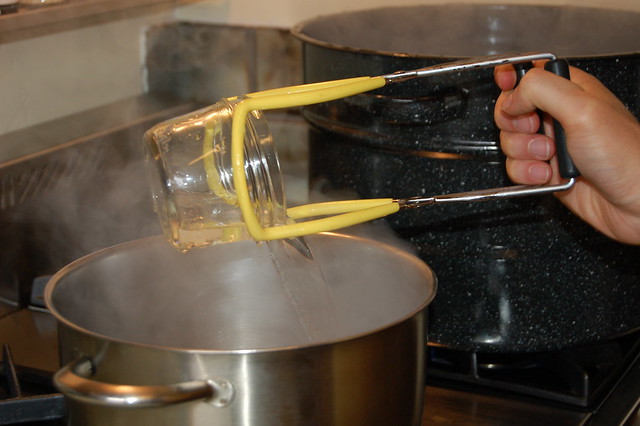
Fill your sterilized jars with the hot jam and toss them into the canning pot for a bit.

Tomato jam in the canner by Eve Fox, Garden of Eating blog, copyright 2011

Et voilá! You have tomato jam - sweet, salty, spicy. Try this delectable jam on bread or crackers with some goat cheese or brie or something much stinkier, serve it with grilled sausage (it's great with these spiced lamb kabobs) or steak, use it in place of ketchup on a burger, or try it as a glaze for roasted chicken or pork - I think you will love it!

Jar of tomato jam by Eve Fox, Garden of Eating blog, copyright 2011

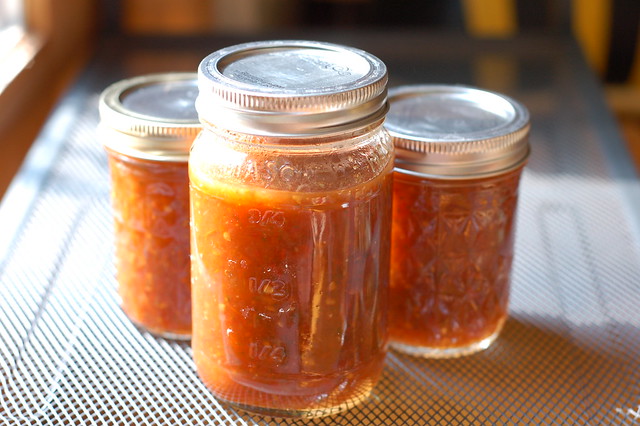
If you don't want to bother with canning, just cut the proportions down accordingly to make a much smaller amount. It will keep in the fridge for up to a week in a tightly covered jar.

Three jars of tomato jam by Eve Fox, Garden of Eating blog, copyright 2011

-- print recipe --
Tomato Jam
Makes between 3 and 5 pints, depending on what kind of tomatoes you use and how long you reduce it

Ingredients

* 5 pounds firm, ripe tomatoes, finely chopped
* 3 1/2 cups sugar
* 8 tablespoons lime juice
* 2 teaspoons freshly grated ginger
* 1 teaspoon cinnamon
* 1/2 teaspoon ground cloves
* 1 tablespoon salt
* 1 tablespoon red chili flakes

Directions

1. Combine all the ingredients in a large, non-reactive pot. Bring to a boil and then reduce the temperature to a simmer. Stirring regularly, simmer the jam until it reduces to a sticky, jammy mess. This will take between 1 and 1 1/2 hours, depending on how high you keep your heat.

2. When the jam has cooked down sufficiently, remove it from the heat and fill the jars, leaving 1/4 inch of headspace. Wipe the rims with a clean, damp paper towel, apply the lids and twist on the rings. Process in a boiling water canner for 20 minutes.

3. When time is up, remove jars from water bath and allow them to cool. When the jars are cool enough to handle, test the seals. Store the jars in a cool, dark place for up to one year.

Not feeling totally confident about how to can food? Check out my how-to post here for an overview of the process.

You might also like:

Thursday, September 15, 2011

Pickled Beets With Cumin and Cloves

Thursday, September 15, 2011

Here at our house, the canning continues. The latest is this delightful pickled beet recipe that seemed like a good way to use the three big bunches of beets that have been cooling their heels in the crisper of our fridge since we picked them up from our CSA several weeks ago. We had three delicious varieties -- red, chiogga and golden.

Pickled Beets With Cumin & Cloves by Eve Fox, Garden of Eating blog, copyright 2011

If you're not a fan of beets, I encourage you to keep trying them. After hating beets with a passion for about 30 years, I did a complete about-face a few years back and now love them. I think it's easier to transition to golden beets as their flavor is a little mellower and sweeter than red or purple beets. They served as the "gateway beet" for me.

Roasted beets, peeled and ready to slice by Eve Fox, Garden of Eating blog, copyright 2011

Cumin and beets go so well together - the exotic savory flavor pairs really nicely with the beets' rich sweetness. Vinegar adds a little bite and salt brings the whole thing up to a humming pitch.

Cumin seeds, cloves and salt by Eve Fox, Garden of Eating blog, copyright 2011

These pickled beets are delicious on falafel or as part of a Middle Eastern style mezze spread with hummus, olives and stuffed grape leaves. In addition to tasting good, they also look good - I think the jars are positively jewel-like.

Pickled Beets With Cumin & Cloves by Eve Fox, Garden of Eating blog, copyright 2011

If you've ever cooked with beets before, you know that they stain - so wear gloves unless you're okay with having pink hands for the day (the mark of a beet lover!)

Beet Blood on my Hands by Eve Fox, Garden of Eating blog, copyright 2011

The recipe below is from Sherri Brooks Vinton's excellent canning and preserving cookbook, Put 'Em Up.

-- print recipe --
Pickled Beets With Cumin and Cloves
Makes about 3 pints

Ingredients

* 2 pounds beets (any variety), tops and root ends cut off
* 1 cup distilled white vinegar
* 1/2 cup water
* 1/2 cup sugar
* 1/2 Tbsp salt
* 1 Tbsp cumin seed
* 1/4 tsp whole cloves

Directions

1. Prep the beets by boiling or roasting them until nearly tender. To boil them, place in a large pot with water to cover by 2 to 3 inches. Bring to a low boil and cook until beets are tender when pierced with a knife, 30 to 40 minutes depending on the size of the beets. Drain and set aside until enough to handle. To roast them, preheat the oven to 375 F. Wrap the beets in foil and place on a baking sheet. Roast until tender when pierced with a fork, 45 minutes to an hour, depending on the size of the beets. Remove from the oven, open the foil and set aside until cool enough to handle. Regardless of which cooking method you choose, the skins should slip off the cooked beets easily, leaving lovely smooth beets behind. Use a paring knife to cuff away and stubborn bits or damaged spots. Then cut them in half and then again into 1/4 slices. Set aside while you prepare your jars and brine.

2. Boil your jars and lids for 10 minutes. Meanwhile, prepare the brine - combine the vinegar, water, sugar and salt in a medium, non-reactive saucepan, and bring to a boil. Stir to dissolve the sugar and salt, then remove from the heat.

3. Pack the beets into 3 clean, hot pint jars, arranging the slices snugly but with enough room for brine to circulate and stopping 1 inch below the top of the jars. Divide the cumin seed and cloves evenly among the jars. Pour the hot bring brine over the beets to cover by 1/2 inch. Leave 1/2 inch of headspace between the top of the liquid and the lid.

4. If you don't want to bother canning these, you can just let them cool, cover them and store them in the fridge for up to 3 weeks. If you do want to preserve them for up to a year, follow these instructions: Release any trapped air bubbles by shimmying a knife round the edges of the jars. Wipe the rims clean with a clean, damp paper towel. Apply the lids and screw on the jar bands. Process the jars for 30 minutes in a boiling water bath canner. Remove the jars and allow to cool. Test the seals (the tops should all be popped down) and store in a cool, dark place for up to one year. Any jars whose lids have not popped down should be stored in the refrigerator and used within 3 weeks.

Not feeling totally confident yet about canning? Check out my how-to post for more detailed instructions.

You might also like:
For more delicious recipes, gardening ideas, foraging tips, and food-related inspiration "like" the Garden of Eating on Facebook, or follow me on Twitter and Pinterest.

Friday, September 9, 2011

Heirloom Tomato Salsa

Friday, September 9, 2011

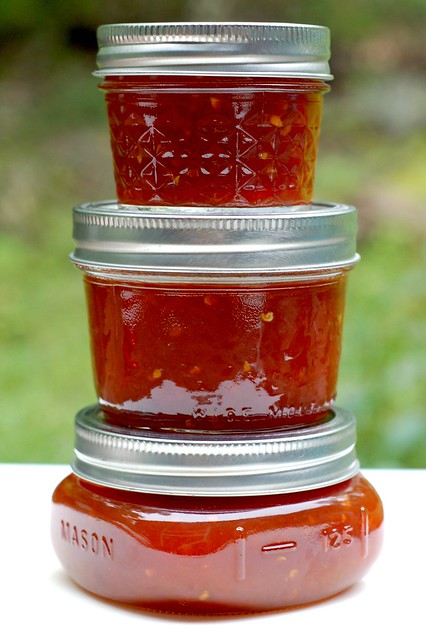
Freshly canned salsa by Eve Fox, Garden of Eating blog, copyright 2011

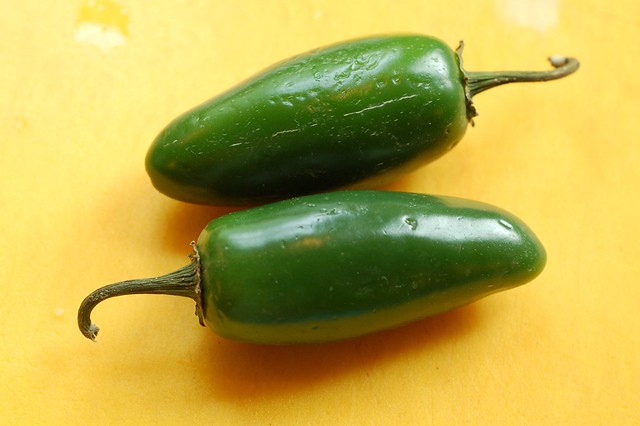
Some like it hot...but I like it mild. That's one of the nice things about making your own salsa -- you can make it as spicy or non-spicy as you like.

Some like it hot - jalapenos by Eve Fox, Garden of Eating blog, copyright 2011

My own salsa-making journey was inspired by two jars of delicious salsa we received from my aunt Maggie last winter. They were so far and above even the best supermarket salsa money can buy, that we used each and every drop -- a radical departure from my norm which is to open a pint jar, use about half of it, put it back in the fridge, feel vaguely guilty while it begins to grow an entire colony of mold on it, then throw it out several months later in a fit of disgusted refrigerator cleaning.

These jars of homemade salsa were special enough to inspire me to find new ways to use them up - I even rediscovered western omelettes!

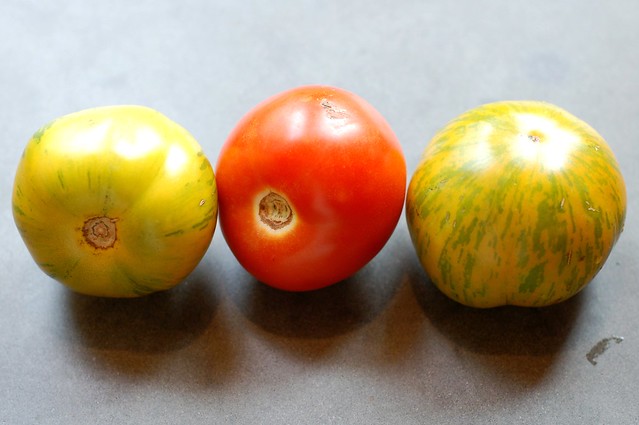
Heirloom tomato trio by Eve Fox, Garden of Eating blog, copyright 2011

So when tomatoes starting rolling in a couple of weeks ago, I thought, "why not make some really good salsa of our own to last us the whole long, cold, bleak, dreary, depressing winter?" (can you tell I do not care for winter?)

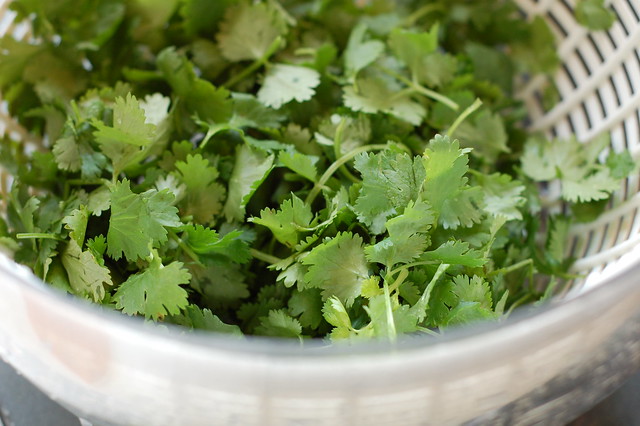
Cilantro by Eve Fox, Garden of Eating blog, copyright 2011

I asked Auntie Maggie what she does to create her awesome deliciousness and I have to admit that my enthusiasm for the whole project quadrupled when she said she just puts all the ingredients right into the food processor. After the previous week's tomato sauce canning bonanza with its requisite peeling, slicing and dicing, I was ready for this quicker, easier prep method.

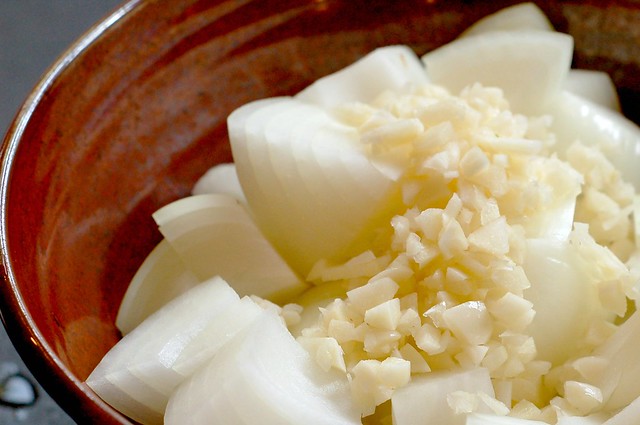
Onions and garlic by Eve Fox, Garden of Eating blog, copyright 2011

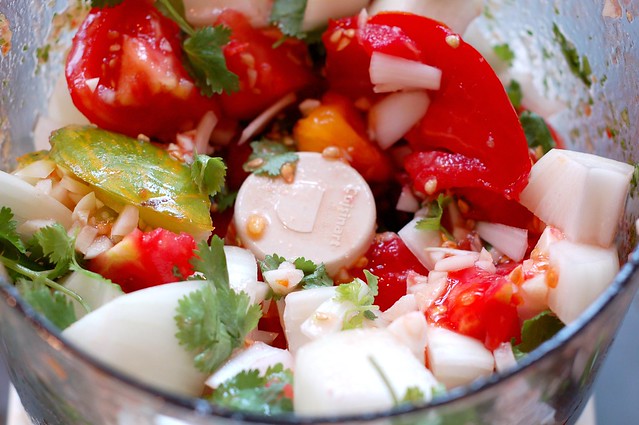
The ingredients are simple - tomatoes, onions, garlic, cilantro, jalapeños, white or apple cider vinegar, sugar, and salt. You wash things off, chop them roughly, dump them in the Cuisinart, blend for a bit, cook for a bit and then can it all. Es tan fácil!

Salsa ingredients in the cuisinart by Eve Fox, Garden of Eating blog, copyright 2011

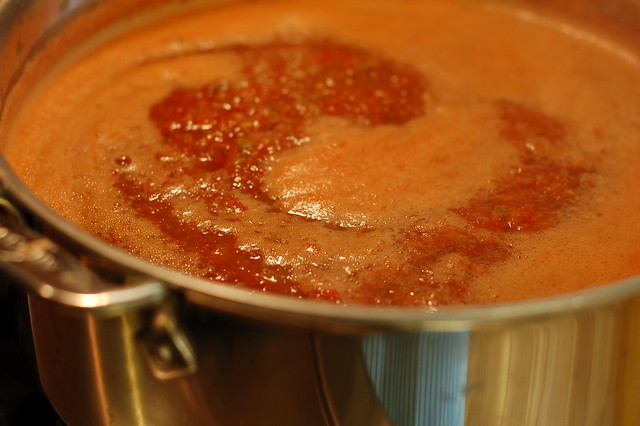
I am morally opposed to seeding tomatoes so my salsa was a bit watery when it came out of the food processor but I just cooked it down until it reached the perfect consistency.

Salsa simmering by Eve Fox, Garden of Eating blog, copyright 2011

As a result of the previous week's tomato sauce canning, when it came time to start sterilizing jars, we realized there was a serious shortage of pints... But the gods of serendipity were shining on our house that day as this potential tragedy led to a truly brilliant innovation - half-pint jars of salsa!

Sterilizing the perfectly-sized half-pint jars

No more rushing to use up a full pint of salsa, no more feeling guilty about wasting salsa, and no more feeling revolted by the mold colonies growing in our fridge - it's a win-win-win.

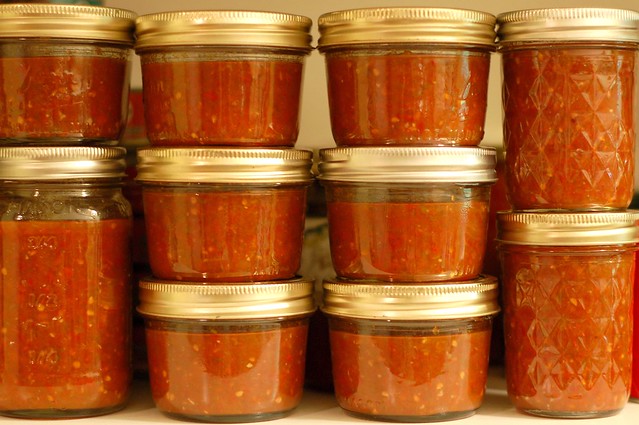
Heirloom Tomato Salsa Lines The Shelf by Eve Fox, Garden of Eating blog, copyright 2011

The cheerful jars lining the shelf in our pantry should help add some (mild) heat to the coming cold winter days.

-- print recipe --
Heirloom Tomato Salsa
Makes 6 pints (or 12 half-pints)

Ingredients

* 5 lbs heirloom tomatoes
* 1-2 jalapeño peppers, seeds, ribs and stems removed, finely diced (I recommend wearing gloves when working with these)
* 2 onions, roughly chopped
* 4 large cloves of garlic, roughly chopped
* 1 cup fresh cilantro leaves, washed, and dried
* 1 1/2 cups white vinegar
* 1/4 cup sugar
* 1 Tbsp sea salt

Directions

1. Place the tomatoes, onions, garlic, and cilantro in the bowl of a food processor and blend until it reaches the desired consistency.

2. Put the blended mixture into a large, non-reactive pot, add the jalapeños, sugar, salt and vinegar, bring to a boil and then simmer until it reaches the desired thickness. 

3. While the salsa is cooking, sterilize your jars and lids in the hot water bath for 10 minutes. Drain and remove the jars, ladle the hot salsa directly into the hot jars leaving 1/4" head space, wipe the rims with a clean, damp paper towel, apply the lids, and secure the bands.

4. Process in a hot water bath canner for 20 minutes, then remove from the water and let the jars cool on a rack or several dishtowels to avoid extreme temperature changes which can crack the jars. One cooled, check the seals (the lids must be popped down) and store in a cool dark place for up to one year. If any of the lids have not sealed properly, store the jar in the fridge and use within one week.

Not feeling totally confident about canning food yet? Check out my how-to post here for an overview of the process.

You might also like:


Wednesday, September 7, 2011

Summer In a Jar - Simple Tomato Sauce With Garlic & Basil

Wednesday, September 7, 2011

Last summer, the late blight destroyed the vast majority of east coast tomato crops but this year, there are fat, flavorful tomatoes hanging from vines everywhere ya look. In fact, this one was hanging off the vine in a pot in our little container garden just a few days ago. It's an Ulster Germaid grown from seeds I bought from our very own Hudson Valley Seed Library this spring.

First ripe Ulster Germaid tomato in our garden by Eve Fox, Garden of Eating blog, copyright 2011

I managed to put up 10 pints of this simple, tasty tomato sauce just hours before Hurricane Irene descended on Ulster County with a vengeance. The resulting devastation and power outage (we were without power for four days and we were among the lucky ones in this area!) did delay my posting this for over a week. But, as they say, better late than never...

12 pints of simple tomato sauce by Eve Fox, Garden of Eating blog, copyright 2011

I used a mix of heirloom tomatoes from our CSA, Hearty Roots Community Farm, and plum tomatoes from Hardeman's farmstand just down the road from them in Red Hook.

First tomatoes of the season by Eve Fox, Garden of Eating blog, copyright 2009

I kept the additions simple - sautéed onions and garlic, fresh basil, sea salt, freshly ground pepper and a little red wine.

Fixings for fresh tomato sauce


Although there's considerable prep time involved,  the process is quite simple -- just blanch, peel, chop, sautée, simmer, sterilize, and can!

Blanching the tomatoes in batches by Eve Fox, Garden of Eating blog, copyright 2011

It takes a little while but there's something very satisfying about pulling the skins off those delicious red 'maters.

Peeled tomatoes by Eve Fox, Garden of Eating blog, copyright 2011

After chatting with my cousin, Nina, our family's culinary oracle, I decided to be daring (or terribly foolish, TBD, depending on whether I end up poisoning my whole family with botulism...) and ignore the guidelines about adding lemon juice or citric acid to the jars prior to canning. I tried to minimize the risks by keeping my non-tomato additions minimal to ensure that the sauce will be of a higher acidity, having the sauce at a boil when it came time to ladle it into the jars, thoroughly sterilizing the jars, and processing the hell out of them once full and capped. However, none of this will actually prevent botulism so my directions below call for lemon juice as I do not want to be responsible for causing any deaths among my readers...

Tomato sauce simmering on the stove by Eve Fox, Garden of Eating blog, copyright 2011

I am a relative canning novice but I have canned tomato sauce in this manner in the past without killing anyone so I'm just going to cross my fingers and hope for the best. But YOU should add the lemon juice or citric acid to the jars or use a pressure canner since that will allow you to get the sauce hot enough to actually kill any botulin.

12 pints of simple tomato sauce by Eve Fox, Garden of Eating blog, copyright 2011

Remember that important adage (adored by parents the world over): "Do as I say, not as I do." Here's the recipe.

Simple Tomato Sauce
Makes roughly 8 pints or 4 quarts

Ingredients (I recommend using organic whenever possible)

* 20 lbs ripe tomatoes (you can use plum or other varieties)
* 1 large onion, chopped
* 6-8 cloves of garlic, minced
* one bunch fresh basil leaves, washed, dried and coarsely chopped
* 2 tsp freshly ground black pepper
* 4 tsp sea salt
* 3 Tbsp olive oil
* 1/2 cup red wine (optional)
* 1/2 cup sugar (this may sound like a lot but you will need to add lemon juice to each jar and the sugar helps to counteract the tartness)
* bottled lemon juice (amount will depend on how much you're making)

Directions

1. Bring a large stockpot of water to a boil. Immerse the tomatoes (you'll most likely have to do this in batches unless you've got a really really big pot!) in the boiling water for 30 to 60 seconds or until the skins begin to split. Then dip in a large bowl of cold water (ice water is best) and slip off the skins. Core the tomatoes and remove any blemished or discolored parts. Chop roughly and set aside.

2. In a large, heavy saucepan, sauté the onions and garlic in the olive oil until translucent and fragrant. Add the tomatoes, basil, sugar, wine and spices and bring to a boil. Simmer uncovered until thick enough for serving - this will take a few hours. The volume will be reduced by almost one-half. Stir often to prevent sticking. If you prefer smoother sauce, you can use an immersion blender to process the sauce right in the pot (this is what I did.)

3. When the sauce is beginning to look like it's approaching the right consistency, fill your canning pot with water and put it on high heat. Once the water has reached a boil, place your jars and lids in the water and boil them for 10 minutes to sterilize them. Or, if you don't have a canner or don't want to deal with all this hootenany, you can also just freeze the sauce in batches. Just let it cool down fully before you put it in whatever containers you plan to freeze it in! We often use yogurt containers.

4. To be safe, add 1/4 teaspoon of citric acid or 1 tablespoon of lemon juice to each pint (double those amounts for quarts). Then ladle the bubbling hot sauce into the hot, sterilized jars, leaving 1/2-inch head space. Remove any air bubbles. Wipe the rims and screw threads with a clean, damp paper towel, apply the two piece metal canning lids, and tighten the screw bands.

5. Process the jars as follows (unless you live at high altitude in which case you should check the UGA's site for recommended processing times.) If you have access to a pressure canner, please use it - it's definitely safer than the hot water bath one!

Pressure Canner
20 minutes for pints
25 minutes for quarts
Using either 11 pounds pressure with a dial gauge pressure canner or 10 pounds pressure with a weighted gauge pressure canner.

Hot Water Bath Canner
35 minutes for pints
45 minutes for quarts

6. After processing, remove the jars immediately, and place on a rack to cool. You should begin to hear a delightful "pop" "pop" "pop" sound of the jar lids sealing. Any jars whose lids do not pop down should be placed in the fridge and used within one week.

You might also like:

Sunday, September 25, 2011

Tomato Tart Two Ways

Tomato tart with caramelized onions, gruyere and thyme by Eve Fox, Garden of Eating blog, copyright 2011

I know, I know. You're probably thinking, "enough with the tomatoes!!" But I can't seem to stop... Bear with me, though, we'll be on to winter squash and root veggies ad nauseum soon enough.

I made these two tomato tarts with a green salad for lunch today. I can't help thinking of this lovely meal as summer's last gasp. The last tomatoes from the garden, the last arugala (I pulled the plants out this morning), the last few heart-breakingly crisp little cukes from our quickly withering vines...

Tomato tarts and green salad by Eve Fox, Garden of Eating blog, copyright 2011

The tarts were inspired by one that our friend, Kali, made for us this summer. The original recipe, which is much simpler than the one below - just pastry, tomatoes, thyme, olive oil, salt and pepper, is from Canal House Cooking Volume No. 4: Farm Markets & Gardens - a delicious set of cookbooks.

While the Canal House tart was delightful, I had a hankering for something a tad more substantial and less appetizer-like today. I also had a big hunk of gruyère cheese that was not getting any younger and a simple chevre that I had no other plans for. And since the package of puff pastry I'd bought came with two sheets, I thought, "why not try this tart two ways?" So I made one with the goat cheese and one with the gruyère. But that is where the differences end, otherwise, they were identical.

Tomato by Eve Fox, Garden of Eating blog, copyright 2011

It's important to use only the best tomatoes -- you want something really sweet and rich for this since the flavor will be first and foremost.

Thankfully, our thyme plant is not bothered by the end of summer (unlike me) and was happy to oblige with a few tender stems.

Thyme by Eve Fox, Garden of Eating blog, copyright 2011

I am a huge fan of caramelized onions (though to be honest these were not truly caramelized, just sautéed with salt, pepper and a splash of balsamic vinegar) so I thought some alliums would make a nice addition, too.

Red onion by Eve Fox, Garden of Eating blog, copyright 2011

The resulting tarts were mighty toothsome. I loved the addition of the cheese and the sweet onions. My only regret was that I had not thought to scatter some pine nuts on them (so I've added that in the recipe below).

Tomato tart with caramelized onions, goat cheese and thyme by Eve Fox, Garden of Eating blog, copyright 2011

My husband and I were divided in our opinions - I thought the goat cheese version was tastier while he favored the gruyère. It's a fortunate difference of opinion since we each have our eyes on the leftovers of our respective favorites...

Tomato tart with caramelized onions, gruyere and thyme by Eve Fox, Garden of Eating blog, copyright 2011

Either way, this tart is easy and scrumptious. The puff pastry makes it look and taste decadent with extremely minimal work on your part. Effortless gourmet dining...

Tomato tarts and green salad by Eve Fox, Garden of Eating blog, copyright 2011

-- print recipe --
Tomato Tart
Makes one tart that serves 4-6 as an appetizer or 2-3 as an entree


Ingredients

* 1 sheet puff pastry, defrosted
* 2 medium or 1 large tomato, cored and sliced (not too thick - you want to avoid too much weight or liquid as it will make the pastry soggy)
* 2-3 branches fresh thyme
* 4 oz goat or gruyère cheese
* 1 large onion, sliced
* Extra-virgin olive oil
* Freshly ground black pepper
* Sea salt
* Handful of toasted pine nuts

Directions

1. Preheat the oven to 375 degrees F. While you're waiting for the pastry to defrost, sautée the onions in a frying pan in olive oil until translucent. Splash with a little balsamic vinegar and continue to cook another 1-2 minutes.

2. Lay the sheet of puff pastry out on a parchment paper-lined baking sheet. Prick the dough inside the border all over with the tines of a fork to prevent it from puffing up too much during baking.

3. Spread a layer of whichever cheese you choose on the pastry. Top with the onions, then arrange the tomatoes on the pastry in a single layer (crowding or overlapping the tomatoes will make the puff pastry soggy). Strip the branches of thyme, scattering the leaves over the tomatoes. Drizzle the tart with some olive oil and season with pepper. If using gruyère, reserve a little cheese to sprinkle over the top.

4. Bake the tart until the pastry is crisp and deeply browned on the bottom and around the edges, 30-40 minutes. Season with salt and serve.

You might also like:
For more delicious recipes, gardening ideas, foraging tips, and food-related inspiration "like" the Garden of Eating on Facebook, or follow me on Twitter and Pinterest.

Wednesday, September 21, 2011

Slow Oven-Roasted Tomatoes

You say tomato. I say slow oven-roasted tomato...

Oven roasted San Marzano tomatoes by Eve Fox, Garden of Eating blog, copyright 2011

When I saw these pop up on Food In Jars' Facebook page a couple weeks ago, I knew that I would be making them. They are the most delicious thangs -- sweet, chewy, and intensely tomato-ey (it's my blog so I can make up any words I feel like.) The long roasting concentrates a whole tomato's worth of flavor into the delightfully shriveled, slightly gooey treat that remains at the end of 10-12 hours in the oven.

While not exactly quick, they are sublimely easy to make. All you do is preheat your oven to 200 F. While you're waiting, wash the tomatoes.

Tomatoes by Eve Fox, Garden of Eating blog, copyright 2011

Slice them in half (or into quarters if you're using a rounder, fatter variety) and lay them in a single layer on parchment covered baking sheets.

Tomatoes about to go into the oven by Eve Fox, Garden of Eating blog, copyright 2011

Drizzle with olive oil, then sprinkle with sea salt and freshly ground pepper(you could throw some basil, thyme or oregano into the mix, too, if you feel like it.)

Tomatoes about to go into the oven by Eve Fox, Garden of Eating blog, copyright 2011

Then slide the sheets in and cook them at this low temperature for 10-12 hours (or more like 8 if you're using cherry or grape tomatoes since they're much smaller). Check them periodically to make sure they're not getting too dried out for your taste (and to make sure your oven is still on - ours kept turning off for some reason... Not good!)

Tomatoes roasting in the oven by Eve Fox, Garden of Eating blog, copyright 2011

When they're done, let them cool down. Remove however many you plan to scarf down in the next week and put them in an airtight container with a lid.

Oven-roasted San Marzano tomatoes by Eve Fox, Garden of Eating blog, copyright 2011

Then freeze the rest on their sheets, pack them into glass jars or freezer bags and toss them into the freezer.

Two freezer bags of oven roasted tomatoes by Eve Fox, Garden of Eating blog, copyright 2011

These are DIVINE atop some goat cheese on crackers or baguette, chopped in salad, added to sauces, or just eaten on their own. I think you'll find them quite addictive...

Greens with quinoa, broiled salmon oven roasted tomatoes, cucumber, beets, pinenuts, currants and lemon pesto mayo dressing by Eve Fox, Garden of Eating blog, copyright 2011

You might also like:

Tuesday, September 20, 2011

Tomato Jam

I first made tomato jam a few years ago as an accompaniment to a decadent middle eastern-inspired meal in honor of my friend Nadia and her then-boyfriend, Martin who'd made the long trek out from Boston to visit us in Berkeley. Nadia is an adventurous cook and an appreciative eater so we ended up spending a lot of our time together in the kitchen.

Tomato jam

In addition to the spiced tomato jam, the meal feast included spiced lamb kabobs, tzatziki (a.k.a., cucumber yogurt salad), lemon-scented quinoa with tahini and chickpeas, hummous topped with caramelized onions, Greek yogurt, roasted golden beets, pinenuts, and cilantro, and a green salad and some pita to round it all out. Needless to say, no one went hungry.

Jar of tomato jam by Eve Fox, Garden of Eating blog, copyright 2011

So when I saw this enticing recipe for tomato jam on Food In Jars (an awesome canning and preserving blog written by Marisa McClellan) I realized that it's been too long since I've made this delectable jam. In fact, not only have Nadia and Martin had time to tie the knot since I last made tomato jam, they now have an extremely cute 8-month-old, too. Looks like I've been slacking!

A spoonful of sweet, spicy tomato jam by Eve Fox, Garden of Eating blog, copyright 2011

Marisa's recipe below is nearly identical to the Mark Bittman recipe I first used. I don't think you could go wrong with either one but since I've already posted about the Bittman one, I'll give Food In Jars' version a try. As canning projects go, this one is easy.

You wash your tomatoes.

Tomatoes by Eve Fox, Garden of Eating blog, copyright 2011

Chop them up.

Chopping tomatoes for tomato jam by Eve Fox, Garden of Eating blog, copyright 2011

Grate some fresh ginger.

Grating ginger by Eve Fox, Garden of Eating blog, copyright 2011

Simmer it in a pot with lime juice, sugar, salt and a few ground spices until it gets thick and gooey.

Tomato jam reducing by Eve Fox, Garden of Eating blog, copyright 2011

Fill your sterilized jars with the hot jam and toss them into the canning pot for a bit.

Tomato jam in the canner by Eve Fox, Garden of Eating blog, copyright 2011

Et voilá! You have tomato jam - sweet, salty, spicy. Try this delectable jam on bread or crackers with some goat cheese or brie or something much stinkier, serve it with grilled sausage (it's great with these spiced lamb kabobs) or steak, use it in place of ketchup on a burger, or try it as a glaze for roasted chicken or pork - I think you will love it!

Jar of tomato jam by Eve Fox, Garden of Eating blog, copyright 2011

If you don't want to bother with canning, just cut the proportions down accordingly to make a much smaller amount. It will keep in the fridge for up to a week in a tightly covered jar.

Three jars of tomato jam by Eve Fox, Garden of Eating blog, copyright 2011

-- print recipe --
Tomato Jam
Makes between 3 and 5 pints, depending on what kind of tomatoes you use and how long you reduce it

Ingredients

* 5 pounds firm, ripe tomatoes, finely chopped
* 3 1/2 cups sugar
* 8 tablespoons lime juice
* 2 teaspoons freshly grated ginger
* 1 teaspoon cinnamon
* 1/2 teaspoon ground cloves
* 1 tablespoon salt
* 1 tablespoon red chili flakes

Directions

1. Combine all the ingredients in a large, non-reactive pot. Bring to a boil and then reduce the temperature to a simmer. Stirring regularly, simmer the jam until it reduces to a sticky, jammy mess. This will take between 1 and 1 1/2 hours, depending on how high you keep your heat.

2. When the jam has cooked down sufficiently, remove it from the heat and fill the jars, leaving 1/4 inch of headspace. Wipe the rims with a clean, damp paper towel, apply the lids and twist on the rings. Process in a boiling water canner for 20 minutes.

3. When time is up, remove jars from water bath and allow them to cool. When the jars are cool enough to handle, test the seals. Store the jars in a cool, dark place for up to one year.

Not feeling totally confident about how to can food? Check out my how-to post here for an overview of the process.

You might also like:

Thursday, September 15, 2011

Pickled Beets With Cumin and Cloves

Here at our house, the canning continues. The latest is this delightful pickled beet recipe that seemed like a good way to use the three big bunches of beets that have been cooling their heels in the crisper of our fridge since we picked them up from our CSA several weeks ago. We had three delicious varieties -- red, chiogga and golden.

Pickled Beets With Cumin & Cloves by Eve Fox, Garden of Eating blog, copyright 2011

If you're not a fan of beets, I encourage you to keep trying them. After hating beets with a passion for about 30 years, I did a complete about-face a few years back and now love them. I think it's easier to transition to golden beets as their flavor is a little mellower and sweeter than red or purple beets. They served as the "gateway beet" for me.

Roasted beets, peeled and ready to slice by Eve Fox, Garden of Eating blog, copyright 2011

Cumin and beets go so well together - the exotic savory flavor pairs really nicely with the beets' rich sweetness. Vinegar adds a little bite and salt brings the whole thing up to a humming pitch.

Cumin seeds, cloves and salt by Eve Fox, Garden of Eating blog, copyright 2011

These pickled beets are delicious on falafel or as part of a Middle Eastern style mezze spread with hummus, olives and stuffed grape leaves. In addition to tasting good, they also look good - I think the jars are positively jewel-like.

Pickled Beets With Cumin & Cloves by Eve Fox, Garden of Eating blog, copyright 2011

If you've ever cooked with beets before, you know that they stain - so wear gloves unless you're okay with having pink hands for the day (the mark of a beet lover!)

Beet Blood on my Hands by Eve Fox, Garden of Eating blog, copyright 2011

The recipe below is from Sherri Brooks Vinton's excellent canning and preserving cookbook, Put 'Em Up.

-- print recipe --
Pickled Beets With Cumin and Cloves
Makes about 3 pints

Ingredients

* 2 pounds beets (any variety), tops and root ends cut off
* 1 cup distilled white vinegar
* 1/2 cup water
* 1/2 cup sugar
* 1/2 Tbsp salt
* 1 Tbsp cumin seed
* 1/4 tsp whole cloves

Directions

1. Prep the beets by boiling or roasting them until nearly tender. To boil them, place in a large pot with water to cover by 2 to 3 inches. Bring to a low boil and cook until beets are tender when pierced with a knife, 30 to 40 minutes depending on the size of the beets. Drain and set aside until enough to handle. To roast them, preheat the oven to 375 F. Wrap the beets in foil and place on a baking sheet. Roast until tender when pierced with a fork, 45 minutes to an hour, depending on the size of the beets. Remove from the oven, open the foil and set aside until cool enough to handle. Regardless of which cooking method you choose, the skins should slip off the cooked beets easily, leaving lovely smooth beets behind. Use a paring knife to cuff away and stubborn bits or damaged spots. Then cut them in half and then again into 1/4 slices. Set aside while you prepare your jars and brine.

2. Boil your jars and lids for 10 minutes. Meanwhile, prepare the brine - combine the vinegar, water, sugar and salt in a medium, non-reactive saucepan, and bring to a boil. Stir to dissolve the sugar and salt, then remove from the heat.

3. Pack the beets into 3 clean, hot pint jars, arranging the slices snugly but with enough room for brine to circulate and stopping 1 inch below the top of the jars. Divide the cumin seed and cloves evenly among the jars. Pour the hot bring brine over the beets to cover by 1/2 inch. Leave 1/2 inch of headspace between the top of the liquid and the lid.

4. If you don't want to bother canning these, you can just let them cool, cover them and store them in the fridge for up to 3 weeks. If you do want to preserve them for up to a year, follow these instructions: Release any trapped air bubbles by shimmying a knife round the edges of the jars. Wipe the rims clean with a clean, damp paper towel. Apply the lids and screw on the jar bands. Process the jars for 30 minutes in a boiling water bath canner. Remove the jars and allow to cool. Test the seals (the tops should all be popped down) and store in a cool, dark place for up to one year. Any jars whose lids have not popped down should be stored in the refrigerator and used within 3 weeks.

Not feeling totally confident yet about canning? Check out my how-to post for more detailed instructions.

You might also like:
For more delicious recipes, gardening ideas, foraging tips, and food-related inspiration "like" the Garden of Eating on Facebook, or follow me on Twitter and Pinterest.

Friday, September 9, 2011

Heirloom Tomato Salsa

Freshly canned salsa by Eve Fox, Garden of Eating blog, copyright 2011

Some like it hot...but I like it mild. That's one of the nice things about making your own salsa -- you can make it as spicy or non-spicy as you like.

Some like it hot - jalapenos by Eve Fox, Garden of Eating blog, copyright 2011

My own salsa-making journey was inspired by two jars of delicious salsa we received from my aunt Maggie last winter. They were so far and above even the best supermarket salsa money can buy, that we used each and every drop -- a radical departure from my norm which is to open a pint jar, use about half of it, put it back in the fridge, feel vaguely guilty while it begins to grow an entire colony of mold on it, then throw it out several months later in a fit of disgusted refrigerator cleaning.

These jars of homemade salsa were special enough to inspire me to find new ways to use them up - I even rediscovered western omelettes!

Heirloom tomato trio by Eve Fox, Garden of Eating blog, copyright 2011

So when tomatoes starting rolling in a couple of weeks ago, I thought, "why not make some really good salsa of our own to last us the whole long, cold, bleak, dreary, depressing winter?" (can you tell I do not care for winter?)

Cilantro by Eve Fox, Garden of Eating blog, copyright 2011

I asked Auntie Maggie what she does to create her awesome deliciousness and I have to admit that my enthusiasm for the whole project quadrupled when she said she just puts all the ingredients right into the food processor. After the previous week's tomato sauce canning bonanza with its requisite peeling, slicing and dicing, I was ready for this quicker, easier prep method.

Onions and garlic by Eve Fox, Garden of Eating blog, copyright 2011

The ingredients are simple - tomatoes, onions, garlic, cilantro, jalapeños, white or apple cider vinegar, sugar, and salt. You wash things off, chop them roughly, dump them in the Cuisinart, blend for a bit, cook for a bit and then can it all. Es tan fácil!

Salsa ingredients in the cuisinart by Eve Fox, Garden of Eating blog, copyright 2011

I am morally opposed to seeding tomatoes so my salsa was a bit watery when it came out of the food processor but I just cooked it down until it reached the perfect consistency.

Salsa simmering by Eve Fox, Garden of Eating blog, copyright 2011

As a result of the previous week's tomato sauce canning, when it came time to start sterilizing jars, we realized there was a serious shortage of pints... But the gods of serendipity were shining on our house that day as this potential tragedy led to a truly brilliant innovation - half-pint jars of salsa!

Sterilizing the perfectly-sized half-pint jars

No more rushing to use up a full pint of salsa, no more feeling guilty about wasting salsa, and no more feeling revolted by the mold colonies growing in our fridge - it's a win-win-win.

Heirloom Tomato Salsa Lines The Shelf by Eve Fox, Garden of Eating blog, copyright 2011

The cheerful jars lining the shelf in our pantry should help add some (mild) heat to the coming cold winter days.

-- print recipe --
Heirloom Tomato Salsa
Makes 6 pints (or 12 half-pints)

Ingredients

* 5 lbs heirloom tomatoes
* 1-2 jalapeño peppers, seeds, ribs and stems removed, finely diced (I recommend wearing gloves when working with these)
* 2 onions, roughly chopped
* 4 large cloves of garlic, roughly chopped
* 1 cup fresh cilantro leaves, washed, and dried
* 1 1/2 cups white vinegar
* 1/4 cup sugar
* 1 Tbsp sea salt

Directions

1. Place the tomatoes, onions, garlic, and cilantro in the bowl of a food processor and blend until it reaches the desired consistency.

2. Put the blended mixture into a large, non-reactive pot, add the jalapeños, sugar, salt and vinegar, bring to a boil and then simmer until it reaches the desired thickness. 

3. While the salsa is cooking, sterilize your jars and lids in the hot water bath for 10 minutes. Drain and remove the jars, ladle the hot salsa directly into the hot jars leaving 1/4" head space, wipe the rims with a clean, damp paper towel, apply the lids, and secure the bands.

4. Process in a hot water bath canner for 20 minutes, then remove from the water and let the jars cool on a rack or several dishtowels to avoid extreme temperature changes which can crack the jars. One cooled, check the seals (the lids must be popped down) and store in a cool dark place for up to one year. If any of the lids have not sealed properly, store the jar in the fridge and use within one week.

Not feeling totally confident about canning food yet? Check out my how-to post here for an overview of the process.

You might also like:


Wednesday, September 7, 2011

Summer In a Jar - Simple Tomato Sauce With Garlic & Basil

Last summer, the late blight destroyed the vast majority of east coast tomato crops but this year, there are fat, flavorful tomatoes hanging from vines everywhere ya look. In fact, this one was hanging off the vine in a pot in our little container garden just a few days ago. It's an Ulster Germaid grown from seeds I bought from our very own Hudson Valley Seed Library this spring.

First ripe Ulster Germaid tomato in our garden by Eve Fox, Garden of Eating blog, copyright 2011

I managed to put up 10 pints of this simple, tasty tomato sauce just hours before Hurricane Irene descended on Ulster County with a vengeance. The resulting devastation and power outage (we were without power for four days and we were among the lucky ones in this area!) did delay my posting this for over a week. But, as they say, better late than never...

12 pints of simple tomato sauce by Eve Fox, Garden of Eating blog, copyright 2011

I used a mix of heirloom tomatoes from our CSA, Hearty Roots Community Farm, and plum tomatoes from Hardeman's farmstand just down the road from them in Red Hook.

First tomatoes of the season by Eve Fox, Garden of Eating blog, copyright 2009

I kept the additions simple - sautéed onions and garlic, fresh basil, sea salt, freshly ground pepper and a little red wine.

Fixings for fresh tomato sauce


Although there's considerable prep time involved,  the process is quite simple -- just blanch, peel, chop, sautée, simmer, sterilize, and can!

Blanching the tomatoes in batches by Eve Fox, Garden of Eating blog, copyright 2011

It takes a little while but there's something very satisfying about pulling the skins off those delicious red 'maters.

Peeled tomatoes by Eve Fox, Garden of Eating blog, copyright 2011

After chatting with my cousin, Nina, our family's culinary oracle, I decided to be daring (or terribly foolish, TBD, depending on whether I end up poisoning my whole family with botulism...) and ignore the guidelines about adding lemon juice or citric acid to the jars prior to canning. I tried to minimize the risks by keeping my non-tomato additions minimal to ensure that the sauce will be of a higher acidity, having the sauce at a boil when it came time to ladle it into the jars, thoroughly sterilizing the jars, and processing the hell out of them once full and capped. However, none of this will actually prevent botulism so my directions below call for lemon juice as I do not want to be responsible for causing any deaths among my readers...

Tomato sauce simmering on the stove by Eve Fox, Garden of Eating blog, copyright 2011

I am a relative canning novice but I have canned tomato sauce in this manner in the past without killing anyone so I'm just going to cross my fingers and hope for the best. But YOU should add the lemon juice or citric acid to the jars or use a pressure canner since that will allow you to get the sauce hot enough to actually kill any botulin.

12 pints of simple tomato sauce by Eve Fox, Garden of Eating blog, copyright 2011

Remember that important adage (adored by parents the world over): "Do as I say, not as I do." Here's the recipe.

Simple Tomato Sauce
Makes roughly 8 pints or 4 quarts

Ingredients (I recommend using organic whenever possible)

* 20 lbs ripe tomatoes (you can use plum or other varieties)
* 1 large onion, chopped
* 6-8 cloves of garlic, minced
* one bunch fresh basil leaves, washed, dried and coarsely chopped
* 2 tsp freshly ground black pepper
* 4 tsp sea salt
* 3 Tbsp olive oil
* 1/2 cup red wine (optional)
* 1/2 cup sugar (this may sound like a lot but you will need to add lemon juice to each jar and the sugar helps to counteract the tartness)
* bottled lemon juice (amount will depend on how much you're making)

Directions

1. Bring a large stockpot of water to a boil. Immerse the tomatoes (you'll most likely have to do this in batches unless you've got a really really big pot!) in the boiling water for 30 to 60 seconds or until the skins begin to split. Then dip in a large bowl of cold water (ice water is best) and slip off the skins. Core the tomatoes and remove any blemished or discolored parts. Chop roughly and set aside.

2. In a large, heavy saucepan, sauté the onions and garlic in the olive oil until translucent and fragrant. Add the tomatoes, basil, sugar, wine and spices and bring to a boil. Simmer uncovered until thick enough for serving - this will take a few hours. The volume will be reduced by almost one-half. Stir often to prevent sticking. If you prefer smoother sauce, you can use an immersion blender to process the sauce right in the pot (this is what I did.)

3. When the sauce is beginning to look like it's approaching the right consistency, fill your canning pot with water and put it on high heat. Once the water has reached a boil, place your jars and lids in the water and boil them for 10 minutes to sterilize them. Or, if you don't have a canner or don't want to deal with all this hootenany, you can also just freeze the sauce in batches. Just let it cool down fully before you put it in whatever containers you plan to freeze it in! We often use yogurt containers.

4. To be safe, add 1/4 teaspoon of citric acid or 1 tablespoon of lemon juice to each pint (double those amounts for quarts). Then ladle the bubbling hot sauce into the hot, sterilized jars, leaving 1/2-inch head space. Remove any air bubbles. Wipe the rims and screw threads with a clean, damp paper towel, apply the two piece metal canning lids, and tighten the screw bands.

5. Process the jars as follows (unless you live at high altitude in which case you should check the UGA's site for recommended processing times.) If you have access to a pressure canner, please use it - it's definitely safer than the hot water bath one!

Pressure Canner
20 minutes for pints
25 minutes for quarts
Using either 11 pounds pressure with a dial gauge pressure canner or 10 pounds pressure with a weighted gauge pressure canner.

Hot Water Bath Canner
35 minutes for pints
45 minutes for quarts

6. After processing, remove the jars immediately, and place on a rack to cool. You should begin to hear a delightful "pop" "pop" "pop" sound of the jar lids sealing. Any jars whose lids do not pop down should be placed in the fridge and used within one week.

You might also like: