RESOURCES

Friday, July 31, 2009

Quick Coconut Vegetable Curry

Friday, July 31, 2009

Coconut Veggie Curry by Eve Fox, Garden of Eating blog

Simply put, this curry is "the bomb." It's simple, delicious, easy to make and good for you. It was inspired by a similar dish my brother-in-law, Daniel, made for dinner a few weeks ago. He's a loose kind of cook -- instead of reading a recipe he relies on gut instinct. And his instincts were right on in this case!

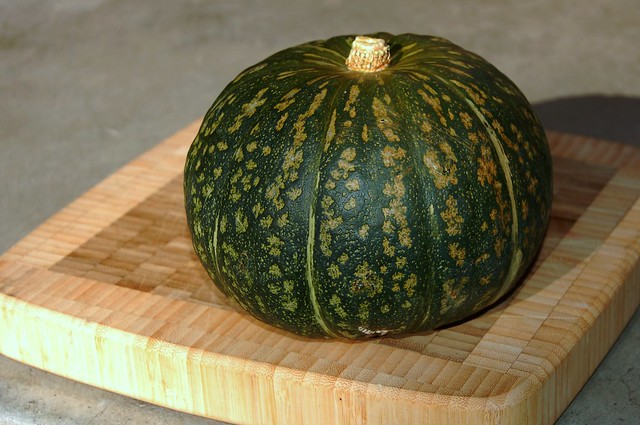
Kabocha

Although the recipe below calls for green beans, kabocha squash and chard since those are the things we'd received in our produce box this past week, you could just as easily substitute spinach or kale for the chard, turnips or carrots (or both) for the squash, add some potatoes, etc. Likewise, though I've listed curry powder below, you could toast your own spices if you've got the time and inclination or you could also use one of the jarred Thai curry pastes (Mae Ploy is my Thai cooking teacher's favorite brand and I agree that it's very good) with delightful results. The basic concept is very flexible so feel free to experiment.

That said, the kabocha squash is truly excellent in this curry -- its dense, starchy flesh lends lots of substance and its sweet, meaty flavor complements the coconut milk nicely.

Kabocha squash by Eve Fox, Garden of Eating blog

Besides tasting really good, one of the nicest things about this dish is its simplicity. It's a great way to work a bunch of fresh veggies into a delicious meal. I'd recommend serving it with short grain brown rice and a salad.

Coconut Veggie Curry by Eve Fox, Garden of Eating blog

-- print recipe --Quick Coconut Vegetable Curry
Serves 6

Ingredients

* 1 small to medium-sized kabocha squash, halved, seeds removed and cut into 1-inch cubes
* 1 bunch chard, washed, stems removed and chopped into 1-inch pieces, leaves cut into ribbons
* 2 big handfuls of green beans, washed and trimmed
* 2 medium onions, sliced
* 3 cloves of garlic, minced
* 1 tsp minced fresh ginger
* 2 cans of coconut milk (my Thai cooking teacher recommends the Chaokoh brand and after doing her blind taste-test, I have to agree with her!)
* 3 cups of vegetable broth
* A very large handful of fresh cilantro, washed and chopped
* Freshly ground black pepper
* 3 Tbsps curry powder and/or garam masala (you can use more if you like)
* 2 tsps canola oil or ghee
* A pinch of red pepper flakes
* 1 Tbsp sugar

Directions

1. Start by prepping the veggies: Cut the squash in half, remove the seeds and then cut the flesh into 1-inch cubes (there's no need to peel kabocha squash). Wash the chard and remove the stems, chopping them into 1-inch long pieces. Cut the chard leaves into ribbons. Slice the onions and mince the garlic and ginger. Wash and chop the cilantro.

2. Once all the veggies are prepped, put your rice on to cook. I recommend either short grain brown rice or basmati rice for this curry.

3. In a large pot, saute the onions, garlic, ginger and chili flakes in the oil or ghee for several minutes, cooking until the onions have begun to soften and become translucent. While that stuff is frying, boil the water for the vegetable bouillon and mix it well (unless you're using prepared vegetable broth).

4. Add the vegetable broth and the coconut milk to the pot then toss in the cubed kabocha squash and season it all with curry powder, garam masala, pepper and sugar (there's most likely no need for salt since the vegetable broth should be fairly salty.) Bring to a boil then reduce the heat to medium-high and simmer for 5-10 minutes or until the squash is beginning to feel tender when poked with a fork.

5. Add the green beans and the chard stems and simmer for another 3-5 minutes or until the green beans feel done to your liking. Then toss in the ribbons of chard leaf and the cilantro and cook for another 2-3 minutes.

6. Allow to cool slightly and serve over the warm rice.

A few other recipes you might like:
Like this recipe? Click here to browse through more Eatwell Recipes.


The Eatwell Project: a year of seasonal recipes -- logo by Eve Fox

Sunday, July 26, 2009

Wild Blackberry Sorbet With Garden Mint & Lavender

Sunday, July 26, 2009

I grew up in the lush countryside of New York's Hudson River Valley. As a little girl, picking the wild blackberries that grew down the street from my house was one of my favorite things to do in the hot, hazy days of late summer.

Wild blackberries by Eve Fox copyright 2008
My friend Emily shared my enthusiasm for the berries and she would come over to play "blackberry factory" with me -- a game that was as simple and delicious as it sounds. We would wander down the road from my house, stopping every few feet to pop the black bubbles of tar that had formed in the heat. When we finally reached the bramble, we'd steal ourselves for a moment then plunge into the thick patch of blackberry canes, doing our best to avoid the thorns. The berries were abundant -- there were always plenty to bring home even after stuffing ourselves. Despite the rather capitalist sounding name we'd chosen, picking blackberries was one of the sacred rituals of summertime.

Handful of blackberries by Eve Fox copyright 2008
Unfortunately, in the decades since I left home my life as a city-dweller has not offered me many opportunities to pick berries. So I was delighted to discover upon moving to the East Bay a few years ago that blackberries flourish in many parts of this urban environment.

Yesterday, we joined our good friends for a picking expedition in their Oakland hills neighborhood. The steep, dry hillsides are covered in blackberries -- the canes seem to favor the rarely used public stairways that provide a shortcut through the hills.


Public stairway is home to many berries by Eve Fox copyright 2008
We started out with clean hands and empty buckets and worked our way through the neighborhood, relieving the canes of their ripe berries as we went. We picked in peace with only a few curious and amused glances from passing drivers and returned an hour later with our hands stained purple, our arms scratched, and our buckets brimming with blackberries!

Berry-stained hands, post-picking expedition by Eve Fox copyright 2008
Back at the house, we washed the berries carefully to remove the dust and dislodge the little bugs we'd carried home. When they'd drained, we laid the berries out singly on cookie sheets -- by far the easiest way to prepare them for freezing. Once frozen, you can use a metal spatula to simply scoop them off the tray into a ziplock bag or other container and then pop them back in the freezer to be used for smoothies, sauces, etc., whenever you want them.

Frozen Blackberries on Cookie Sheet by Eve Fox copyright 2008
My husband had made a simple yet delicious blackberry sorbet after similar picking expeditions last summer and we were eager to make our first batch of the season. But this time, I decided it would be fun to experiment with adding some fresh herbs from our garden-- mint and lavender.

After freezing the berries, the next step was to infuse the mint and lavender I'd picked into a simple syrup of organic sugar and water. After the syrup had cooled, I strained the herbs out and poured the liquid into an ice cube tray which then joined the berries in the freezer.

Sprigs of mint and lavender from our garden by Eve Fox copyright 2008
Once the berries and the herb-infused syrup cubes were fully frozen, we were ready to create this divine, locally foraged dessert. We poured some berries and a few cubes of simple syrup into the cuisinart, added a little water and processed until smooth - all of which took less than five minutes.

We sat back to appreciate our creation. The wild blackberry sorbet was a breathtakingly beautiful purple (J.Crew's colorists might call it either "burgundy" or "cabernet") and the taste was no less breathtaking - cool and smooth, sweet yet tart, with subtle notes of lavender and mint. The simple recipe is below - feel free to make slight adjustments to taste. Enjoy!


Wild Blackberry Sorbet With Garden Mint & Lavender By Eve Fox Copyright 2008
Wild Blackberry Sorbet with Garden Mint & Lavender
Makes 4 servings

Ingredients

* 3 cups fresh blackberries, washed and dried
* 1/4 cup organic sugar
* 1/4 cup water
* A handful of fresh mint leaves, washed and dried
* 2-3 sprigs of fresh lavender, washed and dried
* Ice water for blending

Directions

1. Lay the clean, drained berries in a single layer on a cookie sheet and place in the freezer until frozen through. It is best to do both this and the next step the day or night before you plan to make the sorbet - just make sure you leave enough time for everything to freeze.

2. Make the herb-infused simple syrup by combining the water and sugar in a small heavy-bottomed saucepot and heat over a medium flame until it comes to a boil. Turn it off and let cool completely.

3. Strain out the mint leaves and lavender and pour the cooled syrup into an ice cube tray - should make roughly 4 syrup cubes. Place the tray in the freezer until syrup is frozen (the cubes may remain a little mushy as a result of all the sugar.)

4. Once the berries and herb-infused syrup cubes have frozen, you can make the sorbet. Place the frozen berries and syrup cubes in the bowl of a cuisinart or blender and add a few teaspoons of ice water to aid in blending. Continue to process or blend, adding small amounts of the ice water as needed, until smooth.

5. Serve, topped with a sprig of mint leaves and/or lavender.


Wild Blackberry Sorbet With Garden Mint & Lavender By Eve Fox Copyright 2008
This recipe is included in the Foodista Best of the Food Blogs cookbook.

You might also like:

Provençal Vegetable Tian

ingredients for vegetable tian, Eve Fox, Garden of Eating blog

Several years ago, I clipped a recipe for vegetable tian from a Martha Stewart Living mag -- it just looked too pretty to pass up. Unfortunately, it's been languishing in my recipe file ever since then.

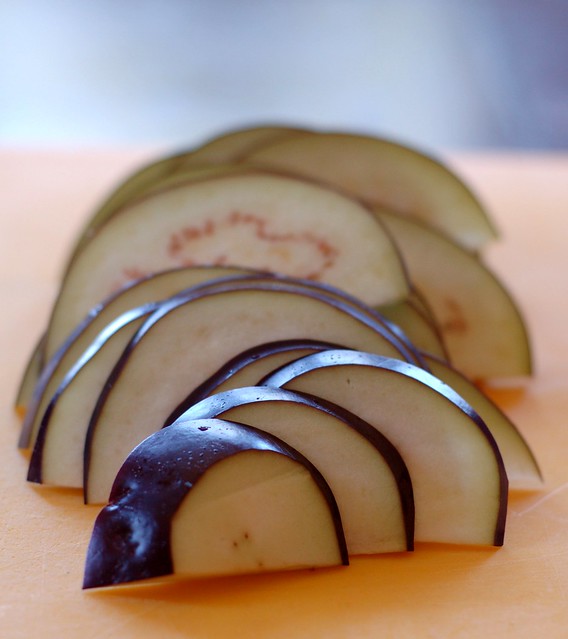
Since we received some lovely-looking tomatoes, zucchini, onions and the very first aubergine (eggplant) of the season in this week's produce box and we also happen to have potatoes and garlic left over from a previous produce box, it seemed like the perfect time to finally give this yummy recipe a try.

Sliced aubergine, first of the season by Eve Fox, the Garden of Eating, copyright 2009

The tian originated in Provence in the south of France and is similar to a gratin except for the fact that it does not include bread crumbs or cheese (though you can top it with gruyere if you like which is also very tasty). The baking concentrates the flavors of the vegetables so it is a great dish in which to showcase truly tasty veggies (but not a great dish to make if you have to use supermarket fare which often tends to taste kind of bland.)

Ingredients for vegetable tian, all sliced and ready to layer, Eve Fox, Garden of Eating blog

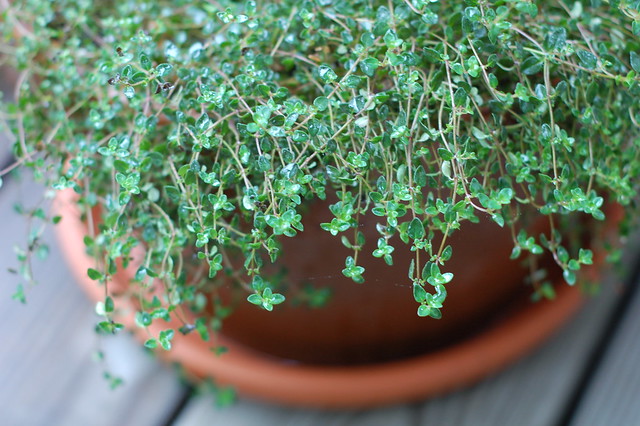
The traditional recipe calls for leeks but since we received red onions in our box, I've substituted those, instead. Some recipes seem to call for potatoes while others do not but I love potatoes so I've included them below. If you don't have thyme on hand, you can substitute basil or oregano.

Our Thyme Plant by Eve Fox, Garden of Eating blog, copyright 2011

The amounts of each thing below are fairly rough; the trick is to use freshly picked, high-quality veggies and to cut them thinly. The recipe below is a mix of the Martha Stewart recipe and one I found on Slashfood with a few adjustments of my own.

Vegetable tian by Eve Fox, Garden of Eating blog

This can be a main dish, albeit a fairly light one, but it also goes very well with grilled meats or roast chicken, a green salad and some fresh bread to sop up the juices. Bon appetit!

-- print recipe --Provençal Vegetable Tian
Serves 4

Ingredients

* 1 large onion or 2 medium leeks
* 2 large cloves garlic
* 1 or 2 small zucchini
* 1 or 2 small aubergines (eggplants)
* 1 or 2 small potatoes
* 2 or 3 medium plum tomatoes
* 2 or 3 sprigs fresh thyme
* 1/4 cup dry white wine
* Extra virgin olive oil
* Butter
* Sea salt
* Freshly ground black pepper

Directions

1. Cut a piece of parchment paper to the size of a two-quart glass or ceramic baking dish. Set aside. Butter the inside of the dish and set aside. Preheat the oven to 375 degrees.

2. Slice the onions and peel and mince the garlic. (If you're using leeks, cut the root end off and chop where the green begins then slice the white part and rinse in cold water to remove any sand/dirt. Let dry in a collander.)

3. Remove the ends from the zucchini and aubergines and discard. Cut each crosswise into coins 1/8-inch thick. Remove the stem ends from the tomatoes and discard. Cut each crosswise into rounds 1/8-inch thick. Scrub and dry the potato(es) and cut into 1/8-inch thick slices.

4. Coat a small pan with a good dose of olive oil and heat until shimmering. Add the garlic and swirl to coat. Gently add the onions (or leeks). Cook, stirring frequently, until the onions (or leeks) have begun to soften and the garlic has released its fragrance, approximately two to five minutes.

5. Carefully spread the onion/leek-garlic mixture across the bottom of the baking dish. Sprinkle with salt and a few grindings of fresh black pepper; strip the leaves from one of the sprigs of thyme and sprinkle over the mixture.

6. Layer the zucchini, aubergines, potato, and tomato on top of the onion/leek-garlic mixture, alternating each and overlapping slightly. I made sure to put the juicier things (squash and tomato) between the drier veggies (eggplant and potato) to keep the whole thing consistently moist. If working with a square or rectangular dish, layer in rows; if working with a circular or oval dish, work in fans from the center. Drizzle with a two-count of olive oil and splash with the wine. Sprinkle with salt and a few grindings of fresh black pepper; strip the leaves from the remaining thyme and sprinkle over the casserole.

7. Butter the cut parchment and carefully place, buttered side down, on top of the vegetables. Bake for 35 to 45 minutes, depending on your oven, until the vegetables are soft but not mushy while the edges are nicely crisp and brown.

A few other recipes you might like:

For more delicious recipes, gardening ideas, foraging tips, and food-related inspiration "like" the Garden of Eating on Facebook, or follow me on Twitter and Pinterest.

Like this recipe? Click here to browse through more Eatwell Recipes.
The Eatwell Project: a year of seasonal recipes -- logo by Eve Fox

Sunday, July 19, 2009

Salade Niçoise - A Hearty Summer Treat (Eatwell Recipe 23)

Sunday, July 19, 2009

Salade Nicoise by Katrin Morenz via Flickr

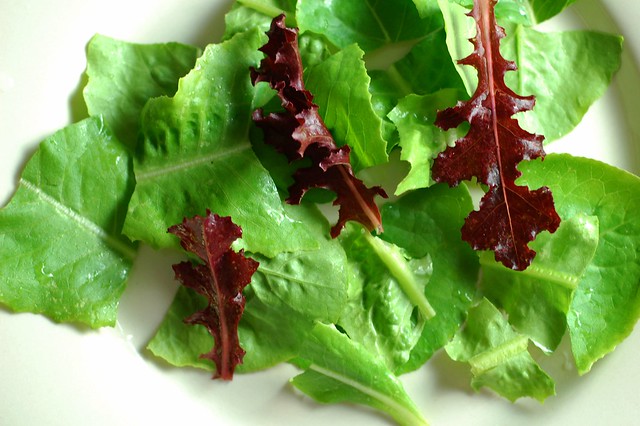
I first made this delicious salad eight years ago and have been hooked on it ever since. My husband and I were visiting with my in-laws. My mom-in-law has a lovely garden that was in high production and I wanted to find a good use for the luscious lettuces and tender herbs that lined its pathways, as well as the delightful french green beans that were literally climbing its walls and the red tomatoes that were growing sweet in the rich dirt and strong mid-summer sun.

Lettuce from the garden by Eve Fox, The Garden of Eating, copyright 2014

After consulting The Joy of Cooking for inspiration, I decided to try throwing all these things together (along with boiled eggs, tuna, olives and a little onion) in a salade Niçoise -- a "composed salad" that is built along the same lines as the American Cobb salad but with different, Mediterranean-inspired ingredients.

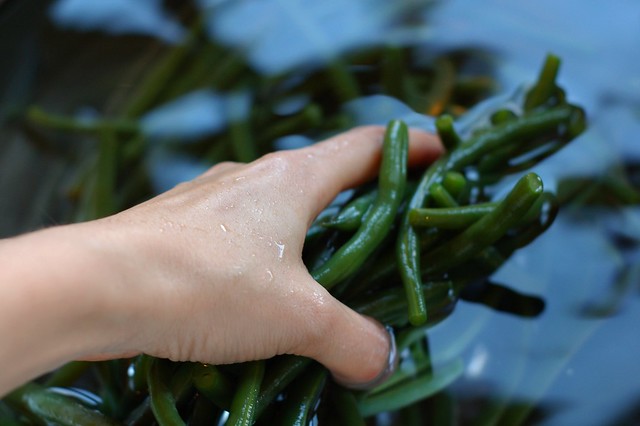
Cooling down the parboiled beans by Eve Fox, Garden of Eating blog, copyright 2012

I grabbed a colander and some scissors and headed down the stone steps to the garden to gather up the goodies. Once I'd hauled my loot back to the kitchen, I started washing, drying, boiling and slicing. It took some time to get all the ingredients prepped but the end result blew me away.

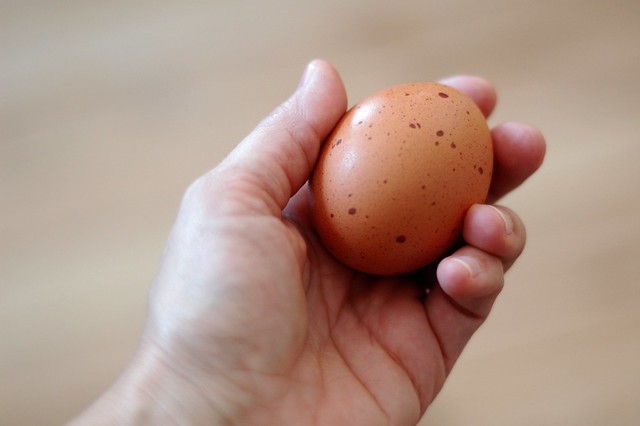
Hand holding an egg by Eve Fox, The Garden of Eating, copyright 2014

The salad is hearty and satisfying but still light. You get crisp (lettuce), sweet (tomatoes, green beans and potatoes, too, if you use the right ones), salty (olives and capers), meaty (tuna and eggs) and flavorful (herbs). Happily, last week's produce box contained many of the essential ingredients of a Niçoise salad -- fresh pasture-raised eggs, lettuce, potatoes, chives, and the first green beans and tomatoes of the summer.

First tomatoes of the season by Eve Fox, copyright 2009

The Niçoise salad draws its name from its birthplace, the delightful city of Nice on the Mediterranean Sea in the south of France. I say merçi beaucoup to the French for this wonderful creation.


Salade Nicoise by Katrin Morenz via Flickr

-- print recipe --Salade Niçoise
Serves 4-6

Ingredients

For the salad:
* 1 head of Boston or red leaf lettuce, washed and dried
* 6 eggs (use free-range, organic)
* 1 can of tuna (the kind packed in oil is the tastiest), drained or if you're feeling extra fancy, you can substitute grilled tuna steaks for the canned tuna
* 1/2 small red onion, thinly sliced
* 1 lb green beans, washed and trimmed
* 2 ripe tomatoes, washed and sliced into wedges
* 6 small Yukon Gold or Yellow Finn potatoes, scrubbed
* 1/2 cup Nicoise olives
* 2 Tbsps capers, drained

For the dressing:
* 6 Tbsps olive oil
* 3 Tbsps red wine vinegar
* 2 tsps Dijon mustard
* A handful of fresh herbs (chives, basil, thyme oregano, parsely), washed and finely chopped
* Sea salt and freshly ground black pepper to taste

Directions

1. Prepare the ingredients for the salad. Hard boil the eggs then drain and let cool before peeling and slicing in half length-wise. Boil the potatoes in a pot of salted water for 20 minutes, then remove (save the hot water, you'll need it for the beans) drain and let cool before cutting into 1/2-inch thick slices. Toss the trimmed greenbeans into the boiling water and cook until bright green but still crisp, 2 to 3 minutes then drain the beans and run them under cold water to prevent further cooking. Wash and dry the lettuce and herbs. Wash and slice the tomatoes into 8 wedges apiece. Drain the tuna and flake it.

2. Make the dressing. Chop the fresh herbs. Whisk together in a small bowl the vinegar, mustard, salt and pepper. Slowly add the olive oil in a steady stream, whisking constantly.

3. Drizzle a quarter of the dressing over the cooked, cut up pieces of potato and the green beans and toss gently to coat. Drizzle a quarter of the dressing over the lettuce and tomatoes and gently toss to coat.

4. Compose the salad. Lay the lettuce out and top it with the tomato wedges and onion slices. Drizzle with another quarter of the dressing. Arrange the hard-boiled eggs and tuna fish over this and drizzle with the remainder of the dressing. Top with the capers and olives and serve with fresh french bread.

You might also like:

The Eatwell Project: a year of seasonal recipes -- logo by Eve Fox

For more delicious recipes, gardening ideas, foraging tips, and food-related inspiration "like" the Garden of Eating on Facebook, or follow me on Twitter and Pinterest.

Sunday, July 12, 2009

Frittata With Chevre, New Potatoes & Herbs

Sunday, July 12, 2009

Frittata with chevre, new potatoes and herbs

A frittata is a half-sauteed, half-baked (in a good way) omelette of Italian provenance. One of the best things about frittatas is that there are so many yummy possibilities. Onions, peppers, spinach, chard, potatoes, fresh tomatoes, pesto, sun dried tomatoes, ham, sausage, gruyere, chevre, cheddar, parmesan -- with options like these, how could you really go wrong?

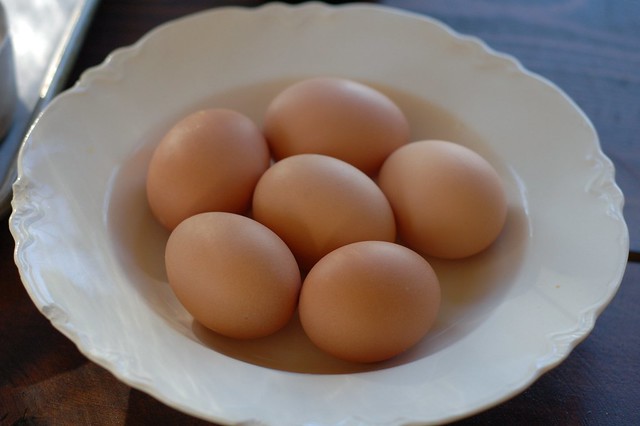
A bowl of pasture-raised eggs await their fate...

Since we received a half dozen pasture-raised eggs, several fresh onions, and a bag of new potatoes in our produce box this week, a frittata seemed like a good way to use up several things in one hearty meal. I kept this frittata fairly simple but you should feel free to adapt the basic recipe below by adding or substituting other ingredients.

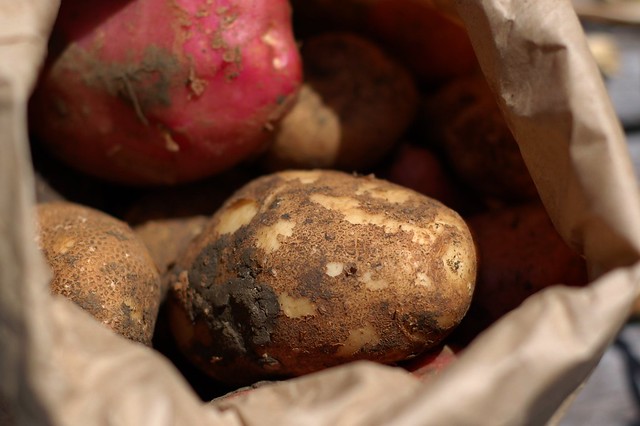
Desiree potatoes from Eatwell Farm

Although I baked this frittata in a pie dish, it is easiest to cook the dish from start to finish in a frying pan or skillet (saves you the washing of one more dish) so the directions below are for that preparation. A frittata makes a great lunch but is also hearty enough for dinner if served with some salad and bread or another side dish or two. And it's tasty hot or cold.

Frittata with chevre, new potatoes and herbs

-- print recipe --Frittata With Chevre, New Potatoes & Herbs
Serves 4

Ingredients

* 6 eggs, beaten
* 3 medium-sized potatoes, scrubbed
* 1 medium onion, sliced or diced (up to you)
* 3 oz goat cheese, crumbled (I used a delicious herb chevre made by Cypress Grove)
* 2 tsps fresh herbs, rinsed and dried (I used thyme, sage and marjoram but dill and parsley would be tasty, too)
* 1 tsp sea salt
* Several grinds of black pepper
* 2 tsps olive oil

Directions

1. Boil the potatoes until just tender when pricked with a fork. Drain and let sit until cool enough to handle.

2. Preheat the oven to 350 degrees. In a medium-sized frying pan or cast iron skillet, heat the olive oil over a medium flame (you will be baking the frittata in this dish so be sure to choose one that is both oven-proof and large enough to hold all the ingredients.) Saute the onions in the oil until translucent.

3. Cut the boiled potatoes into 1-inch cubes and mince the fresh herbs. Beat the eggs in a bowl, throwing in the minced herbs and seasoning with the sea salt and pepper (use enough salt to season the whole dish.)

4. Add the potatoes to the onions in the skillet and stir well to coat all the pieces with oil. Turn the flame down to low and add the eggs and goat cheese to the pan. Cook for 5 minutes or until the bottom is set. Transfer the skillet to the oven and brown it under the broiler for 3 or so minutes (keep it at a bit of a distance from the flame if you can) until the top is set -- be sure to keep a close eye on this since things can burn very quickly under the broiler. If your frittata mixture is deeper than about one inch, you may want to bake it in the oven for a 5-10 minutes before you finish it off with a minute or two of broiling.

5. Remove from broiler and allow to cool slightly then cut into generously sized wedges, and serve.

A few more recipes you might like:
For more delicious recipes, gardening ideas, foraging tips, and food-related inspiration "like" the Garden of Eating on Facebook, or follow me on Twitter and Pinterest.

The Eatwell Project: a year of seasonal recipes -- logo by Eve Fox

Monday, July 6, 2009

Fresh Peach Cobbler With Biscuit Topping (Eatwell Recipe 21)

Monday, July 6, 2009

Fresh peach cobbler with biscuit topping

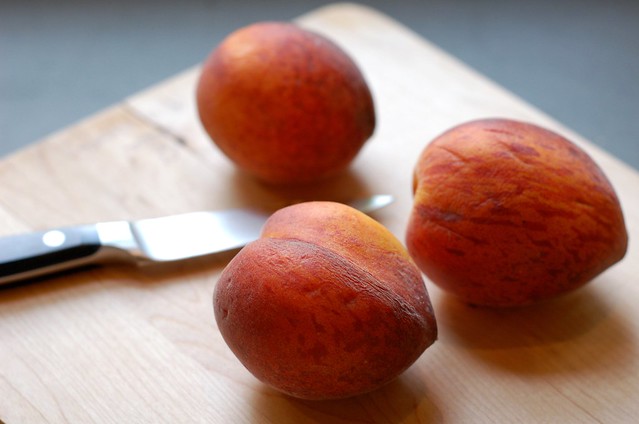
We've been receiving a paper bag full of fresh peaches in our produce box for the past few weeks. These sweet, fuzzy treats usually get devoured within a few hours of entering our home. But this week I set a bunch aside for baking as I'd been hankering for a peach dessert.

The Peaches by Eve Fox, Garden of Eating blog, copyright 2011

I found this cobbler recipe in a Cook's Illustrated magazine several years ago and have never once been disappointed by it, nor has anyone I've made it for... It's simple, summery and scrumptious (how's that for alliteration?) The biscuit topping is crisp on the outside, soft on the inside, topped with a little bit of crunchy browned sugar and a perfect complement to the sweet, juicy fruit filling.

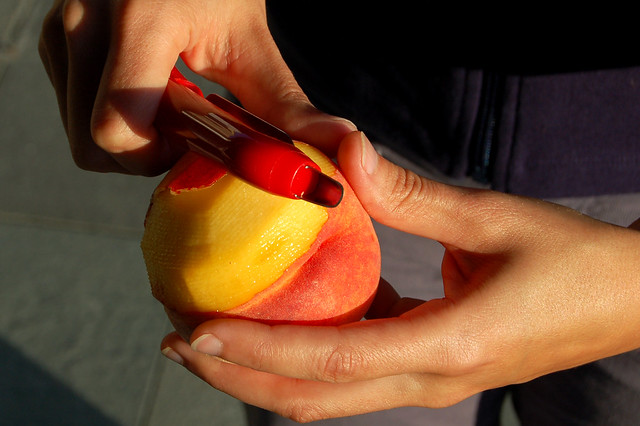
It calls for you to peel the peaches for which this awesome soft-skin fruit peeler by Zyliss is ideal - it has a finely serrated blade which works really well. It's also good for peeling tomatoes should you ever need to do that.

Peeling a peach for crisp

Though to be honest, I only sometimes peel the peaches and think it's good both ways.  The original recipe also calls for you to scoop the dark flesh around the peach out but I skip that, too, and have no regrets.

Hope you enjoy this delicious taste of summer.

Fresh peach cobbler with biscuit topping

-- print recipe --Fresh Peach Cobbler With Biscuit Topping
Serves 6

Ingredients

Filling
* 2 1/2 pounds peaches , ripe but firm (6 to 7 medium)
* 1/4 cup granulated sugar
* 1 teaspoon cornstarch
* 1 tablespoon fresh lemon juice
* pinch of salt

Biscuit Topping
* 1 cup unbleached all-purpose flour
* 3 tablespoons granulated sugar
* 3/4 teaspoon baking powder
* 1/4 teaspoon baking soda
* 1/4 teaspoon table salt
* 5 tablespoons unsalted butter (cold), cut into 1/4-inch cubes
* 1/3 cup plain whole-milk yogurt
* 1 teaspoon granulated sugar
* 1 teaspoon ground cinnamon

Directions

1. Adjust oven rack to lower-middle position and heat oven to 425 degrees.

2. For the filling: Peel peaches (see note), then halve and pit each, cutting each half into 4 wedges. Gently toss peaches and sugar together in large bowl; let stand for 30 minutes, tossing several times. Drain peaches in colander set over large bowl. Whisk 1/4 cup of drained juice (you can save the rest of the sweetened peach juice for a sauce or mix with some seltzer for a lovely spritzer), cornstarch, lemon juice, and salt together in small bowl. Toss peach juice mixture with peach slices and transfer to 8-inch-square glass baking dish. Bake until peaches begin to bubble around edges, about 10 minutes.

3. For the topping: While he tpeaches are baking, put the flour, 3 tablespoons sugar, baking powder, baking soda, cinnamon and salt in a food processor and pulse to combine. Scatter the butter over the mixture and pulse until it resembles coarse meal, about 10 1-second pulses. Transfer to a medium bowl, add the yogurt and toss with a rubber spatula until a cohesive dough is formed. (Don't overmix dough or biscuits will be tough.) Break dough into 6 evenly sized but roughly-shaped mounds and set aside.

4. To assemble and bake: After the peaches have baked 10 minutes, remove them from the oven and place the dough mounds on top, spacing them at least 1/2 inch apart (they should not touch). Sprinkle each mound with a portion of the remaining 1 teaspoon sugar and bake until the topping is golden brown and the fruit is bubbling - about 16 to 18 minutes. Cool the cobbler on a wire rack until warm, about 20 minutes and serve with vanilla ice cream.

A few more recipes you might like:
Like this recipe? Click here to browse through more Eatwell Recipes.

The Eatwell Project: a year of seasonal recipes -- logo by Eve Fox

Saturday, July 4, 2009

Loquat Chutney - Chinese Fruit Meets Indian Flavor

Saturday, July 4, 2009

Loquats by Eve Fox copyright 2008

We're in the thick of loquat season here in Berkeley. Many of the loquat trees are so laden with these exotic orange fruits that they look as if they might actually topple over.

Since I lived on the east coast for 29 years without ever once encountering a loquat tree, I realize that many of you may be wondering what on earth a loquat is... If so, loquats are a delicious fruit that are native to southeastern China but that also seem to flourish here in California. They have a juicy flesh that is somewhat firm and very sweet. Their flavor is hard to describe but I personally think it falls somewhere between an apple and an apricot, if you can imagine that. Each fruit contains two big, beautiful seeds that look like little balls of polished wood).

Loquat seed

Although it is extremely easy to forage for loquats here in North Berkeley, my brother and his family actually have a big loquat tree growing behind their house which makes it even easier to pick them.


Bowl of pitted loquats

We recently got together to make a big batch of loquat chutney. The fruits are a perfect choice for this spicy, sweet treat. My adorable niece Lila helped pick the loquats and did her share of eating the fruits, too, as her sticky little face can attest.


Lila with her bowl of loquats (very proud)

The seeds do make this task a bit more time-consuming but many hands will make the work go quickly so this is a good thing to do with friends. I recommend making a big batch and canning it since a jar of loquat chutney makes a very nice gift.

1/2 pint jars of loquat chutney, fresh from a refreshing boiling water bath

I made a special label for my jars (move over Martha...) which you can see below and are also welcome to use for your own jars if you like. I took my inspiration from a beautiful Chinese painting of a loquat tree and bird from the time of the Song Dynasty (though my version is done in colored pencil.) For more detailed instructions on how to can foods, check out my little tutorial.

Loquat Chutney Label by Eve Fox, copyright 2009

-- print recipe --Loquat Chutney

Ingredients

* 1 1/2 pounds loquats -- washed, de-seeded and cut into small pieces
* 1 pound onion -- chopped
* 1/2 pound apples, grated
* 1 pound sugar
* 2 teaspoons mustard
* 2 teaspoons sea salt
* 1 teaspoon curry powder
* 1 tbsp mustard seeds, crushed
* 1 tablespoon molasses
* 2 tbsps fresh ginger, peeled and julienned into thin strips
* 1 pint (2 cups) apple cider vinegar
* 2 cups water
* 1/4 cup raisins or currants

Directions

1. Put all the ingredients in a large pot and bring to a boil. Cook gently until soft and a good color, about 1 - 1 1/2 hours, stirring regularly to prevent the chutney from sticking or burning.


Chutney cooking

2. Boil the canning jars (1/2 pint , 1 pint, etc., the size is up to you) and lids to sterilize them (you can also sterilize them in your dish washer if you prefer.)


Sterilizing the jars.

Pour the hot chutney into the hot jars, being sure to leave half an inch of headroom in each jar.


Filling the jars with loquat chutney. The sterilized funnel makes it a neater process.

Drop the sterilized lids on, cover with the rings and tighten until well closed.


My husband tightening the lids on the jars of loquat chutney before they go into the canner

3. Process the sealed jars for 10 minutes in a boiling water bath. Remove the jars from the boiling water bath and let cool in a draft-free place overnight. Check the lids to make sure they've popped down to ensure they're properly sealed (I love the sound the jars make as they seal.) If any of the lids have not sealed properly, refrigerate those jars and use them right away. The rest can be stored in a cool dark place for 9 months.

This chutney is a nice accompaniment to roasted meats, lamb burgers, kabobs of all kinds, Indian food, vegetable fritters, and many more things.

You may also like:
For more delicious recipes, gardening ideas, foraging tips, and food-related inspiration "like" the Garden of Eating on Facebook, or follow me on Twitter and Pinterest.

Friday, July 31, 2009

Quick Coconut Vegetable Curry

Coconut Veggie Curry by Eve Fox, Garden of Eating blog

Simply put, this curry is "the bomb." It's simple, delicious, easy to make and good for you. It was inspired by a similar dish my brother-in-law, Daniel, made for dinner a few weeks ago. He's a loose kind of cook -- instead of reading a recipe he relies on gut instinct. And his instincts were right on in this case!

Kabocha

Although the recipe below calls for green beans, kabocha squash and chard since those are the things we'd received in our produce box this past week, you could just as easily substitute spinach or kale for the chard, turnips or carrots (or both) for the squash, add some potatoes, etc. Likewise, though I've listed curry powder below, you could toast your own spices if you've got the time and inclination or you could also use one of the jarred Thai curry pastes (Mae Ploy is my Thai cooking teacher's favorite brand and I agree that it's very good) with delightful results. The basic concept is very flexible so feel free to experiment.

That said, the kabocha squash is truly excellent in this curry -- its dense, starchy flesh lends lots of substance and its sweet, meaty flavor complements the coconut milk nicely.

Kabocha squash by Eve Fox, Garden of Eating blog

Besides tasting really good, one of the nicest things about this dish is its simplicity. It's a great way to work a bunch of fresh veggies into a delicious meal. I'd recommend serving it with short grain brown rice and a salad.

Coconut Veggie Curry by Eve Fox, Garden of Eating blog

-- print recipe --Quick Coconut Vegetable Curry
Serves 6

Ingredients

* 1 small to medium-sized kabocha squash, halved, seeds removed and cut into 1-inch cubes
* 1 bunch chard, washed, stems removed and chopped into 1-inch pieces, leaves cut into ribbons
* 2 big handfuls of green beans, washed and trimmed
* 2 medium onions, sliced
* 3 cloves of garlic, minced
* 1 tsp minced fresh ginger
* 2 cans of coconut milk (my Thai cooking teacher recommends the Chaokoh brand and after doing her blind taste-test, I have to agree with her!)
* 3 cups of vegetable broth
* A very large handful of fresh cilantro, washed and chopped
* Freshly ground black pepper
* 3 Tbsps curry powder and/or garam masala (you can use more if you like)
* 2 tsps canola oil or ghee
* A pinch of red pepper flakes
* 1 Tbsp sugar

Directions

1. Start by prepping the veggies: Cut the squash in half, remove the seeds and then cut the flesh into 1-inch cubes (there's no need to peel kabocha squash). Wash the chard and remove the stems, chopping them into 1-inch long pieces. Cut the chard leaves into ribbons. Slice the onions and mince the garlic and ginger. Wash and chop the cilantro.

2. Once all the veggies are prepped, put your rice on to cook. I recommend either short grain brown rice or basmati rice for this curry.

3. In a large pot, saute the onions, garlic, ginger and chili flakes in the oil or ghee for several minutes, cooking until the onions have begun to soften and become translucent. While that stuff is frying, boil the water for the vegetable bouillon and mix it well (unless you're using prepared vegetable broth).

4. Add the vegetable broth and the coconut milk to the pot then toss in the cubed kabocha squash and season it all with curry powder, garam masala, pepper and sugar (there's most likely no need for salt since the vegetable broth should be fairly salty.) Bring to a boil then reduce the heat to medium-high and simmer for 5-10 minutes or until the squash is beginning to feel tender when poked with a fork.

5. Add the green beans and the chard stems and simmer for another 3-5 minutes or until the green beans feel done to your liking. Then toss in the ribbons of chard leaf and the cilantro and cook for another 2-3 minutes.

6. Allow to cool slightly and serve over the warm rice.

A few other recipes you might like:
Like this recipe? Click here to browse through more Eatwell Recipes.


The Eatwell Project: a year of seasonal recipes -- logo by Eve Fox

Sunday, July 26, 2009

Wild Blackberry Sorbet With Garden Mint & Lavender

I grew up in the lush countryside of New York's Hudson River Valley. As a little girl, picking the wild blackberries that grew down the street from my house was one of my favorite things to do in the hot, hazy days of late summer.

Wild blackberries by Eve Fox copyright 2008
My friend Emily shared my enthusiasm for the berries and she would come over to play "blackberry factory" with me -- a game that was as simple and delicious as it sounds. We would wander down the road from my house, stopping every few feet to pop the black bubbles of tar that had formed in the heat. When we finally reached the bramble, we'd steal ourselves for a moment then plunge into the thick patch of blackberry canes, doing our best to avoid the thorns. The berries were abundant -- there were always plenty to bring home even after stuffing ourselves. Despite the rather capitalist sounding name we'd chosen, picking blackberries was one of the sacred rituals of summertime.

Handful of blackberries by Eve Fox copyright 2008
Unfortunately, in the decades since I left home my life as a city-dweller has not offered me many opportunities to pick berries. So I was delighted to discover upon moving to the East Bay a few years ago that blackberries flourish in many parts of this urban environment.

Yesterday, we joined our good friends for a picking expedition in their Oakland hills neighborhood. The steep, dry hillsides are covered in blackberries -- the canes seem to favor the rarely used public stairways that provide a shortcut through the hills.


Public stairway is home to many berries by Eve Fox copyright 2008
We started out with clean hands and empty buckets and worked our way through the neighborhood, relieving the canes of their ripe berries as we went. We picked in peace with only a few curious and amused glances from passing drivers and returned an hour later with our hands stained purple, our arms scratched, and our buckets brimming with blackberries!

Berry-stained hands, post-picking expedition by Eve Fox copyright 2008
Back at the house, we washed the berries carefully to remove the dust and dislodge the little bugs we'd carried home. When they'd drained, we laid the berries out singly on cookie sheets -- by far the easiest way to prepare them for freezing. Once frozen, you can use a metal spatula to simply scoop them off the tray into a ziplock bag or other container and then pop them back in the freezer to be used for smoothies, sauces, etc., whenever you want them.

Frozen Blackberries on Cookie Sheet by Eve Fox copyright 2008
My husband had made a simple yet delicious blackberry sorbet after similar picking expeditions last summer and we were eager to make our first batch of the season. But this time, I decided it would be fun to experiment with adding some fresh herbs from our garden-- mint and lavender.

After freezing the berries, the next step was to infuse the mint and lavender I'd picked into a simple syrup of organic sugar and water. After the syrup had cooled, I strained the herbs out and poured the liquid into an ice cube tray which then joined the berries in the freezer.

Sprigs of mint and lavender from our garden by Eve Fox copyright 2008
Once the berries and the herb-infused syrup cubes were fully frozen, we were ready to create this divine, locally foraged dessert. We poured some berries and a few cubes of simple syrup into the cuisinart, added a little water and processed until smooth - all of which took less than five minutes.

We sat back to appreciate our creation. The wild blackberry sorbet was a breathtakingly beautiful purple (J.Crew's colorists might call it either "burgundy" or "cabernet") and the taste was no less breathtaking - cool and smooth, sweet yet tart, with subtle notes of lavender and mint. The simple recipe is below - feel free to make slight adjustments to taste. Enjoy!


Wild Blackberry Sorbet With Garden Mint & Lavender By Eve Fox Copyright 2008
Wild Blackberry Sorbet with Garden Mint & Lavender
Makes 4 servings

Ingredients

* 3 cups fresh blackberries, washed and dried
* 1/4 cup organic sugar
* 1/4 cup water
* A handful of fresh mint leaves, washed and dried
* 2-3 sprigs of fresh lavender, washed and dried
* Ice water for blending

Directions

1. Lay the clean, drained berries in a single layer on a cookie sheet and place in the freezer until frozen through. It is best to do both this and the next step the day or night before you plan to make the sorbet - just make sure you leave enough time for everything to freeze.

2. Make the herb-infused simple syrup by combining the water and sugar in a small heavy-bottomed saucepot and heat over a medium flame until it comes to a boil. Turn it off and let cool completely.

3. Strain out the mint leaves and lavender and pour the cooled syrup into an ice cube tray - should make roughly 4 syrup cubes. Place the tray in the freezer until syrup is frozen (the cubes may remain a little mushy as a result of all the sugar.)

4. Once the berries and herb-infused syrup cubes have frozen, you can make the sorbet. Place the frozen berries and syrup cubes in the bowl of a cuisinart or blender and add a few teaspoons of ice water to aid in blending. Continue to process or blend, adding small amounts of the ice water as needed, until smooth.

5. Serve, topped with a sprig of mint leaves and/or lavender.


Wild Blackberry Sorbet With Garden Mint & Lavender By Eve Fox Copyright 2008
This recipe is included in the Foodista Best of the Food Blogs cookbook.

You might also like:

Provençal Vegetable Tian

ingredients for vegetable tian, Eve Fox, Garden of Eating blog

Several years ago, I clipped a recipe for vegetable tian from a Martha Stewart Living mag -- it just looked too pretty to pass up. Unfortunately, it's been languishing in my recipe file ever since then.

Since we received some lovely-looking tomatoes, zucchini, onions and the very first aubergine (eggplant) of the season in this week's produce box and we also happen to have potatoes and garlic left over from a previous produce box, it seemed like the perfect time to finally give this yummy recipe a try.

Sliced aubergine, first of the season by Eve Fox, the Garden of Eating, copyright 2009

The tian originated in Provence in the south of France and is similar to a gratin except for the fact that it does not include bread crumbs or cheese (though you can top it with gruyere if you like which is also very tasty). The baking concentrates the flavors of the vegetables so it is a great dish in which to showcase truly tasty veggies (but not a great dish to make if you have to use supermarket fare which often tends to taste kind of bland.)

Ingredients for vegetable tian, all sliced and ready to layer, Eve Fox, Garden of Eating blog

The traditional recipe calls for leeks but since we received red onions in our box, I've substituted those, instead. Some recipes seem to call for potatoes while others do not but I love potatoes so I've included them below. If you don't have thyme on hand, you can substitute basil or oregano.

Our Thyme Plant by Eve Fox, Garden of Eating blog, copyright 2011

The amounts of each thing below are fairly rough; the trick is to use freshly picked, high-quality veggies and to cut them thinly. The recipe below is a mix of the Martha Stewart recipe and one I found on Slashfood with a few adjustments of my own.

Vegetable tian by Eve Fox, Garden of Eating blog

This can be a main dish, albeit a fairly light one, but it also goes very well with grilled meats or roast chicken, a green salad and some fresh bread to sop up the juices. Bon appetit!

-- print recipe --Provençal Vegetable Tian
Serves 4

Ingredients

* 1 large onion or 2 medium leeks
* 2 large cloves garlic
* 1 or 2 small zucchini
* 1 or 2 small aubergines (eggplants)
* 1 or 2 small potatoes
* 2 or 3 medium plum tomatoes
* 2 or 3 sprigs fresh thyme
* 1/4 cup dry white wine
* Extra virgin olive oil
* Butter
* Sea salt
* Freshly ground black pepper

Directions

1. Cut a piece of parchment paper to the size of a two-quart glass or ceramic baking dish. Set aside. Butter the inside of the dish and set aside. Preheat the oven to 375 degrees.

2. Slice the onions and peel and mince the garlic. (If you're using leeks, cut the root end off and chop where the green begins then slice the white part and rinse in cold water to remove any sand/dirt. Let dry in a collander.)

3. Remove the ends from the zucchini and aubergines and discard. Cut each crosswise into coins 1/8-inch thick. Remove the stem ends from the tomatoes and discard. Cut each crosswise into rounds 1/8-inch thick. Scrub and dry the potato(es) and cut into 1/8-inch thick slices.

4. Coat a small pan with a good dose of olive oil and heat until shimmering. Add the garlic and swirl to coat. Gently add the onions (or leeks). Cook, stirring frequently, until the onions (or leeks) have begun to soften and the garlic has released its fragrance, approximately two to five minutes.

5. Carefully spread the onion/leek-garlic mixture across the bottom of the baking dish. Sprinkle with salt and a few grindings of fresh black pepper; strip the leaves from one of the sprigs of thyme and sprinkle over the mixture.

6. Layer the zucchini, aubergines, potato, and tomato on top of the onion/leek-garlic mixture, alternating each and overlapping slightly. I made sure to put the juicier things (squash and tomato) between the drier veggies (eggplant and potato) to keep the whole thing consistently moist. If working with a square or rectangular dish, layer in rows; if working with a circular or oval dish, work in fans from the center. Drizzle with a two-count of olive oil and splash with the wine. Sprinkle with salt and a few grindings of fresh black pepper; strip the leaves from the remaining thyme and sprinkle over the casserole.

7. Butter the cut parchment and carefully place, buttered side down, on top of the vegetables. Bake for 35 to 45 minutes, depending on your oven, until the vegetables are soft but not mushy while the edges are nicely crisp and brown.

A few other recipes you might like:

For more delicious recipes, gardening ideas, foraging tips, and food-related inspiration "like" the Garden of Eating on Facebook, or follow me on Twitter and Pinterest.

Like this recipe? Click here to browse through more Eatwell Recipes.
The Eatwell Project: a year of seasonal recipes -- logo by Eve Fox

Sunday, July 19, 2009

Salade Niçoise - A Hearty Summer Treat (Eatwell Recipe 23)

Salade Nicoise by Katrin Morenz via Flickr

I first made this delicious salad eight years ago and have been hooked on it ever since. My husband and I were visiting with my in-laws. My mom-in-law has a lovely garden that was in high production and I wanted to find a good use for the luscious lettuces and tender herbs that lined its pathways, as well as the delightful french green beans that were literally climbing its walls and the red tomatoes that were growing sweet in the rich dirt and strong mid-summer sun.

Lettuce from the garden by Eve Fox, The Garden of Eating, copyright 2014

After consulting The Joy of Cooking for inspiration, I decided to try throwing all these things together (along with boiled eggs, tuna, olives and a little onion) in a salade Niçoise -- a "composed salad" that is built along the same lines as the American Cobb salad but with different, Mediterranean-inspired ingredients.

Cooling down the parboiled beans by Eve Fox, Garden of Eating blog, copyright 2012

I grabbed a colander and some scissors and headed down the stone steps to the garden to gather up the goodies. Once I'd hauled my loot back to the kitchen, I started washing, drying, boiling and slicing. It took some time to get all the ingredients prepped but the end result blew me away.

Hand holding an egg by Eve Fox, The Garden of Eating, copyright 2014

The salad is hearty and satisfying but still light. You get crisp (lettuce), sweet (tomatoes, green beans and potatoes, too, if you use the right ones), salty (olives and capers), meaty (tuna and eggs) and flavorful (herbs). Happily, last week's produce box contained many of the essential ingredients of a Niçoise salad -- fresh pasture-raised eggs, lettuce, potatoes, chives, and the first green beans and tomatoes of the summer.

First tomatoes of the season by Eve Fox, copyright 2009

The Niçoise salad draws its name from its birthplace, the delightful city of Nice on the Mediterranean Sea in the south of France. I say merçi beaucoup to the French for this wonderful creation.


Salade Nicoise by Katrin Morenz via Flickr

-- print recipe --Salade Niçoise
Serves 4-6

Ingredients

For the salad:
* 1 head of Boston or red leaf lettuce, washed and dried
* 6 eggs (use free-range, organic)
* 1 can of tuna (the kind packed in oil is the tastiest), drained or if you're feeling extra fancy, you can substitute grilled tuna steaks for the canned tuna
* 1/2 small red onion, thinly sliced
* 1 lb green beans, washed and trimmed
* 2 ripe tomatoes, washed and sliced into wedges
* 6 small Yukon Gold or Yellow Finn potatoes, scrubbed
* 1/2 cup Nicoise olives
* 2 Tbsps capers, drained

For the dressing:
* 6 Tbsps olive oil
* 3 Tbsps red wine vinegar
* 2 tsps Dijon mustard
* A handful of fresh herbs (chives, basil, thyme oregano, parsely), washed and finely chopped
* Sea salt and freshly ground black pepper to taste

Directions

1. Prepare the ingredients for the salad. Hard boil the eggs then drain and let cool before peeling and slicing in half length-wise. Boil the potatoes in a pot of salted water for 20 minutes, then remove (save the hot water, you'll need it for the beans) drain and let cool before cutting into 1/2-inch thick slices. Toss the trimmed greenbeans into the boiling water and cook until bright green but still crisp, 2 to 3 minutes then drain the beans and run them under cold water to prevent further cooking. Wash and dry the lettuce and herbs. Wash and slice the tomatoes into 8 wedges apiece. Drain the tuna and flake it.

2. Make the dressing. Chop the fresh herbs. Whisk together in a small bowl the vinegar, mustard, salt and pepper. Slowly add the olive oil in a steady stream, whisking constantly.

3. Drizzle a quarter of the dressing over the cooked, cut up pieces of potato and the green beans and toss gently to coat. Drizzle a quarter of the dressing over the lettuce and tomatoes and gently toss to coat.

4. Compose the salad. Lay the lettuce out and top it with the tomato wedges and onion slices. Drizzle with another quarter of the dressing. Arrange the hard-boiled eggs and tuna fish over this and drizzle with the remainder of the dressing. Top with the capers and olives and serve with fresh french bread.

You might also like:

The Eatwell Project: a year of seasonal recipes -- logo by Eve Fox

For more delicious recipes, gardening ideas, foraging tips, and food-related inspiration "like" the Garden of Eating on Facebook, or follow me on Twitter and Pinterest.

Sunday, July 12, 2009

Frittata With Chevre, New Potatoes & Herbs

Frittata with chevre, new potatoes and herbs

A frittata is a half-sauteed, half-baked (in a good way) omelette of Italian provenance. One of the best things about frittatas is that there are so many yummy possibilities. Onions, peppers, spinach, chard, potatoes, fresh tomatoes, pesto, sun dried tomatoes, ham, sausage, gruyere, chevre, cheddar, parmesan -- with options like these, how could you really go wrong?

A bowl of pasture-raised eggs await their fate...

Since we received a half dozen pasture-raised eggs, several fresh onions, and a bag of new potatoes in our produce box this week, a frittata seemed like a good way to use up several things in one hearty meal. I kept this frittata fairly simple but you should feel free to adapt the basic recipe below by adding or substituting other ingredients.

Desiree potatoes from Eatwell Farm

Although I baked this frittata in a pie dish, it is easiest to cook the dish from start to finish in a frying pan or skillet (saves you the washing of one more dish) so the directions below are for that preparation. A frittata makes a great lunch but is also hearty enough for dinner if served with some salad and bread or another side dish or two. And it's tasty hot or cold.

Frittata with chevre, new potatoes and herbs

-- print recipe --Frittata With Chevre, New Potatoes & Herbs
Serves 4

Ingredients

* 6 eggs, beaten
* 3 medium-sized potatoes, scrubbed
* 1 medium onion, sliced or diced (up to you)
* 3 oz goat cheese, crumbled (I used a delicious herb chevre made by Cypress Grove)
* 2 tsps fresh herbs, rinsed and dried (I used thyme, sage and marjoram but dill and parsley would be tasty, too)
* 1 tsp sea salt
* Several grinds of black pepper
* 2 tsps olive oil

Directions

1. Boil the potatoes until just tender when pricked with a fork. Drain and let sit until cool enough to handle.

2. Preheat the oven to 350 degrees. In a medium-sized frying pan or cast iron skillet, heat the olive oil over a medium flame (you will be baking the frittata in this dish so be sure to choose one that is both oven-proof and large enough to hold all the ingredients.) Saute the onions in the oil until translucent.

3. Cut the boiled potatoes into 1-inch cubes and mince the fresh herbs. Beat the eggs in a bowl, throwing in the minced herbs and seasoning with the sea salt and pepper (use enough salt to season the whole dish.)

4. Add the potatoes to the onions in the skillet and stir well to coat all the pieces with oil. Turn the flame down to low and add the eggs and goat cheese to the pan. Cook for 5 minutes or until the bottom is set. Transfer the skillet to the oven and brown it under the broiler for 3 or so minutes (keep it at a bit of a distance from the flame if you can) until the top is set -- be sure to keep a close eye on this since things can burn very quickly under the broiler. If your frittata mixture is deeper than about one inch, you may want to bake it in the oven for a 5-10 minutes before you finish it off with a minute or two of broiling.

5. Remove from broiler and allow to cool slightly then cut into generously sized wedges, and serve.

A few more recipes you might like:
For more delicious recipes, gardening ideas, foraging tips, and food-related inspiration "like" the Garden of Eating on Facebook, or follow me on Twitter and Pinterest.

The Eatwell Project: a year of seasonal recipes -- logo by Eve Fox

Monday, July 6, 2009

Fresh Peach Cobbler With Biscuit Topping (Eatwell Recipe 21)

Fresh peach cobbler with biscuit topping

We've been receiving a paper bag full of fresh peaches in our produce box for the past few weeks. These sweet, fuzzy treats usually get devoured within a few hours of entering our home. But this week I set a bunch aside for baking as I'd been hankering for a peach dessert.

The Peaches by Eve Fox, Garden of Eating blog, copyright 2011

I found this cobbler recipe in a Cook's Illustrated magazine several years ago and have never once been disappointed by it, nor has anyone I've made it for... It's simple, summery and scrumptious (how's that for alliteration?) The biscuit topping is crisp on the outside, soft on the inside, topped with a little bit of crunchy browned sugar and a perfect complement to the sweet, juicy fruit filling.

It calls for you to peel the peaches for which this awesome soft-skin fruit peeler by Zyliss is ideal - it has a finely serrated blade which works really well. It's also good for peeling tomatoes should you ever need to do that.

Peeling a peach for crisp

Though to be honest, I only sometimes peel the peaches and think it's good both ways.  The original recipe also calls for you to scoop the dark flesh around the peach out but I skip that, too, and have no regrets.

Hope you enjoy this delicious taste of summer.

Fresh peach cobbler with biscuit topping

-- print recipe --Fresh Peach Cobbler With Biscuit Topping
Serves 6

Ingredients

Filling
* 2 1/2 pounds peaches , ripe but firm (6 to 7 medium)
* 1/4 cup granulated sugar
* 1 teaspoon cornstarch
* 1 tablespoon fresh lemon juice
* pinch of salt

Biscuit Topping
* 1 cup unbleached all-purpose flour
* 3 tablespoons granulated sugar
* 3/4 teaspoon baking powder
* 1/4 teaspoon baking soda
* 1/4 teaspoon table salt
* 5 tablespoons unsalted butter (cold), cut into 1/4-inch cubes
* 1/3 cup plain whole-milk yogurt
* 1 teaspoon granulated sugar
* 1 teaspoon ground cinnamon

Directions

1. Adjust oven rack to lower-middle position and heat oven to 425 degrees.

2. For the filling: Peel peaches (see note), then halve and pit each, cutting each half into 4 wedges. Gently toss peaches and sugar together in large bowl; let stand for 30 minutes, tossing several times. Drain peaches in colander set over large bowl. Whisk 1/4 cup of drained juice (you can save the rest of the sweetened peach juice for a sauce or mix with some seltzer for a lovely spritzer), cornstarch, lemon juice, and salt together in small bowl. Toss peach juice mixture with peach slices and transfer to 8-inch-square glass baking dish. Bake until peaches begin to bubble around edges, about 10 minutes.

3. For the topping: While he tpeaches are baking, put the flour, 3 tablespoons sugar, baking powder, baking soda, cinnamon and salt in a food processor and pulse to combine. Scatter the butter over the mixture and pulse until it resembles coarse meal, about 10 1-second pulses. Transfer to a medium bowl, add the yogurt and toss with a rubber spatula until a cohesive dough is formed. (Don't overmix dough or biscuits will be tough.) Break dough into 6 evenly sized but roughly-shaped mounds and set aside.

4. To assemble and bake: After the peaches have baked 10 minutes, remove them from the oven and place the dough mounds on top, spacing them at least 1/2 inch apart (they should not touch). Sprinkle each mound with a portion of the remaining 1 teaspoon sugar and bake until the topping is golden brown and the fruit is bubbling - about 16 to 18 minutes. Cool the cobbler on a wire rack until warm, about 20 minutes and serve with vanilla ice cream.

A few more recipes you might like:
Like this recipe? Click here to browse through more Eatwell Recipes.

The Eatwell Project: a year of seasonal recipes -- logo by Eve Fox

Saturday, July 4, 2009

Loquat Chutney - Chinese Fruit Meets Indian Flavor

Loquats by Eve Fox copyright 2008

We're in the thick of loquat season here in Berkeley. Many of the loquat trees are so laden with these exotic orange fruits that they look as if they might actually topple over.

Since I lived on the east coast for 29 years without ever once encountering a loquat tree, I realize that many of you may be wondering what on earth a loquat is... If so, loquats are a delicious fruit that are native to southeastern China but that also seem to flourish here in California. They have a juicy flesh that is somewhat firm and very sweet. Their flavor is hard to describe but I personally think it falls somewhere between an apple and an apricot, if you can imagine that. Each fruit contains two big, beautiful seeds that look like little balls of polished wood).

Loquat seed

Although it is extremely easy to forage for loquats here in North Berkeley, my brother and his family actually have a big loquat tree growing behind their house which makes it even easier to pick them.


Bowl of pitted loquats

We recently got together to make a big batch of loquat chutney. The fruits are a perfect choice for this spicy, sweet treat. My adorable niece Lila helped pick the loquats and did her share of eating the fruits, too, as her sticky little face can attest.


Lila with her bowl of loquats (very proud)

The seeds do make this task a bit more time-consuming but many hands will make the work go quickly so this is a good thing to do with friends. I recommend making a big batch and canning it since a jar of loquat chutney makes a very nice gift.

1/2 pint jars of loquat chutney, fresh from a refreshing boiling water bath

I made a special label for my jars (move over Martha...) which you can see below and are also welcome to use for your own jars if you like. I took my inspiration from a beautiful Chinese painting of a loquat tree and bird from the time of the Song Dynasty (though my version is done in colored pencil.) For more detailed instructions on how to can foods, check out my little tutorial.

Loquat Chutney Label by Eve Fox, copyright 2009

-- print recipe --Loquat Chutney

Ingredients

* 1 1/2 pounds loquats -- washed, de-seeded and cut into small pieces
* 1 pound onion -- chopped
* 1/2 pound apples, grated
* 1 pound sugar
* 2 teaspoons mustard
* 2 teaspoons sea salt
* 1 teaspoon curry powder
* 1 tbsp mustard seeds, crushed
* 1 tablespoon molasses
* 2 tbsps fresh ginger, peeled and julienned into thin strips
* 1 pint (2 cups) apple cider vinegar
* 2 cups water
* 1/4 cup raisins or currants

Directions

1. Put all the ingredients in a large pot and bring to a boil. Cook gently until soft and a good color, about 1 - 1 1/2 hours, stirring regularly to prevent the chutney from sticking or burning.


Chutney cooking

2. Boil the canning jars (1/2 pint , 1 pint, etc., the size is up to you) and lids to sterilize them (you can also sterilize them in your dish washer if you prefer.)


Sterilizing the jars.

Pour the hot chutney into the hot jars, being sure to leave half an inch of headroom in each jar.


Filling the jars with loquat chutney. The sterilized funnel makes it a neater process.

Drop the sterilized lids on, cover with the rings and tighten until well closed.


My husband tightening the lids on the jars of loquat chutney before they go into the canner

3. Process the sealed jars for 10 minutes in a boiling water bath. Remove the jars from the boiling water bath and let cool in a draft-free place overnight. Check the lids to make sure they've popped down to ensure they're properly sealed (I love the sound the jars make as they seal.) If any of the lids have not sealed properly, refrigerate those jars and use them right away. The rest can be stored in a cool dark place for 9 months.

This chutney is a nice accompaniment to roasted meats, lamb burgers, kabobs of all kinds, Indian food, vegetable fritters, and many more things.

You may also like:
For more delicious recipes, gardening ideas, foraging tips, and food-related inspiration "like" the Garden of Eating on Facebook, or follow me on Twitter and Pinterest.